
1. Introduction
This manual provides detailed instructions for the installation, operation, and maintenance of your JOYING Android 13 Car Radio Head Unit, Model JY-HT153N4. This unit is designed specifically for Honda CRV models manufactured between 2012 and 2016. Please read this manual thoroughly before installation and use to ensure proper function and safety.
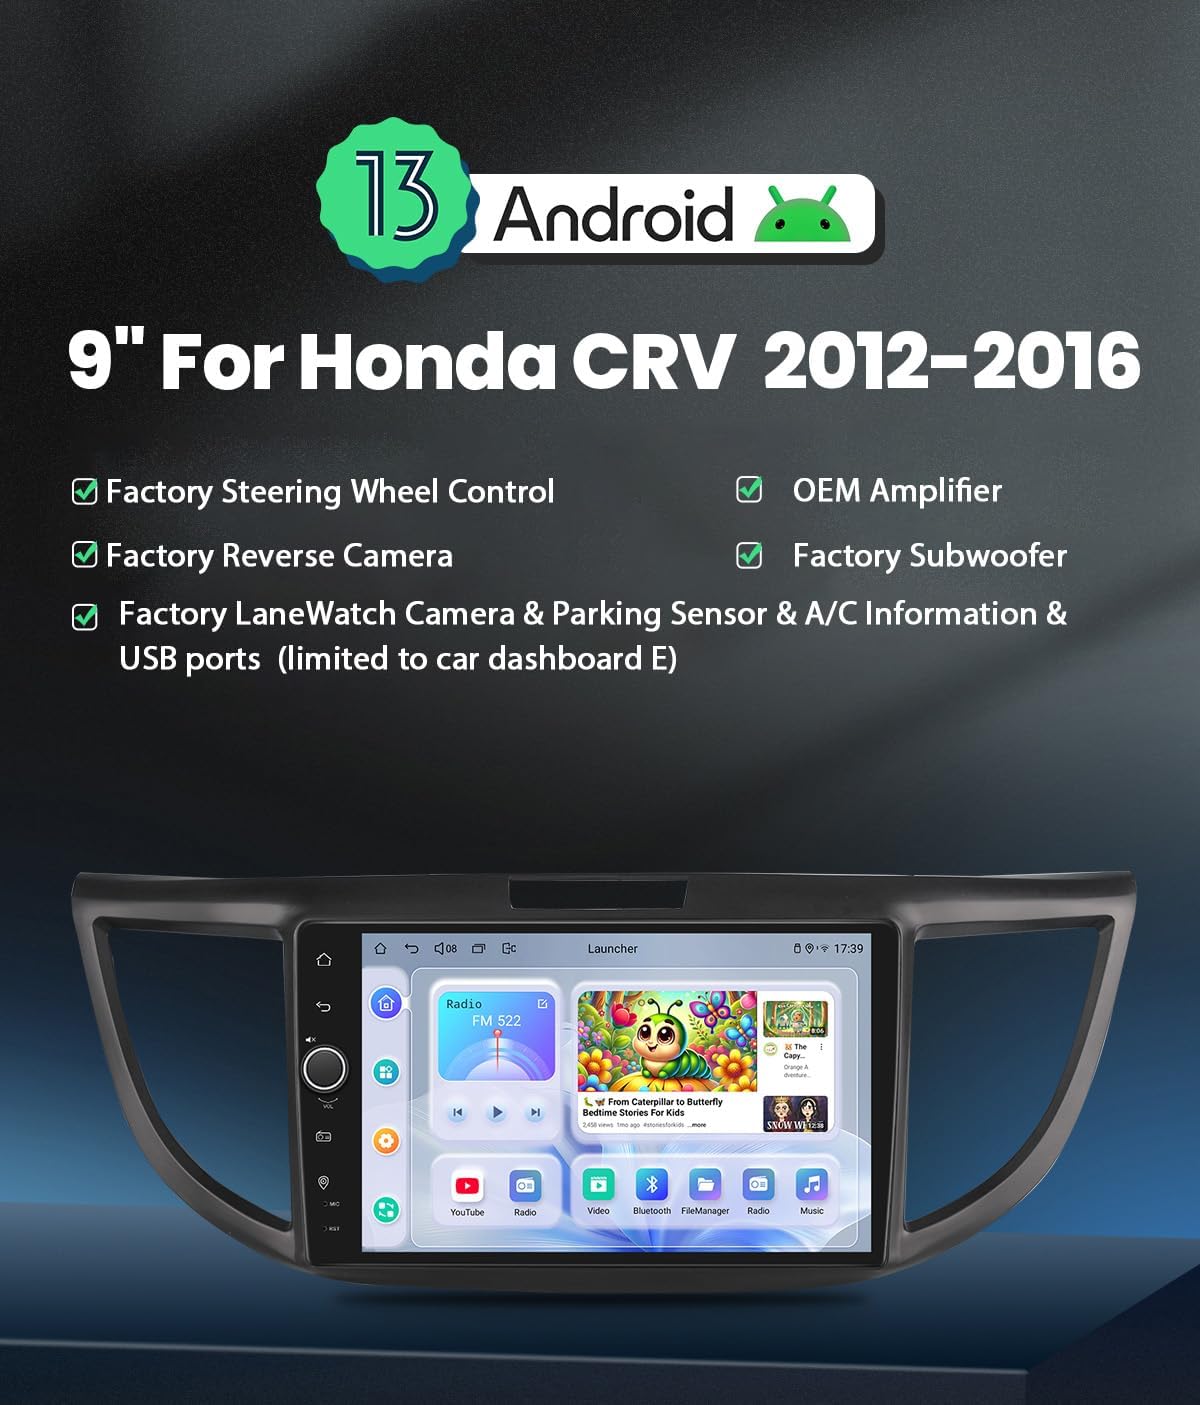
Image 1: JOYING Android 13 Car Radio Head Unit. This image displays the front view of the 9-inch head unit, highlighting its Android 13 operating system and compatibility with Honda CRV 2012-2016 models.
2. Safety Information
- Always consult a professional for installation if you are unsure about any steps. Incorrect installation can damage the vehicle's electrical system or the head unit.
- Do not operate the device in a way that distracts you from driving. Always prioritize road safety.
- Ensure all wiring is properly insulated and secured to prevent short circuits and interference.
- Avoid exposing the unit to extreme temperatures, direct sunlight for prolonged periods, or excessive moisture.
- Do not attempt to disassemble or modify the unit. This will void the warranty and may cause damage.
3. Package Contents
Verify that all components are present in the package:
- 9" Radio Head Unit (x1)
- Single Din Cage (x1)
- Left & Right Bracket (x1)
- WiFi Antenna (x1)
- GPS Antenna (x1)
- 4G Antenna (x2)
- External Microphone (x1)
- USB Cable (x2)
- AR Cable (x1)
- Screen Ribbon Cable (x1)
- Power Cable (x1)
- User Manual (x1)
4. Setup and Installation
4.1 Confirm Your Car Dashboard Configuration
Before installation, it is crucial to identify your Honda CRV's dashboard configuration to ensure compatibility and correct wiring. Refer to the image below to match your vehicle's dashboard type.
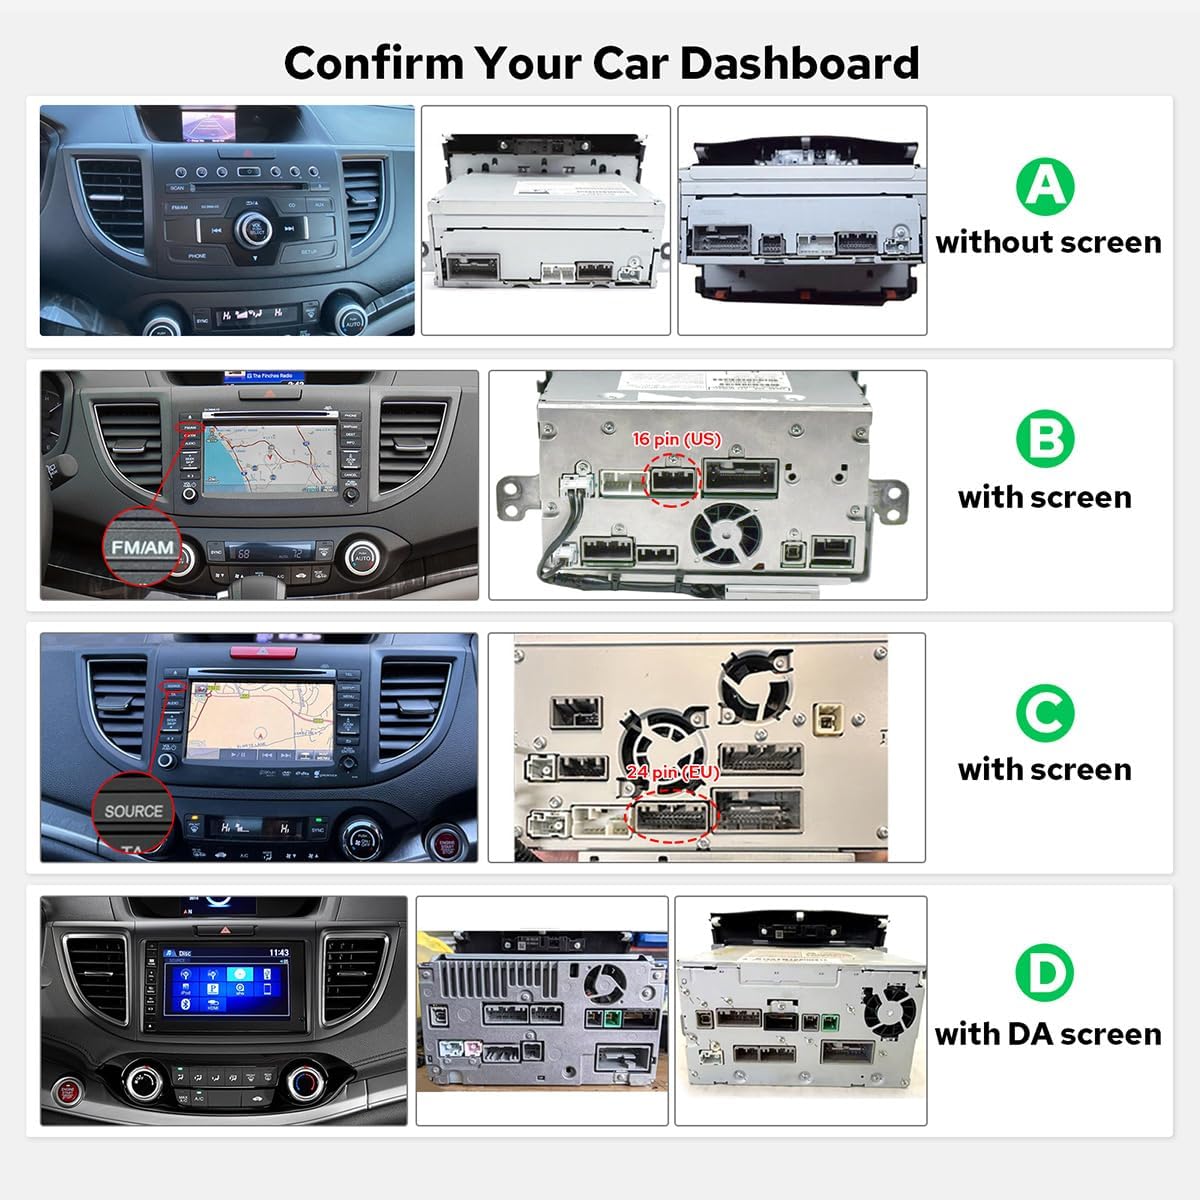
Image 2: Dashboard Configuration Guide. This image displays four different Honda CRV dashboard types (A, B, C, D) with corresponding rear views of the factory radio connections, indicating whether they are 'without screen' or 'with screen'. This helps in identifying the correct wiring harness.
4.2 Wiring Connections
The head unit features various ports for power, audio, video, and data. Connect the provided cables according to the wiring diagram specific to your vehicle's configuration. Ensure all connections are secure.
- Power Cable: Connect to the vehicle's power harness.
- GPS Antenna: Connect to the GPS port and mount in a location with a clear view of the sky.
- WiFi Antenna: Connect to the WiFi port.
- 4G Antennas: Connect both 4G antennas to their respective ports for optimal signal.
- USB Cables: Connect for external USB devices or CarPlay/Android Auto.
- External Microphone: Connect for improved call quality.
- AR Cable & Screen Ribbon Cable: For specific display connections.

Image 3: Rear View and Dimensions. This image shows the rear panel of the head unit with all connection ports labeled (e.g., USB, HDMI OUT, Optical, Coaxial, 4G ANT, GPS ANT, Power). Dimensions (166mm width, 94mm depth, 50mm height) are also indicated.
4.3 Mounting
Install the single DIN cage and brackets into your dashboard opening. Secure the head unit into the cage, ensuring it is firmly seated and flush with the dashboard. The suitable dash kit/trim kit is included for a seamless fit.
5. Operating Instructions
5.1 Power On/Off and Initial Boot
- The unit will power on automatically when the car ignition is turned on.
- The first boot-up may take approximately 30-40 seconds. Subsequent boots will be faster, typically within 2 seconds.
- To power off, turn off the car ignition.
5.2 Basic Navigation and Controls
The 9-inch touchscreen provides intuitive control. Use gestures (tap, swipe) to navigate the Android 13 interface. Physical buttons on the unit or steering wheel controls (if configured) can also be used for common functions like volume and track changes.
5.3 Bluetooth 5.0 Connectivity
The unit supports Bluetooth 5.0 for audio streaming and hands-free calling. It also supports automatic phone book transfer. Note that Bluetooth connectivity is primarily for phone and OBD dongle connections.
- Go to the Bluetooth settings on the head unit.
- Enable Bluetooth on your mobile device and search for available devices.
- Select the head unit from the list and pair. Confirm the pairing code if prompted.
5.4 GPS Navigation
The head unit features precise GPS engines and includes a GPS antenna for faster real-time navigation. It supports offline maps:
- Online Navigation: Connect to the internet via WiFi or 4G module to use online mapping services.
- Offline Maps: Download map data for specific regions to the car stereo for use without an internet connection.
- Synchronization: Mobile phone map data can be synchronized to the head unit via CarPlay or Android Auto.
5.5 Built-in 4G Module
Insert a compatible SIM card into the designated slot for internet access. The 4G module supports FDD-LTE (B2/B4/B5/B7/B12/B13/B14/B17/B25/B26/B38/B66/B71) and TDD-LTE (B41). Note that this module is for internet access only and does not support phone calls or SMS.
5.6 Apple CarPlay and Android Auto
Connect your smartphone via USB cable or Bluetooth to access Apple CarPlay or Android Auto. This allows you to use your phone's apps, navigation, make calls, and listen to music directly on the head unit's larger screen.

Image 4: CarPlay and Android Auto Interface. This image illustrates the user interfaces for both Apple CarPlay and Android Auto, showing how phone applications are mirrored and controlled on the head unit's screen.
5.7 High-Quality Sound Features
The unit incorporates a TDA7851 DSP chip, a 48-band graphic equalizer, and 4x50W max output power for enhanced audio quality. It also supports aftermarket amplifiers and offers multiple audio outputs:
- 4 Audio Outputs
- 1 SUB Output
- Fiber Optical Output
- SPDIF Coaxial Output
- Center Channel Output
These outputs allow for direct connection to external amplifiers with optical fiber or coaxial digital input for ultimate sound quality.
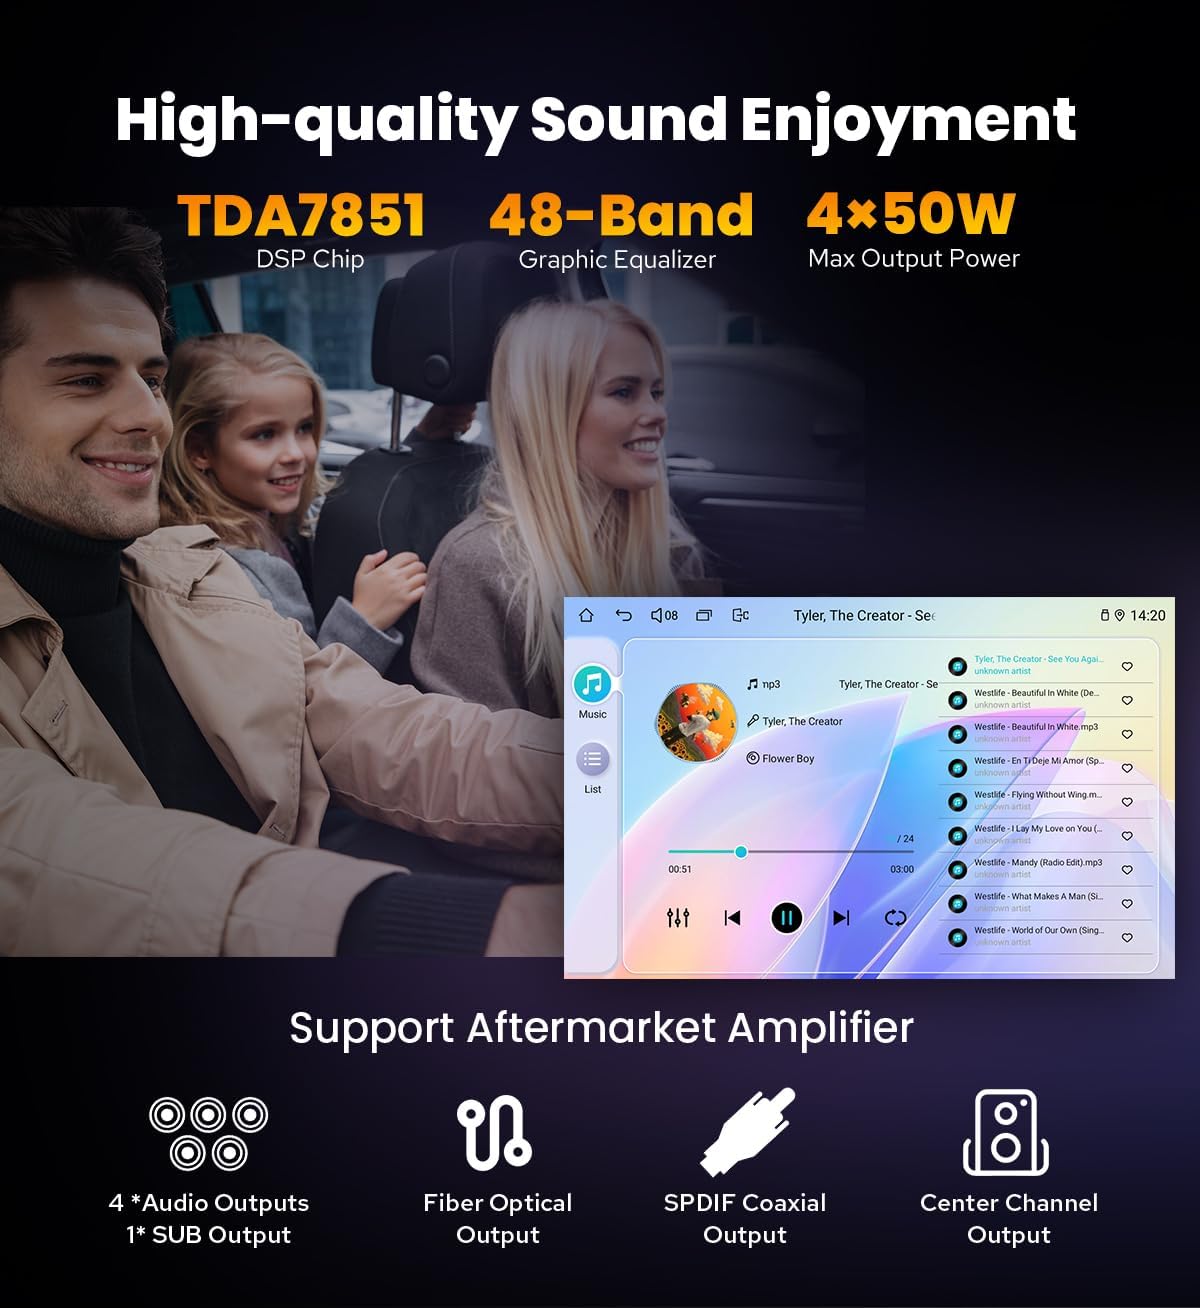
Image 5: Audio Features. This image highlights the TDA7851 DSP chip, 48-band graphic equalizer, and 4x50W output, along with various audio output options like Fiber Optical and SPDIF Coaxial.
5.8 HDMI Output
The HDMI output provides a full digital image and sound-sending interface, allowing uncompressed audio and video signals to be output synchronously to external displays (e.g., headrest monitors). No manual adjustment is required. Note: The HDMI cable is not included.
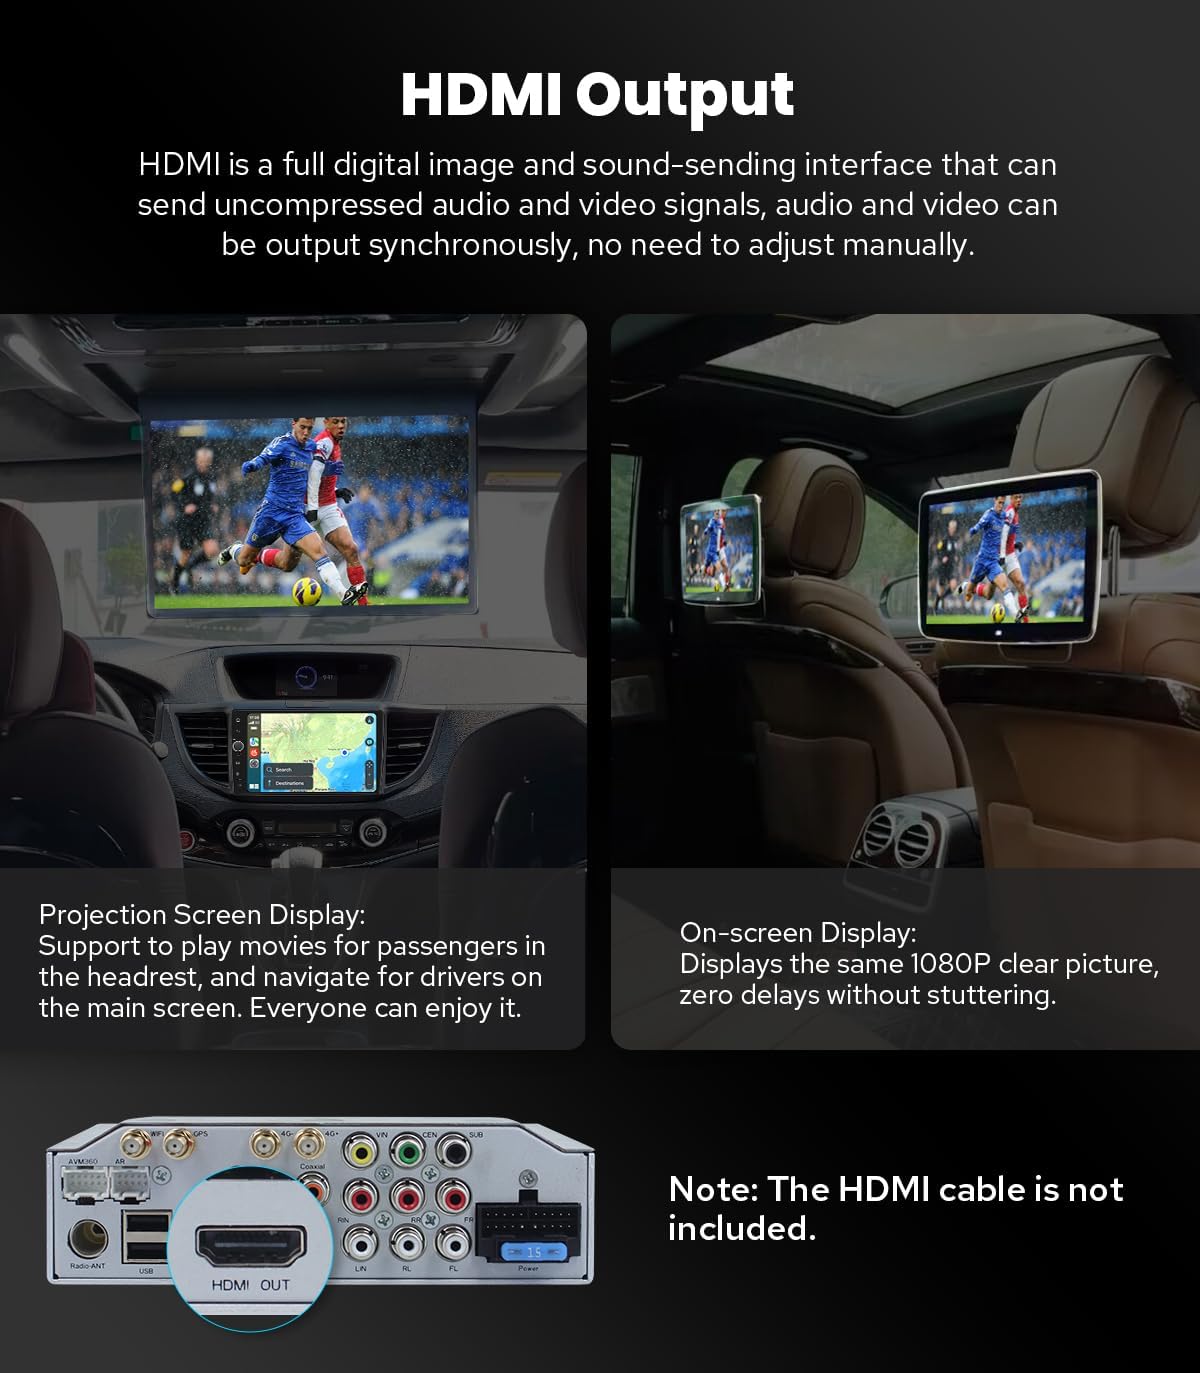
Image 6: HDMI Output Functionality. This image demonstrates the use of the HDMI output to connect to rear-seat monitors for projection screen display, showing the main unit's HDMI port.
5.9 Split-screen Multitasking
The head unit supports split-screen multitasking, allowing you to run two applications simultaneously on the screen.
- Tap the recent apps icon.
- Find the app you want to run in split-screen. Tap the split-screen button (usually an icon with two rectangles) next to the app to bring up the split-screen function.
- The first app will occupy one side of the screen. Select the second app from the recent apps list to fill the other side.

Image 7: Split-screen Multitasking. This image illustrates the steps to activate and use the split-screen feature, showing two applications running side-by-side on the head unit's display.
6. Maintenance
6.1 Cleaning
- Use a soft, dry cloth to clean the screen and exterior of the unit.
- Do not use abrasive cleaners, solvents, or chemical sprays, as these can damage the screen or finish.
6.2 Software Updates
Periodically check the manufacturer's website for software updates. Updates can improve performance, add new features, or fix bugs. Follow the provided instructions carefully when performing updates.
6.3 Cooling System
The unit features a dual heat sink design for superior heat dissipation and improved temperature control. You can set a warning value for CPU temperature or radio volume. If the temperature or volume exceeds this value, the cooling fan will automatically activate to prevent overheating.

Image 8: Cooling System. This image illustrates the dual heat sink design and the internal cooling fan, along with a screenshot of the fan control settings interface.
7. Troubleshooting
- No Power: Check all power connections and the vehicle's fuse box. Ensure the ignition is on.
- No Sound: Verify speaker connections, volume levels, and audio output settings. Check if an external amplifier is properly connected and powered.
- GPS Signal Issues: Ensure the GPS antenna is correctly connected and mounted in a location with a clear view of the sky.
- Bluetooth Pairing Failure: Ensure Bluetooth is enabled on both devices and they are within range. Try restarting both devices.
- Touchscreen Unresponsive: Try restarting the unit. If the issue persists, a factory reset may be necessary (consult support).
- Unit Overheating: Check for proper ventilation around the unit. Ensure the cooling fan is operating if the temperature rises.
8. Specifications
| Feature | Specification |
|---|---|
| Model Number | JY-HT153N4 |
| Brand | JOYING |
| Screen Size | 9 inches |
| Operating System | Android 13 |
| Memory Storage Capacity | 64 GB |
| Connectivity Technology | Bluetooth 5.0, 4G, WiFi |
| Special Features | Apple CarPlay, Android Auto, Built-in DSP, Optical Fiber Output, Coaxial Digital Output, HDMI Output |
| Audio Output Mode | Stereo |
| Human Interface Input | Touchscreen |
| Supported Satellite Navigation System | GPS |
| Compatible Vehicle Type | Honda CRV (2012-2016) |
| Manufacturer | JOYING |
| Country of Origin | China |
9. Warranty and Support
For warranty information and technical support, please refer to the warranty card included with your product or visit the official JOYING website. Keep your purchase receipt as proof of purchase for any warranty claims.

