
1. Introduction
This manual provides essential instructions for the safe and effective operation, maintenance, and troubleshooting of your Saker Mini Multi-Functional Table Saw, model HSSJ13004. Please read this manual thoroughly before initial use and retain it for future reference.
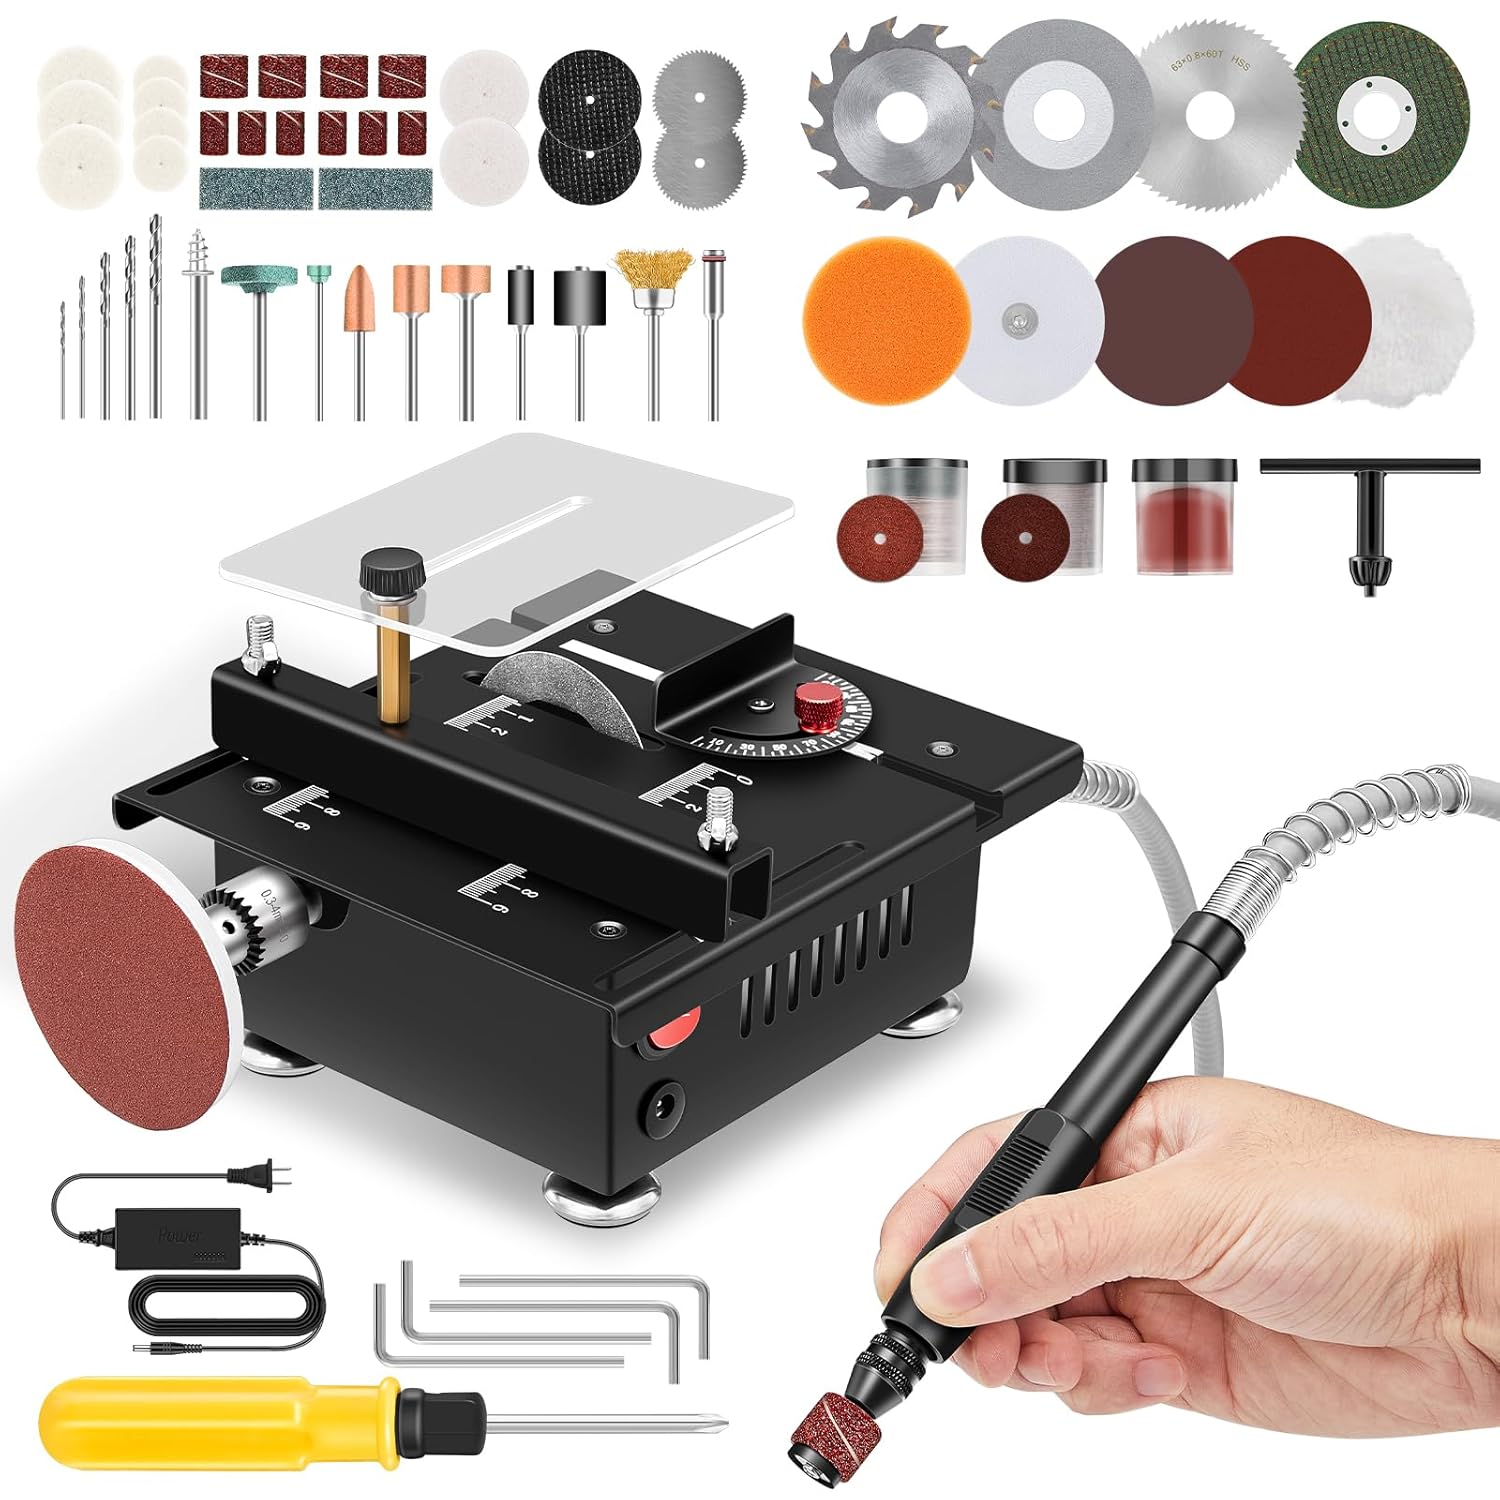
Figure 1: Saker Mini Multi-Functional Table Saw with included accessories, including various saw blades, sanding discs, drill bits, and the flexible shaft attachment.
The Saker Mini Multi-Functional Table Saw is designed for precision cutting of small materials such as PCB boards, wooden sticks, plastic sheets, thin wooden boards, cans, copper-clad panels, aluminum tubes, and copper tubes. It features adjustable height, variable speed control, and an adjustable cutting angle, making it suitable for various crafting and DIY projects.
2. Safety Instructions
Always prioritize safety when operating power tools. Failure to follow these instructions may result in injury or damage to the tool.
- Read the Manual: Understand all instructions and warnings before operation.
- Work Area: Keep your work area clean, well-lit, and free from clutter.
- Personal Protective Equipment (PPE): Always wear safety glasses, hearing protection, and a dust mask. Avoid loose clothing or jewelry that could get caught in moving parts.
- Power Connection: Ensure the power button is in the "OFF" position before plugging in the saw.
- Secure Workpiece: Always secure the material being cut to prevent kickback.
- Blade Guard: Never operate the saw without the blade guard properly in place.
- Maintenance: Disconnect power before performing any maintenance, blade changes, or adjustments.
- Children and Bystanders: Keep children and bystanders at a safe distance from the operating saw.
- Stability: Ensure the saw is placed on a stable, level surface. The anti-slip rubber feet help prevent shifting during operation.
3. Components Overview
Familiarize yourself with the main components of your Saker Mini Multi-Functional Table Saw.
- Main Unit: The core table saw body with motor and cutting platform.
- Saw Blades: Includes PCB cutting blades, high-speed steel saw blades, alloy saw blades, and resin saw blades (63mm diameter, 16mm inner hole).
- Flexible Shaft: For precision sanding, engraving, and drilling with various grinding heads.
- Power Adapter: Connects the saw to an electrical outlet.
- Push-Pull Chute: Guides material for straight cuts.
- Angle Adjustment Mechanism: Allows setting cutting angles from 0° to 90°.
- Height Adjustment Knob: Controls the cutting height of the blade.
- Transparent Baffle: Protects against debris splash.
- Speed Control Unit: Adjusts motor speed with 7 distinct settings.
4. Setup
- Unpacking: Carefully remove all components from the packaging. Verify that all parts listed in the components overview are present and undamaged.
- Placement: Position the table saw on a stable, level, and clean workbench. Ensure adequate space around the saw for safe operation and material handling. The anti-slip rubber feet should firmly grip the surface.
- Power Connection:
- Ensure the saw's power switch is in the "OFF" position.
- Connect the power adapter cable to the saw's power input port.
- Plug the power adapter into a suitable electrical outlet.
- Blade Installation (Refer to Figure 2):
- Disconnect the power adapter from the outlet.
- Carefully remove the transparent baffle and any securing screws if necessary.
- Use the provided wrench to loosen the blade arbor nut.
- Select the appropriate blade for your material (e.g., PCB cutting blade for circuit boards, high-speed steel for wood). Ensure the blade's teeth are oriented correctly for cutting.
- Place the blade onto the arbor, ensuring it is seated properly.
- Tighten the arbor nut securely with the wrench.
- Reattach the transparent baffle.

Figure 2: Illustration of different blade types and their installation for specific cutting tasks.
- Flexible Shaft Attachment (Refer to Figure 3):
- Ensure the saw is unplugged.
- Locate the flexible shaft port on the side of the main unit.
- Screw the flexible shaft connector onto the port until secure.
- Insert the desired grinding head or drill bit (0.5-3.2mm shank diameter) into the flexible shaft's chuck and tighten it.

Figure 3: The flexible shaft attachment in use for fine detail work, demonstrating its compatibility with various grinding heads.
5. Operating Instructions
5.1 Powering On and Speed Adjustment (Refer to Figure 4)
- Ensure the saw is properly set up and plugged in.
- Press the power button on the main unit to turn the saw on.
- Use the speed control unit to adjust the motor speed. The saw features 7 adjustable speed settings, allowing for precise control up to 6000 RPM. Select a lower speed for delicate materials or higher precision, and a higher speed for faster cutting of appropriate materials.

Figure 4: The 100W motor and the speed control unit, highlighting the 7 distinct speed settings for varied applications.
5.2 Cutting Operations
- Height Adjustment: Turn the height adjustment knob to raise or lower the saw blade to the desired cutting depth. The maximum cutting depth is 16mm.
- Angle Adjustment (Refer to Figure 5):
- Loosen the angle adjustment knob.
- Adjust the cutting platform to the desired angle between 0° and 90°. The panel has clear markings for accurate angle setting.
- Tighten the angle adjustment knob to secure the setting.
- Material Feeding:
- Place the workpiece firmly against the push-pull chute for straight cuts.
- Slowly and steadily feed the material into the rotating blade. Avoid forcing the material, as this can cause kickback or damage to the motor/blade.
- Always keep your hands clear of the blade path. Use a push stick for smaller pieces.

Figure 5: Adjustable cutting angle mechanism and the push-pull chute for guiding materials during cutting operations.
5.3 Using the Flexible Shaft (Refer to Figure 3)
The flexible shaft extends the functionality of your table saw for detailed work such as sanding, engraving, and drilling.
- Ensure the flexible shaft is securely attached and the desired grinding head or drill bit is installed.
- Turn on the main unit and adjust the speed as needed for the task.
- Hold the flexible shaft like a pen and apply gentle, controlled pressure to the workpiece.
- Always wear appropriate eye protection when using the flexible shaft, especially for tasks that generate dust or small particles.

Figure 6: Examples of drill chucks and attachments for cutting, polishing, and sanding with the flexible shaft.
6. Maintenance
Regular maintenance ensures the longevity and optimal performance of your Saker Mini Multi-Functional Table Saw.
- Disconnect Power: Always unplug the saw before performing any cleaning or maintenance.
- Cleaning:
- After each use, clear sawdust and debris from the table surface, blade area, and motor vents using a brush or compressed air.
- Wipe down external surfaces with a damp cloth. Do not use harsh chemicals or solvents.
- Blade Care:
- Inspect blades regularly for dullness, damage, or missing teeth. Replace dull or damaged blades promptly.
- Clean resin and pitch buildup from blades using a suitable blade cleaner.
- Flexible Shaft: Inspect the flexible shaft for any kinks or damage. Ensure the chuck operates smoothly.
- Storage: Store the saw in a clean, dry place, away from direct sunlight and moisture. Keep all accessories organized.
7. Troubleshooting
This section addresses common issues you might encounter with your table saw.
| Problem | Possible Cause | Solution |
|---|---|---|
| Saw does not start. | No power supply; Power switch off; Faulty power adapter. | Check power outlet and connections. Ensure power switch is ON. Test with another outlet. |
| Blade not cutting efficiently or burning wood. | Dull or incorrect blade; Material fed too fast; Incorrect speed setting. | Replace blade. Use the correct blade type for the material. Reduce feeding speed. Adjust to a higher speed setting if appropriate for the material. |
| Excessive vibration during operation. | Loose blade; Unstable work surface; Damaged blade. | Ensure blade is securely tightened. Place saw on a firm, level surface. Inspect blade for damage and replace if necessary. |
| Inaccurate cuts. | Improper angle setting; Loose fence/chute; Material not secured. | Verify angle settings. Ensure push-pull chute is properly aligned and secured. Always secure the workpiece. |
If you encounter issues not listed here or if solutions do not resolve the problem, please contact customer support.
8. Specifications

Figure 7: Key performance specifications and blade dimensions of the Saker Mini Multi-Functional Table Saw.
| Feature | Specification |
|---|---|
| Brand | Saker |
| Model Number | HSSJ13004 |
| Power Source | Corded Electric |
| Motor Power | 100W |
| Max Motor Speed | 6000 RPM |
| Speed Settings | 7 adjustable settings |
| Saw Blade Diameter | 63 mm |
| Saw Blade Bore | 16 mm |
| Max Cutting Depth | 16 mm |
| Adjustable Cutting Angle | 0° to 90° |
| Flexible Shaft Shank Diameter | 0.5 - 3.2 mm |
| Dimensions (L x W x H) | 180mm x 160mm x 100mm (7.09in x 6.30in x 3.94in) |
| Item Weight | 2.94 kg (6.48 lbs) |
| Included Components | Main unit, various saw blades, flexible shaft, power adapter, accessories. |
9. Warranty Information
Saker products are manufactured to high-quality standards. For specific warranty terms and conditions, please refer to the warranty card included with your product or visit the official Saker website. Keep your purchase receipt as proof of purchase for any warranty claims.
10. Customer Support
If you have any questions, require technical assistance, or need to order replacement parts, please contact Saker customer support through the following channels:
- Website: Visit the official Saker website for FAQs and support contact information.
- Email: Refer to your product packaging or warranty card for customer service email addresses.
- Phone: Refer to your product packaging or warranty card for customer service phone numbers.
When contacting support, please have your model number (HSSJ13004) and purchase date readily available.