
1. Introduction
The Oase EcoFlow 60 internal filter is designed for effective water filtration in freshwater, saltwater, and turtle aquariums up to 15 gallons (60L). This multi-stage filter provides both mechanical and biological filtration to maintain clear and healthy aquatic environments. Its design features rounded edges and a hidden intake to protect aquatic life and plants. The filter includes customizable flow settings, a spray bar, and a venturi nozzle for enhanced oxygenation. This manual provides instructions for proper installation, operation, and maintenance to ensure optimal performance and longevity of your filter.
2. Safety Information
Please read and follow all safety instructions carefully before operating this product. Failure to do so may result in injury or damage to the product or aquarium.
- Electrical Safety: Always disconnect power to all aquarium equipment before performing maintenance or handling the filter. Ensure your hands are dry when plugging or unplugging the unit. Do not operate if the power cord or plug is damaged.
- Water Immersion: This filter is designed for submersible use only. Ensure the filter is fully submerged in water during operation to prevent damage to the motor.
- Intended Use: Use this product only for its intended purpose in aquariums. Do not use with flammable or corrosive liquids.
- Children: Keep this appliance out of reach of children. Close supervision is necessary when the appliance is used near children.
- Installation: Ensure the filter is securely mounted in the aquarium before operation.
3. Package Contents
Verify that all components are present in the package:
- Oase EcoFlow 60 Filter Unit
- Detachable Mounting Bracket with Suction Cups
- Filter Media (BioPearls and 20 ppi Coarse Filter Foam)
- Spray Bar
- Venturi Nozzle
4. Setup Instructions
- Prepare Filter Media: The filter comes with BioPearls and 20 ppi coarse filter foam. Ensure these are correctly placed within the filter modules. The top media basket can be customized with your preferred media.
- Attach Mounting Bracket: Secure the detachable mounting bracket to the back of the filter unit. The suction cups on the bracket will be used to attach the filter to the aquarium glass.
- Position in Aquarium: Place the filter unit inside the aquarium, ensuring it is fully submerged. Press the suction cups firmly against the inner glass wall to secure the filter. The hidden intake should be positioned to allow for optimal water circulation.
- Install Output Accessories: Choose your desired water output method:
- For a diffused flow, attach the spray bar to the filter outlet.
- For increased oxygenation, attach the venturi nozzle to the filter outlet. This nozzle draws air into the water flow.
- You can also use the top nozzle directly for a concentrated flow.
- Connect Power: Once the filter is securely installed and fully submerged, plug the power cord into a grounded electrical outlet. The filter will begin operation.

Figure 1: Hassle-Free Installation. The detachable mounting bracket provides secure placement and easy unit removal.
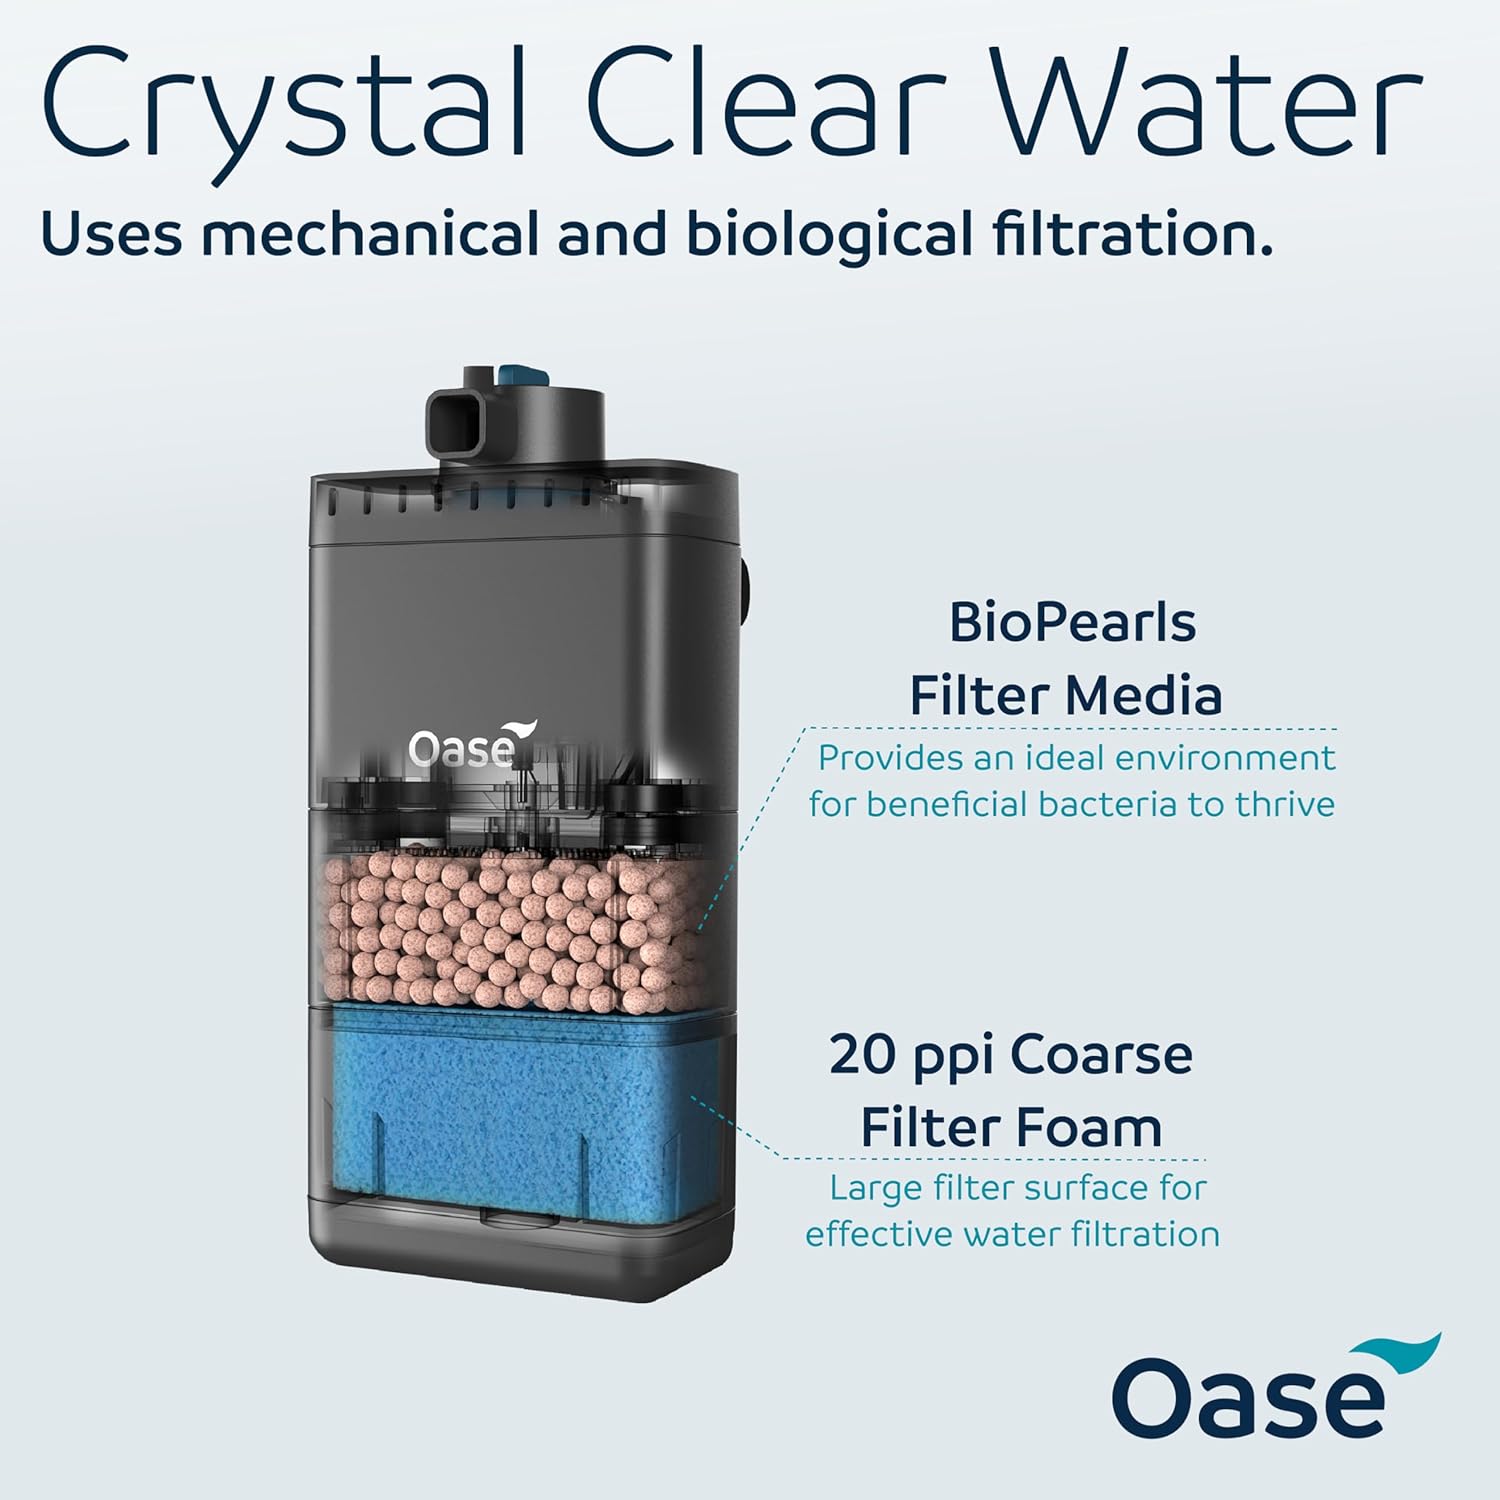
Figure 2: Crystal Clear Water. Mechanical and biological filtration layers with BioPearls and foam.
Video 1: OASE EcoFlow Internal Aquarium Filter for Tanks. This video demonstrates the assembly and installation process of the filter.
5. Operating Instructions
The Oase EcoFlow 60 filter offers customizable flow control to suit your aquarium's needs.
- Adjusting Flow Rate: The flow rate can be adjusted by rotating the blue knob on top of the filter unit. Turn clockwise to decrease flow and counter-clockwise to increase flow.
- Adjusting Flow Direction: The direction of the water output can be adjusted by rotating the entire top nozzle or spray bar assembly.
- Venturi Nozzle for Oxygenation: If the venturi nozzle is installed, ensure the air intake tube is above the water surface. This will draw air into the water stream, increasing oxygen levels in the aquarium.

Figure 3: Customizable Flow Control. Adjust the flow method, direction, and rate based on your aquarium's needs, including the detachable venturi nozzle for extra oxygen.
Video 2: Oase EcoFlow - Product Features. This video highlights various features of the filter, including flow adjustment and media customization.
6. Maintenance
Regular maintenance is crucial for the efficient operation and longevity of your Oase EcoFlow 60 filter. Always disconnect power before performing any maintenance.
- Filter Removal: Gently pull the filter unit away from the aquarium glass to release the suction cups. The EasyClean magnetic catches allow for easy removal of filter modules without disturbing the pump.
- Disassembly: Separate the filter modules by gently pulling them apart. The magnetic connections will release.
- Cleaning Filter Media: Rinse the 20 ppi coarse filter foam and BioPearls in old aquarium water (not tap water) to preserve beneficial bacteria. Replace media as needed, typically every 1-3 months for foam and 6-12 months for BioPearls, depending on aquarium load.
- Cleaning Impeller: Carefully remove the impeller cover and the impeller itself. Clean any debris or buildup from the impeller and its housing using a small brush.
- Reassembly: Reassemble the filter in reverse order, ensuring all components are securely fitted. The magnetic catches will guide the modules back into place.
- Reinstallation: Place the cleaned and reassembled filter back into the aquarium, ensuring it is fully submerged and securely mounted before reconnecting power.

Figure 4: Easy Maintenance. The EasyClean magnetic filter module makes routine care faster and simpler. A locking feature prevents backflow during removal.
7. Troubleshooting
If you encounter issues with your Oase EcoFlow 60 filter, refer to the following common problems and solutions:
| Problem | Possible Cause | Solution |
|---|---|---|
| Filter not starting | No power; Impeller jammed; Airlock | Check power connection; Clean impeller; Gently shake filter to release air. |
| Reduced water flow | Clogged filter media; Dirty impeller; Flow control setting too low | Clean or replace filter media; Clean impeller; Adjust flow control knob. |
| Excessive noise | Impeller dirty or damaged; Air in filter; Filter not fully submerged | Clean or replace impeller; Gently shake filter to release air; Ensure filter is fully submerged. |
| Water not clear | Clogged filter media; Insufficient biological filtration; Filter too small for tank | Clean or replace filter media; Ensure proper biological media is used; Consider additional filtration if tank is heavily stocked or larger than recommended. |
8. Specifications
| Feature | Detail |
|---|---|
| Product Dimensions | 3.7 x 2.6 x 8 inches |
| Item Weight | 1.76 Pounds |
| Model Number | EcoFlow 60 |
| Manufacturer Part Number | 94114 |
| Brand | OASE |
| Color | Black |
| Style | Submersible |
| Tank Capacity | Up to 15 Gallons (60L) |
| Specific Uses | Indoor Aquarium Filtration |
| GTIN / UPC | 198318000253 |
9. Warranty and Support
The Oase EcoFlow 60 Internal Aquarium Filter is backed by a 3-year manufacturer's warranty. This warranty covers defects in materials and workmanship under normal use.
For warranty claims, technical support, or replacement parts, please contact OASE customer service. Refer to the product packaging or the official OASE website for the most current contact information.
OASE Customer Service:
- Website: www.oase-livingwater.com
- Email: Refer to website for contact form or email address.
- Phone: Refer to website for regional phone numbers.