1. Introduction
This instruction manual provides comprehensive guidance for the installation, operation, and maintenance of your MSI MAG FORGE 130A AIRFLOW Mid-Tower PC Case. Please read this manual thoroughly before beginning assembly to ensure correct setup and to prevent any damage to the product or other components.
The MSI MAG FORGE 130A AIRFLOW is designed to offer excellent cooling performance and expandability for various PC builds. It features a mesh front and top panel for optimal airflow, a tempered glass side panel to showcase internal components, and supports a wide range of motherboard sizes and cooling solutions.
2. Safety Information
- Always disconnect the power supply from the wall outlet before installing or removing any components.
- Wear an anti-static wrist strap to prevent electrostatic discharge (ESD) damage to sensitive components.
- Handle all components with care. Avoid touching pins or circuit boards directly.
- Keep small parts, such as screws, away from children.
- Ensure proper ventilation around the PC case to prevent overheating.
- Do not attempt to repair the case yourself. Contact qualified service personnel if issues arise.
3. Package Contents
Verify that all items are present in the package. If any items are missing or damaged, contact your retailer.
- MSI MAG FORGE 130A AIRFLOW PC Case
- Accessory Box (containing screws, cable ties, and other small parts)
- Pre-installed Auto-RGB Fans (3x Front 120mm, 1x Rear 120mm)
- User Manual (this document)
4. Component Identification
4.1 External View
The following image illustrates the overall design of the MSI MAG FORGE 130A AIRFLOW PC case, highlighting its mesh front panel and tempered glass side panel.

Image 4.1: Front-left view of the MSI MAG FORGE 130A AIRFLOW PC Case, showcasing the mesh front panel with three illuminated RGB fans and the tempered glass side panel.
4.2 Dimensions
Understanding the case dimensions is crucial for planning your build and ensuring compatibility with your components and workspace.

Image 4.2: Diagram showing the dimensions of the MSI MAG FORGE 130A AIRFLOW PC Case: 210mm (width), 411.6mm (depth), and 498mm (height).
4.3 Top I/O Ports
The top panel provides convenient access to essential ports and controls.

Image 4.3: Close-up view of the top I/O panel, featuring an LED On/Off button, two USB 5Gbps Type-A ports, Mic-in, Audio-out, Reset button, and Power button.
4.4 Internal Layout and Compatibility
The internal structure supports various motherboard form factors and component sizes.

Image 4.4: Internal diagram illustrating compatibility with Mini-ITX, Micro-ATX, and ATX motherboards, along with GPU and PSU placement.
4.5 Drive Bays
The case offers multiple drive bays for 2.5-inch and 3.5-inch storage devices.

Image 4.5: Rear internal view showing the placement of three 2.5-inch drive mounts and two 2.5/3.5-inch combo drive bays.
5. Setup and Installation
5.1 Preparing the Case
- Place the case on a flat, stable surface.
- Remove the tempered glass side panel by unscrewing the thumbscrews and carefully sliding it off.
- Remove the right-side metal panel by unscrewing the thumbscrews and sliding it backward.
- The front mesh panel can be carefully detached from the bottom for fan installation or cleaning.
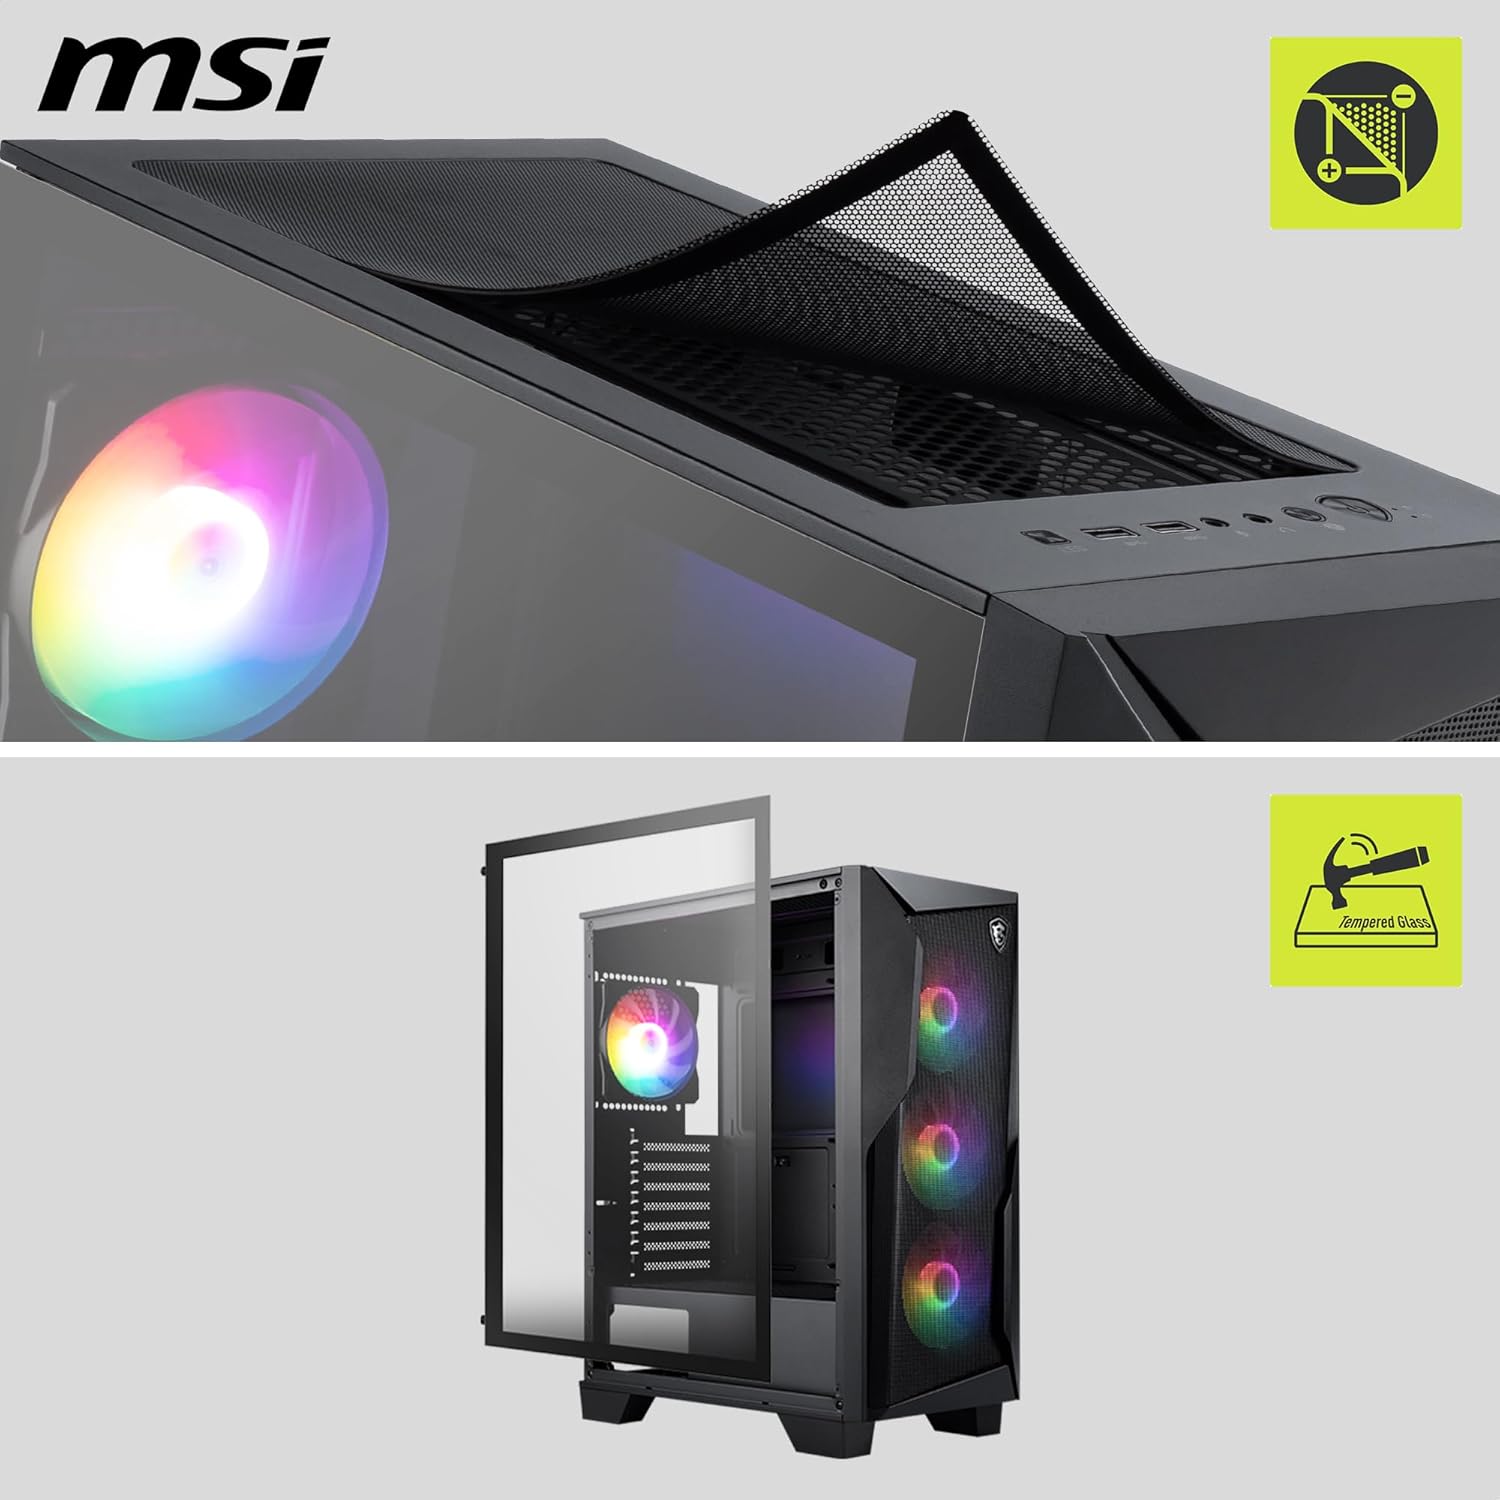
Image 5.1: The PC case with the tempered glass side panel removed, revealing the internal structure and fan mounts.
5.2 Motherboard Installation
- Install the I/O shield (if not pre-attached to your motherboard) into the rear opening of the case.
- Align your ATX, Micro-ATX, or Mini-ITX motherboard with the standoffs inside the case. Ensure the standoffs match your motherboard's screw holes.
- Secure the motherboard with the provided screws.
5.3 Power Supply Unit (PSU) Installation
- Slide the PSU into the dedicated compartment at the bottom rear of the case.
- Secure the PSU with screws from the rear of the case.
5.4 Storage Drive Installation
- 2.5-inch SSDs: Mount SSDs onto the dedicated 2.5-inch trays located behind the motherboard tray or on the PSU shroud. Secure with screws.
- 3.5-inch HDDs: Install HDDs into the 2.5/3.5-inch combo drive cage located beneath the PSU shroud. Slide the drive into the tray and secure it.
5.5 Graphics Card (GPU) Installation
- Remove the necessary expansion slot covers at the rear of the case.
- Insert your GPU into the appropriate PCIe slot on the motherboard.
- Secure the GPU with screws to the case.
5.6 Fan and Radiator Installation
The case supports various fan and radiator configurations:
- Front: 3x 120mm or 2x 140mm fans; 120/140/240mm radiator. (3x 120mm Auto-RGB fans pre-installed)
- Top: 2x 120mm or 2x 140mm fans; 120/240mm radiator.
- Rear: 1x 120mm fan; 120mm radiator. (1x 120mm Auto-RGB fan pre-installed)
- PSU Shroud: 2x 120mm fans.
Install additional fans or radiators as needed, securing them with appropriate screws.
5.7 Cable Management
Utilize the cable routing cutouts and tie-down points behind the motherboard tray to organize cables. This improves airflow and aesthetics.
5.8 Connecting Front I/O
Connect the cables from the top I/O panel (USB, Audio, Power, Reset, LED) to the corresponding headers on your motherboard. Refer to your motherboard manual for specific header locations.
6. Operating Instructions
6.1 First Power-On
Once all components are installed and cables are connected, replace the side panels. Connect your monitor, keyboard, mouse, and power cable. Press the power button on the top I/O panel to start your system.
6.2 LED Control
The pre-installed Auto-RGB fans will illuminate automatically. Use the dedicated LED On/Off button on the top I/O panel to toggle the lighting effect.
7. Maintenance
7.1 Cleaning Dust Filters
The MSI MAG FORGE 130A AIRFLOW includes removable dust filters on the top and bottom. Regularly clean these filters to maintain optimal airflow and prevent dust buildup inside the case.
- Gently slide out the dust filters.
- Use a soft brush or vacuum cleaner to remove accumulated dust.
- Reinsert the clean filters into their respective slots.
7.2 General Cleaning
For external surfaces, use a soft, damp cloth to wipe away dust and smudges. Avoid using harsh chemicals or abrasive materials that could damage the finish or tempered glass.
8. Troubleshooting
- System does not power on: Ensure all power cables (24-pin ATX, 8-pin CPU, GPU power) are securely connected. Check if the PSU switch is in the 'ON' position. Verify front panel power button connection to the motherboard.
- Fans not spinning: Check fan connections to the motherboard or fan controller. Ensure the PSU is supplying power.
- No display output: Confirm the monitor cable is connected to the graphics card (not the motherboard integrated graphics, unless no discrete GPU is installed). Reseat the graphics card and RAM modules.
- LEDs not working: Ensure the LED power cable is connected. Use the LED On/Off button on the top I/O panel to cycle through modes or turn them on.
- Overheating: Verify all fans are spinning correctly and oriented for proper airflow. Clean dust filters. Ensure CPU cooler and GPU fans are functioning.
9. Specifications
| Feature | Specification |
|---|---|
| Model Name | MAG FORGE 130A AIRFLOW |
| Case Type | Mid Tower |
| Dimensions (W x D x H) | 210 x 411.6 x 498 mm |
| Weight | 5.76 kg |
| Motherboard Support | ATX, Micro-ATX, Mini-ITX |
| Expansion Slots | 7 |
| Drive Bays | 3x 2.5", 2x 2.5"/3.5" Combo |
| I/O Ports | LED On/Off Button, 2x USB 5Gbps Type-A, Audio-Out, Mic-In, Reset Button, Power Button |
| Pre-installed Fans | Front: 3x 120mm Auto-RGB; Rear: 1x 120mm Auto-RGB |
| Max Fan Support | Front: 3x 120mm or 2x 140mm; Top: 2x 120mm or 2x 140mm; Rear: 1x 120mm; PSU Shroud: 2x 120mm |
| Max Radiator Support | Front: 120/140/240mm; Top: 120/240mm; Rear: 120mm |
| Max GPU Length | 330 mm |
| Max CPU Cooler Height | 160 mm |
| Max PSU Length | 200 mm (without 3.5" HDD tray) |
| Materials | Steel, Tempered Glass |
10. Warranty and Support
10.1 Warranty Information
The MSI MAG FORGE 130A AIRFLOW PC Case comes with a 1-year limited warranty from the date of purchase. This warranty covers defects in materials and workmanship under normal use. It does not cover damage caused by improper installation, accidents, abuse, modification, or unauthorized repair.
10.2 Technical Support
For technical assistance, troubleshooting, or warranty claims, please visit the official MSI website or contact MSI customer support through the channels provided on their website. Have your product model name (MAG FORGE 130A AIRFLOW) and serial number ready when contacting support.
For more information, visit: www.msi.com


