1. Introduction
This manual provides comprehensive instructions for the installation, operation, and maintenance of your Tapo C460 KIT 4K Outdoor Solar-Powered Camera System. The system includes two Tapo C460 4K outdoor cameras and one Tapo Smart Hub H500, designed to provide advanced security monitoring with solar charging capabilities and extensive local storage options.
The Tapo C460 cameras offer 4K 8MP resolution with full-color night vision, person, vehicle, and pet detection, and flexible, wire-free installation. The Tapo Smart Hub H500 acts as the central control unit, supporting expandable local storage up to 16TB without monthly fees.
2. Package Contents
Please verify that all components are present in your package:
- 2 x Tapo C460 4K Outdoor Solar-Powered Cameras
- 1 x Tapo Smart Hub H500
- 2 x Solar Panels with Mounting Brackets
- 2 x Camera Mounting Kits (screws, anchors)
- 1 x Power Adapter for Smart Hub H500
- 1 x Ethernet Cable
- 1 x Quick Start Guide
3. Product Overview
3.1 Tapo C460 Camera
The Tapo C460 is a 4K (8MP) outdoor camera featuring a large aperture lens, built-in spotlights for full-color night vision up to 30ft, and a rechargeable battery for wire-free operation. It integrates with the included solar panel for continuous charging.
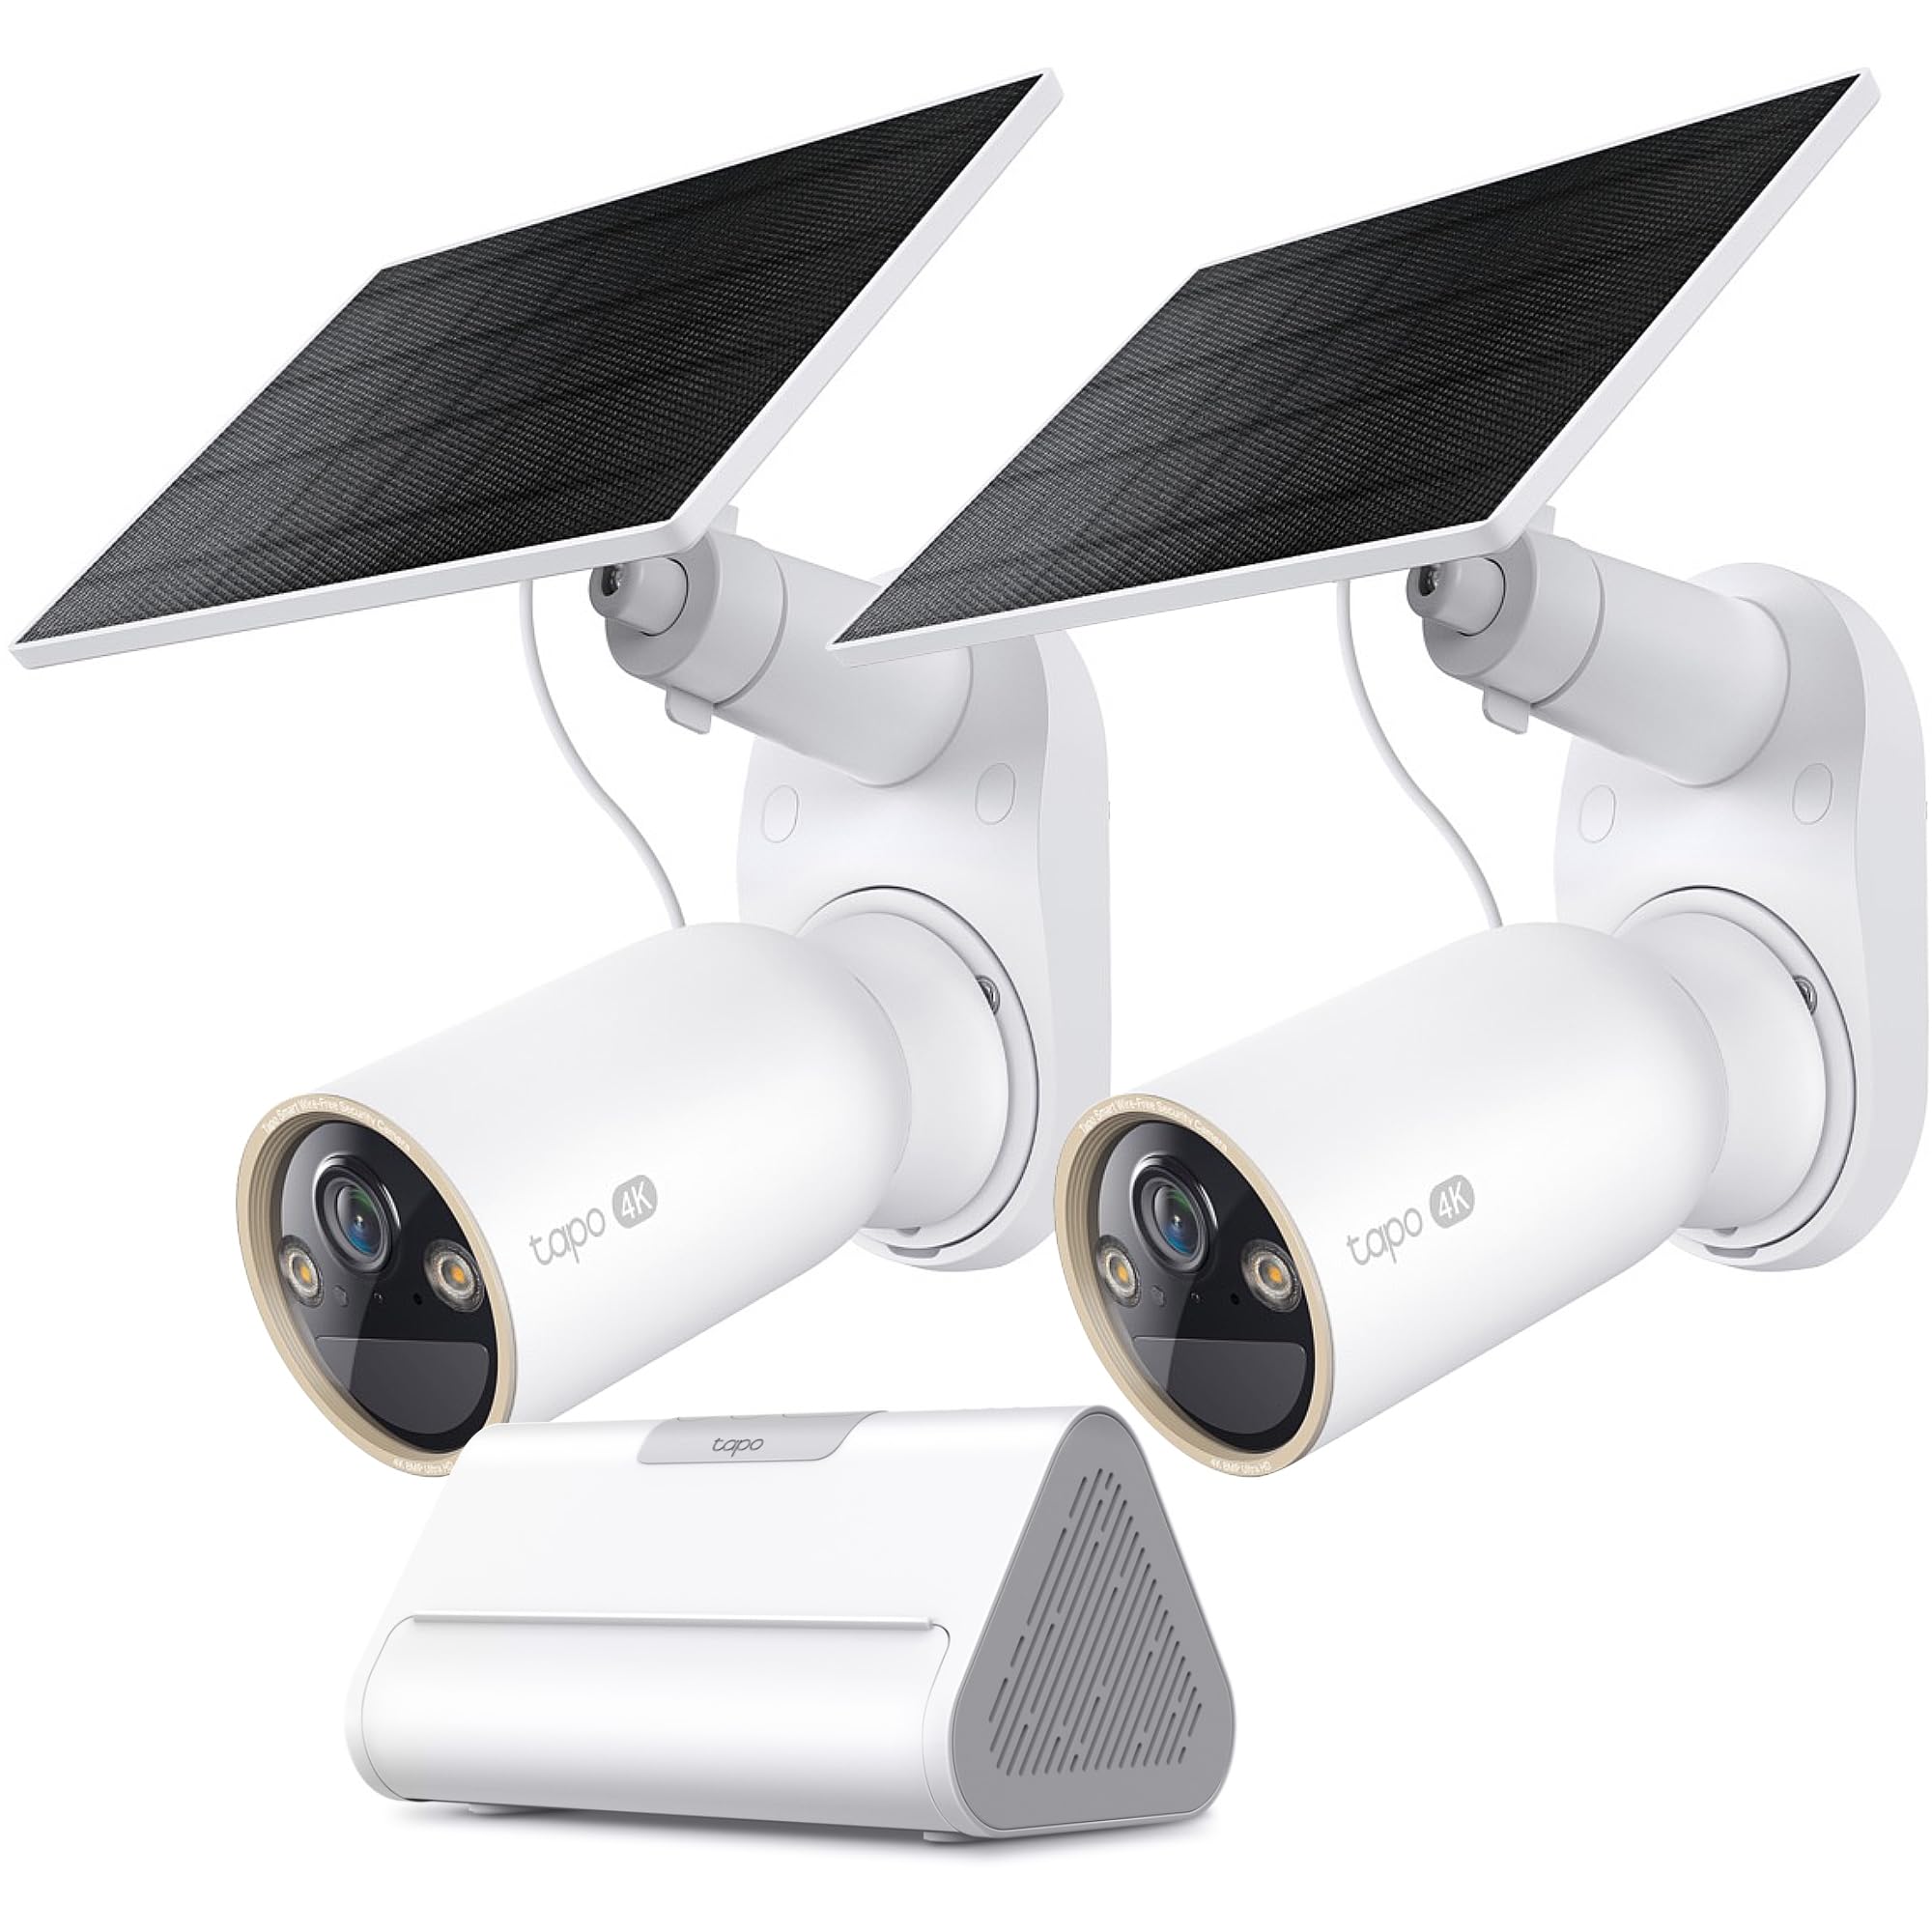
Image: Front view of the Tapo C460 4K Outdoor Solar-Powered Camera, showing the lens, spotlights, and solar panel connection port.
3.2 Tapo Smart Hub H500
The Tapo Smart Hub H500 serves as the central control unit for your Tapo cameras. It connects to your home network and provides secure local storage via a built-in 16GB eMMC, expandable up to 16TB using an HDD/SDD drive (sold separately).

Image: Front view of the Tapo Smart Hub H500, displaying LED indicators and ports for power, Ethernet, and storage expansion.
4. Setup Guide
4.1 Step 1: Charge Cameras
- Before initial use, fully charge each Tapo C460 camera using a standard USB power adapter (not included) and a USB-C cable. A full charge can take several hours.
- The camera's LED indicator will show charging status. Refer to the Quick Start Guide for specific LED behaviors.
4.2 Step 2: Install Tapo App and Set Up Hub
- Download the Tapo app from the App Store (iOS) or Google Play Store (Android).
- Open the Tapo app and create a Tapo ID or log in with an existing one.
- Plug in the Tapo Smart Hub H500 to a power outlet and connect it to your router using the provided Ethernet cable.
- In the Tapo app, tap the "+" icon to add a new device. Select the Tapo Smart Hub H500 and follow the on-screen instructions to complete its setup.
- Once the hub is set up, add your Tapo C460 cameras by selecting them in the app and following the pairing process.

Image: Screenshot of the Tapo app showing the device addition screen, guiding users to select their product for setup.
4.3 Step 3: Mount Cameras and Solar Panels
- Camera Placement: Choose a location that provides the desired viewing angle and is within range of the Smart Hub H500. Ensure the camera is mounted securely.
- Solar Panel Placement: Mount the solar panel in a location that receives direct sunlight for most of the day to ensure optimal charging. Avoid shaded areas.
- Use the provided mounting kits to securely attach both the camera and the solar panel to a wall or other stable surface.
- Connect the solar panel cable to the charging port on the Tapo C460 camera. Ensure the connection is secure and weatherproof.
Video: An official Tapo installation guide demonstrating the steps for mounting the C460 camera and connecting the solar panel for optimal performance.
5. Operation
5.1 Live View and Recording
- Live View: Open the Tapo app and select the desired camera to view its live feed. You can pinch to zoom, take screenshots, or manually record video.
- Recording: The system automatically records events triggered by motion or AI detection. You can access recorded footage through the playback timeline in the app.
5.2 AI Detection Features
The Tapo C460 cameras are equipped with advanced AI detection capabilities:
- Person Detection: Identifies human figures, reducing false alarms from other movements.
- Vehicle Detection: Recognizes vehicles, useful for monitoring driveways or parking areas.
- Pet Detection: Distinguishes pets from humans, allowing for customized alerts.
- Facial Recognition: (If enabled) Can identify known faces, providing more intelligent alerts.
You can configure detection zones, sensitivity levels, and notification preferences for each detection type within the Tapo app settings for each camera.
Video: A brief overview demonstrating the various AI detection features of Tapo cameras, including person, vehicle, and pet detection in action.
5.3 Local Storage Management
The Tapo Smart Hub H500 includes a built-in 16GB eMMC for local storage. For expanded storage, you can install an HDD (Hard Disk Drive) or SSD (Solid State Drive) up to 16TB. Refer to the Smart Hub H500's specific instructions for installing an external drive.
- Accessing Recordings: All recordings are stored locally on the Smart Hub H500. Access them via the Tapo app's playback feature.
- Storage Capacity: The 16GB eMMC provides sufficient storage for basic event recording. An external HDD/SSD significantly increases recording capacity, allowing for longer continuous recording or more extensive event history.
5.4 Night Vision
The Tapo C460 cameras feature full-color 4K night vision. This is achieved through a large aperture lens and integrated spotlights that illuminate the scene, allowing the camera to capture vibrant color images even in complete darkness up to 30 feet away. The camera automatically switches to night vision mode in low-light conditions.
6. Maintenance
6.1 Battery Care
- Ensure the solar panel is clean and free from obstructions to maximize charging efficiency.
- Avoid extreme temperatures that can degrade battery performance.
- If the camera is stored for an extended period, charge it to approximately 50% before storage and recharge every few months to prevent deep discharge.
6.2 Cleaning
- Regularly clean the camera lens and solar panel surface with a soft, damp cloth to remove dust, dirt, or water spots.
- Do not use harsh chemicals or abrasive cleaners, as these can damage the lens or housing.
6.3 Firmware Updates
Tapo regularly releases firmware updates to improve performance, add new features, and enhance security. It is recommended to keep your devices updated:
- Open the Tapo app.
- Navigate to the settings for your Smart Hub H500 or individual C460 cameras.
- Check for available firmware updates and follow the on-screen prompts to install them. Ensure a stable internet connection during the update process.
7. Troubleshooting
- Camera Offline:
- Check the camera's battery level. Recharge if necessary.
- Ensure the camera is within range of the Smart Hub H500.
- Verify the Smart Hub H500 is powered on and connected to the internet.
- Restart the camera and the Smart Hub H500. - Poor Video Quality:
- Clean the camera lens.
- Ensure there are no obstructions in the camera's field of view.
- Check your internet connection speed if experiencing lag in live view.
- Adjust camera placement for optimal lighting. - Detection Not Working:
- Verify that detection features are enabled in the Tapo app settings for the specific camera.
- Adjust detection sensitivity and detection zones.
- Ensure the camera's view is clear and not obstructed. - Solar Panel Not Charging:
- Ensure the solar panel is clean and free from dirt, leaves, or snow.
- Reposition the solar panel to receive direct sunlight for several hours daily.
- Check the connection cable between the solar panel and the camera.
8. Specifications
| Feature | Specification |
|---|---|
| Brand | Tapo |
| Model Numbers | C460 KIT (Camera), H500 (Smart Hub) |
| Video Capture Resolution | 4K (8MP) |
| Frame Rate | 30 fps |
| Night Vision Range | 30 Feet (Full-Color) |
| Special Features | Human Detection, Motion Sensor, Vehicle Detection, Pet Detection, Facial Recognition |
| Local Storage | Built-in 16GB eMMC, Expandable up to 16TB (via HDD/SSD on H500) |
| Power Source | Rechargeable Battery (C460), Solar Panel, AC Power (H500) |
| Color | White |
9. Warranty and Support
Tapo products are backed by a limited warranty. Please refer to the warranty card included in your package or visit the official Tapo website for detailed warranty terms and conditions specific to your region.
For technical support, troubleshooting assistance, or further inquiries, please visit the Tapo Support website or contact Tapo Customer Service through the Tapo app. You can find FAQs, video tutorials, and contact information for support channels there.
Tapo Support Website: www.tapo.com/support


