
SUPERLEX SUPERLEX Bread Maker
Contents
SUPERLEX Bread Maker Instruction Manual
Model: SUPERLEX Bread Maker
1. Product Overview
The SUPERLEX Bread Maker is designed to simplify the process of baking fresh, homemade bread. With its versatile features and user-friendly interface, you can enjoy a variety of bread types, doughs, and even cakes with minimal effort.

Image 1.1: Front view of the SUPERLEX Bread Maker. This compact appliance features a sleek black design with a control panel on the top front.
Key Features:
- 11 Versatile Menus: Bake artisan loaves, gluten-free bread, sourdough, cakes, and dough with dedicated programmes for French, whole wheat, sweet, and quick recipes.
- Dual Loaf Sizes: Capable of baking 1.5lb (700g) or 2lb (900g) fresh bread.
- Rapid Baking: Includes a Quick Bake function for express recipes.
- Automatic Keep Warm: Features a 1-hour automatic keep-warm function after baking is complete.
- Smart Baking with LCD Display: User-friendly interface with a clear LCD display.
- 13-Hour Delay Timer: Plan your baking up to 13 hours in advance.
- 10-Minute Power Cut-off Memory: Resumes operation after short power interruptions.
- Compact & Easy-Clean Design: Space-saving plastic housing with a removable non-stick pan and dual measuring tools for effortless maintenance.
- Adjustable Crust Control: Achieve perfect crusts with precise temperature control (Light, Medium, Dark).

Image 1.2: An overview of the bread maker's features, highlighting the 13-hour delayed bake timer, two loaf sizes, three browning levels, 1-hour keep warm function, quiet operation, and included recipes.
2. Included Accessories
Your SUPERLEX Bread Maker comes with the following accessories to assist you in your baking process:
- Nonstick Pan
- Measuring Spoon
- Measuring Cup
- Hook
- Detachable Dough Hook

Image 2.1: This image displays the main bread machine unit along with its included accessories: the nonstick pan, measuring spoon, measuring cup, hook, and detachable dough hook. Product dimensions are also indicated.
3. Setup
Before first use, please follow these steps to set up your bread maker:
- Unpack: Carefully remove the bread maker and all accessories from the packaging. Retain packaging for future storage or transport.
- Clean: Wash the nonstick bread pan, measuring spoon, measuring cup, and dough hook with warm, soapy water. Rinse thoroughly and dry completely. Wipe the exterior of the bread maker with a damp cloth.
- Position: Place the bread maker on a stable, flat, heat-resistant surface, away from direct sunlight and heat sources. Ensure there is adequate ventilation around the appliance.
- Insert Pan: Place the clean and dry bread pan into the baking chamber. Press down firmly until it clicks into place.
- Attach Dough Hook: Insert the detachable dough hook onto the shaft at the bottom of the bread pan. Ensure it is securely seated.
- Power Connection: Plug the bread maker into a grounded electrical outlet. The display will illuminate, indicating it is ready for use.
4. Operating Instructions
Follow these steps to bake bread using your SUPERLEX Bread Maker:
Adding Ingredients:
- Always add liquid ingredients first, followed by dry ingredients. Yeast should be added last, placed in a small indentation on top of the flour, away from liquids and salt.
- Ensure all ingredients are at room temperature unless specified otherwise in a recipe.

Image 4.1: This composite image illustrates the process of adding flour to the bread pan, interacting with the control panel, the dough being kneaded, and a finished loaf of bread, demonstrating the automatic mode for kneading, rising, and baking.
Control Panel Functions:

Image 4.2: A detailed view of the bread maker's control panel, showing buttons for MENU, COLOR, LOAF SIZE, TIME, and START/STOP, along with the LCD display indicating program number and time.
- MENU Button: Press to cycle through the 11 available programs. The selected program number will appear on the LCD display.
- COLOR Button: Select your desired crust color: Light, Medium, or Dark.
- LOAF SIZE Button: Choose between 700g (1.5lb) or 900g (2lb) loaf sizes.
- TIME Buttons (+/-): Use these buttons to adjust the delay timer for delayed baking. Each press adjusts the time by 10 minutes.
- START/STOP Button: Press once to start the selected program. Press and hold for a few seconds to stop the program.
Baking Process:
- Add ingredients to the bread pan according to your recipe.
- Select the desired program using the MENU button.
- Choose the loaf size (700g or 900g) using the LOAF SIZE button.
- Select the crust color (Light, Medium, Dark) using the COLOR button.
- If you wish to delay the start of baking, use the TIME (+/-) buttons to set the desired delay time.
- Press the START/STOP button to begin the baking cycle. The machine will automatically knead, rise, and bake the bread.
- Once baking is complete, the bread maker will beep and automatically switch to the 1-hour keep-warm function.
- Carefully remove the bread pan using oven mitts. Invert the pan to release the bread onto a wire rack to cool. If the dough hook remains in the bread, use the included hook tool to remove it.
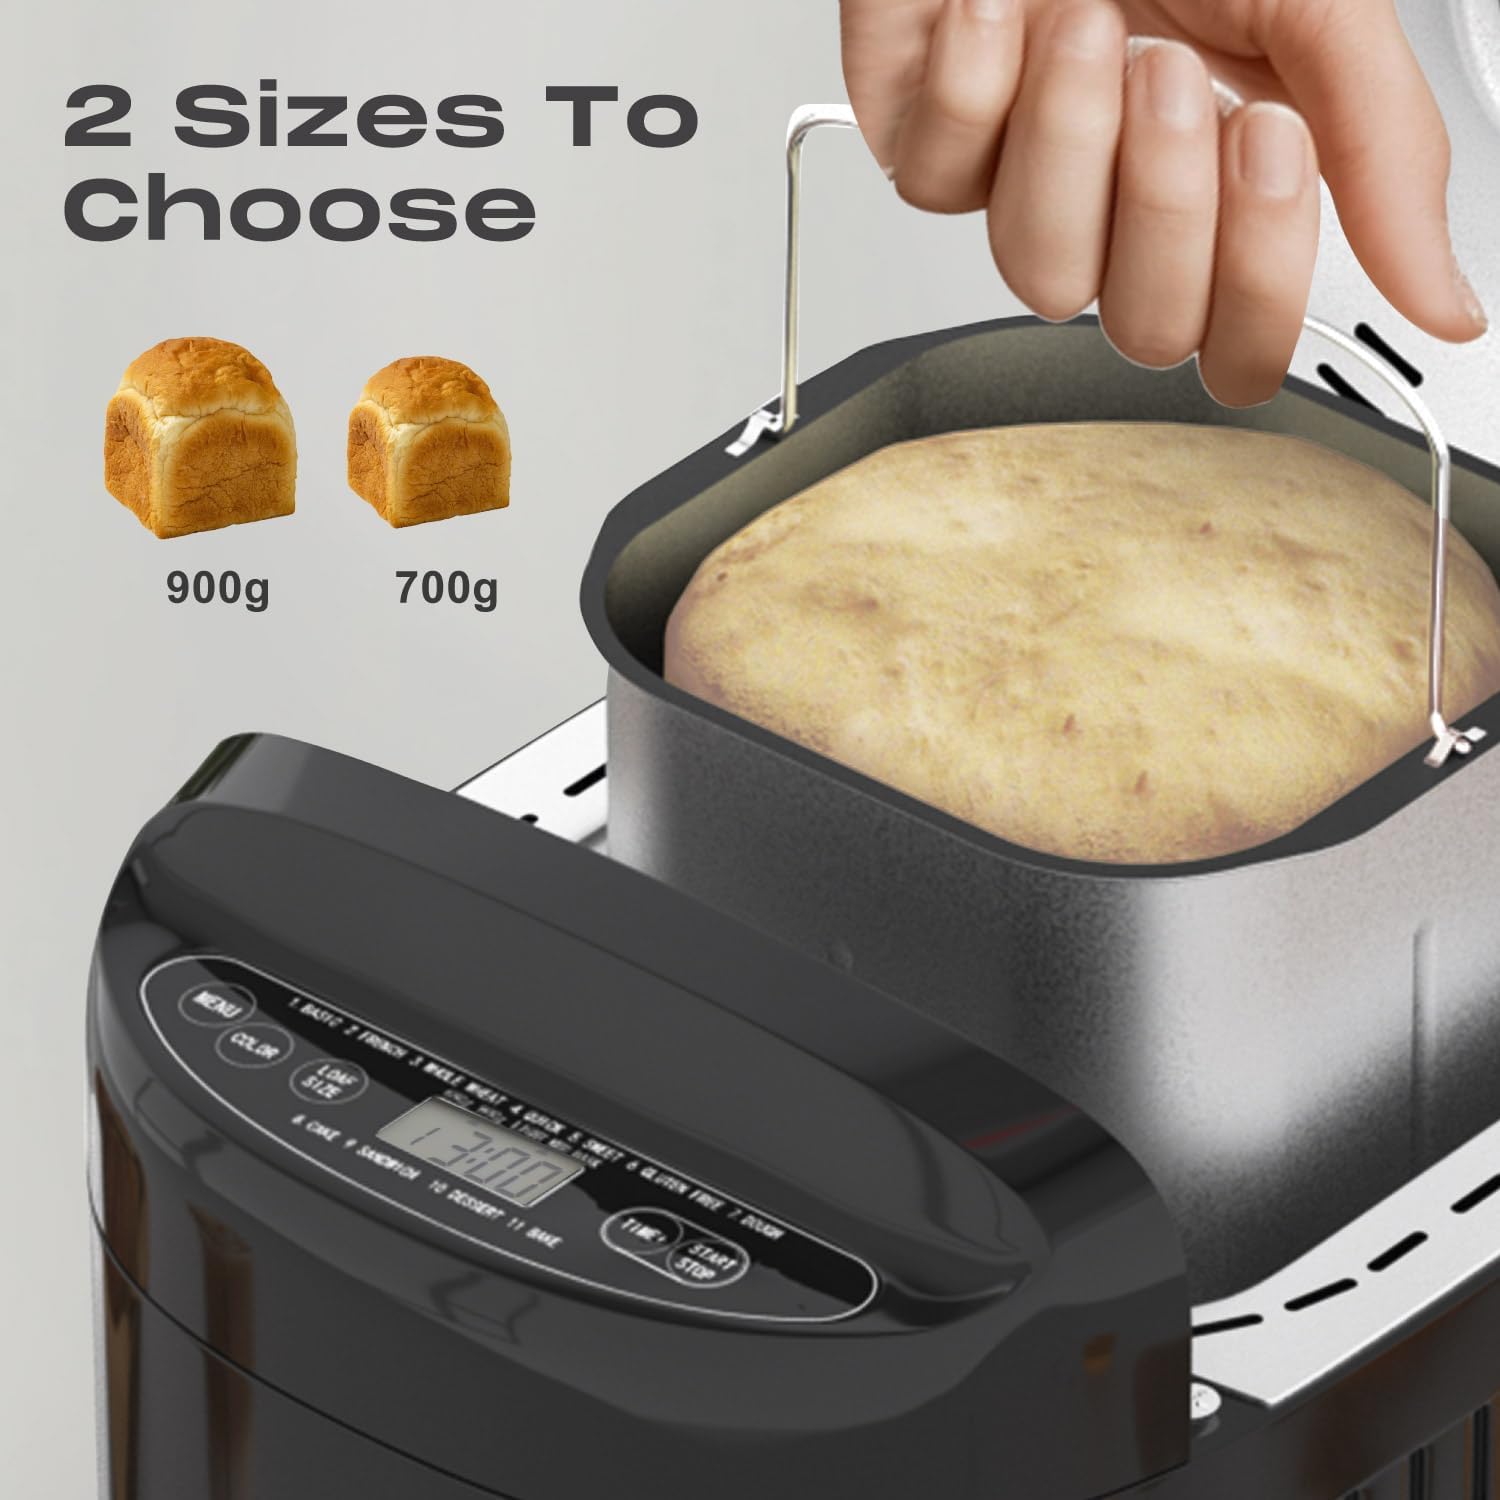
Image 4.3: This image shows the bread pan inside the bread maker, with a baked loaf, and two smaller loaves (900g and 700g) indicating the available loaf sizes.
Delay Timer and Power Cut Memory:
The 13-hour delay timer allows you to set the machine to finish baking at a later time. The 10-minute power cut-off memory ensures that if power is interrupted for less than 10 minutes, the machine will resume the program from where it left off once power is restored.

Image 4.4: This image highlights the 13-hour delay timer feature and the 10-minute power-off memory. It also illustrates the internal heating process and the three crust color options: light, medium, and dark.
5. Maintenance and Cleaning
Proper maintenance ensures the longevity and optimal performance of your bread maker.
Cleaning the Bread Pan and Dough Hook:
- After each use, allow the bread pan and dough hook to cool completely.
- Fill the bread pan with warm, soapy water and let it soak for 10-15 minutes to loosen any stuck-on residue.
- Remove the dough hook and clean it with a soft sponge or brush.
- Gently clean the interior of the bread pan with a soft sponge. Do not use abrasive cleaners, scouring pads, or metal utensils, as these can damage the nonstick coating.
- Rinse thoroughly with clean water and dry completely before storing or re-using.
Cleaning the Exterior:
- Unplug the bread maker from the power outlet before cleaning.
- Wipe the exterior housing with a soft, damp cloth.
- Do not immerse the bread maker in water or any other liquid.
- Clean the viewing window with a soft, damp cloth.
Storage:
Ensure the bread maker and all accessories are clean and dry before storing. Store in a cool, dry place, preferably in its original packaging, to protect it from dust and damage.
6. Troubleshooting
If you encounter any issues with your SUPERLEX Bread Maker, please refer to the following common problems and solutions:
| Problem | Possible Cause | Solution |
|---|---|---|
| Bread does not rise | Expired or inactive yeast; incorrect water temperature; too much salt or sugar. | Check yeast expiry date; use lukewarm water (38-43°C); ensure correct ingredient measurements. |
| Bread is too dense/heavy | Too much flour; not enough liquid; dough hook not properly attached. | Measure ingredients precisely; ensure dough hook is secure. |
| Bread pan sticks | Nonstick coating damaged; residue build-up. | Ensure proper cleaning; avoid metal utensils. |
| Machine stops mid-cycle | Power interruption; overheating. | Check power supply; allow machine to cool down before restarting. |
| Uneven crust color | Incorrect crust setting; uneven heat distribution. | Select desired crust color; ensure proper ventilation around the machine. |
If the problem persists after trying these solutions, please contact SUPERLEX customer support for further assistance.
7. Specifications
| Specification | Detail |
|---|---|
| Brand | SUPERLEX |
| Model | Bread Maker |
| Colour | Black |
| Product Dimensions | 32 x 24 x 28 cm |
| Item Weight | 4.2 kg |
| Loaf Sizes | 1.5lb (700g), 2lb (900g) |
| Programs | 11 Automatic Menus |
| Delay Timer | Up to 13 hours |
| Keep Warm Function | 1 hour automatic |
| Power Cut Memory | 10 minutes |
8. Warranty and Support
SUPERLEX products are manufactured to the highest quality standards. For any warranty claims or technical support, please contact your retailer or visit the official SUPERLEX website for contact information.
Please retain your proof of purchase for warranty purposes.
Ask a question about this manual
Ask about setup, troubleshooting, compatibility, parts, safety, or missing instructions. Manuals+ will review the question and use this page’s manual context to help answer it.