
1. Introduction
Thank you for choosing the Qlife Triker Plus Electric Tricycle. This manual provides essential information for the safe assembly, operation, maintenance, and troubleshooting of your new electric tricycle. Please read this manual thoroughly before your first ride to ensure optimal performance and safety. Keep this manual for future reference.
2. Safety Guidelines
Your safety is paramount. Always adhere to local traffic laws and regulations when operating the tricycle. Failure to follow these guidelines may result in serious injury or property damage.
- Helmet Use: Always wear an approved helmet that fits properly.
- Pre-Ride Check: Before each ride, inspect tires for proper inflation, check brake functionality, ensure all quick releases and fasteners are secure, and verify battery charge level.
- Riding Conditions: Avoid riding in heavy rain, snow, or icy conditions. Be cautious on uneven surfaces.
- Weight Limit: Do not exceed the maximum load capacity of 500 lbs (227 kg).
- Charging Safety: Only use the provided charger. Do not charge unattended. Keep away from flammable materials.
- Children: This tricycle is designed for adults. Do not allow children to operate it.
3. Package Contents
Upon unpacking, verify that all components are present and undamaged:
- Qlife Triker Plus Electric Tricycle (main frame with rear wheels)
- Front Wheel
- Front Fender
- Front Headlight
- Front Basket
- Rear Basket
- Seat with Backrest
- Pedals (Left & Right)
- Battery Charger
- Assembly Tools
- User Manual (this document)
4. Setup and Assembly
The Qlife Triker Plus Electric Tricycle arrives 90% pre-assembled. Follow these steps for final assembly. For a visual guide, please refer to the official installation video below.
Video: Quick Installation Steps for Qlife Triker Plus. This video demonstrates the complete unboxing and assembly process, including unfolding the frame, attaching the handlebars, installing the front wheel, fenders, baskets, seat, and pedals.
4.1. Unpacking and Initial Inspection
Carefully remove the tricycle and all components from the packaging. Remove all protective wrapping and ties. Inspect for any visible damage during transit.
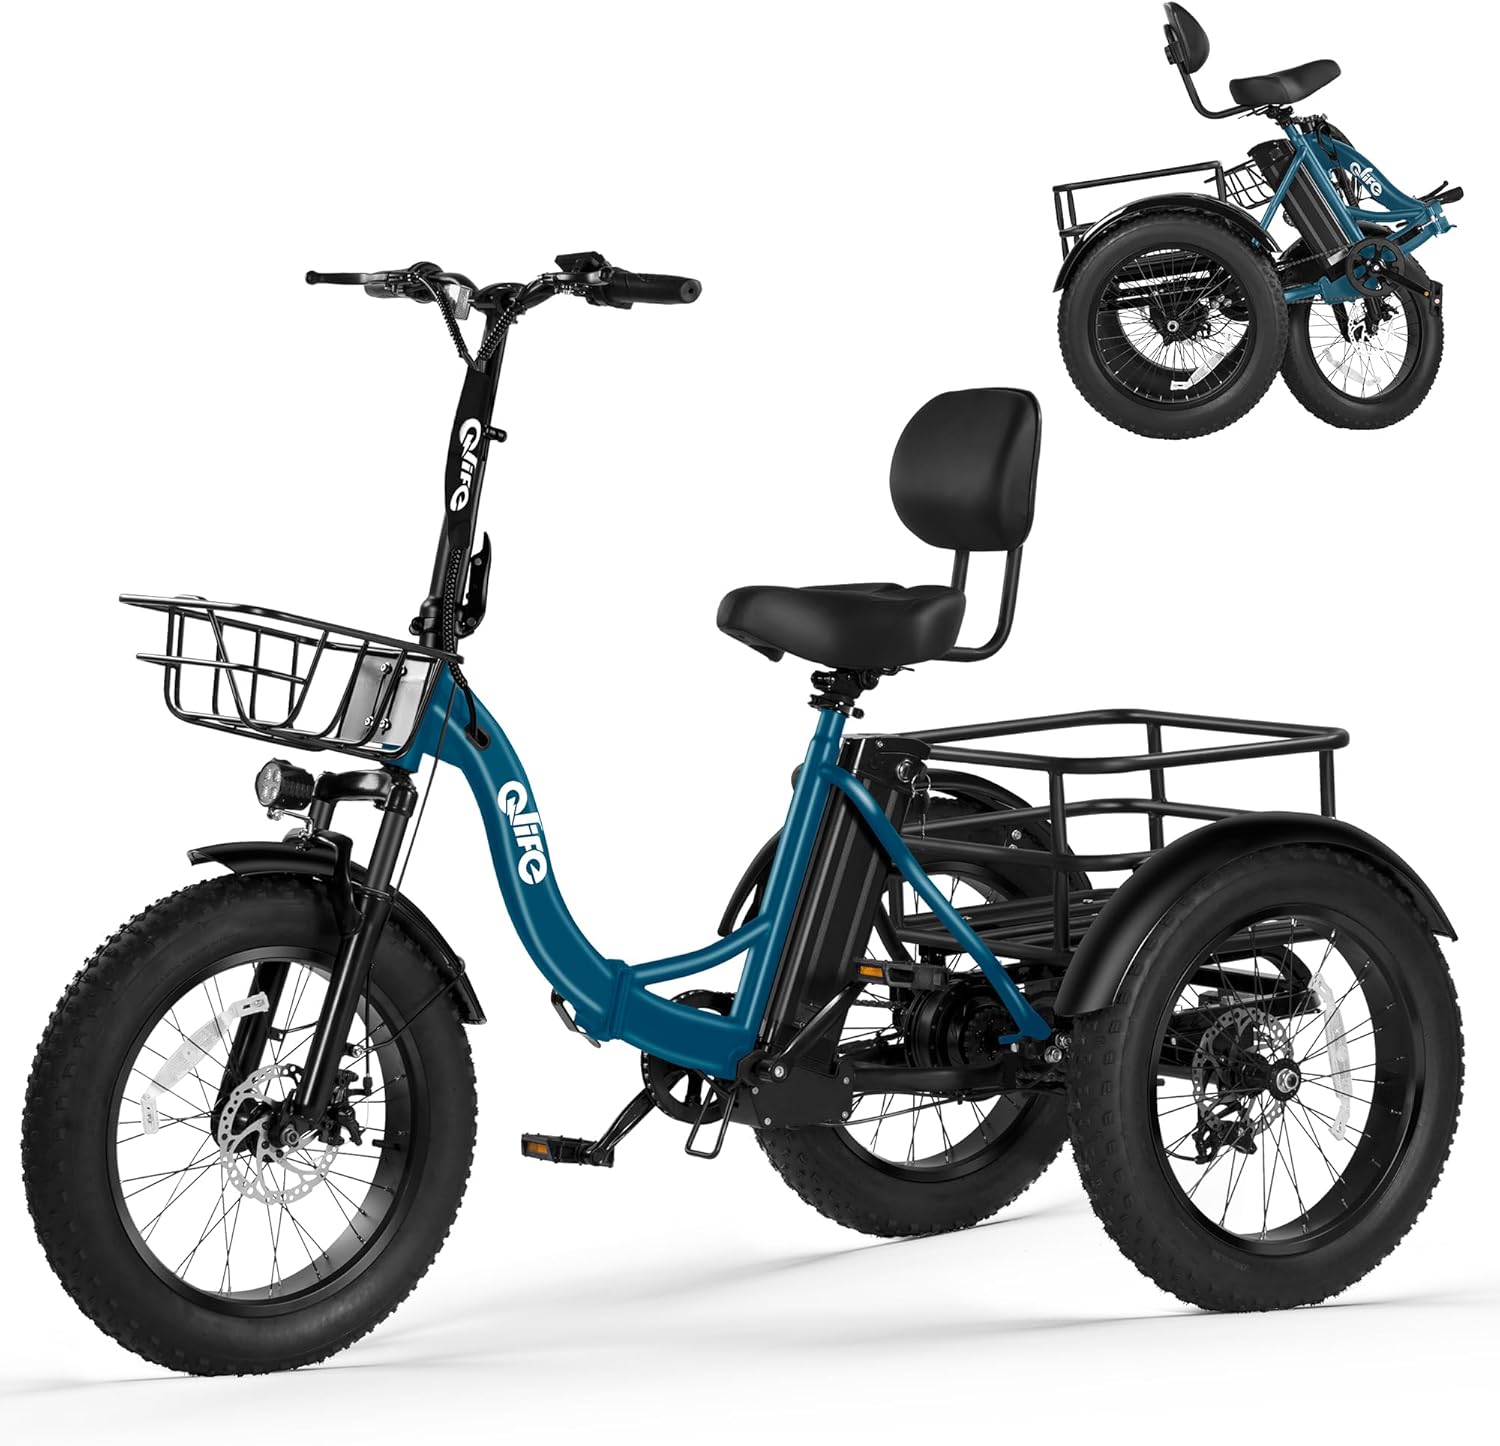
Image: The Qlife Triker Plus Electric Tricycle, showcasing its full size and folded compact form. Ensure all parts are accounted for after unpacking.
4.2. Unfolding the Frame
Locate the main folding hinge on the frame. Release the safety latch and unfold the frame until it locks securely into place. Ensure the latch is fully engaged.
4.3. Handlebar Installation and Adjustment
Insert the handlebar stem into the front fork tube. Adjust the height to a comfortable riding position and secure it using the quick-release lever. Ensure the handlebars are aligned straight with the front wheel.
4.4. Front Fender and Headlight Attachment
Attach the front fender to the front fork using the provided screws. Secure the headlight to the designated mounting point on the front fork or handlebars, ensuring it is aimed correctly.
4.5. Front Wheel Installation
Carefully align the front wheel with the front fork, ensuring the brake rotor slides into the brake caliper. Insert the axle through the fork dropouts and secure it with the provided nuts or quick-release mechanism. Ensure the wheel spins freely without rubbing the brake pads.
4.6. Basket Installation
Attach the front basket to the mounting points on the front of the frame. Secure the rear basket to the rear rack using the provided hardware. Ensure both baskets are stable and securely fastened.

Image: The front and rear cargo baskets, highlighting their capacity for carrying items up to 500 lbs total load.
4.7. Seat and Pedal Installation
Insert the seat post into the frame's seat tube. Adjust the seat height for comfortable pedaling and secure it with the quick-release lever. Attach the pedals to the crank arms, noting that the left pedal (L) threads counter-clockwise and the right pedal (R) threads clockwise.

Image: The extra-large cushioned seat with backrest, designed for comfort and adjustability to suit various riders.
5. Operating Instructions
5.1. Powering On/Off
To power on the tricycle, insert the key into the battery lock and turn it to the 'ON' position. Press and hold the power button on the LCD display. To power off, press and hold the power button again, then turn the key to the 'OFF' position and remove it.
5.2. LCD Display Functions
The HD LCD display provides real-time information about your ride:
- Speed Meter: Displays current riding speed.
- Battery Level: Indicates remaining battery charge.
- Pedal-Assist Level (PAS): Shows the current level of motor assistance (0-5).
- Odometer (ODO): Total distance traveled.
- Trip Distance (TRIP): Distance traveled during the current ride.
- Power Output (POW): Real-time motor power usage.

Image: The Smart LCD Display provides comprehensive ride data at a glance.
5.3. Riding Modes
The Triker Plus offers three riding modes:
- Pedal-Assist Mode: The motor provides assistance as you pedal. Adjust the assist level using the '+' and '-' buttons on the display.
- Full Electric (Throttle) Mode: Engage the twist grip throttle for motor power without pedaling.
- Manual Pedal Mode: Ride the tricycle like a traditional bicycle without any motor assistance.
5.4. Braking System
The tricycle is equipped with disc brakes for reliable stopping power. Squeeze the brake levers gently to slow down and firmly to stop. Always use both brakes simultaneously for balanced and effective braking.
5.5. Battery Charging
To charge the 48V 13Ah removable lithium battery, connect the charger to the charging port on the battery and then to a standard wall outlet. The indicator light on the charger will show charging status (red for charging, green for fully charged). Charging time is approximately 4-6 hours. The battery can be charged on or off the tricycle.

Image: The 624Wh removable battery, providing up to 65 miles of range on a single charge.
6. Maintenance
Regular maintenance ensures the longevity and safe operation of your Qlife Triker Plus.
- Tire Pressure: Check tire pressure regularly (recommended: 20-30 PSI for fat tires). Proper inflation improves ride quality and range.
- Brake Inspection: Periodically check brake pads for wear and brake cables for tension. Adjust or replace as needed.
- Chain Lubrication: Keep the chain clean and lubricated to prevent rust and ensure smooth operation.
- Fastener Check: Regularly inspect all bolts, nuts, and quick releases to ensure they are tight and secure.
- Cleaning: Clean the tricycle with a damp cloth. Avoid high-pressure washing directly on electrical components. The IP54 waterproof rating protects against splashes, but not submersion.
- Battery Care: Store the battery in a cool, dry place. If storing for extended periods, charge it to 50-70% every 2-3 months.
7. Troubleshooting
Here are solutions to common issues you might encounter:
| Problem | Possible Cause | Solution |
|---|---|---|
| Tricycle does not power on | Battery not charged; Key not in 'ON' position; Loose battery connection | Charge battery; Turn key to 'ON'; Re-seat battery securely |
| Motor not engaging | Low battery; Brake levers engaged; PAS level 0; Loose motor cable | Charge battery; Release brake levers; Increase PAS level; Check motor cable connection |
| Short riding range | Low tire pressure; Frequent use of throttle; Heavy load; Uphill riding | Inflate tires to recommended PSI; Use pedal-assist more; Reduce load; Plan routes to avoid steep inclines |
| Brakes feel weak | Worn brake pads; Loose brake cable; Air in hydraulic system (if applicable) | Inspect/replace brake pads; Adjust cable tension; Consult professional for hydraulic issues |
If you encounter issues not listed here or if solutions do not resolve the problem, please contact customer support.
8. Specifications
Key technical specifications for the Qlife Triker Plus Electric Tricycle:
- Motor: Peak 1200W Brushless Rear Hub Motor
- Battery: 48V 13Ah Removable Lithium Battery (624Wh)
- Max Speed: Up to 20 MPH (32 km/h)
- Max Range: Up to 65 Miles (105 km) on a single charge (pedal-assist dependent)
- Load Capacity: Up to 500 lbs (227 kg)
- Tires: 20x4.0 Fat All-Terrain Tires
- Frame Material: Carbon Steel
- Suspension: Front Hydraulic Suspension
- Brakes: Disc Brakes
- Waterproof Rating: IP54
- Differential System: Rear Differential for independent wheel rotation

Image: The powerful 1200W brushless motor, providing smooth acceleration and high performance.

Image: The 20x4.0 fat tires and full suspension system, designed for all-terrain capability and a comfortable ride.

Image: The rear differential mechanism, enhancing stability and maneuverability during turns.
9. Warranty and Support
Qlife stands behind the quality of the Triker Plus Electric Tricycle. Your purchase includes a 1-year warranty covering manufacturing defects and lifetime technical support.
9.1. Contacting Support
For any questions, technical assistance, or warranty claims, please contact our dedicated support team:
- Call Center: +1-833-475-1642 (M-F 8:00 AM - 5:00 PM PST)
- Email Support: service@qlifebike.com

Image: Qlife's customer support information, including phone and email for assistance.


