Introduction
The Browning Strike Force FHDR 40MP Trail Camera is a high-performance device designed for wildlife monitoring, game tracking, and property surveillance. This manual provides essential information for setting up, operating, and maintaining your camera to ensure optimal performance.

Image: The Browning Strike Force FHDR 40MP Trail Camera shown with its complete bundle, including the 32GB SDHC Memory Card, Hi-Speed USB SD Card Reader, and AA batteries.
Bundle Contents
- 1 × Browning Strike Force FHDR 40MP Trail Camera
- 1 × 32GB SDHC Memory Card
- 1 × Hi-Speed SD USB Card Reader
- 2 × Packs of 4 AA Batteries (Total of 8 Batteries)
- 1 × Black Microfiber Camera and Lens Cleaning Cloth
Setup Guide
Follow these steps to prepare your Browning Strike Force FHDR camera for use.
1. Battery Installation
The camera requires six (6) AA batteries for operation. Ensure batteries are inserted with correct polarity.
- Open the battery compartment door located on the side or bottom of the camera.
- Insert six new AA batteries, matching the positive (+) and negative (-) terminals as indicated inside the compartment.
- Close the battery compartment door securely to ensure a watertight seal.
2. SD Card Installation
A 32GB SDHC Memory Card is included for storing images and videos.
- Locate the SD card slot, typically near the battery compartment or under a protective flap.
- Insert the 32GB SDHC card into the slot with the label facing the correct direction until it clicks into place.
- To remove, gently push the card in until it springs out.
3. Mounting the Camera
The camera is designed for tree mounting and outdoor use.

Image: The Browning FHDR40 Trail Camera securely mounted on a tree, demonstrating its intended outdoor deployment for capturing wildlife.
- Choose a suitable location, such as a tree or post, that provides a clear view of the area you wish to monitor.
- Use the included mounting strap or a compatible mounting accessory to secure the camera firmly.
- Adjust the camera's angle to ensure optimal coverage and avoid direct sunlight or strong backlighting.
4. Initial Power On and Basic Settings
After installing batteries and SD card, power on the camera and configure basic settings.
- Switch the camera to the "ON" position.
- The camera's internal display will activate. Navigate through the menu using the control buttons.
- Set the current date and time.
- Format the SD card (this will erase all data on the card, so ensure it's empty or backed up).
- Select your desired capture mode (e.g., Photo, Video, Photo + Video, Time-Lapse).
Operating the Camera
Understand the key features and operational modes of your trail camera.
Capture Modes and Settings
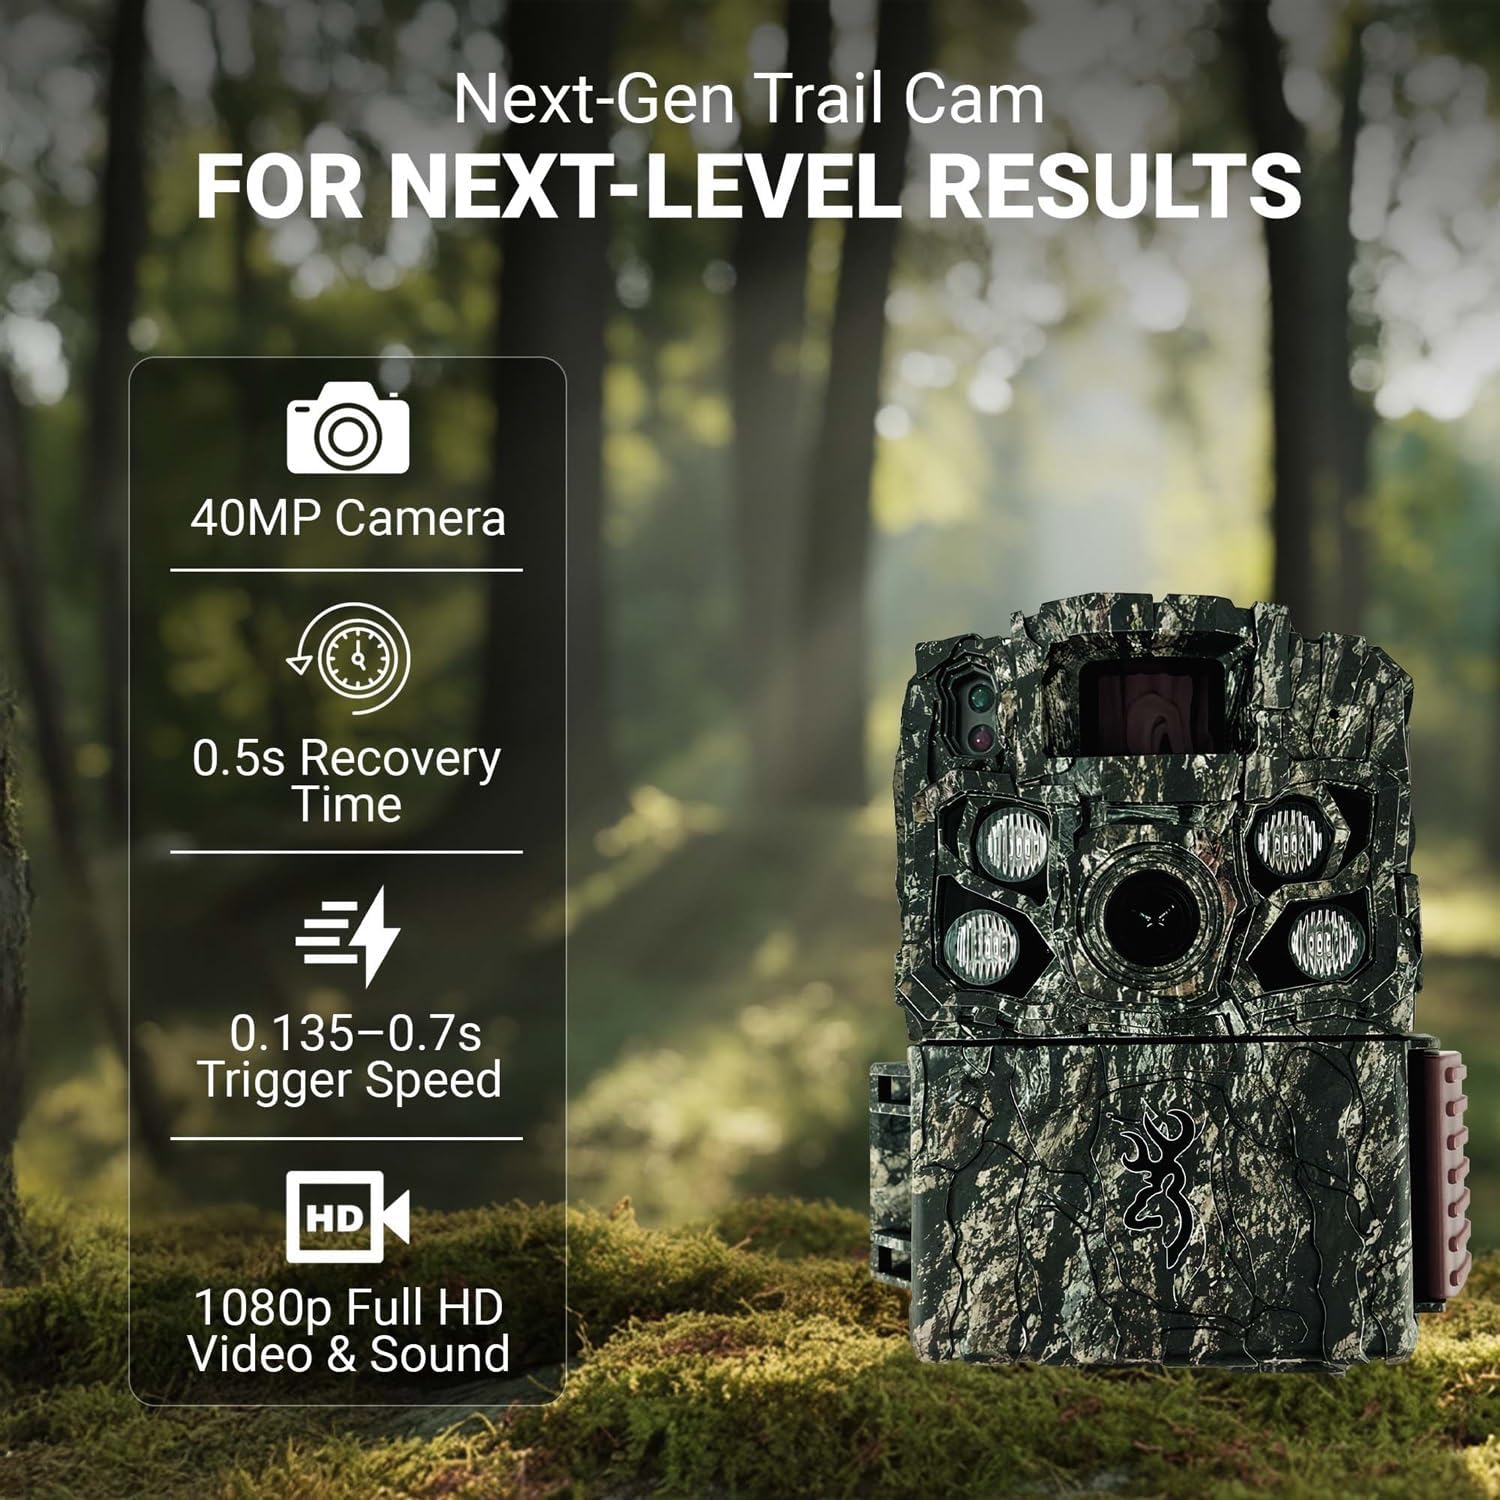
Image: The Browning Trail Camera highlighting its core performance metrics: 40MP camera, 0.5s recovery time, 0.135-0.7s adjustable trigger speed, and 1080p Full HD video with sound.
- Image Quality: Capture stunning 40-megapixel still images, providing exceptional detail and clarity.
- Video Recording: Record high-definition 1080p Full HD videos with audio. The Smart IR Video feature ensures continuous recording as long as motion is detected.
- Trigger Speed: The adjustable trigger speed ranges from 0.135 to 0.7 seconds, allowing for quick capture of fast-moving subjects.
- Recovery Time: A rapid 0.5-second recovery time minimizes the delay between captures, ensuring you don't miss subsequent events.
- Detection Range: The camera features an 80-foot detection range, effectively covering a wide area.
Night Vision and Illumination
The Strike Force FHDR is equipped with advanced night vision capabilities for clear imaging in low-light conditions.

Image: A clear night vision photograph of two deer, demonstrating the camera's ability to capture detailed images in complete darkness.
- Gen 2 Night Optics: Enhanced optics for superior performance in dark environments.
- Radiant 4 Night IR Illumination: Provides powerful infrared light for bright, clear night images without disturbing wildlife.
- Adjustable IR Flash: Choose between Long Range, Fast Motion, and Economy modes to optimize flash performance based on your needs and conserve battery life.
Data Retrieval
To access your captured images and videos, use the included Hi-Speed USB SD Card Reader.
- Turn off the camera and remove the SD card.
- Insert the SD card into the Hi-Speed USB SD Card Reader.
- Connect the USB card reader to your computer's USB port.
- The SD card will appear as a removable drive. You can then copy or move your files to your computer.
Maintenance
Proper maintenance ensures the longevity and optimal performance of your trail camera.
Cleaning the Camera
Use the provided Black Microfiber Camera and Lens Cleaning Cloth for cleaning.
- Gently wipe the camera lens and IR sensors with the microfiber cloth to remove dust, dirt, or smudges.
- For the camera body, use a soft, damp cloth to wipe away any grime. Avoid harsh chemicals or abrasive materials.
- Ensure all seals and covers are free of debris to maintain weather resistance.
Battery Replacement
Replace batteries when the low battery indicator appears or when performance degrades.
- Always replace all six AA batteries at once with new, high-quality alkaline or lithium batteries.
- Do not mix old and new batteries, or different types of batteries.
- Dispose of used batteries responsibly according to local regulations.
Storage
When not in use for extended periods, store the camera properly.
- Remove all batteries from the camera to prevent leakage.
- Store the camera in a cool, dry place, away from direct sunlight and extreme temperatures.
- Keep the lens and sensors covered or protected to prevent dust accumulation.
Troubleshooting
Refer to this section for common issues and their solutions.
| Problem | Possible Cause | Solution |
|---|---|---|
| Camera not powering on | Dead or incorrectly inserted batteries; faulty SD card. | Check battery polarity and replace with fresh batteries. Ensure SD card is inserted correctly. |
| Poor image/video quality | Dirty lens; incorrect settings; low light without IR. | Clean the lens with the microfiber cloth. Adjust image/video resolution settings. Ensure IR flash is enabled for night use. |
| Camera not detecting motion | Obstruction in detection zone; incorrect sensitivity setting; camera too high. | Clear obstructions. Adjust PIR sensitivity. Mount camera at optimal height (approx. 3-5 feet). |
| SD card error | Corrupted card; incompatible card; full card. | Format the SD card in the camera. Try a different compatible SD card. Ensure card is not full. |
Specifications
Detailed technical specifications for the Browning Strike Force FHDR 40MP Trail Camera.
| Model Name | Browning Trail Cameras Strike Force FHDR40 |
| Model Number | BTC-5FHDR40 |
| Image Resolution | 40 Megapixels |
| Video Resolution | 1080p Full HD with Sound (MP4 format) |
| Trigger Speed | Adjustable from 0.135 to 0.7 seconds |
| Recovery Time | 0.5 seconds |
| Detection Range | 80 feet |
| Night Illumination | Gen 2 Night Optics, Radiant 4 Night IR Illumination, 110 ft. night flash range |
| Power Source | 6 AA Batteries (external power support available) |
| Storage | SD Card (up to 32GB SDHC included) |
| Dimensions (L x W x H) | 4.25 x 3 x 2.5 inches |
| Item Weight | 1.6 pounds |
| Mounting Type | Tree Mount |
| Indoor/Outdoor Usage | Outdoor |
Warranty and Support
For detailed warranty information and customer support, please refer to the documentation included with your product or visit the official Browning website.
Manufacturer: Browning
Website: www.browning.com (Please check the official website for the most current support information and contact details.)


