1. Introduction
This manual provides detailed instructions for the setup, operation, and maintenance of your HOTUT WiFi 1080P Mini Camera. Please read this manual thoroughly before using the product to ensure correct usage and optimal performance.

Image: The HOTUT HD Remote WiFi Security Camera, emphasizing its lightweight and portable design, with icons representing key features: Infrared night vision, Two-way intercom, Motion Detection, Wireless connectivity, and High-definition quality.
Key Features:
- 1080p HD Resolution: Provides clear and fluid video quality.
- Enhanced Night Vision: Equipped with 6 advanced infrared LEDs for clear images in low light conditions, with a range of 5-10 meters.
- 2.4 GHz Wi-Fi Connectivity: Easy connection to your home network. (Note: 5 GHz Wi-Fi is not supported.)
- Built-in Wi-Fi Hotspot: Allows recording even when disconnected from the internet.
- Dual Storage Options: Supports local storage via Micro SD card (up to 128GB, not included) and cloud storage.
- Two-Way Audio: Built-in microphone and speaker for real-time communication.
- Motion Detection: Smart motion detection system with adjustable sensitivity and instant notifications to your smartphone.
- Rechargeable Battery: Integrated 960 mAh battery providing 5-7 hours of autonomy.
- Compact Design: Small and discreet for various monitoring applications.

Image: Examples of multi-scenario applications for the camera, including use in a warehouse, houses, shops, and bedrooms, highlighting its versatility, easy installation, high-definition quality, and long standby time.
Package Contents:
- HOTUT WiFi 1080P Mini Camera x 1
- Mounting Bracket x 1
- Type-C Data Cable x 1
- User Manual x 1
2. Product Overview
Familiarize yourself with the components of your HOTUT Mini Camera.

Image: Detailed diagram showing the camera's components. Labels include: (1) SD card slot, (2) Mode key, (3) On/off button, (4) Speaker holes, (5) Charging port, (6) Night vision lights, (7) Lens, (8) Bracket. The image also shows the camera's dimensions: 3.8cm/1.4in height, 4cm/1.6in width, 3.6cm/1.4in depth.
- SD Card Slot: Insert a Micro SD card for local video storage.
- Mode Key: Used for switching modes or resetting the device.
- On/Off Button: Powers the camera on or off.
- Speaker Holes: For audio output during two-way communication.
- Charging Port: Type-C port for charging the camera.
- Night Vision Lights: Infrared LEDs for low-light visibility.
- Lens: The camera's optical lens for capturing video.
- Bracket: Adjustable mount for positioning the camera.
3. Setup
3.1 Charging the Camera
Before first use, fully charge the camera. Connect the provided Type-C data cable to the camera's charging port (5) and the other end to a USB power adapter (not included).
- A full charge typically takes several hours.
- The indicator light will show charging status (refer to app or specific LED behavior in quick start guide if available).
3.2 Inserting a Micro SD Card (Optional)
For local video storage, insert a Micro SD card (up to 128GB, Class 10 or higher recommended) into the SD card slot (1). Ensure the camera is powered off before inserting or removing the card.
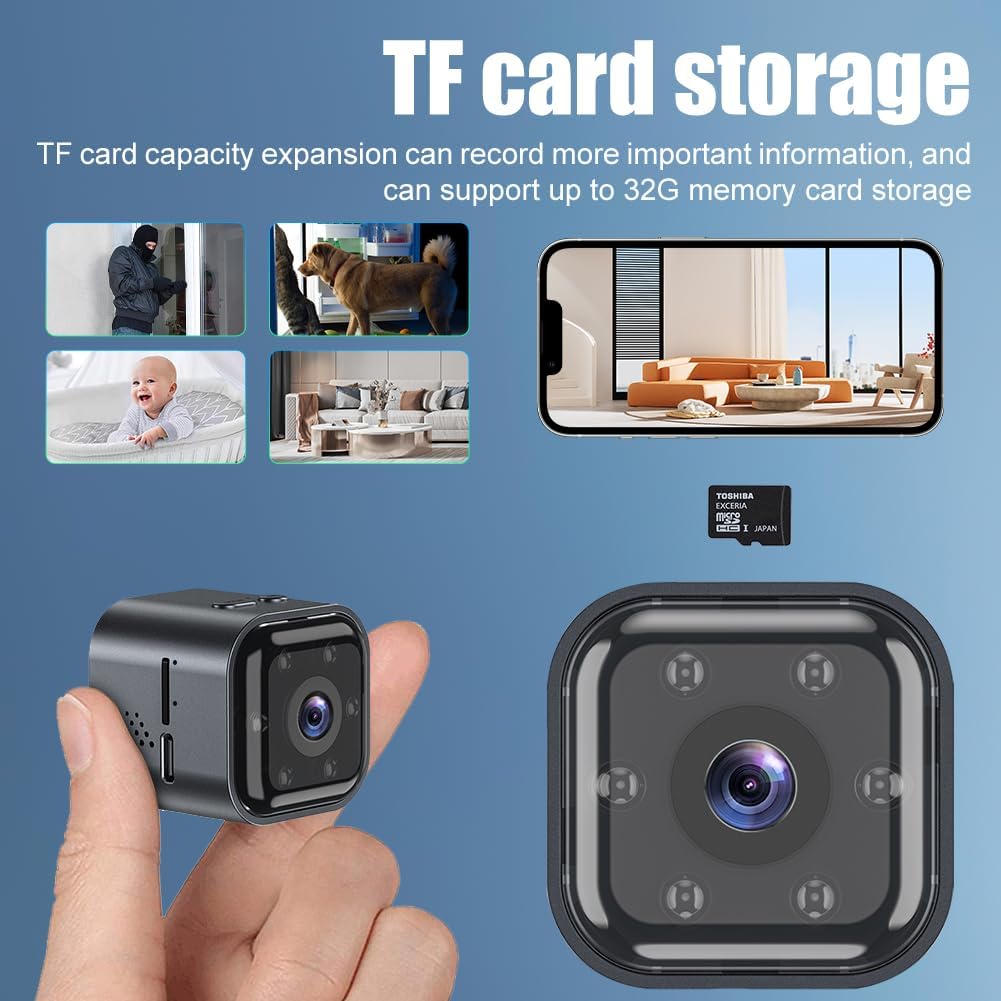
Image: Illustration of the camera with a Micro SD card, indicating the TF card storage feature. The image also shows various monitoring scenarios like home security, pet monitoring, and baby monitoring.
- The camera supports continuous recording or motion-activated recording to the SD card.
- Format the SD card via the mobile application after insertion for optimal compatibility.
3.3 Downloading the Mobile Application
To control and view your camera, download the "iWFCam" application on your smartphone. Scan the QR code provided in the quick start guide (if applicable) or search for "iWFCam" in your device's app store.
- Create an account and log in.
3.4 Connecting to Wi-Fi
The camera connects to your home Wi-Fi network for remote access. Ensure your Wi-Fi network is 2.4 GHz. 5 GHz networks are not supported.
- Power on the camera using the On/Off button (3).
- Open the iWFCam app and follow the on-screen instructions to add a new device.
- Select your 2.4 GHz Wi-Fi network and enter the password.
- The app will guide you through the pairing process, which may involve scanning a QR code displayed on your phone with the camera's lens.
- Once connected, the camera's status indicator light will change (refer to app or quick start guide for specific light patterns).

Image: An overhead view of a house showing the camera mounted on a wall and Wi-Fi signals reaching different rooms, illustrating the wireless connectivity and built-in AP hotspot feature.
3.5 AP Hotspot Mode
The camera features a built-in AP (Access Point) hotspot, allowing it to record even when disconnected from your home internet. This mode creates a direct Wi-Fi connection between your smartphone and the camera within a limited range.
- To activate AP mode, press and hold the Mode key (2) until the indicator light changes (refer to quick start guide for specific instructions).
- Connect your smartphone directly to the camera's Wi-Fi hotspot (usually named with the camera's ID) from your phone's Wi-Fi settings.
- Open the iWFCam app to view the live feed and manage recordings.
4. Operating the Camera
4.1 Real-time Viewing
Once connected to Wi-Fi, open the iWFCam app on your smartphone to access the live video feed from your camera. You can monitor your home, office, or other areas in real-time from anywhere.
4.2 Motion Detection and Notifications
The camera's intelligent motion detection system can alert you to activity in its field of view.

Image: A person entering a room, with the camera detecting motion and sending push notifications to a smartphone displaying "Motion detection is triggered!" from the iWFCam app.
- Activation: Enable motion detection in the iWFCam app settings.
- Sensitivity Adjustment: Adjust the sensitivity of the motion sensor manually within the app to minimize false alerts.
- Notifications: When motion is detected, the camera will send instant push notifications to your smartphone.
4.3 Two-Way Audio
The built-in microphone and speaker allow for two-way voice communication through the camera.
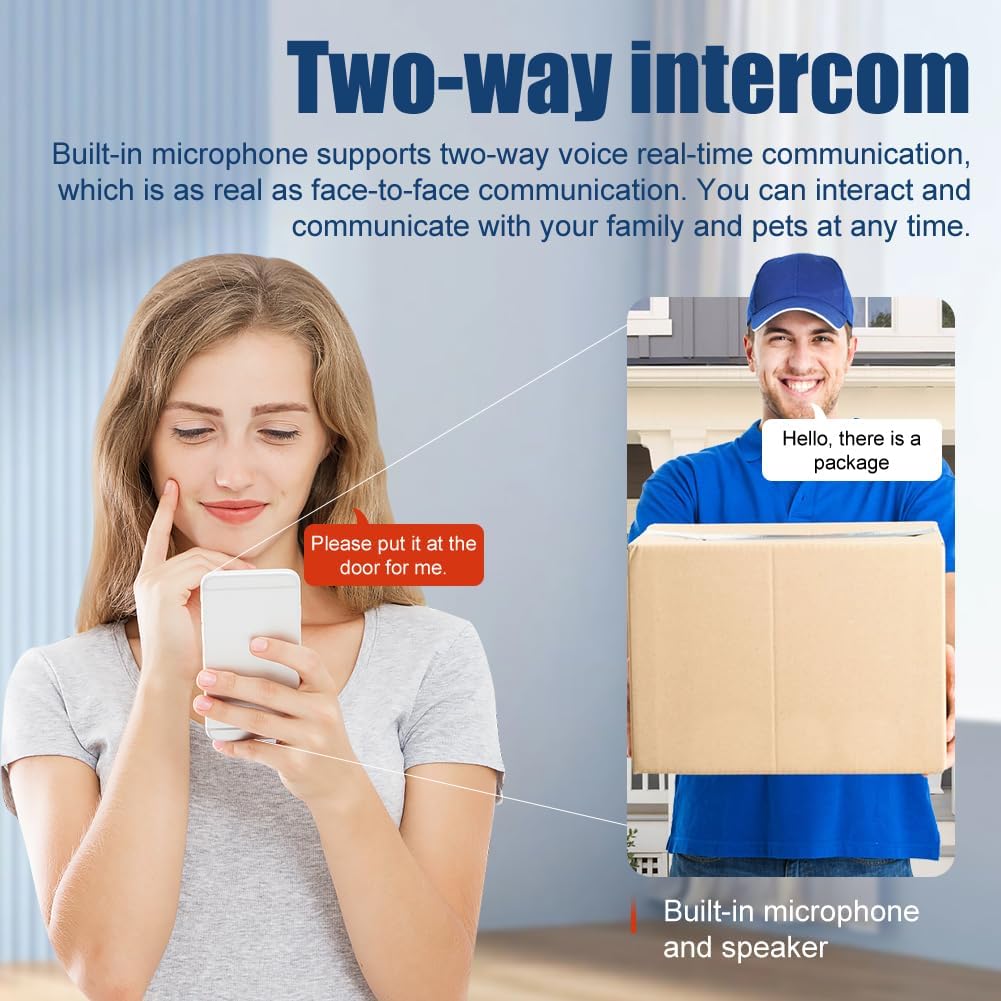
Image: A woman speaking into her smartphone and a delivery person at a door, with speech bubbles indicating two-way communication ("Please put it at the door for me." and "Hello, there is a package"). This illustrates the camera's two-way intercom functionality.
- Tap the microphone icon in the app's live view to speak through the camera.
- Listen to audio from the camera's surroundings through your smartphone.
4.4 Night Vision
The camera automatically switches to infrared night vision mode in low-light conditions, providing clear black and white images.
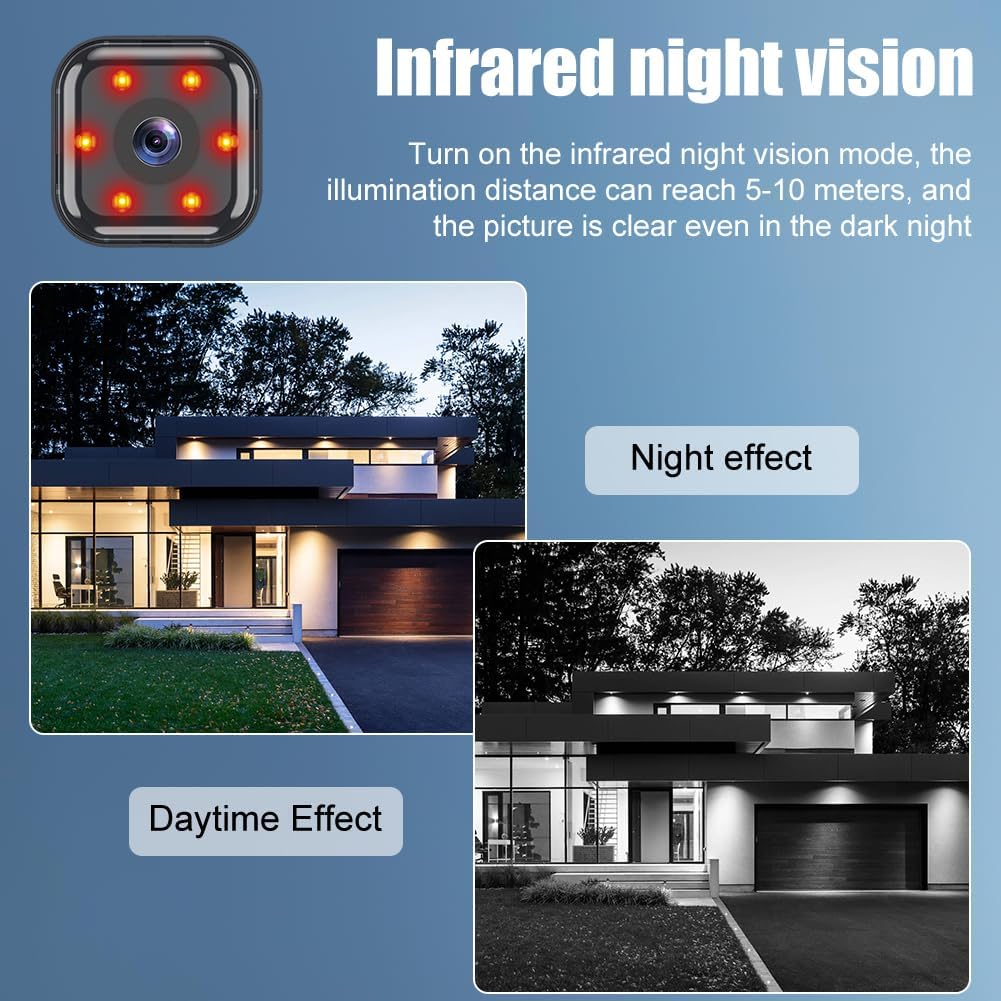
Image: A split image showing a house scene in "Daytime Effect" (color) and "Night effect" (black and white infrared), demonstrating the camera's infrared night vision capability with visible red IR LEDs.
- The illumination distance can reach 5-10 meters.
- Night vision activates automatically but can often be manually controlled in the app settings.
4.5 Recording and Storage
The camera supports both local Micro SD card storage and cloud storage for recorded footage.
- Micro SD Card: Recordings are saved directly to the inserted Micro SD card. Manage recordings and playback through the iWFCam app.
- Cloud Storage: Cloud storage options may be available through the iWFCam app (subscription may be required). This provides secure backup of your recordings.
5. Maintenance
5.1 Cleaning the Camera
- Ensure the camera is powered off and unplugged before cleaning.
- Use a soft, dry cloth to wipe the camera body.
- For the lens, use a lens cleaning cloth or a soft, lint-free cloth specifically designed for optics. Do not use abrasive cleaners or solvents.
5.2 Firmware Updates
Periodically check the iWFCam app for available firmware updates. Updates can improve performance, add new features, and enhance security. Follow the in-app instructions carefully when performing updates.
5.3 Storage Management
- Micro SD Card: Regularly review and back up important recordings. Format the SD card periodically through the app to maintain optimal performance and free up space.
- Cloud Storage: Manage your cloud storage subscription and stored footage directly within the iWFCam app.
6. Troubleshooting
| Problem | Possible Cause | Solution |
|---|---|---|
| Camera fails to connect to Wi-Fi. | Incorrect Wi-Fi password; 5 GHz Wi-Fi network; camera too far from router; network interference. |
|
| No recording to SD card. | SD card not inserted correctly; card full or corrupted; incorrect recording settings. |
|
| Poor night vision quality. | Obstruction in front of the lens; IR lights blocked; insufficient ambient light for IR. |
|
| Short battery life. | Frequent motion detection; continuous recording; extreme temperatures. |
|
| No push notifications. | Notifications disabled in app or phone settings; app not running in background; network issues. |
|
For further assistance, refer to the help section within the iWFCam application or contact customer support.
7. Specifications
| Model Number | 4980082 |
| Resolution | 1080p HD |
| Connectivity | 2.4 GHz Wi-Fi (IEEE 802.11b/g/n) |
| Night Vision Range | 5-10 meters (Infrared) |
| Storage Options | Micro SD card (up to 128GB, not included), Cloud Storage |
| Battery Capacity | 960 mAh (Rechargeable) |
| Battery Life | Approx. 5-7 hours (depending on usage) |
| Audio | Two-way audio (built-in microphone and speaker) |
| Motion Detection | Yes, with adjustable sensitivity and push notifications |
| Operating Temperature | Information not provided in source |
| Dimensions (Approx.) | 3.8cm x 4cm x 3.6cm (Height x Width x Depth) |
| Weight (Approx.) | 40g (camera only) |
8. Warranty and Support
8.1 Warranty Information
HOTUT products are designed and manufactured to the highest quality standards. For specific warranty details, please refer to the warranty card included with your purchase or visit the official HOTUT website. Keep your proof of purchase for warranty claims.
8.2 Customer Support
If you encounter any issues or have questions regarding your HOTUT WiFi 1080P Mini Camera that are not covered in this manual, please contact HOTUT customer support. Contact information can typically be found on the product packaging, the official HOTUT website, or within the iWFCam application.
- Before contacting support, please have your model number (4980082) and purchase information ready.