
Introduction
This user manual provides essential information for the safe and efficient operation of your NEC NP-M300X 3LCD Projector. Please read this manual thoroughly before using the projector to ensure proper setup, operation, and maintenance. Retain this manual for future reference.
Important Safety Information
- Ventilation: Ensure adequate ventilation around the projector. Do not block ventilation openings. Overheating can cause malfunction or fire.
- Power Source: Use only the specified power supply voltage. Connect the power cord securely.
- Lamp: The projector lamp operates at high temperatures and pressures. Allow the projector to cool down before moving or performing maintenance. Do not look directly into the lens when the lamp is on.
- Placement: Place the projector on a stable, level surface. Avoid locations with excessive dust, humidity, or extreme temperatures.
- Cleaning: Disconnect the power cord before cleaning. Use a soft, dry cloth. Do not use liquid or aerosol cleaners.
- Servicing: Do not attempt to service the projector yourself. Refer all servicing to qualified service personnel.
Package Contents
Please verify that all items listed below are included in your package:
- NEC NP-M300X 3LCD Projector
- Remote Control
- Power Cord
- HDMI Cable
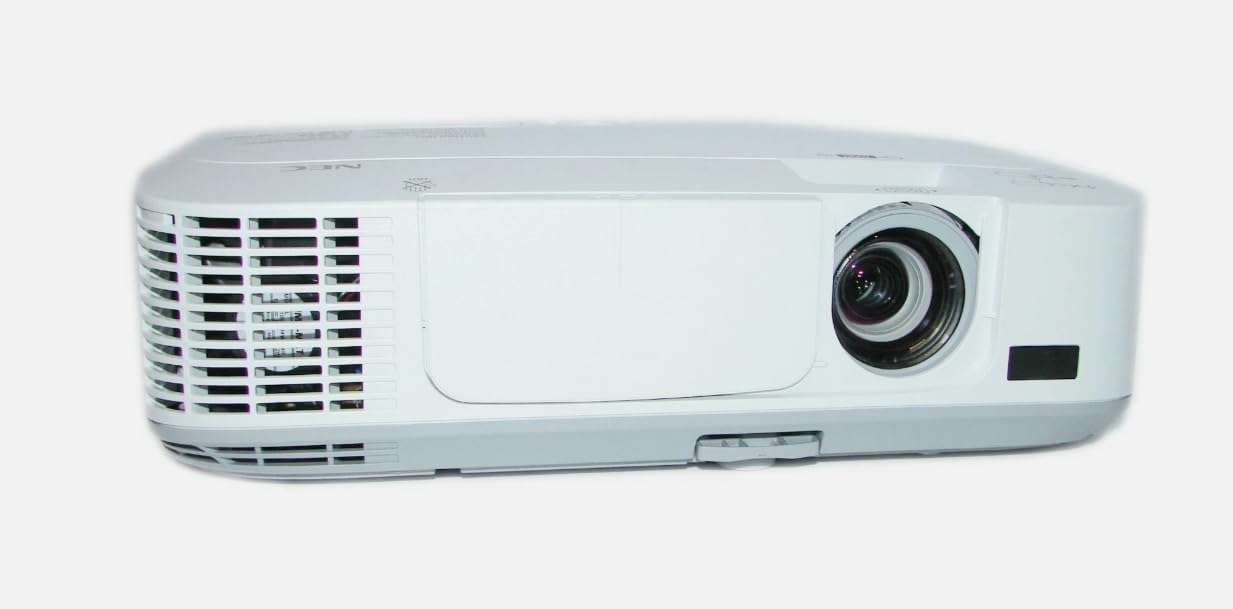
An image showing the front and side view of the white NEC NP-M300X 3LCD Projector, highlighting the lens, ventilation grilles, and control panel area.
Setup Guide
1. Physical Placement
Position the projector on a flat, stable surface or mount it securely. Ensure there is sufficient space around the projector for proper airflow. Adjust the projector's height and angle using the adjustable feet to achieve the desired image position on your screen or wall.
2. Connecting Devices
Connect your video source (e.g., laptop, Blu-ray player) to the projector using the provided HDMI cable. The NEC NP-M300X supports HDMI connectivity for high-quality digital video and audio transmission.
- HDMI: Connect one end of the HDMI cable to the HDMI port on your source device and the other end to the HDMI input port on the projector.
- Power: Connect the power cord to the projector's power inlet and then plug it into a grounded electrical outlet.
Operating Instructions
1. Powering On/Off
- To Power On: Press the Power button on the projector's control panel or the remote control. The power indicator light will illuminate, and the projector will begin its startup sequence.
- To Power Off: Press the Power button again. A confirmation message may appear. Press the Power button once more to confirm shutdown. The projector will enter a cooling cycle before completely shutting down. Do not unplug the projector during the cooling cycle.
2. Input Source Selection
Use the "Input" or "Source" button on the projector or remote control to cycle through available input sources (e.g., HDMI, VGA). Select the input corresponding to your connected device.
3. Image Adjustment
- Focus: Rotate the focus ring on the projector lens until the image appears sharp and clear.
- Zoom: Adjust the zoom ring on the projector lens to change the size of the projected image.
- Keystone Correction: If the image appears trapezoidal, use the keystone correction function (usually accessible via the menu or dedicated buttons on the projector/remote) to square the image.
- Menu Navigation: Use the menu buttons on the projector or remote to access settings for brightness, contrast, color, aspect ratio, and other display options.
Maintenance
1. Lamp Replacement
The projector lamp has a finite lifespan. When the lamp indicator light illuminates or the image becomes dim, it's time to replace the lamp. Refer to the projector's service manual or contact a qualified technician for lamp replacement procedures. Always use genuine replacement lamps.
2. Air Filter Cleaning
Regularly clean the air filter to prevent dust buildup, which can lead to overheating and reduced performance. The cleaning frequency depends on the operating environment. To clean, remove the filter cover, gently remove the filter, and use a soft brush or vacuum cleaner to remove dust. Reinstall the filter and cover securely.
Troubleshooting
| Problem | Possible Cause | Solution |
|---|---|---|
| No image projected | Incorrect input source selected; Cable not connected; Projector in standby. | Select correct input source; Check cable connections; Press power button to wake from standby. |
| Image is blurry | Focus not adjusted; Projector too far/close to screen. | Adjust focus ring; Adjust zoom ring; Reposition projector. |
| Projector overheats/shuts down | Blocked ventilation; Dirty air filter; High ambient temperature. | Ensure clear ventilation; Clean air filter; Operate in a cooler environment. |
| Remote control not working | Dead batteries; Obstruction between remote and projector; Incorrect remote mode. | Replace batteries; Remove obstructions; Ensure remote is pointed at projector's IR receiver. |
Specifications
| Model | NEC NP-M300X (M300X) |
| Display Technology | 3LCD |
| Brightness | 3,000 ANSI Lumens |
| Native Resolution | 1024x768 (XGA) |
| Aspect Ratio | 4:3 |
| Contrast Ratio | 2,000:1 |
| Connectivity | HDMI |
| Item Weight | 6.4 pounds |
| Special Feature | Portable |
Warranty and Support
This product is a renewed item. Warranty terms and support for renewed products typically differ from new products. Please refer to the specific warranty information provided by the seller or refurbisher at the time of purchase. For technical assistance or service inquiries, contact the vendor from whom you purchased this renewed projector.


