1. Introduction
This manual provides essential instructions for the safe and effective operation, setup, and maintenance of your Ambition Seher Pro Wireless Tattoo Pen Machine. Please read this manual thoroughly before using the device to ensure proper function and longevity.
2. Product Overview
The Ambition Seher Pro is a wireless rotary tattoo pen machine designed for professional artists. It features a coreless motor, adjustable stroke length, and a large display battery with billing functionality. Its robust construction and ergonomic design aim to provide stability and control during extended use.

Figure 2.1: Ambition Seher Pro Wireless Tattoo Pen Machine, Gold variant.
Key Features:
- Coreless Motor: Integrated high-performance coreless motor for stable output and low vibration.
- Adjustable Stroke Length: Six precise stroke settings (2.2mm, 2.6mm, 3.0mm, 3.4mm, 3.8mm, 4.2mm) for versatile tattooing styles.
- High Capacity Battery: 2400mAh battery providing 6-7 hours of continuous operation at 8V.
- OLED Display: Large screen displays real-time voltage (1-12V), timer, and auto-billing function.
- Ergonomic Design: 42mm grip diameter and balanced weight (321g) for enhanced stability and comfort.
3. Components and Package Contents
The Ambition Seher Pro package includes the following items:
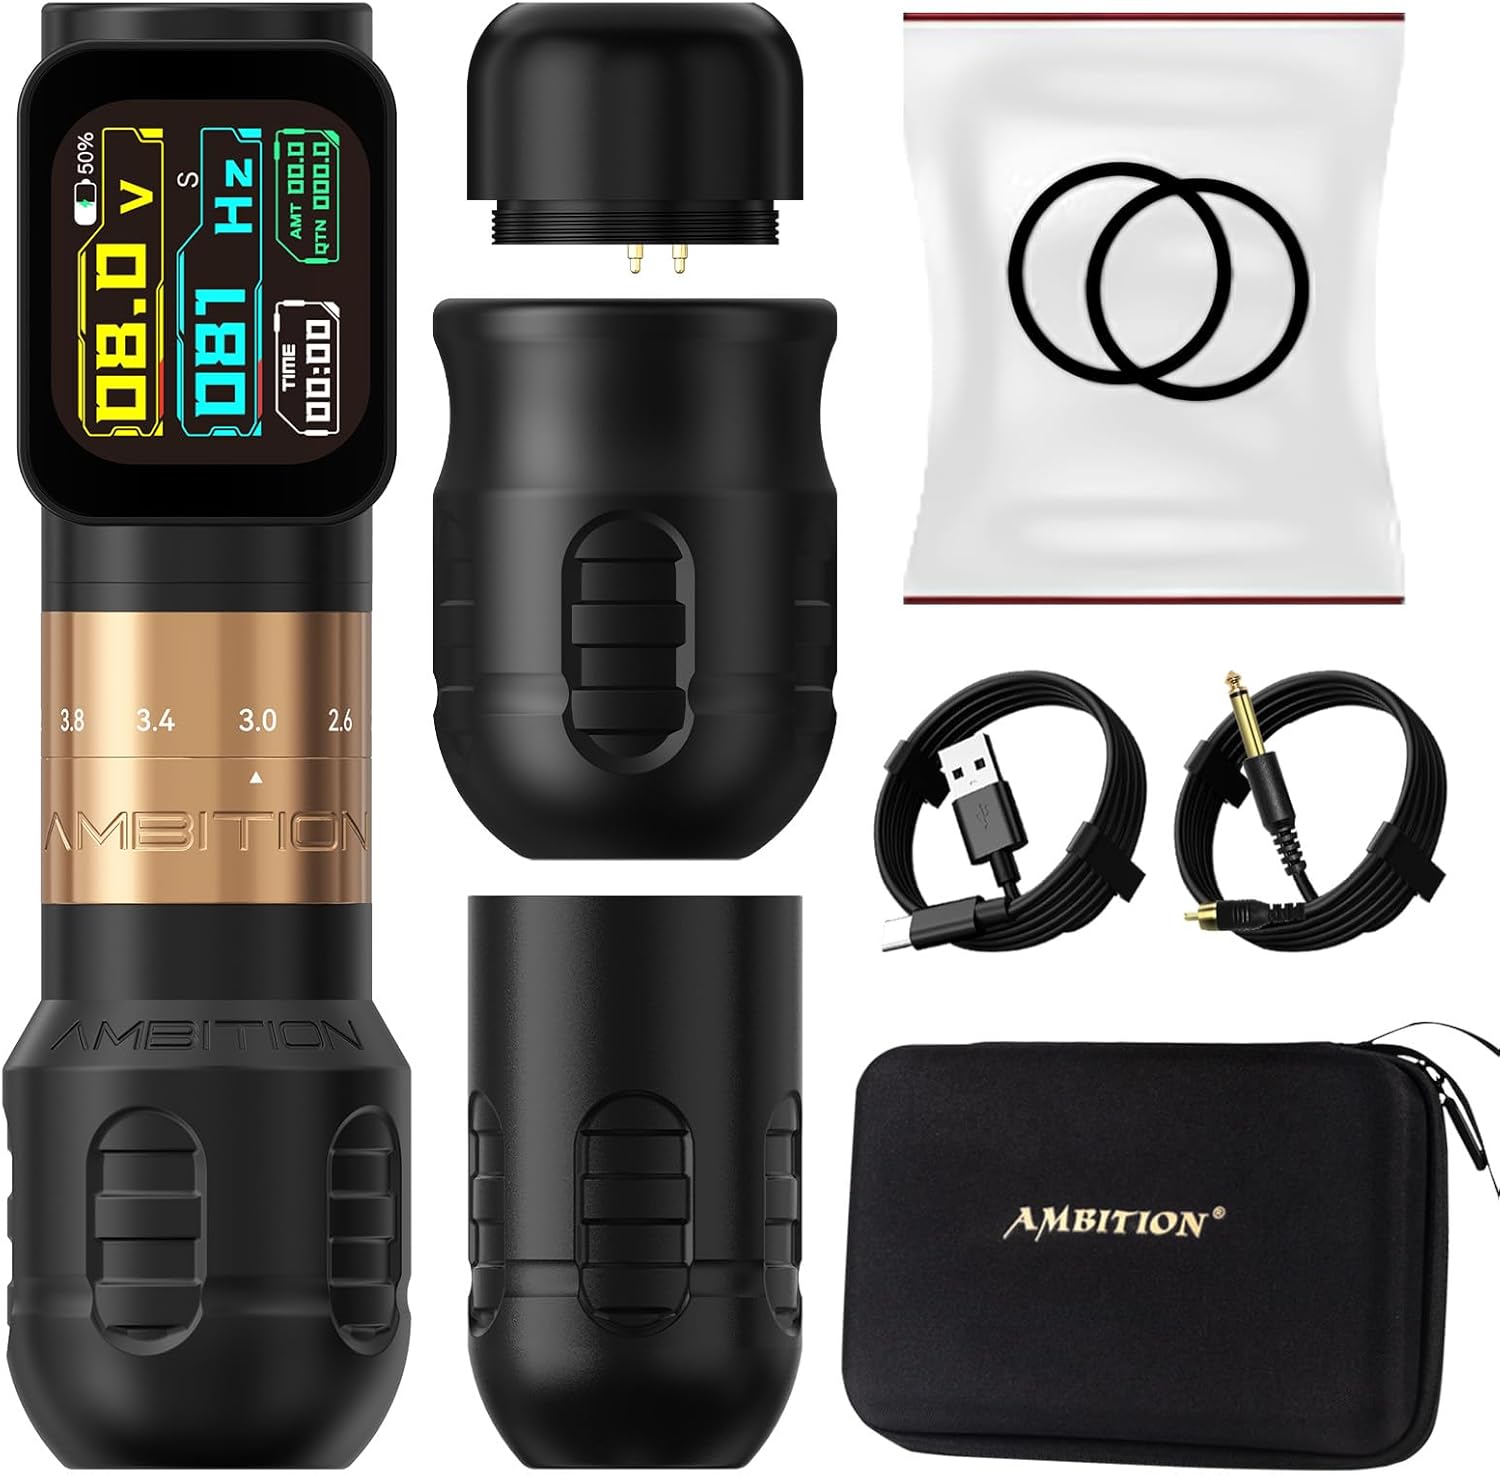
Figure 3.1: Contents of the Ambition Seher Pro package.
- 1x Ambition Seher Pro Cordless Tattoo Machine
- 1x RCA Adapter
- 1x Extra 34mm Grip
- 1x RCA Cable
- 1x Charging Cable (USB)
- 1x Accessory Pouch
- 1x Hard-shell Zippered Case
4. Setup
4.1 Charging the Battery
- Connect the provided USB charging cable to the charging port on the battery unit.
- Connect the other end of the USB cable to a 5V/2A charging adapter (not included).
- The OLED display will indicate charging status. A full charge typically takes 2-3 hours.
- Important: Do not completely drain the battery before charging. Use the original charging cable and a 5V/2A adapter to prevent damage.

Figure 4.1: Battery unit with charging port and display.
4.2 Attaching the Grip
The machine comes with a 42mm grip pre-installed and an extra 34mm grip. To change the grip:
- Gently twist and pull the current grip off the machine body.
- Align the desired grip with the machine body and push it firmly until it clicks into place.

Figure 4.2: The two available grip sizes for user preference.
4.3 Inserting a Needle Cartridge
- Ensure the machine is powered off.
- Carefully insert a compatible cartridge needle into the front opening of the grip.
- Twist the cartridge gently until it is securely seated.
4.4 Using the RCA Adapter (Optional)
If you prefer to use a traditional power supply, attach the RCA adapter to the battery connection point and then connect your RCA cable to the adapter.
5. Operation
5.1 Power On/Off
- To power on, press and hold the power button until the OLED display illuminates.
- To power off, press and hold the power button again until the display turns off.
5.2 Adjusting Voltage
- Use the '+' and '-' buttons on the battery unit to increase or decrease the voltage.
- The voltage range is 1V to 12V, displayed in real-time on the OLED screen.
5.3 Adjusting Stroke Length
The Seher Pro allows for on-the-fly stroke adjustment:
- Locate the adjustment knob on the machine body, above the grip.
- Rotate the knob to select your desired stroke length: 2.2mm, 2.6mm, 3.0mm, 3.4mm, 3.8mm, or 4.2mm.
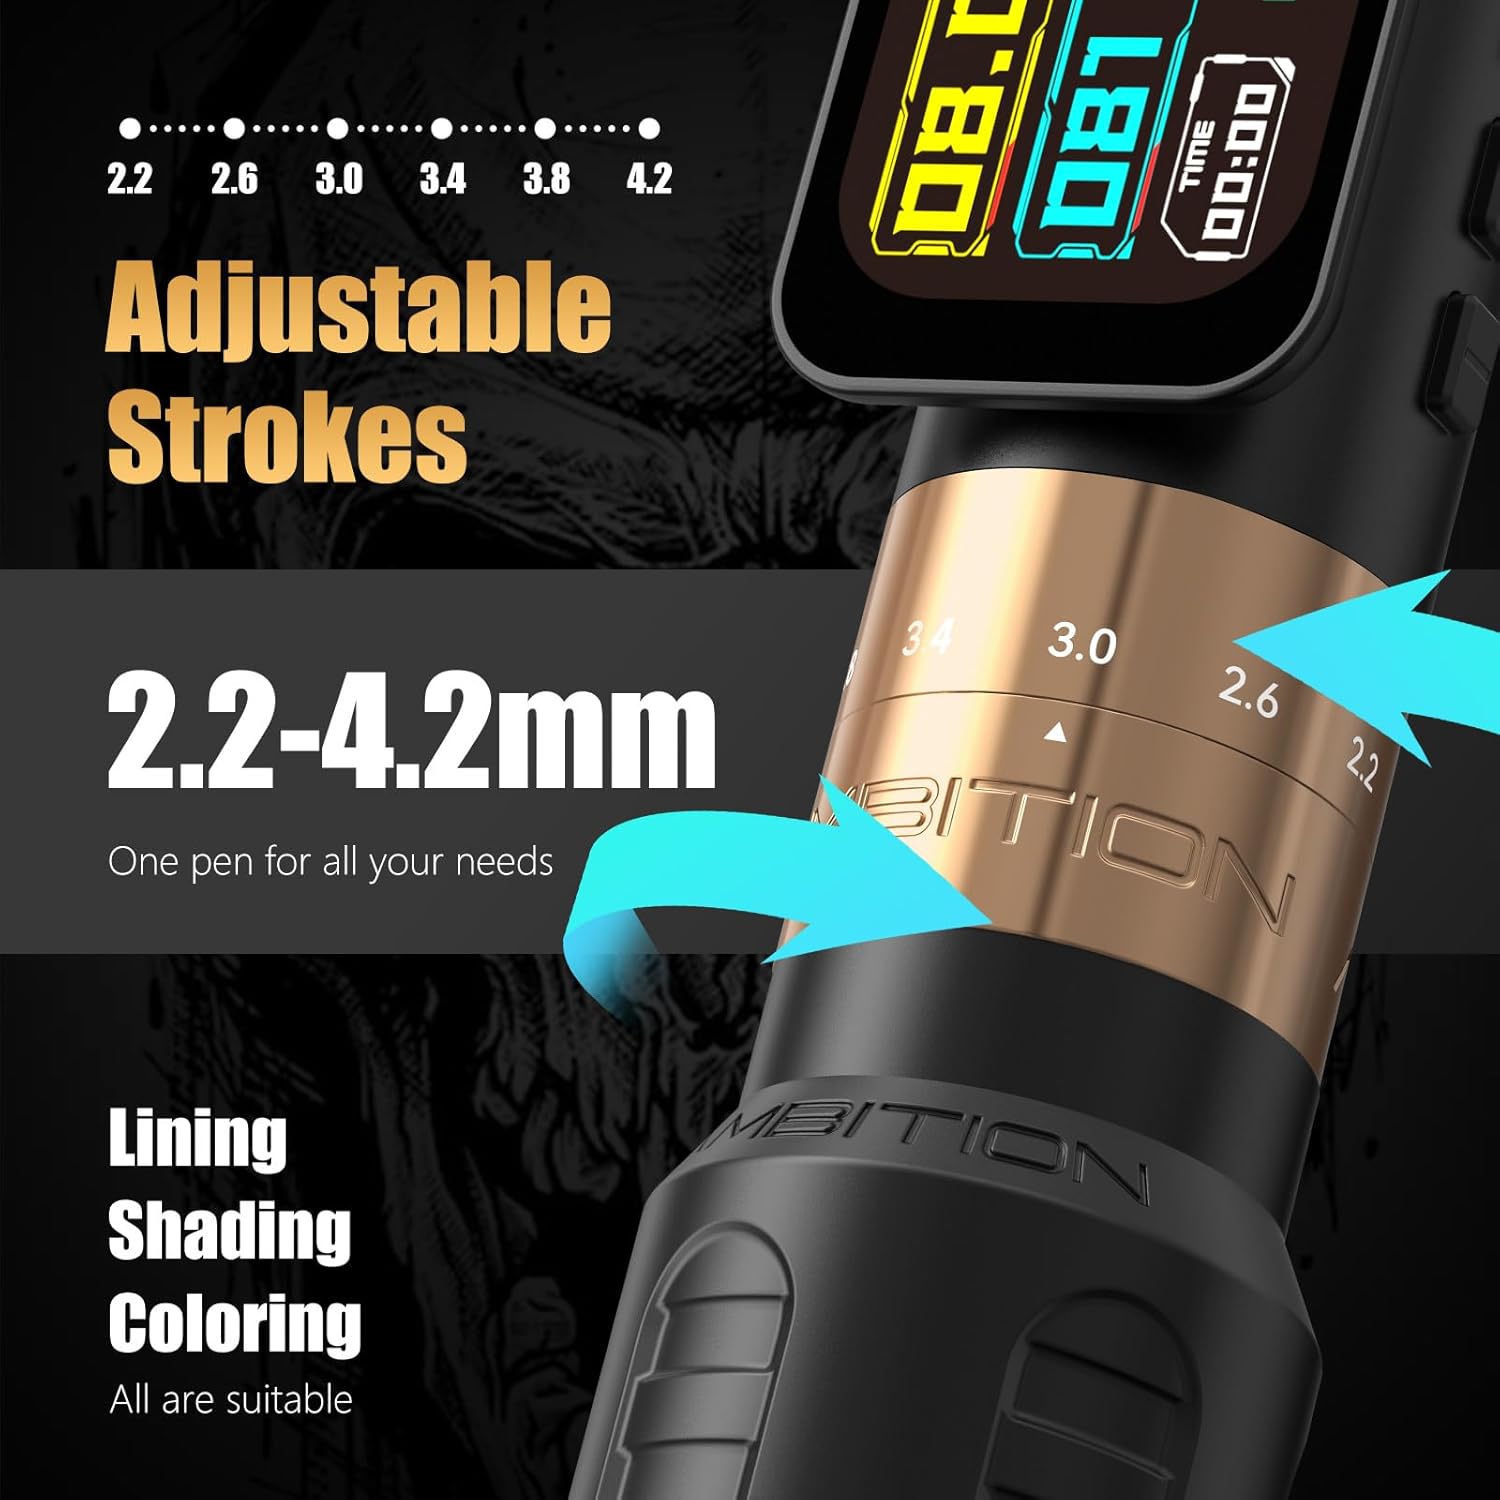
Figure 5.1: Diagram illustrating the adjustable stroke mechanism.
5.4 Adjusting Needle Depth
Needle depth is adjusted by rotating the grip. Turn the grip clockwise to extend the needle and counter-clockwise to retract it.
5.5 Billing Function
The integrated OLED screen includes an auto-billing function. This feature calculates fees based on adjustable per-minute rates during pauses in operation, streamlining workflow for artists.
6. Maintenance
6.1 Cleaning
- Always disconnect the machine from any power source before cleaning.
- Wipe the exterior of the machine with a clean, damp cloth and a mild, non-abrasive disinfectant.
- Do not immerse the machine in liquid or allow liquids to enter internal components.
- Ensure all surfaces are dry before storage or next use.
6.2 Battery Care
- Store the battery in a cool, dry place away from direct sunlight.
- Avoid fully discharging the battery regularly to prolong its lifespan.
- If storing for an extended period, charge the battery to approximately 50% capacity.
7. Troubleshooting
7.1 Machine Not Powering On
- Check if the battery is sufficiently charged. Recharge if necessary.
- Ensure the battery unit is securely attached to the machine body.
7.2 Inconsistent Performance
- Verify that the needle cartridge is correctly inserted and not damaged.
- Check the selected voltage and stroke settings.
- Ensure the battery has adequate charge.
7.3 Display Issues
- If the display is unresponsive or flickering, try restarting the machine.
- Ensure the battery is fully charged.
For persistent issues not resolved by these steps, please contact Ambition customer support.
8. Specifications

Figure 8.1: Detailed technical specifications for the Ambition Seher Pro.
| Feature | Specification |
|---|---|
| Model Number | AB-Seher73187904j-1 |
| Motor | Coreless Motor |
| Motor Speed | 12V - 10500 RPM |
| Operating Voltage | 1V - 12V |
| Battery Capacity | 2400 mAh |
| Battery Life (at 8V) | 6-7 hours |
| Charging Time | 2-3 hours (with 5V/2A adapter) |
| Stroke Lengths | 2.2mm, 2.6mm, 3.0mm, 3.4mm, 3.8mm, 4.2mm |
| Length | 148mm |
| Grip Diameter | 42mm (standard), 34mm (extra) |
| Weight | 321g (15.7 ounces) |
| Product Dimensions | 7.48 x 5.1 x 2.3 inches |
| Manufacturer | Ambition |
9. Safety Information
- For professional external use only.
- Avoid contact with eyes.
- Keep away from naked flame and extreme heat sources.
- Do not attempt to disassemble or modify the device, as this may void the warranty and pose safety risks.
- Always follow proper sterilization and hygiene protocols for all tattoo equipment and accessories.
10. Warranty and Support
The Ambition Seher Pro Wireless Tattoo Pen Machine is backed by a 1-year warranty covering all malfunctions under normal use. For warranty claims, technical assistance, or any inquiries, please contact Ambition official support. Refer to the product packaging or the Ambition website for specific contact details.


