
Product Overview
The COOSPO X1 Mini Electric Bike Pump is designed for convenient and efficient inflation of bicycle tires and various sports balls. Its compact size and powerful performance make it an ideal companion for cyclists.
Included Components:
- X1 Electric Bike Pump
- High-Pressure Hose (with Schrader Valve)
- Needle Valve
- Presta Valve Adapter
- Type-C Cable
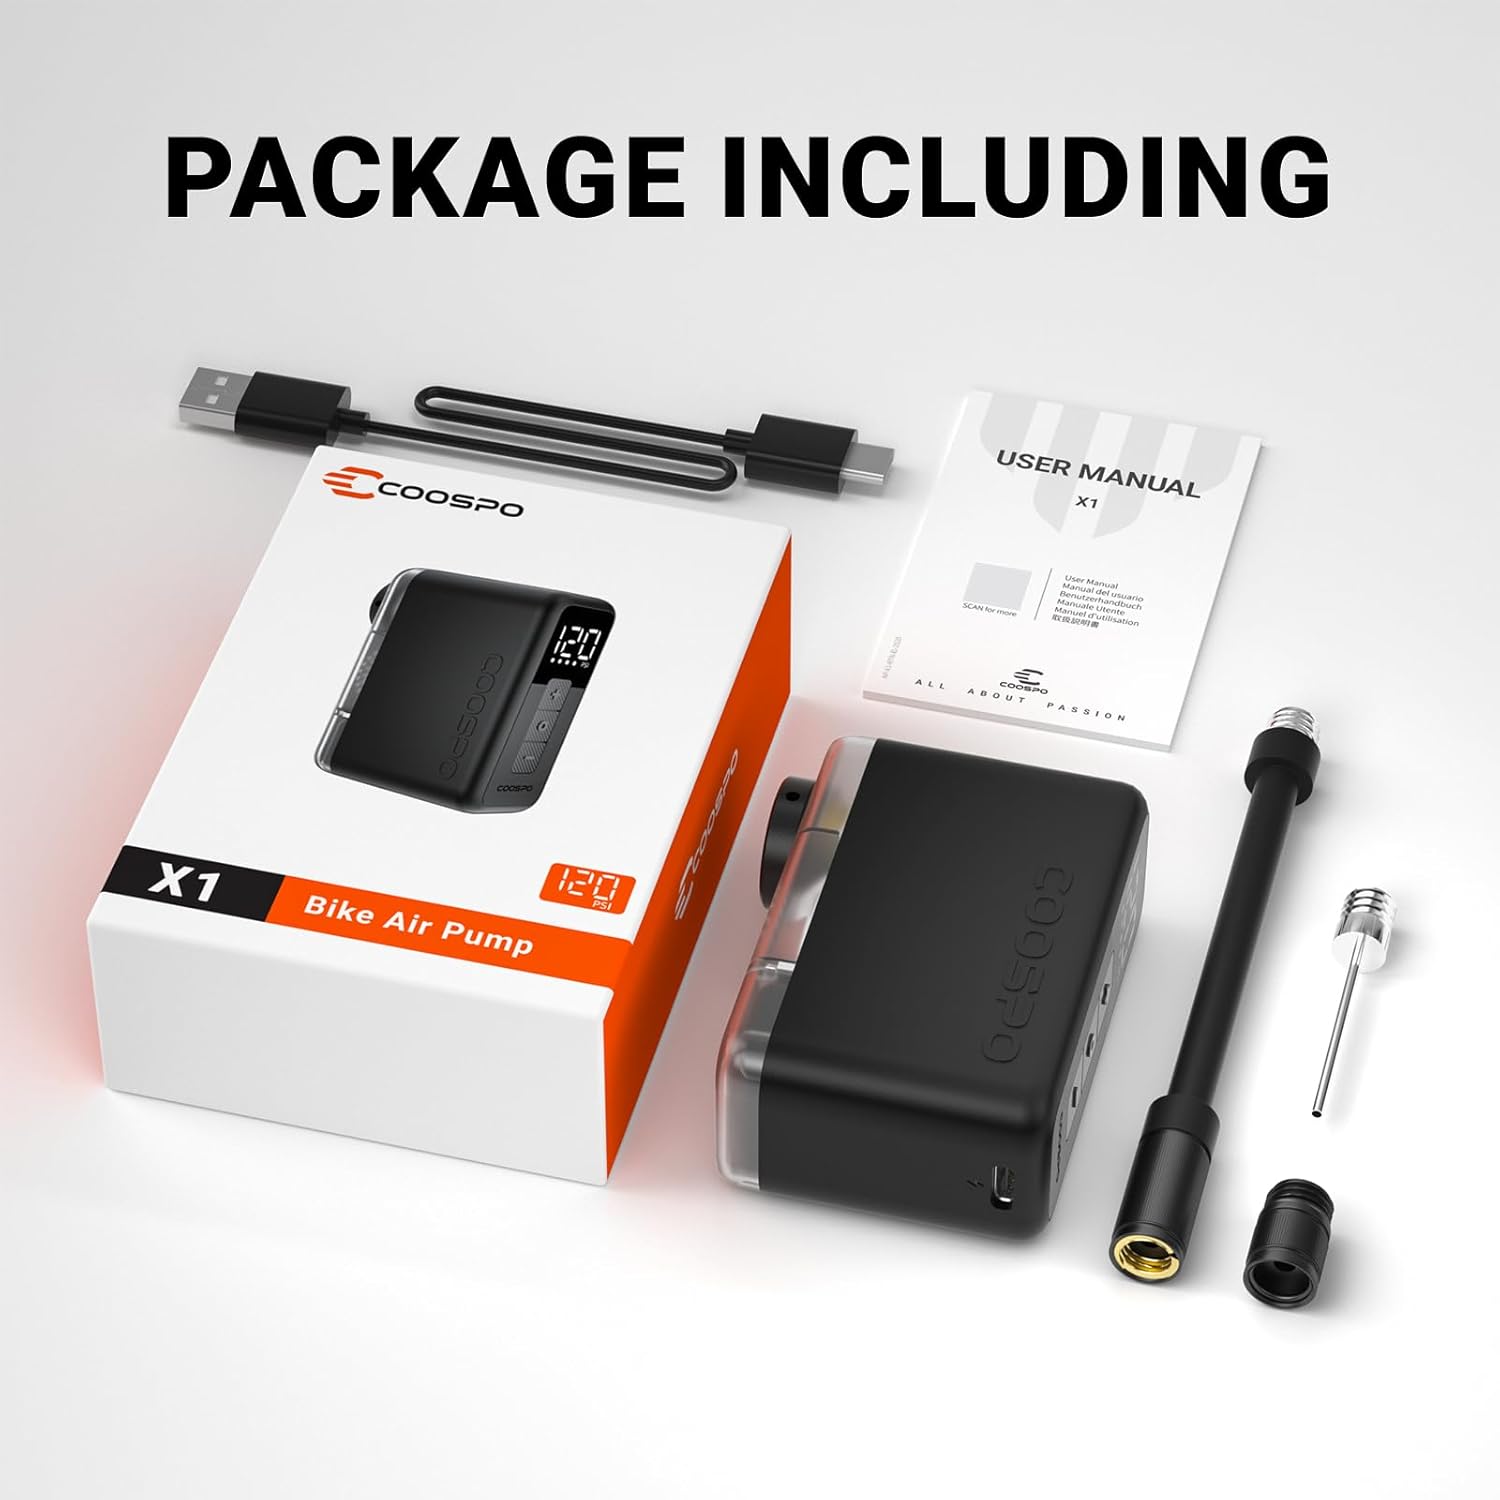
Figure 1: The COOSPO X1 Mini Electric Bike Pump, along with its high-pressure hose, needle valve, Presta valve adapter, and USB-C charging cable, neatly packaged.
Setup and Charging
- Initial Charge: Before first use, fully charge the COOSPO X1 pump using the provided USB-C cable. A full charge takes approximately 40 minutes. A 15-minute charge can inflate one road bike tire.
- Connecting the Hose: Screw the high-pressure hose securely into the pump's inflation port. Ensure a tight connection to prevent air leakage during inflation.
- Attaching Adapters: Select the appropriate valve adapter (Presta or Schrader) for your tire or sports ball. Screw the adapter onto the valve stem, ensuring it is firmly attached to prevent air loss.

Figure 2: The compact COOSPO X1 pump, demonstrating its small size and the various adapters for different valve types.
Operating Instructions
Digital Display and Controls:
The pump features a bright LCD screen that displays real-time tire pressure and battery status. Use the control buttons to operate the device.
- Power On/Off: Hold the central button to power the pump on or off.
- Increase/Decrease Preset Pressure: Use the '+' and '-' buttons to adjust your desired inflation pressure.
- Start/Stop Inflation: Press the central button to start or stop the pump.

Figure 3: The intuitive digital display of the COOSPO X1, showing current pressure readings and battery life indicators.
Inflation Process:
- Ensure the pump is fully charged.
- Connect the hose and appropriate adapter to the valve stem.
- Power on the pump. The display will show the current pressure.
- Use the '+' or '-' buttons to set your desired target pressure. The pump has a high-precision sensor (±1 PSI accuracy).
- Press the central button to begin inflation. The pump will automatically stop once the preset pressure is reached.
- Disconnect the adapter from the valve stem.
The COOSPO X1 features an exclusive atmospheric pressure sensor for auto-calibration, ensuring precise inflation at any altitude and preventing overcharging or low-voltage situations.

Figure 4: The COOSPO X1 offers wide compatibility with various valve types, including Presta and Schrader, and can inflate sports balls.
Performance
The COOSPO X1 delivers powerful inflation capabilities despite its mini size:
- High-Pressure Output: Up to 120 PSI.
- Fast Inflation: Inflate a 700×23C road bike tire from 0 to 80 PSI in approximately 48 seconds, and up to 120 PSI in about 90 seconds.
- Battery Life: Built with 500mAh lithium batteries, it can inflate multiple tires on a single charge.

Figure 5: Detailed inflation performance chart for 700x25C road bike tires, illustrating rapid inflation times.

Figure 6: The COOSPO X1's ultra-light (120g) and compact design, fitting easily into pockets or small bags for portability.
Maintenance
- Cleaning: Wipe the pump exterior with a soft, dry cloth. Do not use harsh chemicals or abrasive cleaners.
- Storage: Store the pump in a cool, dry place away from direct sunlight and extreme temperatures.
- Heat Dissipation: The pump features advanced dynamic balancing technology and an efficient internal ventilation system to prevent overheating. This allows for safe, silicon case-free use.

Figure 7: Illustration of the pump's efficient heat dissipation, ensuring safe operation without external cooling accessories.
Troubleshooting
Common Issues and Solutions:
- Pump not inflating to desired PSI or stopping prematurely:
Solution 1: Ensure full charge. The pump's performance is optimal when fully charged. A low battery level can affect its ability to reach higher pressures. Charge the device completely before use.
Solution 2: Check adapter and hose connections. Ensure the high-pressure hose is screwed in tightly to the pump and the valve adapter is securely attached to the tire/ball valve. Any leaks will prevent proper inflation.
Solution 3: Use supplied adapters. If experiencing issues with third-party adapters, try using the adapters provided with the COOSPO X1 pump. These are designed for optimal compatibility and seal.
- Inaccurate pressure readings:
Solution: Auto Calibration. The pump features an exclusive atmospheric pressure sensor that automatically calibrates at power-on. Ensure the pump is powered on in a stable environment for accurate initial calibration. If readings seem off, power cycle the device.
Specifications
| Feature | Detail |
|---|---|
| Brand | CooSpo |
| Model Name | AP-X1 Mini Bike Pump |
| Color | Black |
| Material | Plastic |
| Item Weight | 120 Grams |
| Power Source | Battery Powered (USB-C Rechargeable) |
| Maximum Pressure | 120 PSI |
| Air Flow Capacity | 17 L/sec |
| Hose Length | 100 Millimeters |
| Battery Capacity | 500mAh Lithium Batteries |
| Valve Compatibility | Presta & Schrader |
Warranty and Support
The COOSPO X1 Mini Electric Bike Pump comes with a 12-month warranty from the date of purchase.
For technical support, warranty claims, or any inquiries, please contact CooSpo customer service through their official website or the retailer where the product was purchased.
Visit the CooSpo Store for more information and product registration.