1. Introduction
Thank you for choosing the Fockety Electric Cycling Panel. This LCD display is designed to enhance your electric bike experience by providing essential riding data, user-friendly controls, and convenient features like a USB charging port. This manual provides detailed instructions for installation, operation, and maintenance to ensure optimal performance and longevity of your device. Please read this manual thoroughly before use.
2. Safety Information
- Always ensure the device is securely mounted before riding.
- Do not attempt to disassemble or modify the panel, as this may void the warranty and cause damage.
- Keep the display clean and dry. Avoid exposure to extreme temperatures or direct sunlight for prolonged periods.
- Ensure all connections are secure and waterproof where applicable.
- Operate your electric bike safely and adhere to all local traffic laws and regulations.
3. Product Overview
The Fockety Electric Cycling Panel is a robust and feature-rich display for electric bicycles. It features a color LCD screen with a thoughtful backlight for clear visibility in various lighting conditions. The panel is constructed from durable ABS plastic, ensuring resilience and protection for its internal components.
Key Features:
- User-Friendly Buttons: External buttons provide comfortable control and efficient operation.
- Backlight Design: Ensures clear visibility day and night.
- Durable Construction: Made from lightweight and sturdy ABS plastic.
- USB Charging Port: 5V 500MA output allows for convenient charging of mobile devices.
- Compatibility: Designed to fit KT controllers for seamless integration.
Components:
- LCD Display Screen
- Control Buttons (Up, Power, Down)
- Mounting Clamp
- Connection Cable
- USB Charging Port
4. Setup and Installation
Follow these steps to properly install your Electric Cycling Panel on your electric bike.
- Choose Mounting Location: Select a suitable position on your handlebar, typically near the left grip, that allows for easy viewing and access to buttons without obstructing your riding.
- Attach Mounting Clamp: Open the mounting clamp and position it around the handlebar. Securely tighten the screws to fix the display in place. Ensure the display is oriented correctly for optimal viewing.
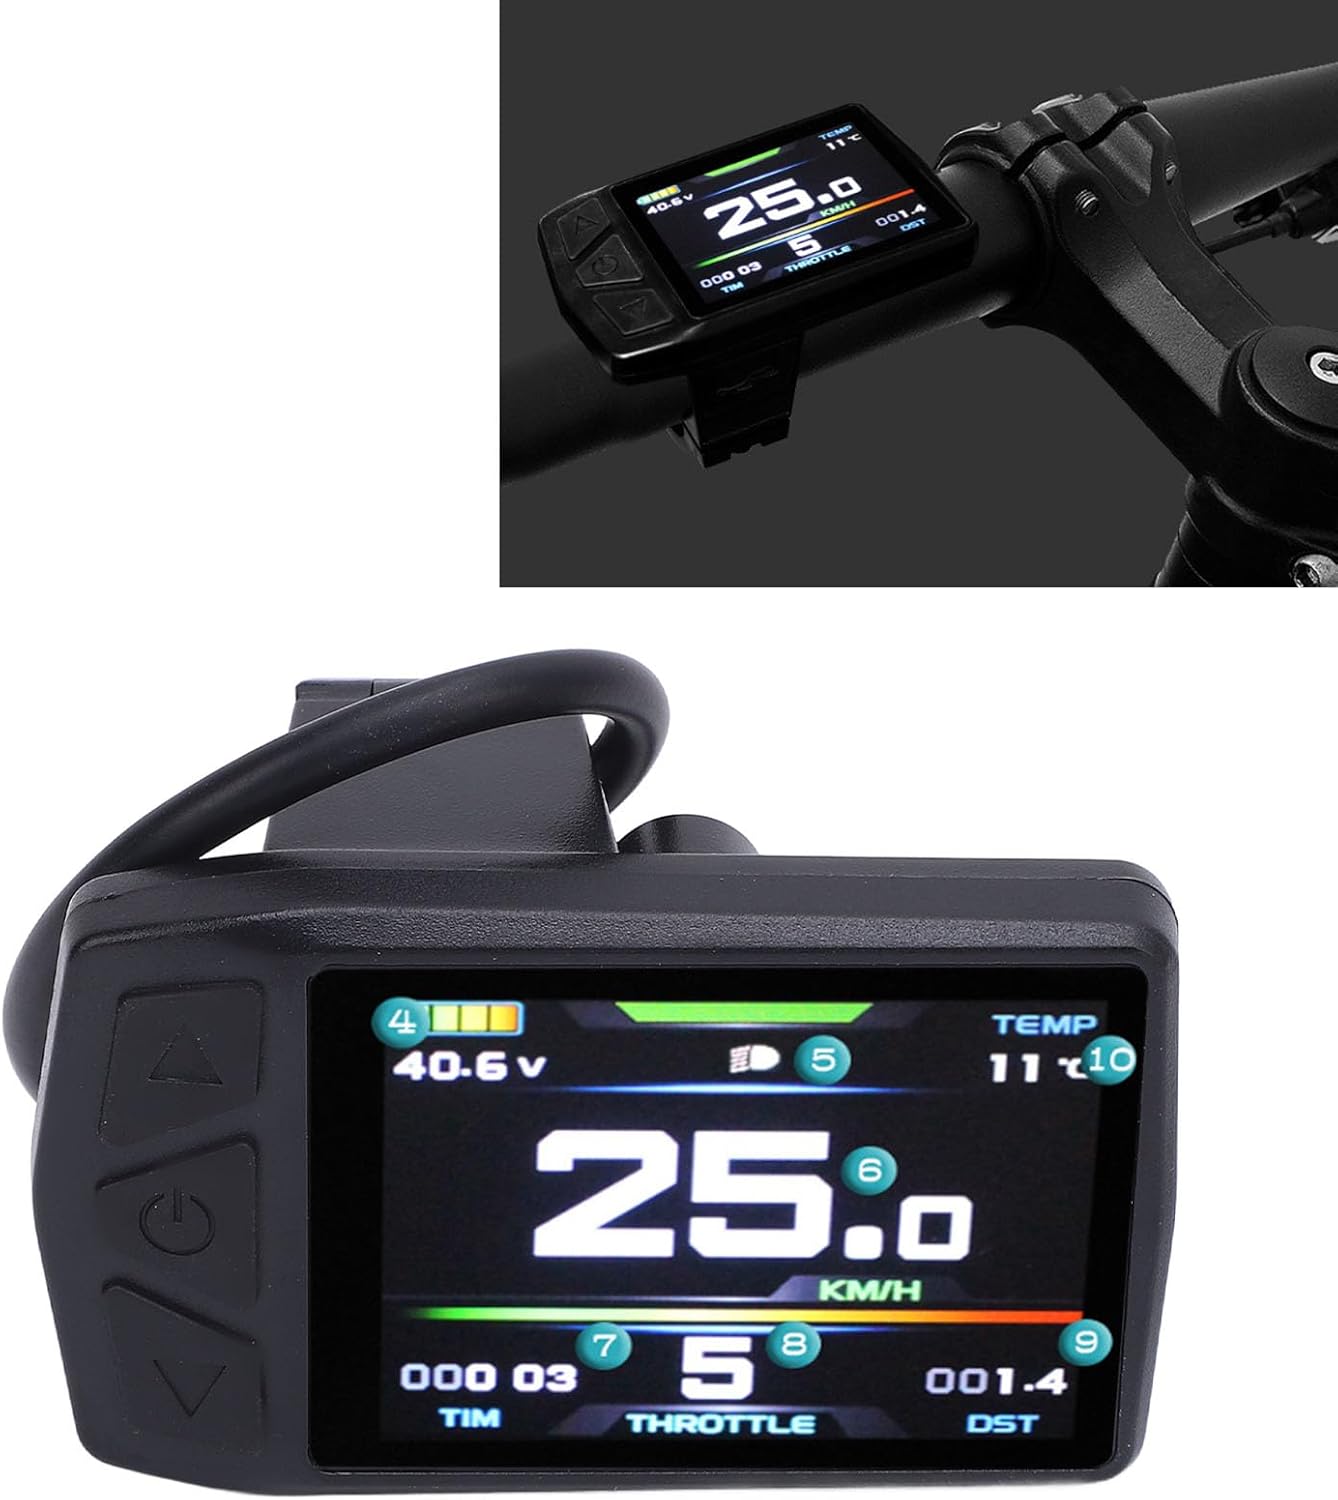
Image: The Electric Cycling Panel securely mounted on a bicycle handlebar, showing its position relative to the rider's view.

Image: A rear view of the cycling panel, highlighting the robust mounting clamp and the integrated connection cable.
- Connect to KT Controller: Locate the appropriate connection port on your KT controller. Carefully align and plug the display's cable into the controller. Ensure a firm and secure connection.
- Cable Management: Route the cable neatly along your bike frame, securing it with cable ties if necessary, to prevent interference with moving parts and protect it from damage.
- Initial Power On: After installation, press the power button on the display to turn it on. The screen should illuminate and display initial information.
5. Operating Instructions
This section details how to operate your Electric Cycling Panel and understand its display.
Button Functions:
- Power Button (Middle): Press and hold to turn the display ON/OFF. Short press to cycle through display modes or confirm selections.
- Up Button (Top): Increases values, navigates up in menus, or increases assist level.
- Down Button (Bottom): Decreases values, navigates down in menus, or decreases assist level.
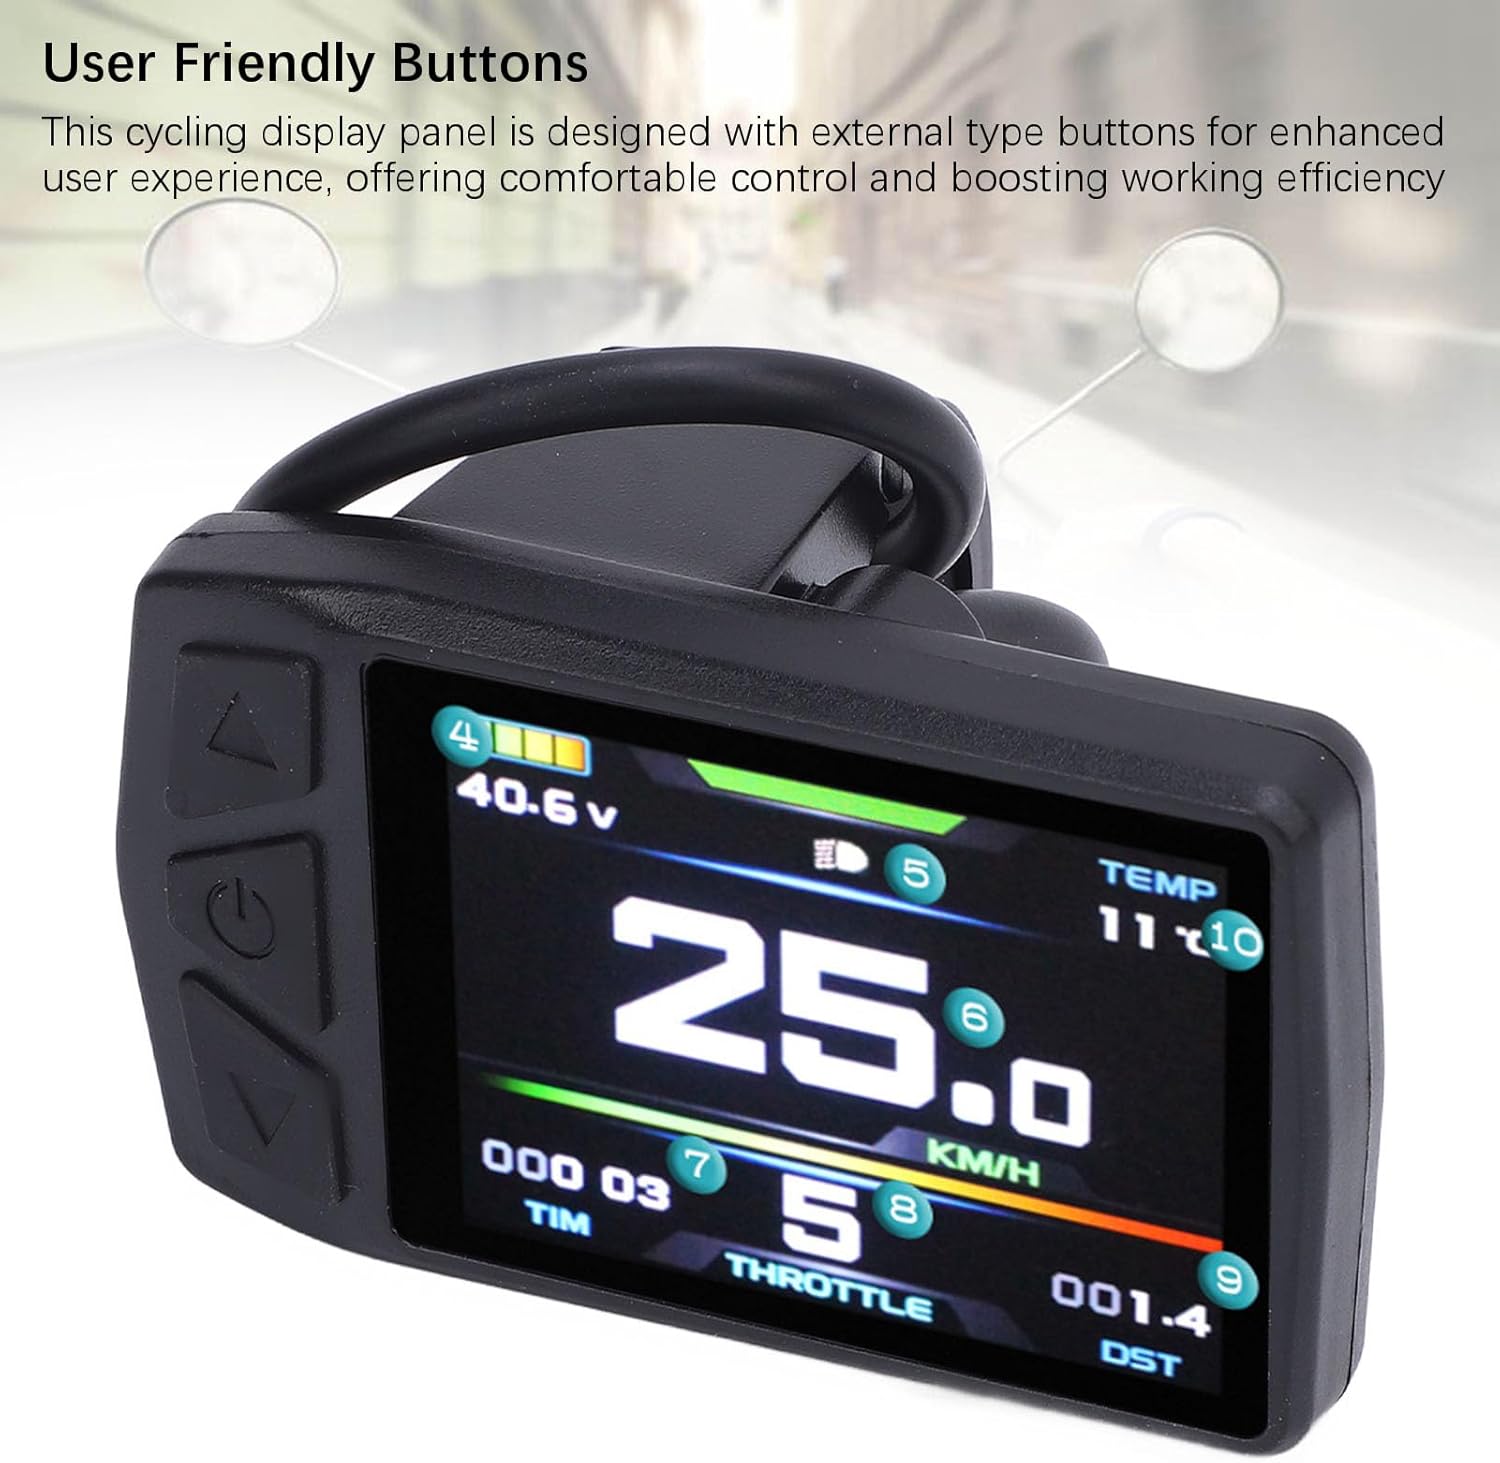
Image: A detailed view of the panel's control buttons (Up, Power, Down) and the illuminated display.
Display Information:
The color LCD screen provides various real-time riding metrics. Refer to the image below for numbered indicators:
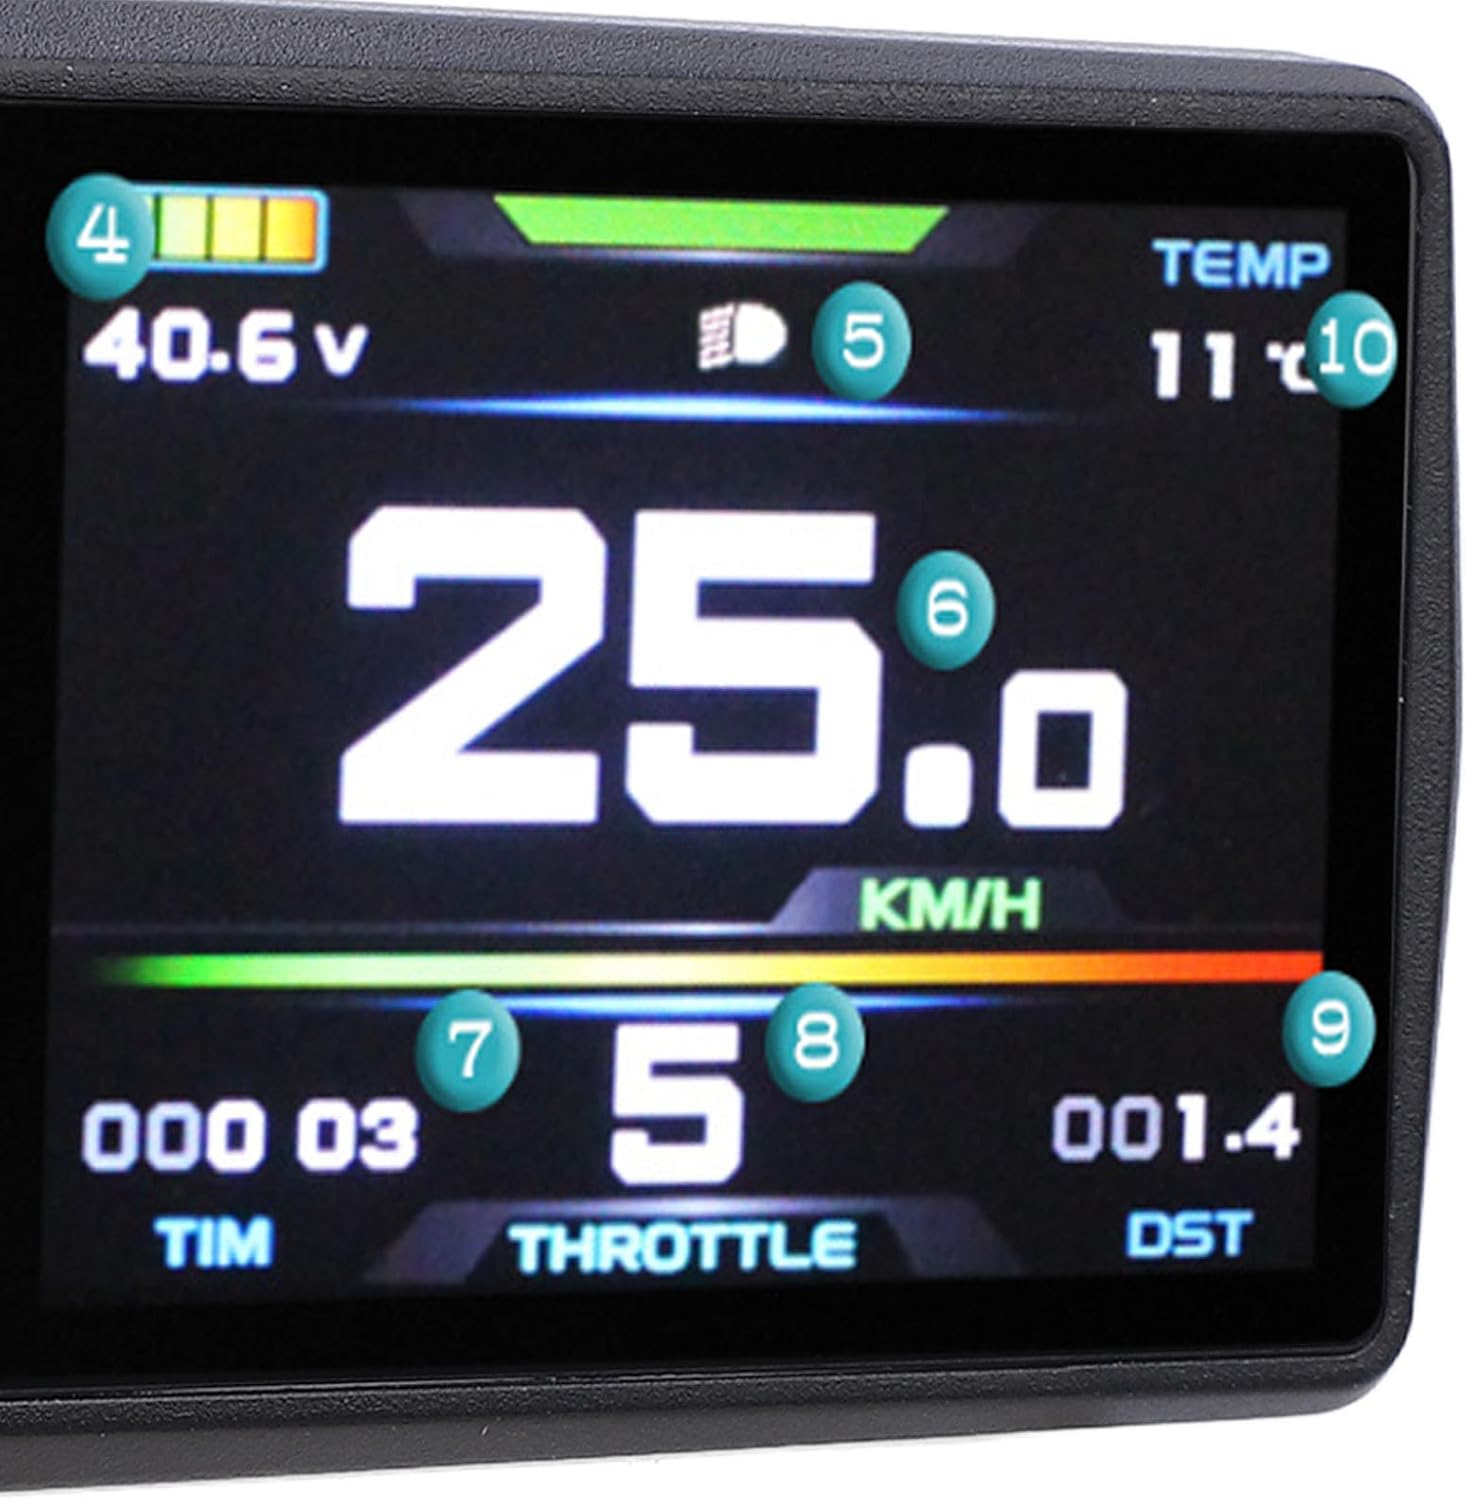
Image: The display screen with numbered labels pointing to different data readouts.
- Battery Level Indicator: Shows the current charge level of your e-bike battery.
- Voltage Display: Current battery voltage (e.g., 40.6V).
- Headlight Indicator: Illuminates when headlights are active.
- Current Speed: Displays your real-time speed (e.g., 25.0 KM/H).
- Assist Level: Indicates the current pedal assist level (e.g., 5).
- Trip Time (TIM): Shows the duration of your current ride.
- Throttle Indicator (THROTTLE): May indicate throttle activity or power output.
- Distance Traveled (DST): Displays the distance covered during the current trip.
- Temperature (TEMP): Shows the ambient temperature.
USB Charging Function:
The panel includes a 5V 500MA USB output port, allowing you to charge your mobile phone or other small electronic devices while riding.
- Locate the USB port on the side or bottom of the display.
- Connect your device using a compatible USB cable.
- Ensure your e-bike's power is on for the USB port to function.
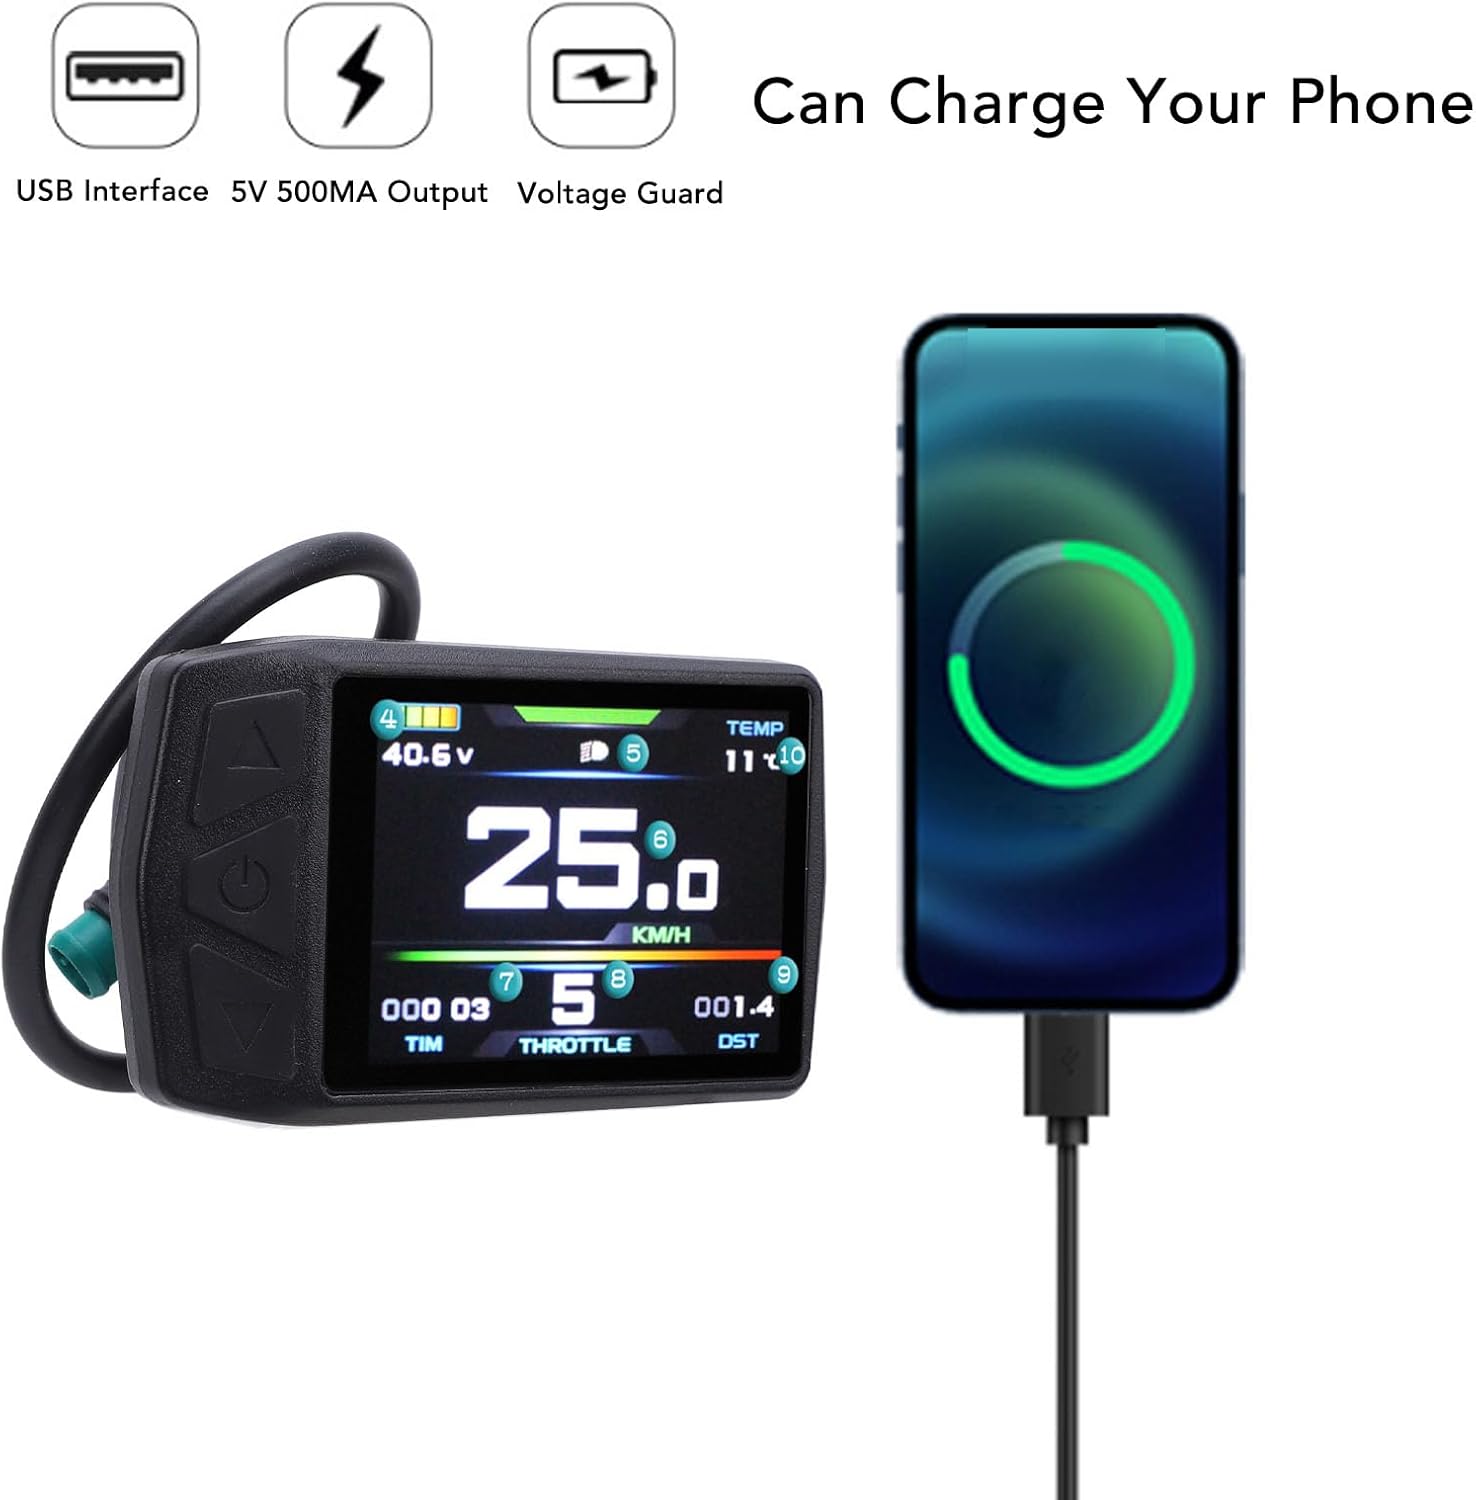
Image: The cycling panel actively charging a smartphone via its integrated USB port, demonstrating its versatility.
6. Maintenance
Proper maintenance ensures the longevity and reliability of your cycling panel.
- Cleaning: Wipe the display screen and body with a soft, damp cloth. Avoid using abrasive cleaners or solvents that could damage the plastic or screen.
- Connections: Periodically check all cable connections to ensure they are secure and free from corrosion or damage.
- Storage: When not in use for extended periods, store the e-bike and display in a cool, dry place away from direct sunlight.
- Inspection: Regularly inspect the mounting clamp for tightness and signs of wear.
7. Troubleshooting
If you encounter issues with your Electric Cycling Panel, refer to the following common problems and solutions:
- Display Not Turning On:
- Ensure the e-bike battery is charged and turned on.
- Check all cable connections between the display and the KT controller for looseness or damage.
- Confirm the power button is pressed and held for the required duration.
- Incorrect Speed/Distance Readings:
- Verify that the wheel circumference setting in your KT controller (if adjustable) is correct.
- Check the speed sensor and its magnet for proper alignment and function.
- USB Charging Not Working:
- Ensure the e-bike system is powered on.
- Check the USB cable for damage and try a different cable or device.
- Display Backlight Not Working:
- Check display settings for backlight intensity or auto-on features.
If problems persist, please contact customer support for further assistance.
8. Specifications
| Feature | Specification |
|---|---|
| Model Number | Focketyp1riwvkte7 |
| Material | ABS Plastic |
| Voltage Compatibility | 24-48V |
| Meter Size (L x W) | Approx. 73 x 44.8mm / 2.9 x 1.8in |
| Clamp Diameter | Approx. 22.2mm / 0.9in |
| USB Output | 5V 500MA |
| Compatibility | KT Controller |
| Item Weight | 3.46 ounces |
| Product Dimensions | 4.33 x 3.15 x 2.36 inches |

Image: A visual representation of the panel's dimensions, including length, width, and clamp diameter.
9. Warranty and Support
This product comes with a standard manufacturer's warranty. Please refer to the warranty card included in your package for specific terms and conditions. For technical support, troubleshooting assistance, or warranty claims, please contact your retailer or the manufacturer directly.
Manufacturer: Fockety