
ARCCTV Q01
ARCCTV Solar Security Camera Q01 User Manual
Model: Q01
1. Introduction
This manual provides detailed instructions for the installation, operation, and maintenance of your ARCCTV Solar Security Camera Model Q01. Please read this manual thoroughly before using the product to ensure proper function and safety. This camera is designed for outdoor surveillance, featuring 4MP resolution, 360° pan-tilt capabilities, solar power, and dual-band Wi-Fi connectivity.
2. Product Overview
2.1 Package Contents
Verify that all items are present in your package:
- Camera Body
- Solar Panel
- Mounting Screws
- User Manual

Figure 2.1: Package Contents
2.2 Camera Components

Figure 2.2: ARCCTV Solar Security Camera Q01
- Camera Lens: 4MP resolution for clear video capture.
- Infrared LEDs: For night vision.
- Spotlight: Provides illumination for color night vision and alerts.
- PIR Motion Sensor: Detects human movement.
- Microphone: For audio input.
- Speaker: For two-way audio output and siren.
- Antennas: For 2.4GHz and 5GHz Wi-Fi connectivity.
- Solar Panel Port: Connects the solar panel for continuous charging.
- MicroSD Card Slot: Supports up to 128GB for local storage.
3. Setup and Installation
3.1 Charging the Camera
Before initial use, fully charge the camera's internal battery using the provided USB cable and a 5V/2A power adapter (not included). This ensures sufficient power for setup and operation, especially if solar charging conditions are initially poor.
3.2 App Download and Account Registration
Download the ARCCTV app from your smartphone's app store (iOS or Android). Follow the in-app instructions to register a new account or log in if you already have one.

Figure 3.1: Initial Setup Steps
3.3 Wi-Fi Connection
The camera supports both 2.4GHz and 5GHz Wi-Fi networks. For the initial configuration, place the camera as close as possible to your Wi-Fi router. The app will guide you through connecting the camera to your home network.

Figure 3.2: Dual-Band Wi-Fi Connectivity
3.4 Mounting the Camera and Solar Panel
The camera is 100% wireless, allowing for flexible placement. Choose a location with optimal sunlight exposure for the solar panel and a strong Wi-Fi signal. Use the included mounting screws and adjustable bracket to secure the camera and solar panel.

Figure 3.3: Solar-Powered Installation

Figure 3.4: Wireless Installation
4. Operating Instructions
4.1 Live View and Pan-Tilt Control
Access the live feed through the ARCCTV app. Use the on-screen controls to pan the camera 355° horizontally and tilt 90° vertically, providing comprehensive coverage of your monitored area.

Figure 4.1: 360° Coverage with App Remote Control

Figure 4.2: Wide-Angle Monitoring
4.2 Two-Way Audio
Utilize the built-in microphone and speaker for two-way communication. Speak through the app to communicate with individuals near the camera, or listen to audio from the camera's location.

Figure 4.3: Two-Way Audio Communication
4.3 Night Vision and Spotlight
The camera features advanced night vision capabilities, including infrared for black and white vision and a built-in spotlight for full-color night vision. The spotlight can also be activated as a deterrent.

Figure 4.4: 4MP QHD Night Vision

Figure 4.5: Color and Black & White Night Vision
4.4 Motion Detection and Alerts
The integrated PIR motion sensor detects human movement, minimizing false alarms from environmental factors. Configure alert settings in the app to receive instant notifications on your smartphone when motion is detected. You can also set up specific alarm zones.

Figure 4.6: Instant Alerts and Security Features

Figure 4.7: Precise PIR Personal Monitoring

Figure 4.8: Setting Up an Alarm Zone
4.5 Storage Options
The camera offers two storage methods for recorded footage:
- MicroSD Card: Insert a microSD card (up to 128GB, not included) into the designated slot for local storage. This option provides free recording without monthly fees.
- Cloud Storage: An optional cloud storage subscription is available for remote backup and advanced features. Refer to the ARCCTV app for subscription details.
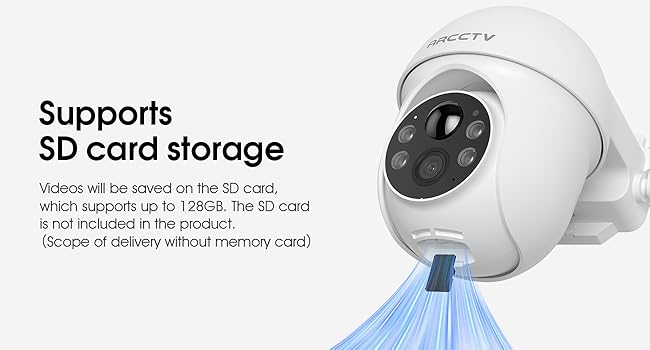
Figure 4.9: MicroSD Card Storage
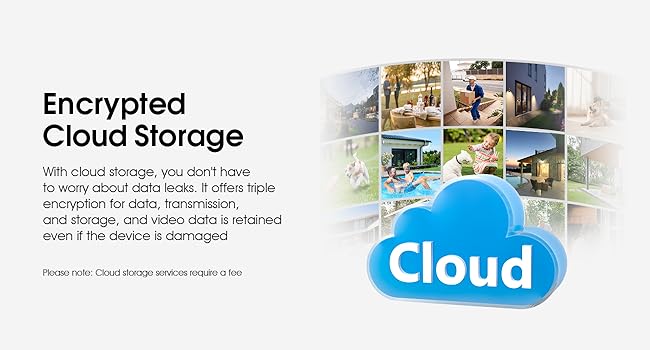
Figure 4.10: Encrypted Cloud Storage
4.6 Alexa Compatibility
The camera is compatible with Amazon Alexa. Integrate your camera with Alexa-enabled devices for voice control and viewing live feeds on compatible smart displays.

Figure 4.11: Compatible with Alexa
5. Maintenance
5.1 Cleaning the Camera and Solar Panel
Regularly clean the camera lens and solar panel with a soft, damp cloth to ensure optimal performance. Avoid abrasive cleaners or harsh chemicals.
5.2 Battery Care
The camera uses a rechargeable battery. While the solar panel provides continuous charging, ensure the solar panel receives adequate sunlight. In prolonged periods of low sunlight, the camera may require manual charging via its USB port.
5.3 Weather Resistance
The camera is designed to be waterproof (IP65 rated) and can withstand various weather conditions. However, extreme weather events may temporarily affect performance or require additional protection.

Figure 5.1: Windproof and Rainproof Design
6. Troubleshooting
- Camera not powering on: Ensure the battery is charged. Connect the camera to a power source using the USB cable to confirm.
- Cannot connect to Wi-Fi:
- Ensure the camera is within range of your Wi-Fi router.
- Verify your Wi-Fi password is correct.
- Try connecting to both 2.4GHz and 5GHz networks if available.
- Restart your router and the camera.
- Poor video quality:
- Check your Wi-Fi signal strength. A weak signal can affect streaming quality.
- Ensure the camera lens is clean.
- Verify the camera is set to 4MP resolution in the app settings.
- Motion alerts not working:
- Check motion detection settings in the app.
- Ensure PIR sensor is not obstructed.
- Verify app notifications are enabled on your smartphone.
- Solar panel not charging:
- Ensure the solar panel is clean and free from obstructions.
- Verify the solar panel is positioned to receive direct sunlight for several hours daily.
- Check the connection cable between the solar panel and the camera.
7. Specifications
| Feature | Detail |
|---|---|
| Model | Q01 |
| Video Resolution | 4MP (2560×1440P) |
| Pan/Tilt Range | 355° Horizontal, 90° Vertical |
| Power Source | Battery Powered & Solar Powered |
| Connectivity | 2.4GHz / 5GHz Dual-Band Wi-Fi |
| Night Vision Range | Up to 33 feet (10 meters) |
| Storage Options | MicroSD Card (up to 128GB), Cloud Storage (subscription required) |
| Audio | Two-Way Audio |
| Motion Detection | PIR Motion Sensor |
| Weather Resistance | Waterproof (IP65) |
| Dimensions (L x W x H) | 8.39 x 5.16 x 6.1 inches |
| Weight | 1.83 pounds (0.83 kg) |
| Included Components | Camera Body, Mounting Screw, Solar Panel, User Manual |
8. Warranty and Support
For warranty information and technical support, please refer to the contact details provided with your product packaging or visit the official ARCCTV website. Keep your purchase receipt for warranty claims.
Ask a question about this manual
Ask about setup, troubleshooting, compatibility, parts, safety, or missing instructions. Manuals+ will review the question and use this page’s manual context to help answer it.