
HOME VISION HV9901
HOME VISION Heavy Duty TV Wall Mount Instruction Manual
Model: HV9901
1. Safety Instructions
Please read this manual carefully before installation and use. Improper installation or use can cause serious injury or damage. If you do not understand these instructions, or have doubts about the safety of the installation, please contact a qualified installer.
- Ensure the mounting surface can safely support the combined weight of the mount and the television.
- Do not exceed the maximum weight capacity of 220 lbs (100 kg).
- This product is designed for installation on wood studs (16"/18"/24"/32" spacing), solid concrete, or brick walls. Do not install on drywall alone.
- Always use a stud finder to locate wood studs accurately.
- Verify VESA compatibility (Min: 200x200mm, Max: 900x600mm) with your TV before installation.
- Use all provided hardware. Do not substitute parts.
- Installation requires at least two people due to the size and weight of the mount and TV.
- Keep children and pets away during installation.
2. Product Overview
The HOME VISION Heavy Duty TV Wall Mount (Model: HV9901) is engineered for large televisions ranging from 60 to 120 inches, supporting up to 220 lbs. Its robust design features a one-piece 37-inch reinforced steel plate and a double hook design for enhanced stability and safety. The mount offers tool-free tilt adjustment for optimal viewing angles and glare reduction, and a low-profile design that keeps your TV close to the wall.
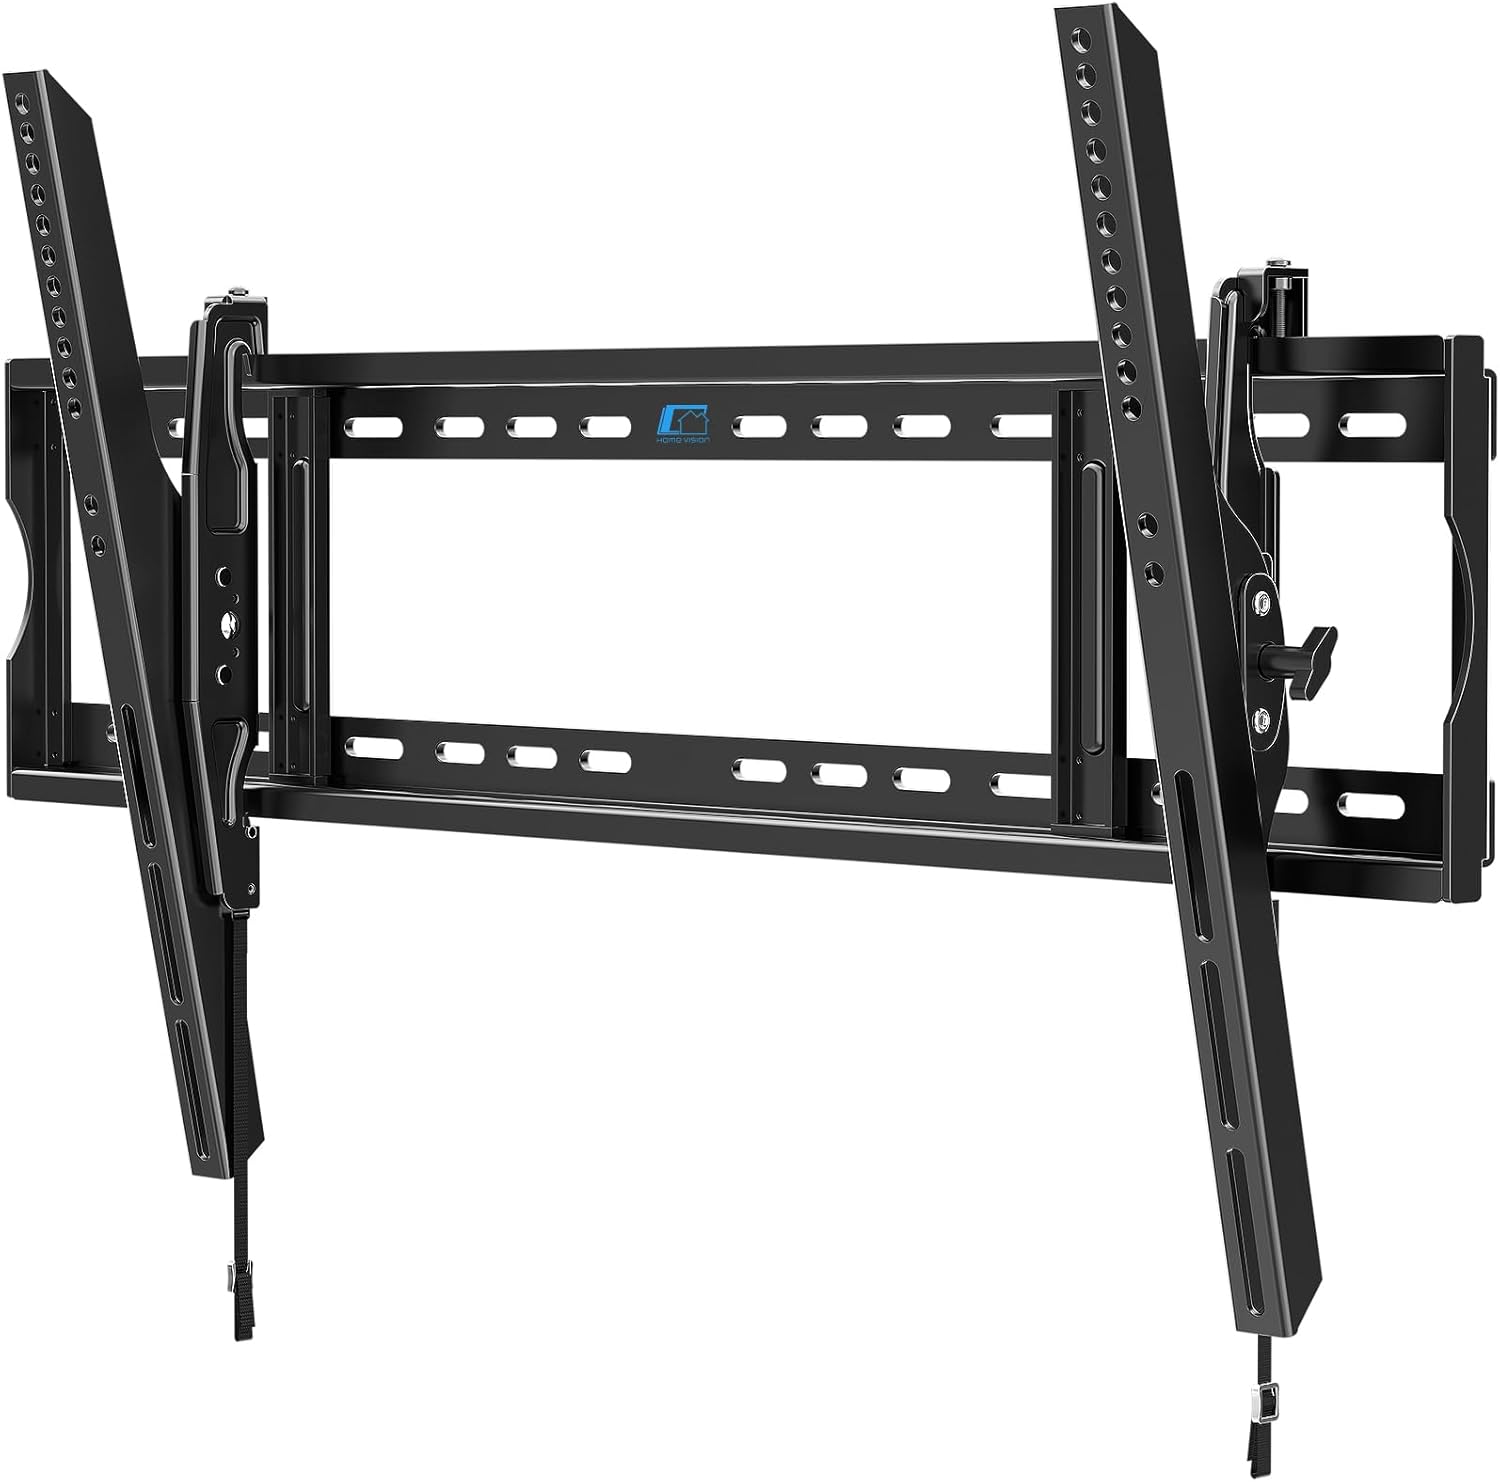
Figure 2.1: HOME VISION Heavy Duty TV Wall Mount (Model HV9901)
This image displays the main components of the HOME VISION Heavy Duty TV Wall Mount, including the wall plate and the two vertical TV brackets.
Key Features:
- Wide Compatibility: Supports TVs from 60" to 120" with VESA patterns from 200x200mm to 900x600mm. Accommodates wood stud spacing up to 32 inches.
- Ultra-Sturdy Construction: Features 2x thicker steel plates, reinforced bolts, and robotic-welded construction for maximum stability, supporting up to 220 lbs.
- Tool-Free Tilt Function: Easily adjust tilt 10° down and 5° up to reduce glare and optimize viewing angles.
- Low-Profile Design: Keeps the TV just 2.56 inches from the wall for a sleek, integrated look.
- Effortless Installation: One-piece wall plate simplifies assembly. Compatible with wood studs, concrete, and brick walls.
- Enhanced Safety: Secure dual hooks, pull cord lock, and anti-drop edges ensure the TV remains securely mounted.
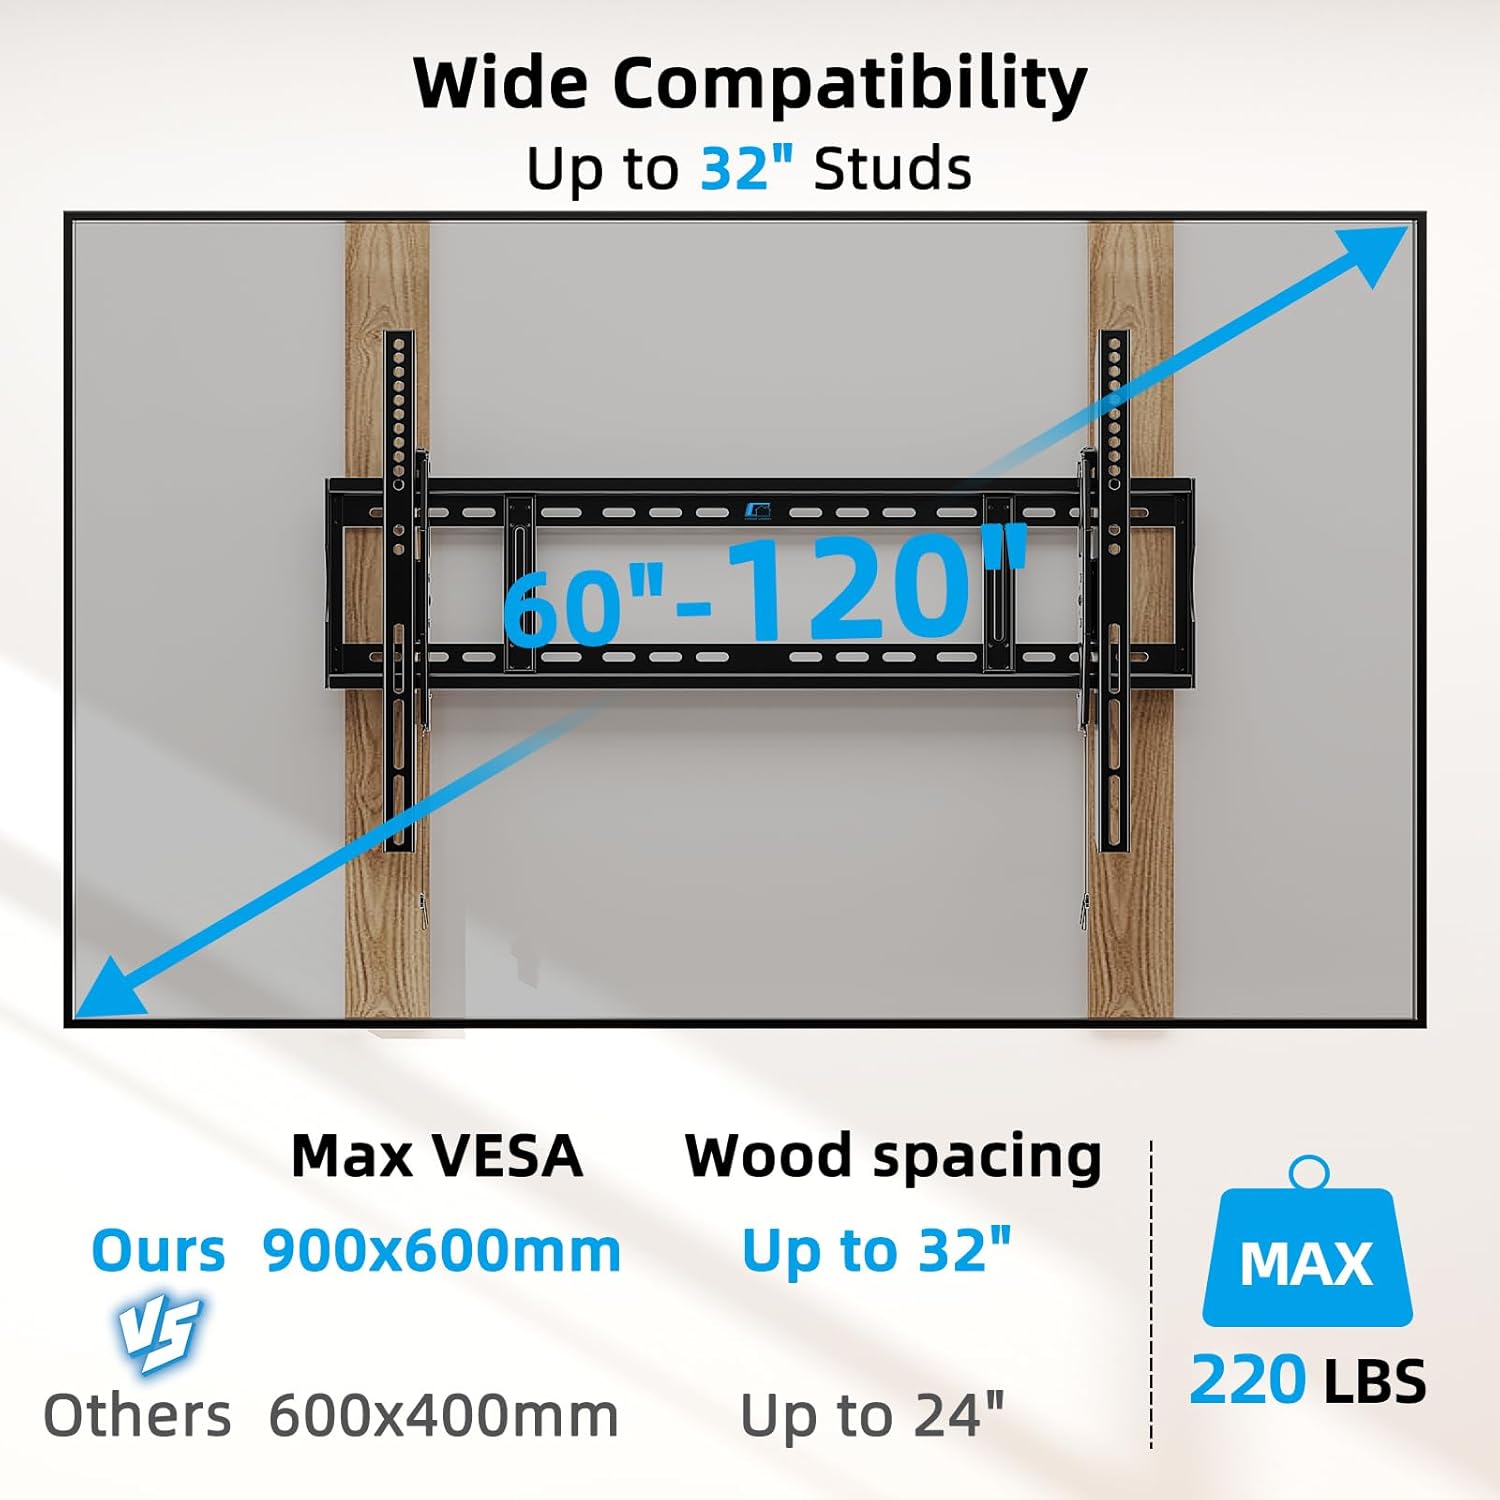
Figure 2.2: Wide Compatibility and Weight Capacity
This image illustrates the wide compatibility of the mount, supporting TVs from 60 to 120 inches, VESA patterns up to 900x600mm, and stud spacing up to 32 inches, with a maximum weight capacity of 220 lbs.
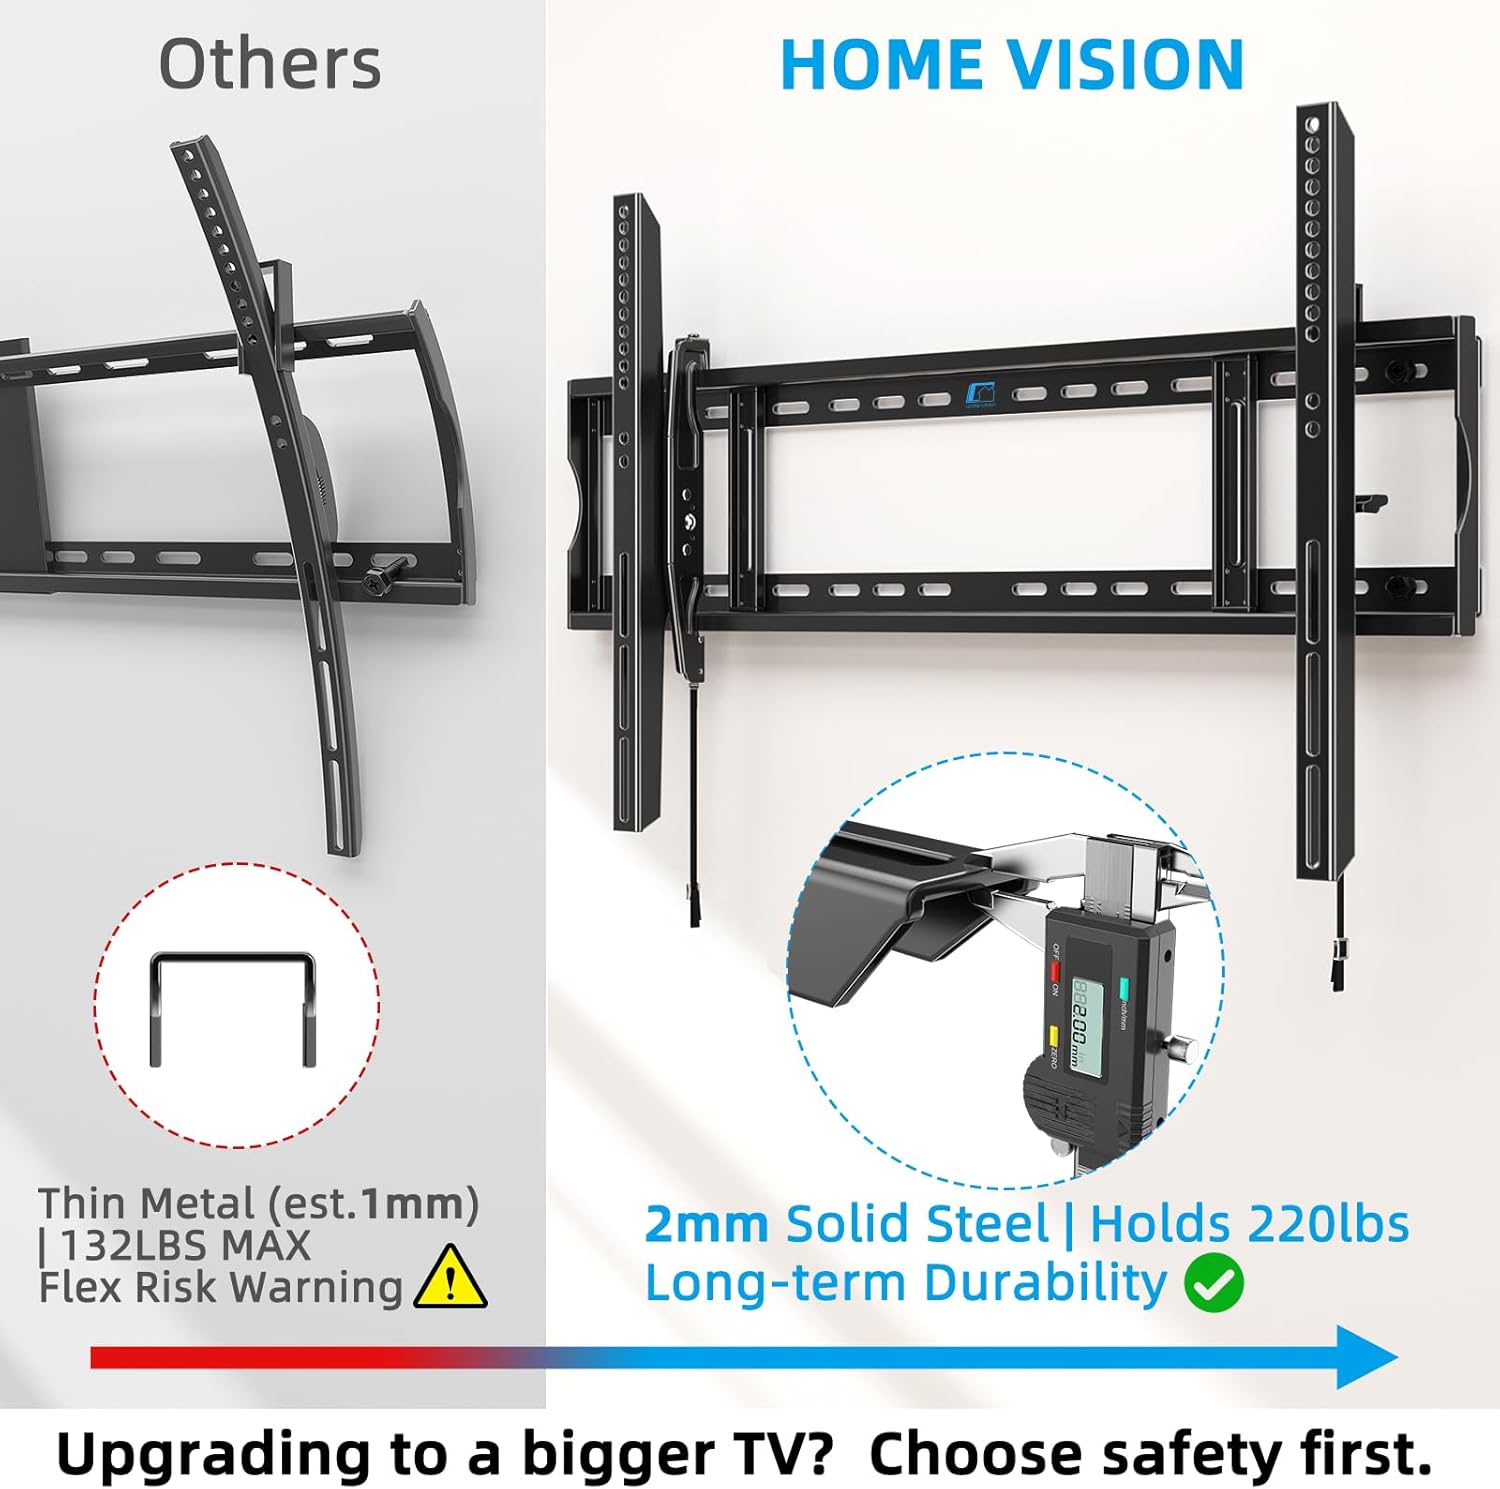
Figure 2.3: Enhanced Durability with 2mm Solid Steel
This image highlights the robust 2mm solid steel construction of the HOME VISION mount compared to thinner alternatives, emphasizing its long-term durability and ability to hold 220 lbs.
3. Package Contents
Before beginning installation, please verify that all parts are included and undamaged. If any parts are missing or defective, contact customer support immediately.
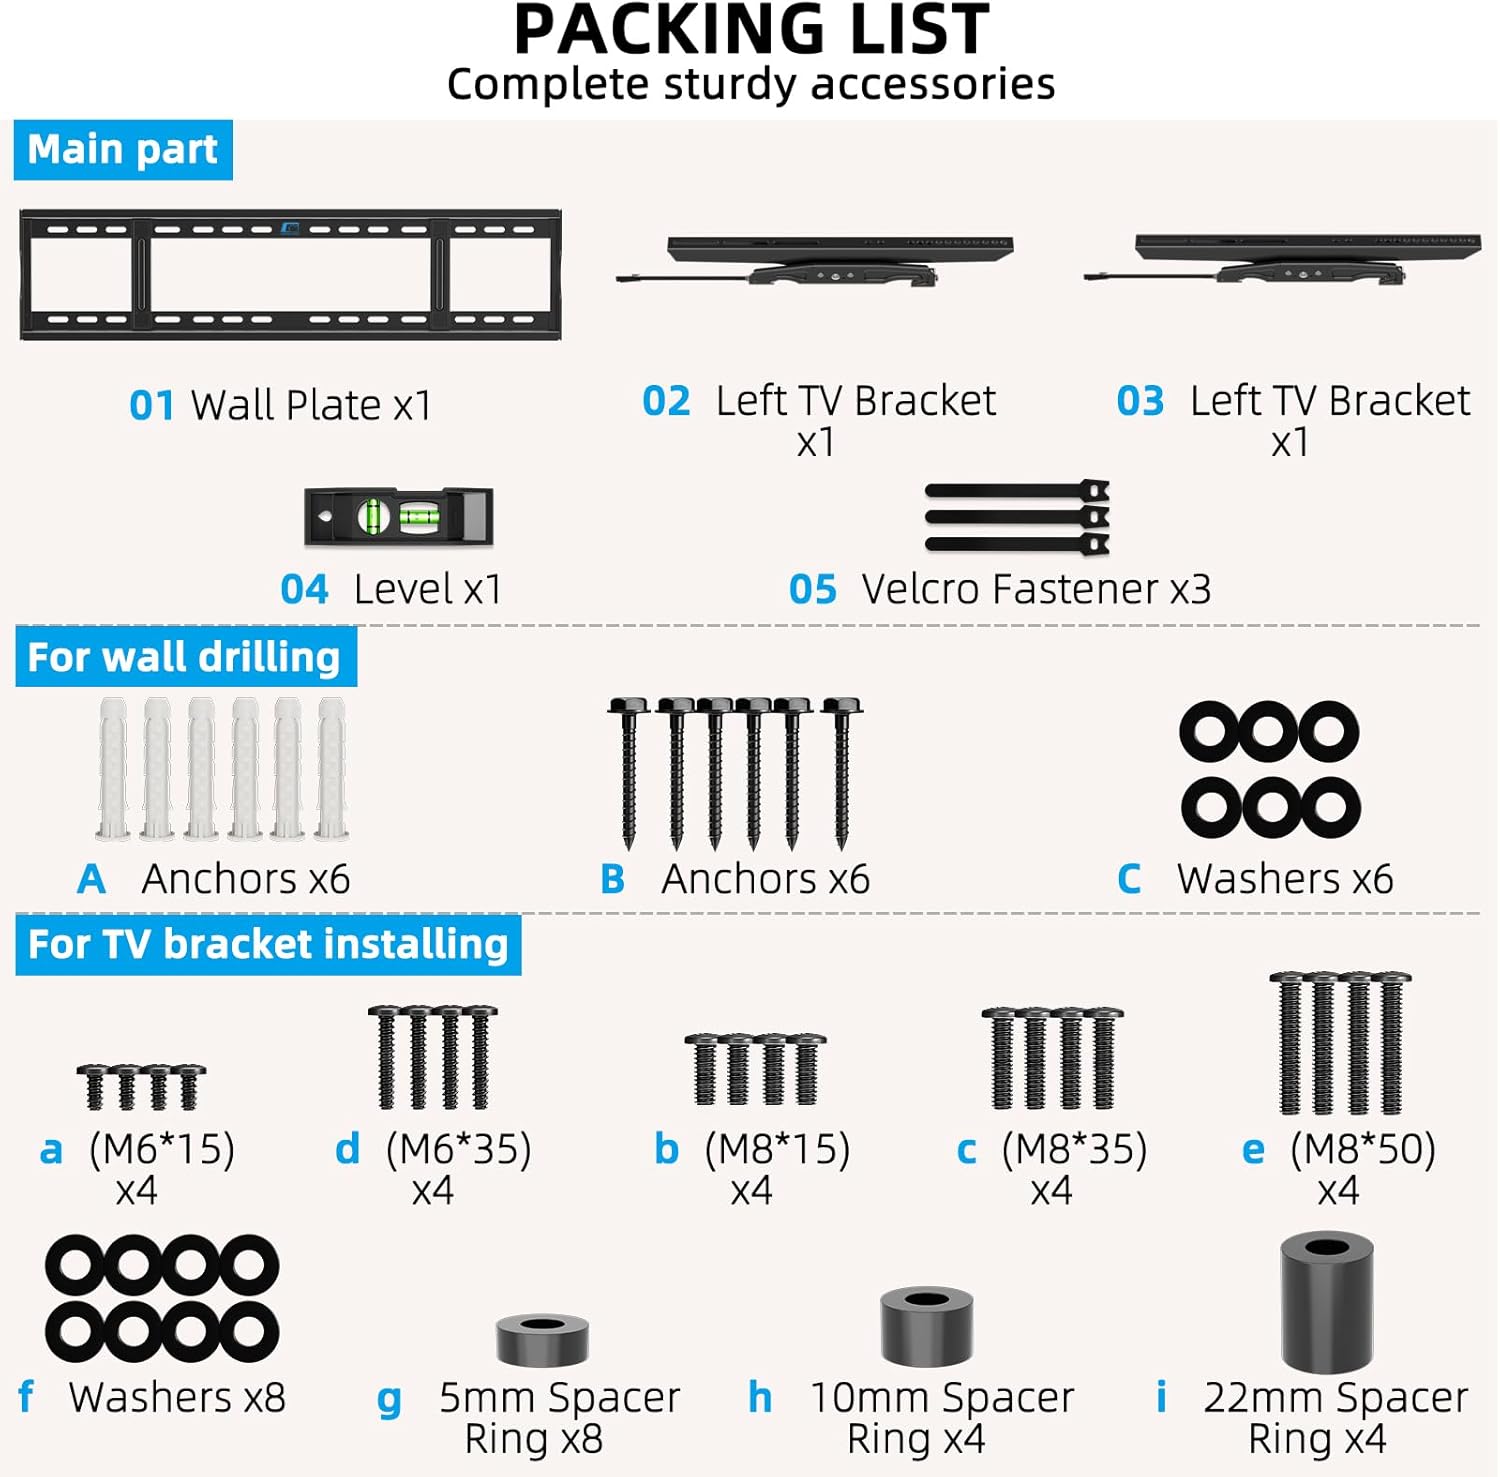
Figure 3.1: Complete Packing List
This image provides a visual guide to all components included in the package, categorized into main parts, wall drilling hardware, and TV bracket installing hardware.
Main Parts:
- 01 Wall Plate x1
- 02 Left TV Bracket x1
- 03 Right TV Bracket x1
- 04 Level x1
- 05 Velcro Fastener x3
For Wall Drilling (Hardware):
- A Anchors x6
- B Anchors x6
- C Washers x6
For TV Bracket Installing (Hardware):
- a (M6*15) x4
- d (M6*35) x4
- b (M8*15) x4
- c (M8*35) x4
- e (M8*50) x4
- f Washers x8
- g 5mm Spacer Ring x8
- h 10mm Spacer Ring x4
- i 22mm Spacer Ring x4
4. Setup & Installation
This section provides step-by-step instructions for installing your HOME VISION TV wall mount. Ensure you have all necessary tools and assistance before proceeding.
Tools Required (Not Included):
- Pencil
- Drill
- Stud Finder (for wood stud installation)
- Measuring Tape
- Socket Wrench or Adjustable Wrench
- Hammer (for concrete/brick anchors)
Installation Steps (Simplified 1-2-3):
The HOME VISION mount is designed for quick and easy installation.
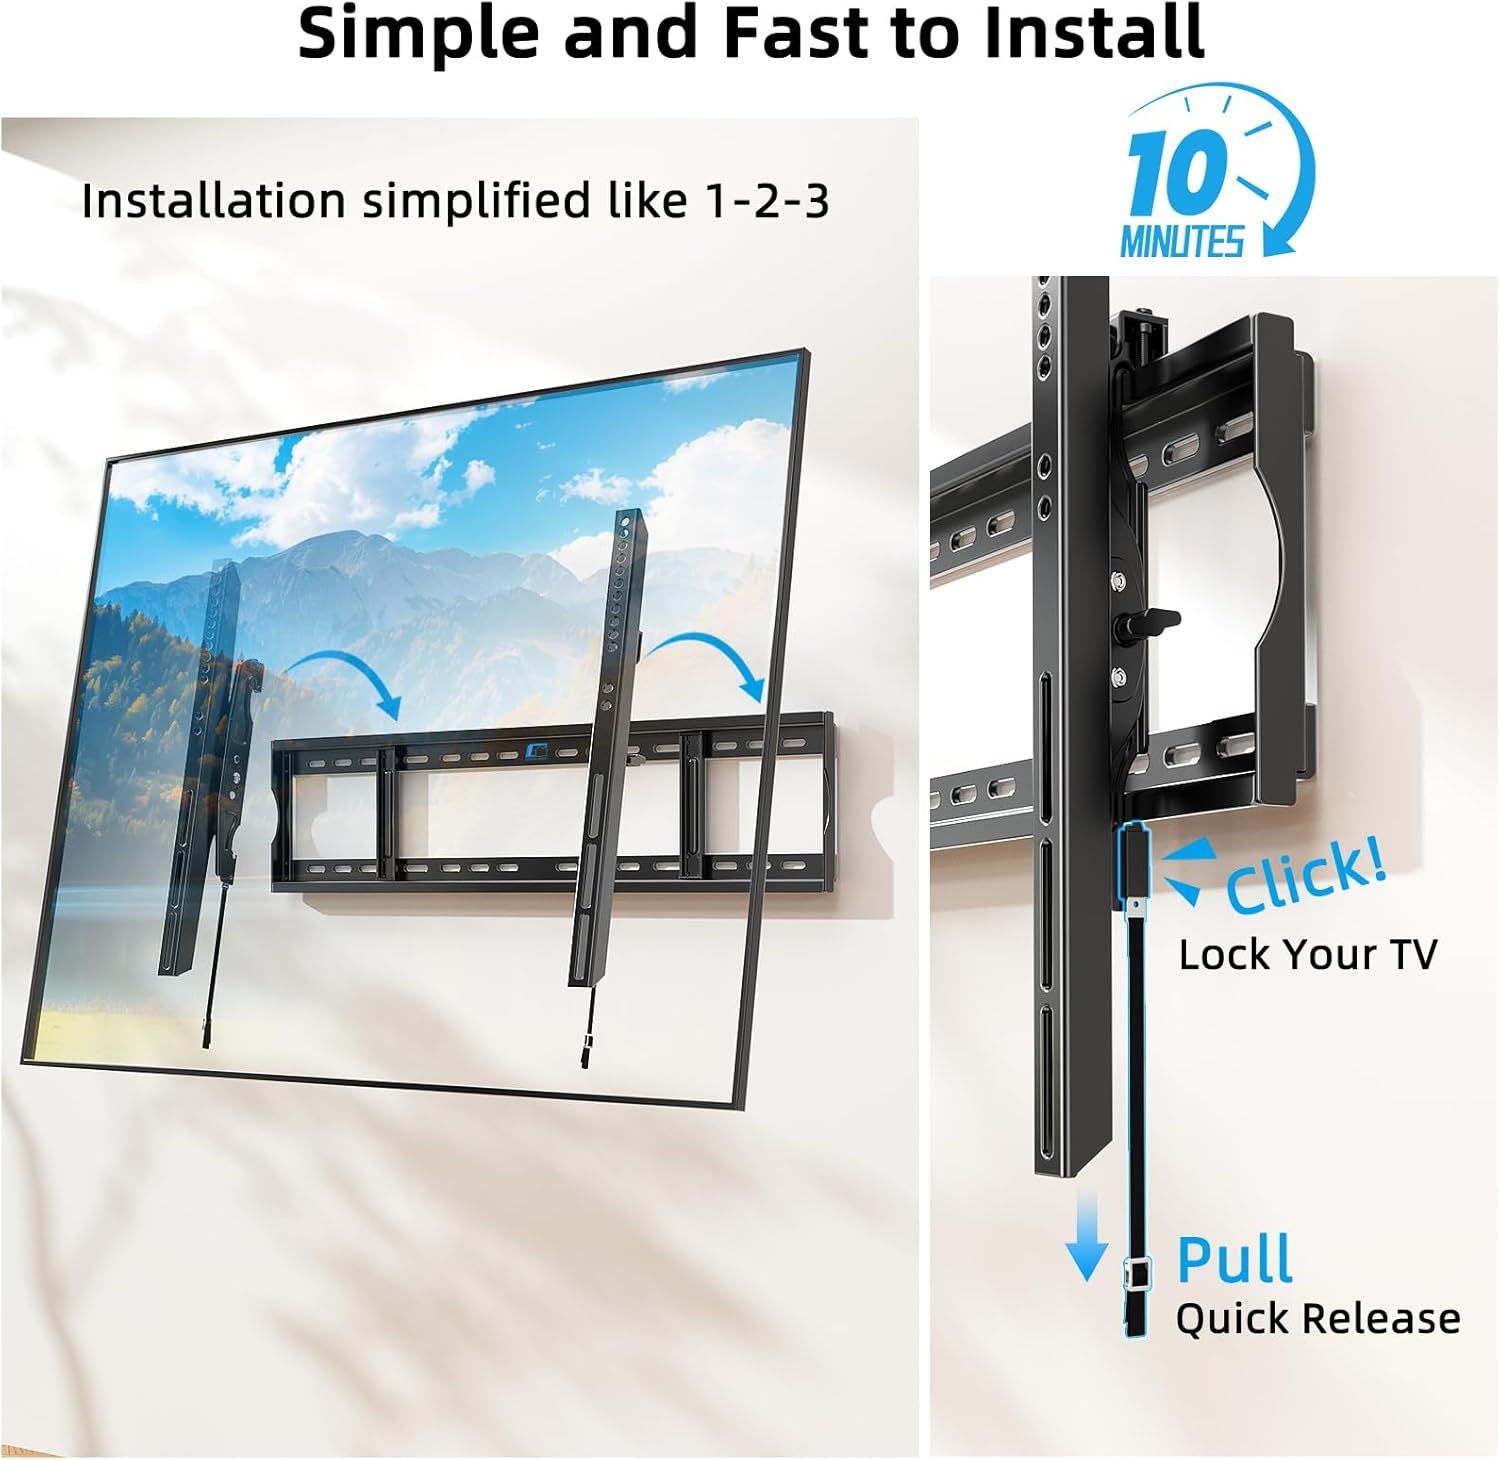
Figure 4.1: Simplified 3-Step Installation Process
This image visually demonstrates the three main steps for installing the TV mount: attaching brackets to the TV, mounting the wall plate, and then hanging and adjusting the TV.
- Attach Brackets to TV: Secure the vertical TV brackets (02 & 03) to the back of your television using the appropriate screws and spacers from the "For TV Bracket Installing" hardware. Ensure the brackets are centered and securely fastened to the VESA mounting holes on your TV.
- Mount Wall Plate:
- For Wood Studs: Use a stud finder to locate the center of your wood studs. Mark the drilling locations on the wall. Drill pilot holes and secure the Wall Plate (01) using the appropriate lag bolts and washers (from "For Wall Drilling" hardware). The mount supports 16", 18", 24", and 32" stud spacing.
- For Concrete/Brick Walls: Mark the drilling locations. Drill holes using a masonry drill bit. Insert the concrete anchors (A or B) into the drilled holes. Secure the Wall Plate (01) using the appropriate lag bolts and washers.
Use the included Level (04) to ensure the wall plate is perfectly horizontal before tightening all fasteners.
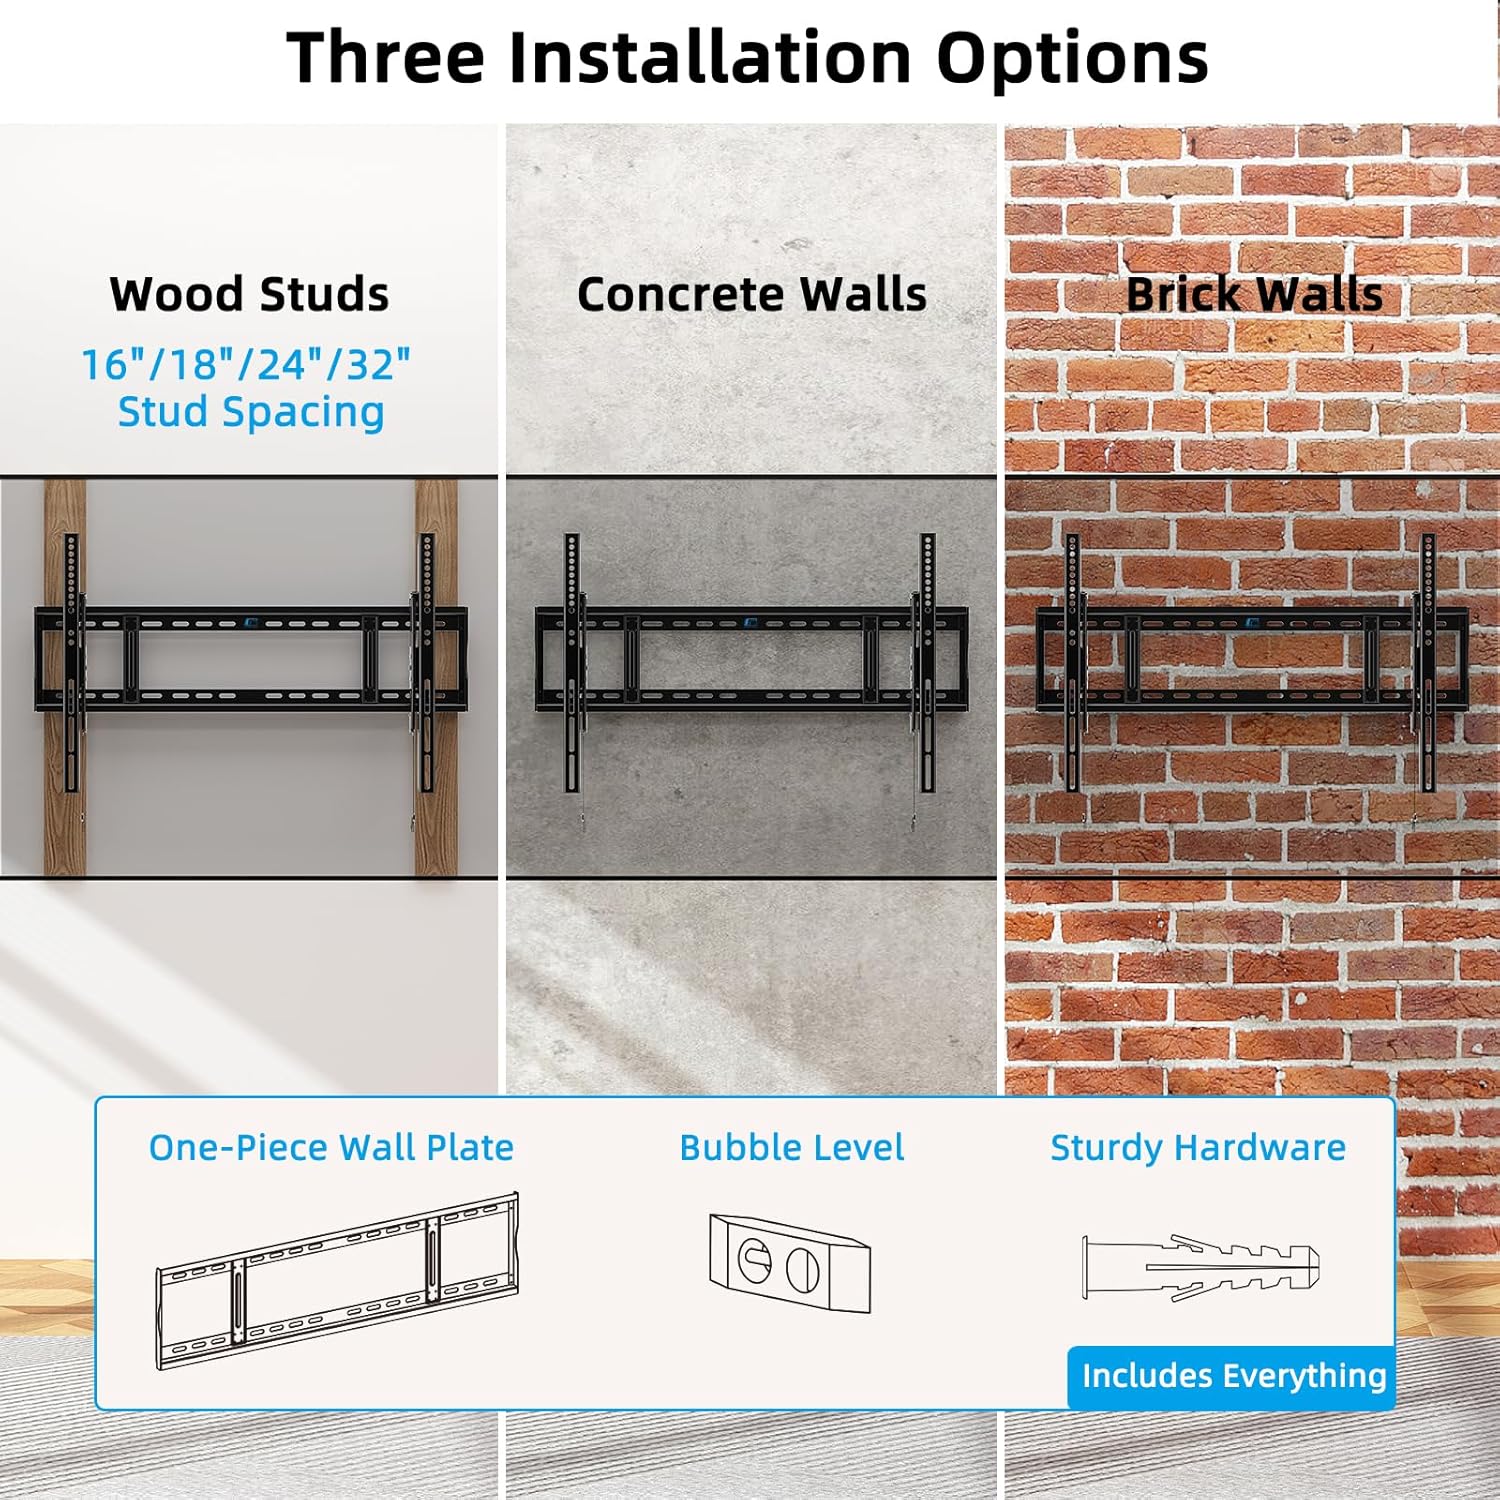
Figure 4.2: Wall Type Compatibility
This image displays the three supported installation options: wood studs (16"/18"/24"/32" spacing), concrete walls, and brick walls, along with illustrations of the one-piece wall plate, bubble level, and sturdy hardware.
- Hang and Adjust TV: Carefully lift the TV (with brackets attached) and hook the brackets onto the top edge of the mounted Wall Plate. Gently lower the TV until it rests securely on the wall plate. The dual hooks and pull cord lock mechanism will engage.
Post-Installation Adjustments:
- Leveling: The mount allows for ±1° post-installation leveling. Adjust as needed for a perfectly aligned screen.
- Lateral Shift: The ultra-smooth wall plate surface allows you to effortlessly slide the TV left or right to center it on your wall after installation.
- Tilt Adjustment: Use the tool-free knobs on the TV brackets to adjust the tilt angle (10° down / 5° up) to reduce glare or achieve your desired viewing position.
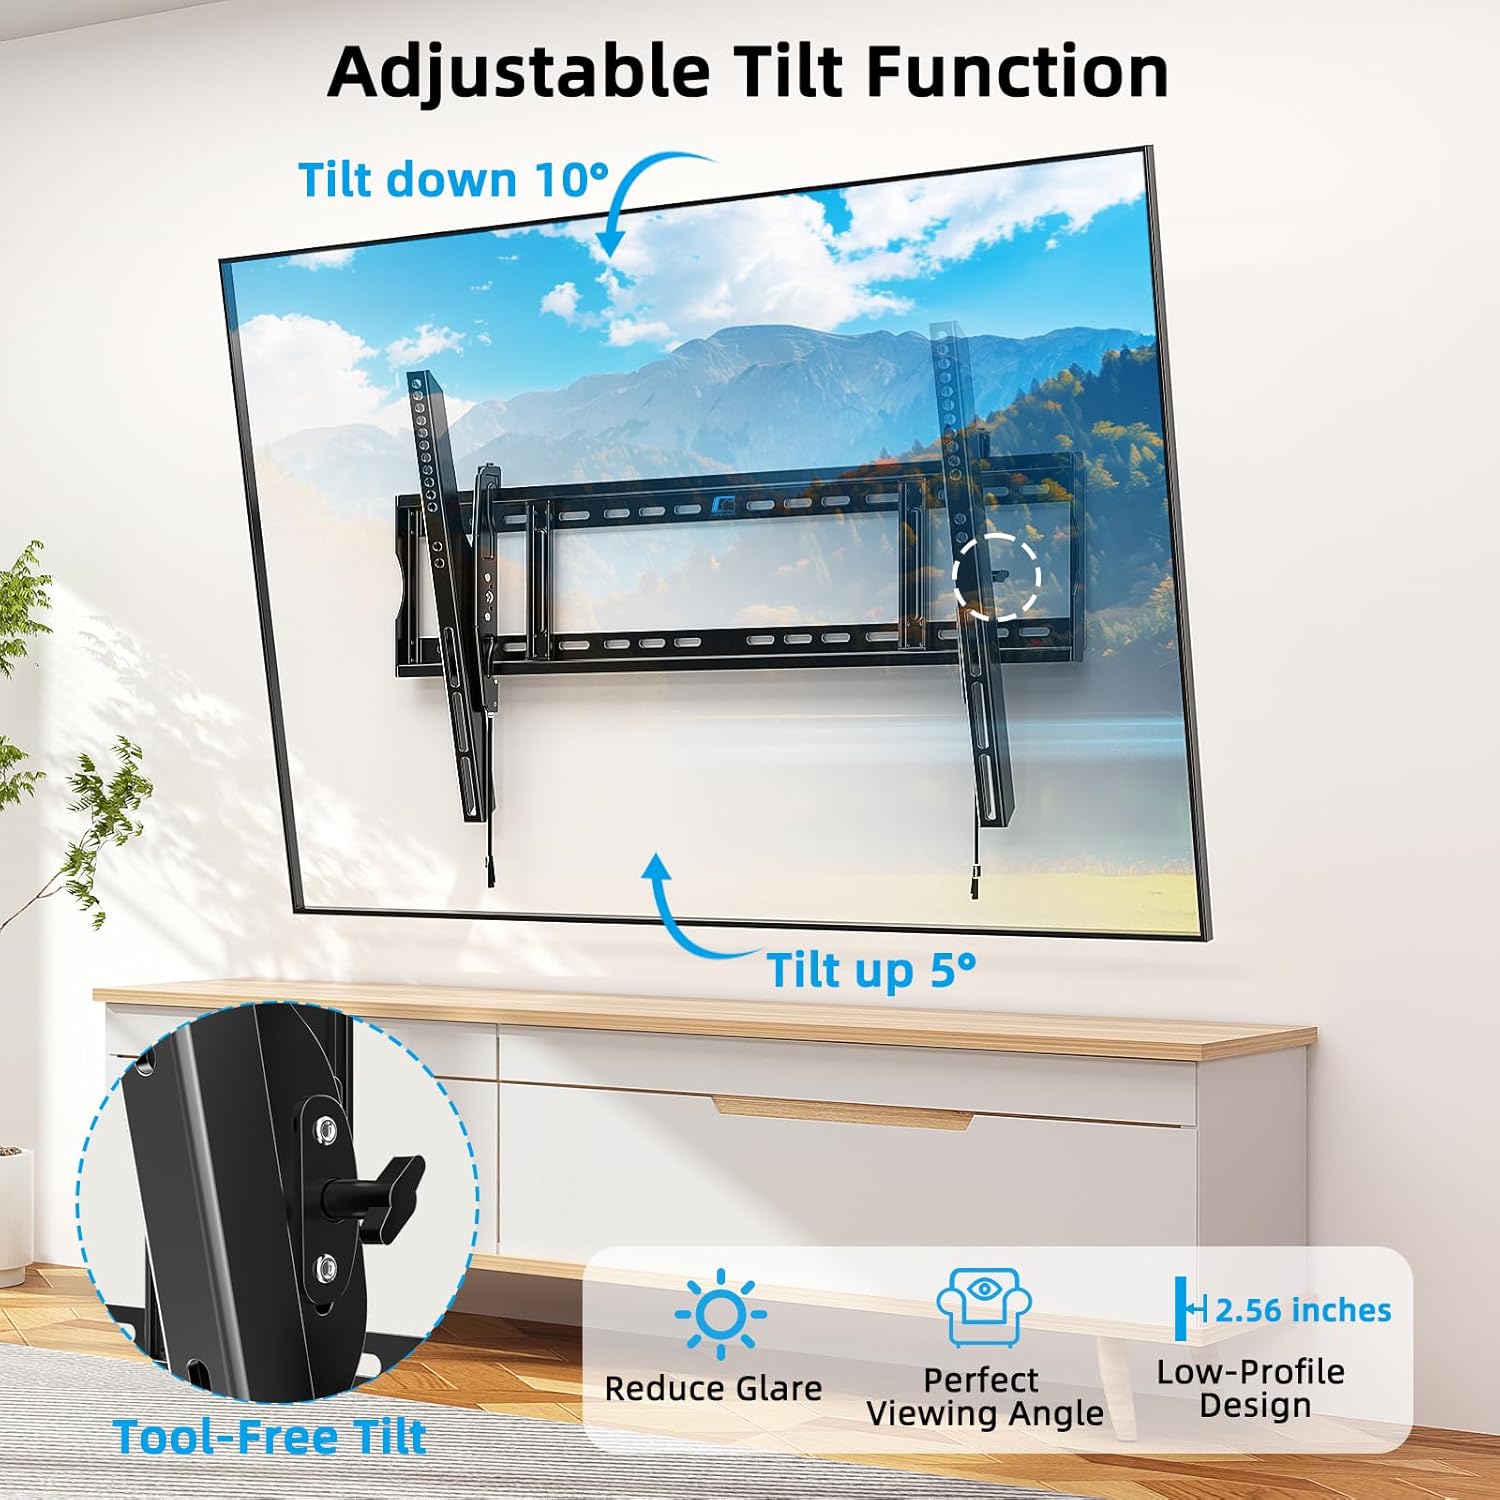
Figure 4.3: Tool-Free Tilt Adjustment
This image demonstrates the adjustable tilt function, allowing the TV to tilt down 10 degrees and up 5 degrees, with a close-up of the tool-free adjustment knob and the low-profile design (2.56 inches from the wall).
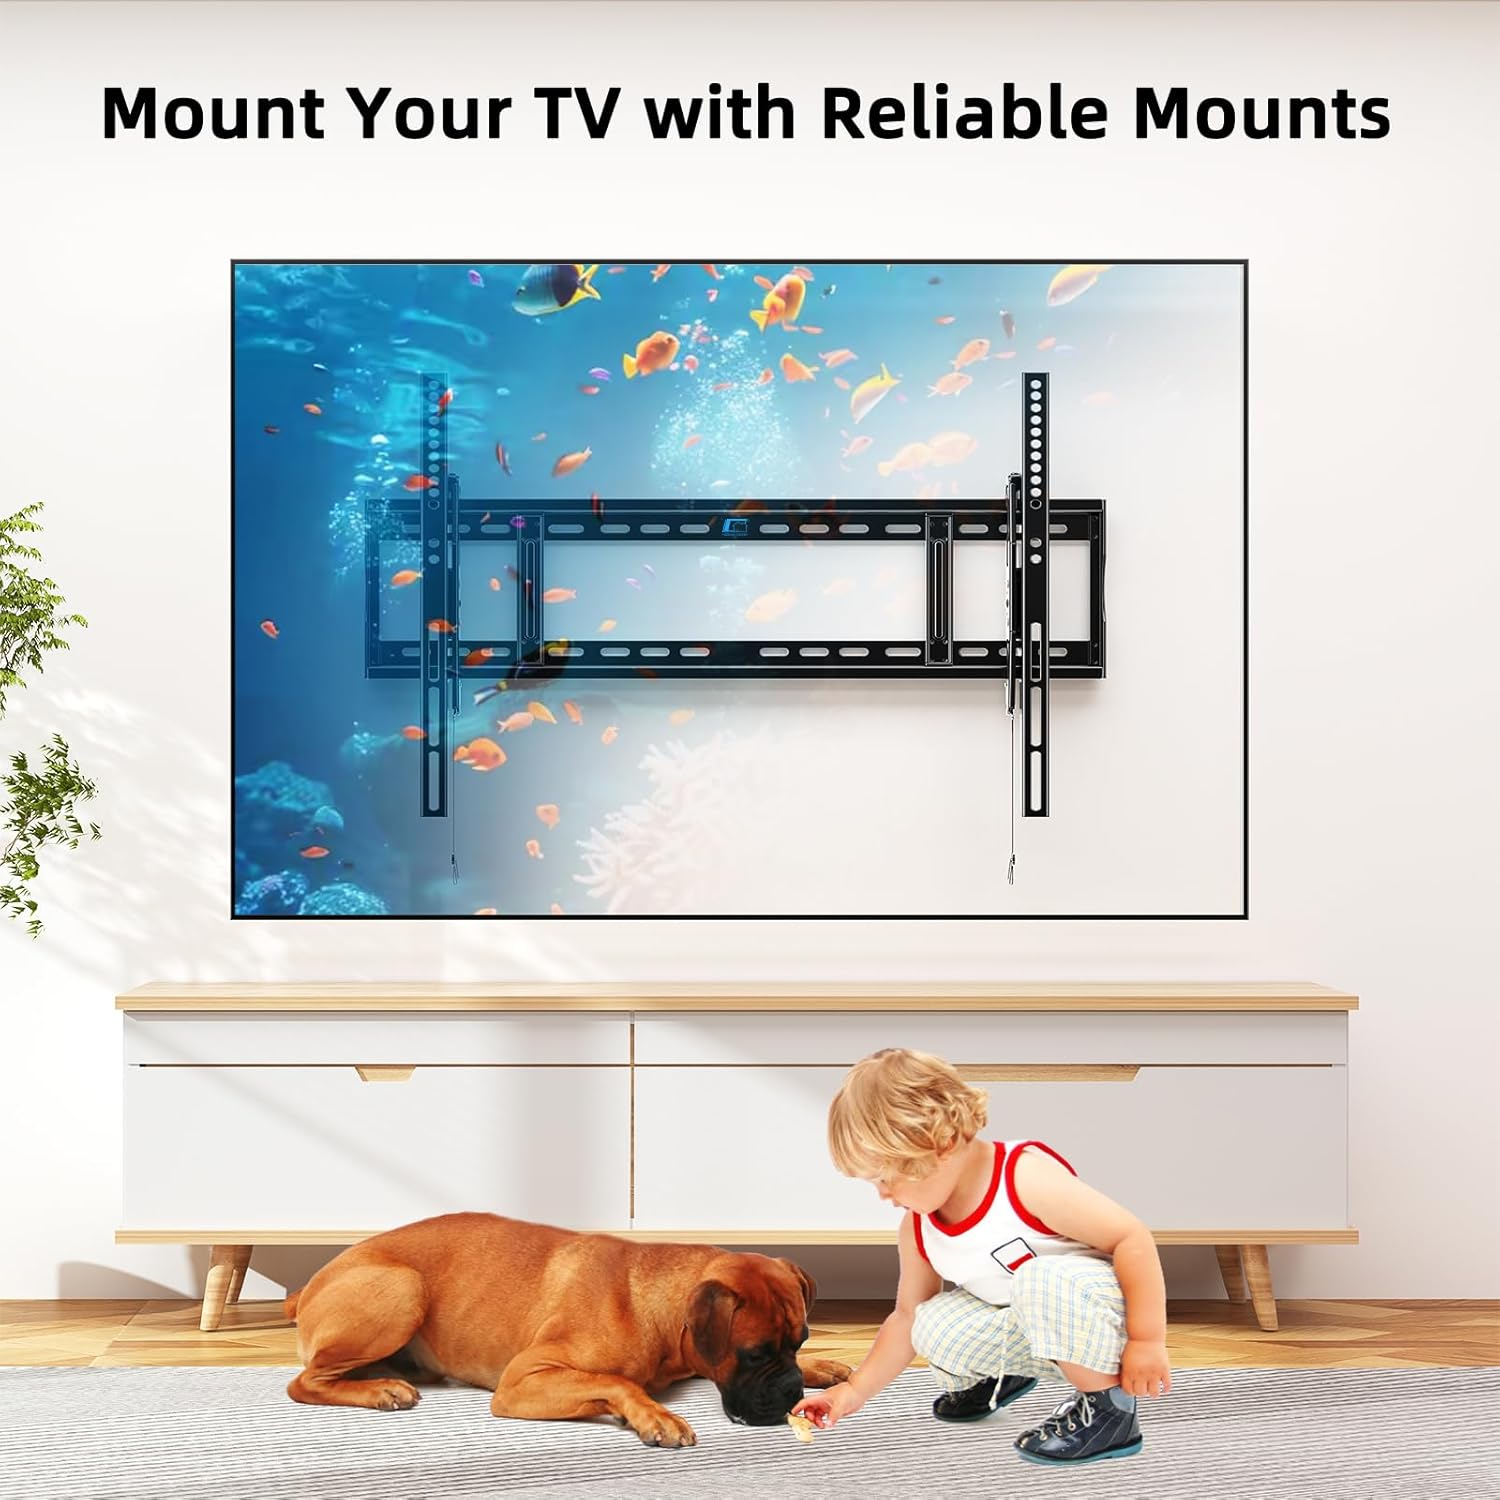
Figure 4.4: Securely Mounted TV
This image shows a large TV securely mounted on the wall, with a child and dog playing safely below, emphasizing the reliability and safety of the mount.
Video 4.1: HOME VISION Advanced Tilt TV Mount HV9901 Overview
This video provides a comprehensive overview of the HOME VISION Advanced Tilt TV Mount HV9901, showcasing its features, robust construction, and ease of use for large TVs up to 120 inches and 220 lbs.
5. Operating Instructions
Once installed, operating your HOME VISION TV wall mount is straightforward.
Adjusting Tilt:
To adjust the vertical tilt of your television:
- Locate the tool-free tilt knobs on the side of each TV bracket.
- Loosen the knobs by turning them counter-clockwise.
- Gently tilt the TV to your desired angle (up to 5° up or 10° down).
- Tighten the knobs by turning them clockwise to secure the TV in place.
Removing TV from Mount:
To safely remove your TV from the wall mount:
- Ensure the TV is in a flat, non-tilted position.
- Locate the pull straps at the bottom of the TV brackets.
- Pull the straps downwards to disengage the locking mechanism.
- With assistance, carefully lift the TV upwards and away from the wall plate.
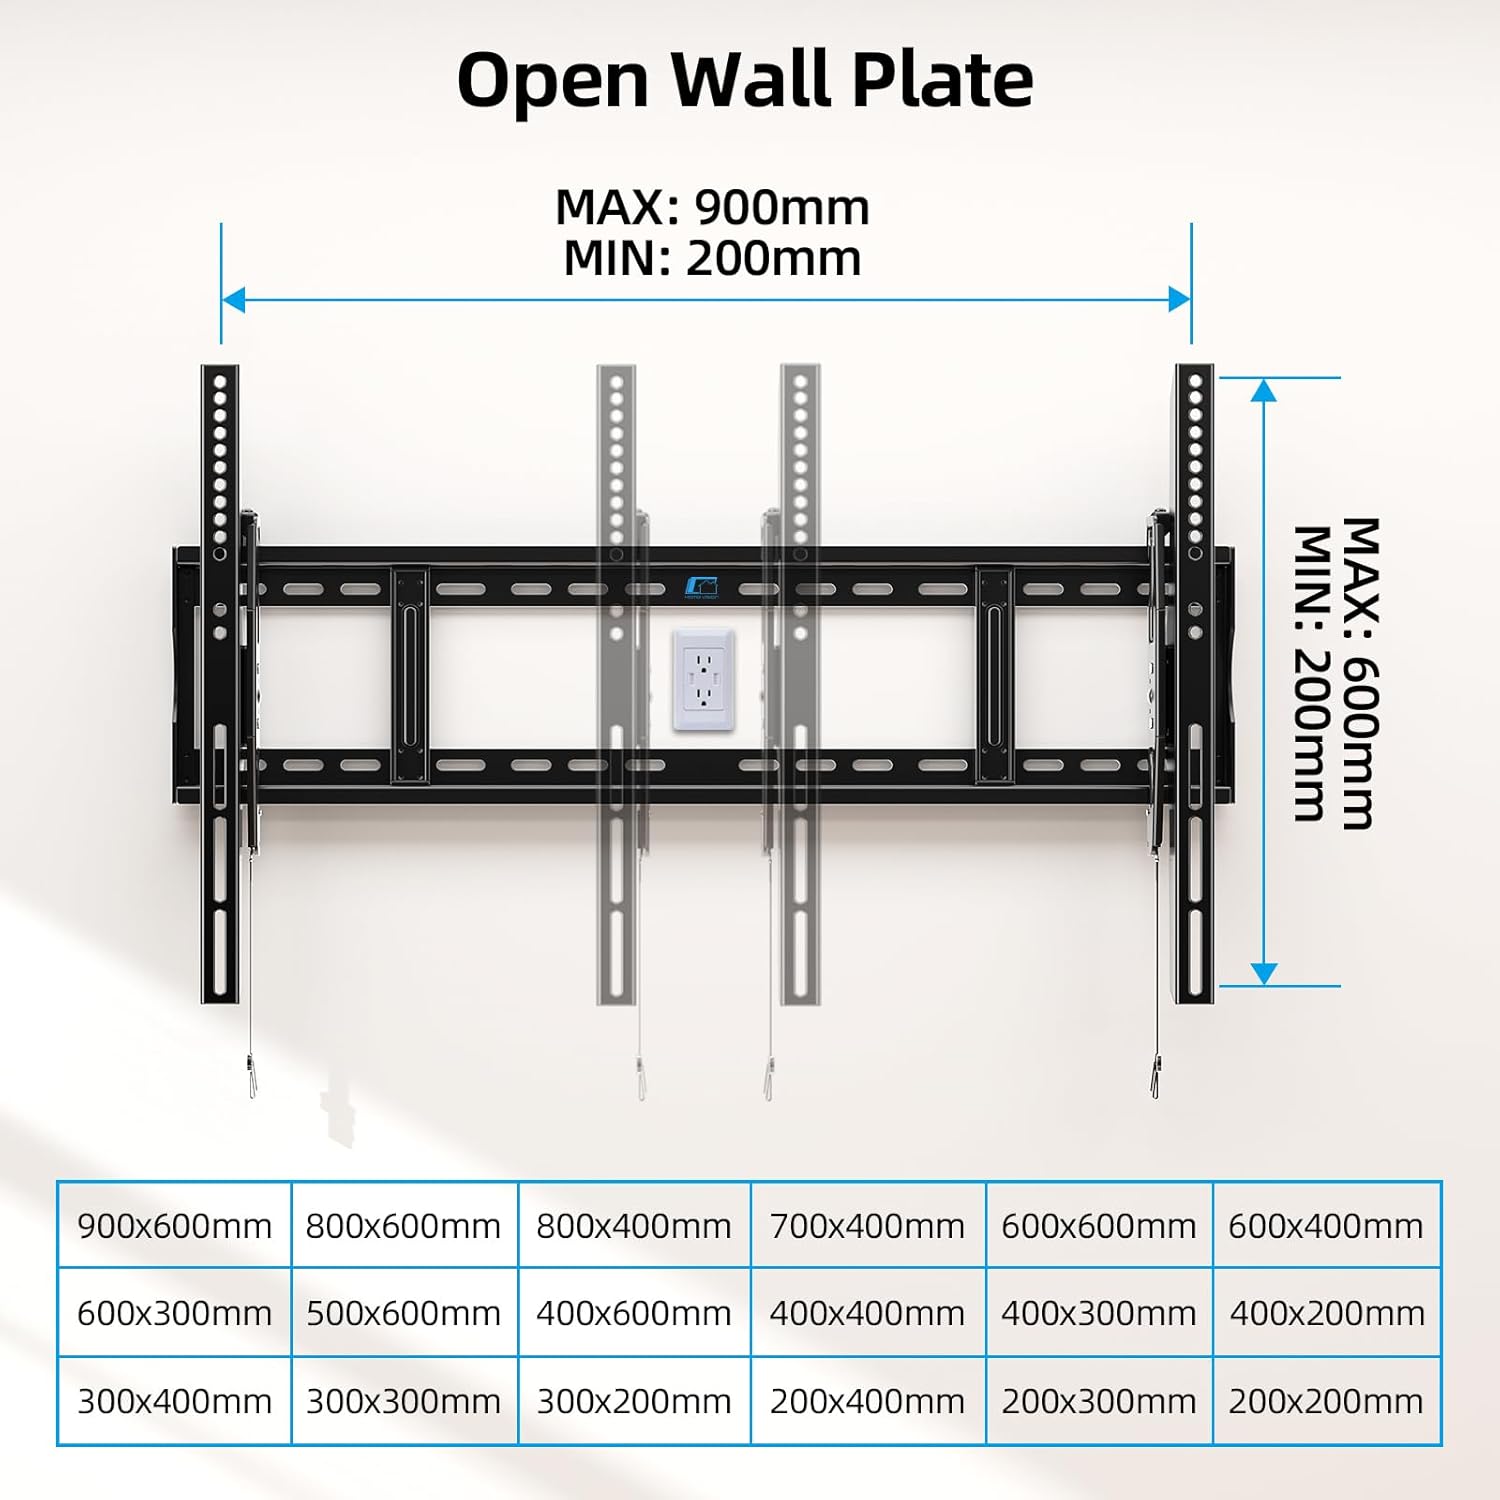
Figure 5.1: VESA Compatibility and Wall Plate Dimensions
This image details the maximum and minimum VESA dimensions supported by the mount (900x600mm max, 200x200mm min) and the overall dimensions of the open wall plate.
6. Maintenance
Regular maintenance ensures the longevity and safe operation of your TV wall mount.
- Cleaning: Wipe the mount with a soft, dry cloth to remove dust. Do not use abrasive cleaners or solvents.
- Periodic Inspection: Every 6-12 months, check all screws and bolts to ensure they are securely tightened. Over time, vibrations or minor shifts can cause fasteners to loosen.
- Check for Damage: Inspect the mount for any signs of wear, corrosion, or damage. If any issues are found, contact customer support and do not use the mount until it is repaired or replaced.
7. Troubleshooting
If you encounter any issues with your HOME VISION TV wall mount, refer to the following common problems and solutions.
| Problem | Possible Cause | Solution |
|---|---|---|
| TV is not level after installation. | Wall plate not perfectly level, or post-installation leveling needs adjustment. | Utilize the ±1° post-installation leveling feature to fine-tune the TV's horizontal alignment. Re-check wall plate level if significant tilt persists. |
| TV feels wobbly or insecure. | Fasteners not fully tightened, incorrect anchors used, or wall surface not strong enough. | Ensure all wall plate and TV bracket fasteners are securely tightened. Verify correct anchors were used for your wall type. If the wall is compromised, consult a professional. |
| Cannot tilt the TV. | Tilt knobs are too tight. | Loosen the tool-free tilt knobs on the TV brackets to allow for adjustment. Retighten once the desired angle is achieved. |
| Missing parts from package. | Packaging error. | Refer to the "Package Contents" section and contact HOME VISION customer support for replacement parts. |
If the problem persists or is not listed here, please contact HOME VISION customer support for further assistance.
8. Specifications
| Brand: | HOME VISION |
| Model Number: | HV9901 |
| Mounting Type: | Wall Mount |
| Movement Type: | Tilt |
| Material: | Alloy Steel |
| Color: | Black |
| Compatible TV Sizes: | 60 - 120 Inches |
| Maximum Weight Capacity: | 220 lbs (100 kg) |
| VESA Compatibility: | Min: 200x200mm, Max: 900x600mm |
| Stud Spacing Compatibility: | 16", 18", 24", 32" |
| Tilt Angle: | +5° / -10° |
| Profile from Wall: | 2.56 inches |
| Product Dimensions: | 33.43 x 2.56 x 24.41 inches |
| Item Weight: | 8.23 pounds |
9. Warranty & Support
Warranty Information:
HOME VISION products are manufactured with high-quality materials and craftsmanship. This product is backed by a limited warranty against defects in materials and workmanship. Please refer to the product packaging or the official HOME VISION website for specific warranty terms and conditions.
Customer Support:
For technical assistance, missing parts, or any questions regarding your HOME VISION TV Wall Mount, please contact our customer support team:
- Email: support@homevision.com (Example Email)
- Phone: 1-800-XXX-XXXX (Example Phone Number)
- Website: www.homevision.com (Example Website)
Please have your model number (HV9901) and purchase information ready when contacting support.
Related documentsHV9901


Ask a question about this manual
Ask about setup, troubleshooting, compatibility, parts, safety, or missing instructions. Manuals+ will review the question and use this page’s manual context to help answer it.