
1. Introduction
This manual provides essential instructions for the safe and efficient use of your Raylix 8-16A Level 1 & 2 Tesla Mobile Charger. Please read this manual thoroughly before operating the device and retain it for future reference. This charger is designed for use with Tesla Model 3, Model Y, Model S, Model X, Cybertruck, and all NACS (North American Charging Standard) compatible electric vehicles.
2. Product Overview
The Raylix 8-16A Tesla Mobile Charger offers flexible charging solutions with adjustable current and smart timer functions. Its robust design ensures reliable performance for both home and travel use.
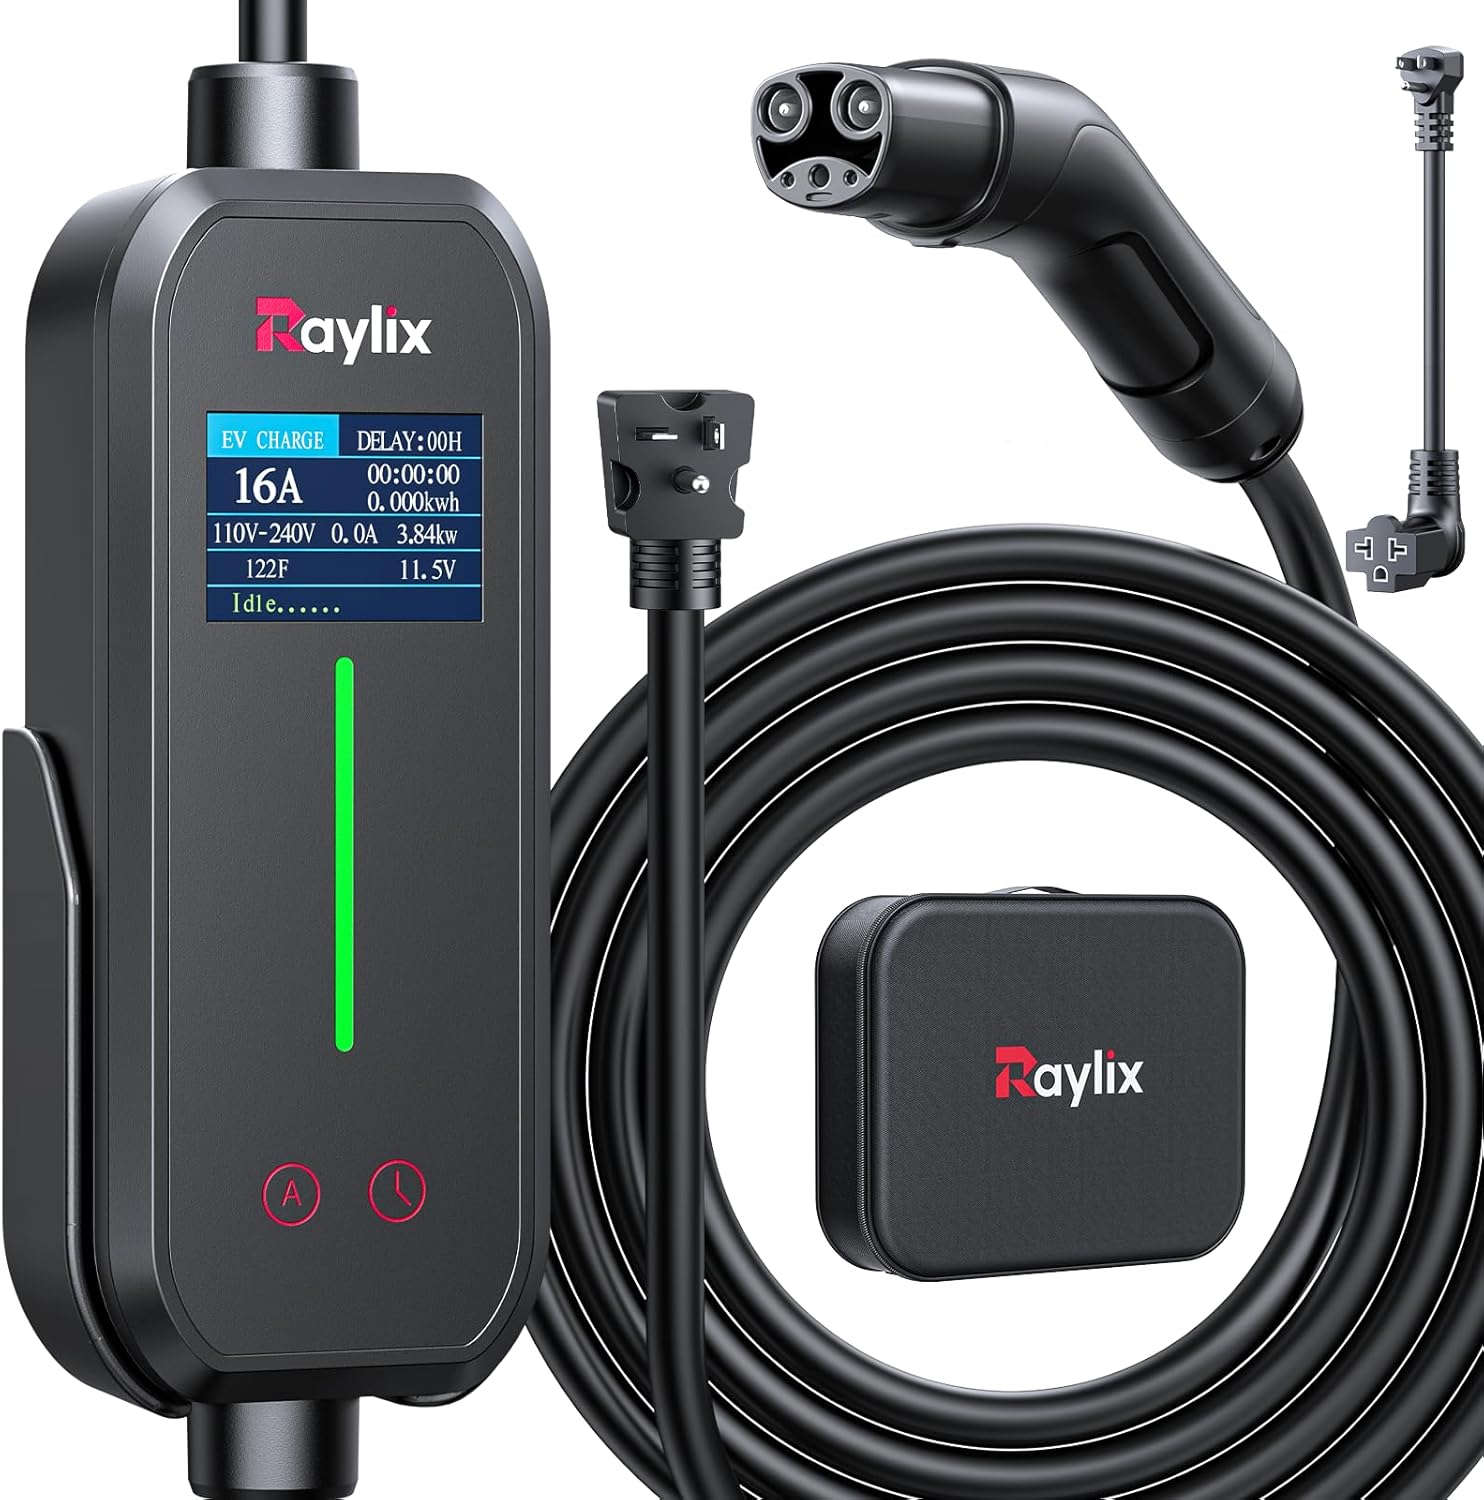
Figure 1: Raylix 8-16A Tesla Mobile Charger with NACS connector and NEMA adapters.
2.1 Package Contents
- Raylix 8-16A Tesla Mobile Charger (with integrated control box and NACS connector)
- NEMA 5-15 Adapter
- NEMA 6-20 Plug
- Carrying Bag
- Wall Mount Bracket
- Instruction Manual
2.2 Key Features
- Adjustable Current: Selectable current levels (8A, 10A, 12A, 16A) for optimized charging.
- Smart Delay Timer: Program charging to start after a 1-12 hour delay.
- Dual Voltage Compatibility: Supports 110V-240V power sources.
- NEMA 5-15 & 6-20 Plugs: Includes adapters for common household and higher-power outlets.
- 21ft Charging Cable: Provides extended reach for convenient charging.
- TFT Color Display: Real-time monitoring of voltage, current, power load, and temperature.
- Integrated Tesla-Style Button: Control the vehicle's charge port directly from the NACS connector.

Figure 2: The charger's TFT color display, showing real-time charging data and settings.
3. Safety Information
Your safety is paramount. The Raylix charger incorporates multiple safety features and certifications to ensure secure operation.
- Certifications: FCC and CE certified, ensuring compliance with safety and quality standards.
- Protection Features: Equipped with overheating, overvoltage, and overcurrent protection.
- Water Resistance: IP65 rated enclosure for protection against water jets, suitable for outdoor use.
- Flame Resistance: UL94V-0 rated materials for enhanced fire safety.
- NEMA 5-15 Outlet Safety: When using the NEMA 5-15 adapter (120V), the charger automatically limits the current to 12A to protect your vehicle and home's electrical system.

Figure 3: The Raylix charger's robust design allows for safe outdoor charging in various weather conditions.
4. Setup
4.1 Connecting the Charger
- Identify the appropriate power outlet: Use the NEMA 5-15 adapter for standard 120V outlets (Level 1 charging) or the NEMA 6-20 plug for 240V outlets (Level 2 charging).
- Connect the chosen plug to the charger's control box. Ensure a secure connection.
- Plug the charger into the wall outlet. The control box display will illuminate, indicating it is powered on.

Figure 4: The charger's interchangeable NEMA 5-15 and 6-20 plugs for different power outlets.
4.2 Wall Mounting (Optional)
The included wall mount bracket allows for convenient storage and access. Secure the bracket to a suitable wall surface using appropriate fasteners (not included), then slide the charger's control box into the bracket.
4.3 Setup and Charging Demonstration
Video 1: Official video tutorial on setting up and operating the Raylix EV Charger control box, including current adjustment and delayed charging.
5. Operating Instructions
5.1 Charging Your Vehicle
- Ensure the charger is properly connected to a power outlet.
- Open your Tesla's charge port. You can do this by pressing the button on the NACS connector.
- Insert the NACS connector into your vehicle's charge port. A click indicates a secure connection. The vehicle's indicator light will confirm charging has begun.
- To stop charging, press and hold the button on the NACS connector to unlock it, then remove it from the vehicle.

Figure 5: Using the integrated button on the NACS connector to open the Tesla's charge port.
5.2 Adjusting Current
The charger allows you to adjust the charging current (8A, 10A, 12A, 16A) directly from the control box. This feature is useful for managing power consumption or adapting to different electrical circuits.
- While the charger is connected to power but not actively charging the vehicle, press and hold the 'A' button on the control box for 3 seconds to enter current adjustment mode.
- Press the 'A' button repeatedly to cycle through the available current options (8A, 10A, 12A, 16A).
- Once your desired current is displayed, press and hold the 'A' button for 3 seconds to confirm the setting.
5.3 Setting Delay Timer
Utilize the smart delay timer to schedule charging during off-peak hours, potentially saving on electricity costs.
- While the charger is connected to power but not actively charging, press the 'Clock' button on the control box to activate the delay timer.
- Press the 'Clock' button repeatedly to adjust the delay time in 1-hour increments, up to 12 hours.
- Once the desired delay is set, the charger will automatically begin charging after the specified time.

Figure 6: The charger's display showing options for adjustable current and time-delayed charging.
Video 2: Official video demonstrating the Raylix Tesla Mobile Charger's Level 1 and Level 2 charging capabilities and ease of use.
6. Maintenance
- Regularly inspect the charging cable, plugs, and control box for any signs of damage, wear, or corrosion.
- Keep the charger clean and free from dust, dirt, and moisture. Use a soft, dry cloth for cleaning. Do not use abrasive cleaners or solvents.
- Store the charger in its carrying bag in a dry, cool place when not in use. Avoid extreme temperatures.
- Ensure the NACS connector and power plugs are free of debris before connecting.
7. Troubleshooting
If you encounter issues with your Raylix charger, refer to the following common troubleshooting steps:
- Charger Not Powering On: Ensure the power plug is fully inserted into a functional wall outlet. Check the circuit breaker for the outlet.
- Charging Not Initiating: Verify that the NACS connector is securely inserted into the vehicle's charge port. Check the vehicle's charging settings. Ensure no delay timer is active.
- Slow Charging: Confirm the selected current setting on the control box. For Level 1 charging (NEMA 5-15), the current is limited to 12A for safety. For faster charging, use a NEMA 6-20 outlet with the appropriate plug.
- Error Message on Display: Note any error codes displayed on the TFT screen and refer to the specific error code section (if available in a more detailed manual) or contact customer support.
- Overheating Indication: If the charger indicates overheating, disconnect it immediately and allow it to cool down in a well-ventilated area before attempting to charge again. Ensure the charger is not exposed to direct sunlight or enclosed spaces during operation.
8. Specifications
| Feature | Specification |
|---|---|
| Model Number | Raylix 8-16A Tesla charger |
| Input Voltage | 110V–240V |
| Adjustable Current | 8A / 10A / 12A / 16A |
| Cable Length | 21 ft |
| Plug Types | NEMA 5-15, NEMA 6-20 |
| Connector Type | NACS (North American Charging Standard) |
| Water Resistance Rating | IP65 |
| Flame Resistance Rating | UL94V-0 |
| Certifications | FCC, CE |
| Item Weight | 6.52 pounds |
| Package Dimensions | 16.38 x 13.3 x 3.82 inches |
9. Warranty and Support
Your Raylix 8-16A Tesla Mobile Charger is backed by a comprehensive 2-year warranty from the date of purchase. This warranty covers manufacturing defects and ensures reliable performance.
Should you encounter any compatibility, operational, or charging issues, our dedicated professional support team is available to assist you. Please contact us via the Amazon Message Center, and we are committed to providing effective solutions within 6 hours.