
1. Introduction
Thank you for choosing the Raylix 32A Level 2 EV Charger. This portable electric vehicle charger is designed to provide efficient and safe charging for your electric vehicle. Please read this manual thoroughly before using the product to ensure proper operation and to maximize its lifespan.
2. Safety Information
Important Notice:
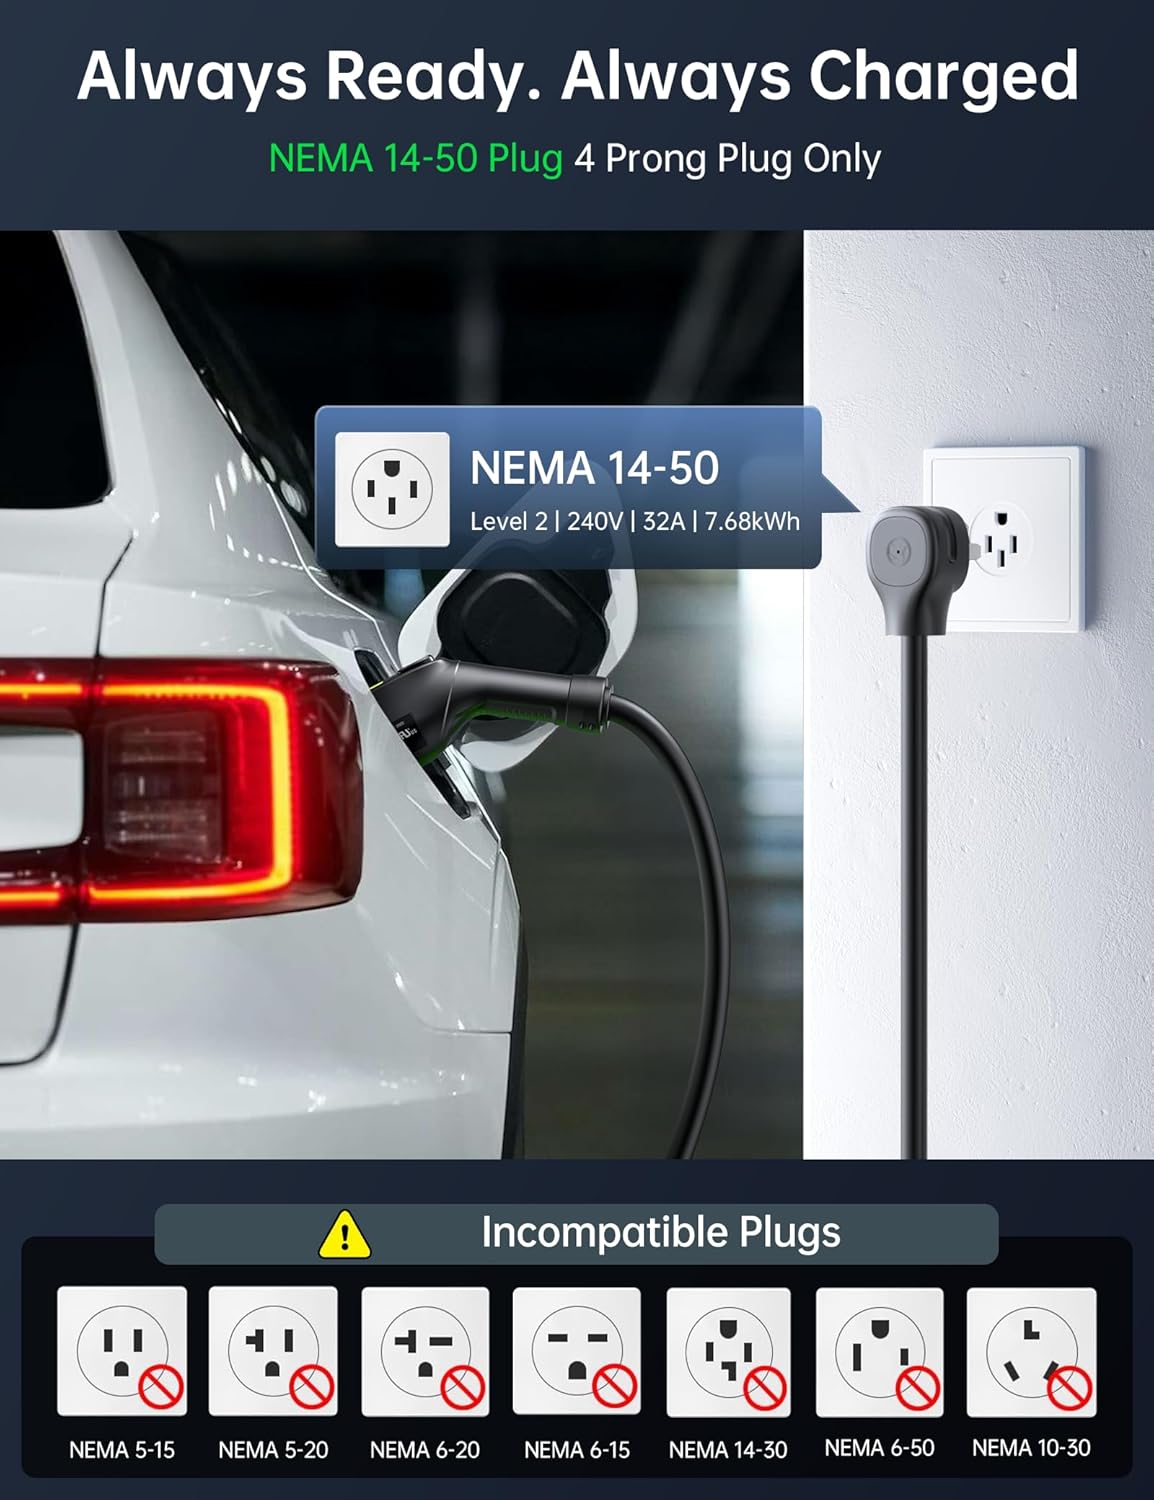
- The Raylix 32A Level 2 EV Charger requires a dedicated 240V/40A circuit and a 4-prong NEMA 14-50 outlet (North American electrical code compliant).
- This charger ONLY works with NEMA 14-50 outlets. It is NOT compatible with 10-30, 14-30, or 6-50 outlets. Please verify your outlet type before use.
Your safety is our priority. The Raylix portable charger features multiple protections to ensure safe charging every time:
- Overvoltage Protection
- Overcurrent Protection
- Overheating Protection
- Leakage Protection
- Grounding Protection
- Undervoltage Protection
- Overcharge Protection
The charger is rigorously tested and certified by FCC and CE, meeting high safety standards. It also features IP66 water and dust resistance and a UL94V-0 fire rating for durability and peace of mind.

3. Package Contents
Upon unboxing your Raylix 32A Level 2 EV Charger, please ensure all the following items are present:
- 1 x Raylix 32A Level 2 EV Charger with 21ft cable
- 1 x Convenient holder for wall mounting
- User Manual
4. Product Features
The Raylix 32A Level 2 EV Charger is equipped with features designed for convenience, efficiency, and safety:
- User-Friendly Display: A built-in display allows easy monitoring of charging status and current settings without needing a separate app.
- Fast Charging: Delivers 34-39 miles of range per hour with a NEMA 14-50 plug (240V, 32A), up to 2 times faster than standard 16A chargers.
- Adjustable Current: Offers flexible current settings (8A/10A/12A/16A/20A/24A/32A) to match your specific charging needs.
- Delayed Charging: Schedule your charging start time to take advantage of off-peak electricity rates.
- Universal Compatibility: Compatible with all electric vehicles and plug-in hybrids using the SAE J1772 connector. For Tesla vehicles, a J1772 to Tesla adapter (sold separately) is required.
- Easy Installation & Portability: Plug-and-play design with no complicated installation. Lightweight, compact, and includes a 21ft cable for versatile use at home, work, or travel. Comes with a convenient holder.


5. Setup and Installation
The Raylix EV Charger is designed for simple plug-and-play installation:
- Ensure you have a dedicated 240V/40A circuit and a NEMA 14-50 outlet.
- Plug the NEMA 14-50 plug of the charger into your 240V outlet.
- Mount the charger control box using the provided holder in a convenient location.
- Connect the J1772 charging connector to your electric vehicle's charging port.

6. Operating Instructions
Using your Raylix EV Charger is straightforward:
6.1 Basic Charging
- Plug the charger into the NEMA 14-50 outlet.
- Connect the J1772 plug to your vehicle's charging port.
- The charger's display will show the current charging status.
6.2 Adjusting Current
The charger allows you to adjust the charging current to suit your needs:
- Press the 'A' button on the control box to cycle through available amperage settings (8A/10A/12A/16A/20A/24A/32A).
- Select the desired current. The display will update to reflect your choice.
6.3 Delayed Charging
To take advantage of off-peak electricity rates, use the delayed charging feature:
- Press the 'Clock' button on the control box to set the desired delay time (1-12 hours).
- The charger will begin charging automatically after the set delay.

7. Compatibility
The Raylix EV Charger offers broad compatibility:
- Universal J1772: Compatible with all electric vehicles and plug-in hybrids that use the SAE J1772 connector, including popular brands like GM, Nissan, Audi, Kia, Honda, BMW, Hyundai, and more.
- Tesla Vehicles: For Tesla vehicles, a J1772 to Tesla adapter is required (sold separately).
8. Maintenance
To ensure the longevity and optimal performance of your Raylix EV Charger, follow these maintenance guidelines:
- Keep the charging cable and connector clean and free from dust or debris.
- Avoid bending or kinking the cable excessively.
- Store the charger in a dry, cool place when not in use.
- Regularly inspect the cable and connectors for any signs of damage. Do not use if damaged.
9. Troubleshooting
If you encounter any issues with your Raylix EV Charger, please refer to the following common troubleshooting tips:
- Charger not powering on: Ensure the NEMA 14-50 plug is fully inserted into a live 240V outlet. Check your circuit breaker.
- Vehicle not charging: Ensure the J1772 connector is securely plugged into the vehicle's charging port. Check the vehicle's charging settings.
- Slow charging: Verify the selected amperage setting on the charger's display. Ensure your vehicle is capable of faster charging.
- Error message on display: Refer to the specific error code in the full user manual (if available) or contact customer support.
For further assistance, please contact Raylix customer support.
10. Specifications
| Specification | Value |
|---|---|
| Brand | Raylix |
| Model | Raylix J1772 32A EV charger |
| Amperage | 32 Amps (Adjustable: 8A/10A/12A/16A/20A/24A/32A) |
| Input Voltage | 240 Volts |
| Charging Power | 7.68 kW |
| Cable Length | 21 ft |
| Connector Type | SAE J1772 |
| Plug Type | NEMA 14-50 (4-prong) |
| Safety Certifications | FCC, CE |
| Water & Dust Resistance | IP66 |
| Fire Rating | UL94V-0 |
11. Warranty and Support
Raylix stands by the quality of its product with a 2-year warranty. In case of any issues, returns or replacements are available if needed.
For any questions or concerns, our dedicated customer support team is available 24/7 and committed to providing solutions within 12 hours. Please reach out to us for assistance before or after your purchase.