
Introduction
This manual provides essential instructions for the safe and efficient operation of your Raylix 12A-16A Level 1/2 Portable EV Charger. Please read this manual thoroughly before using the product and retain it for future reference.
Safety Information
Your Raylix EV Charger is designed with multiple safety features. Adhering to these guidelines ensures safe operation:
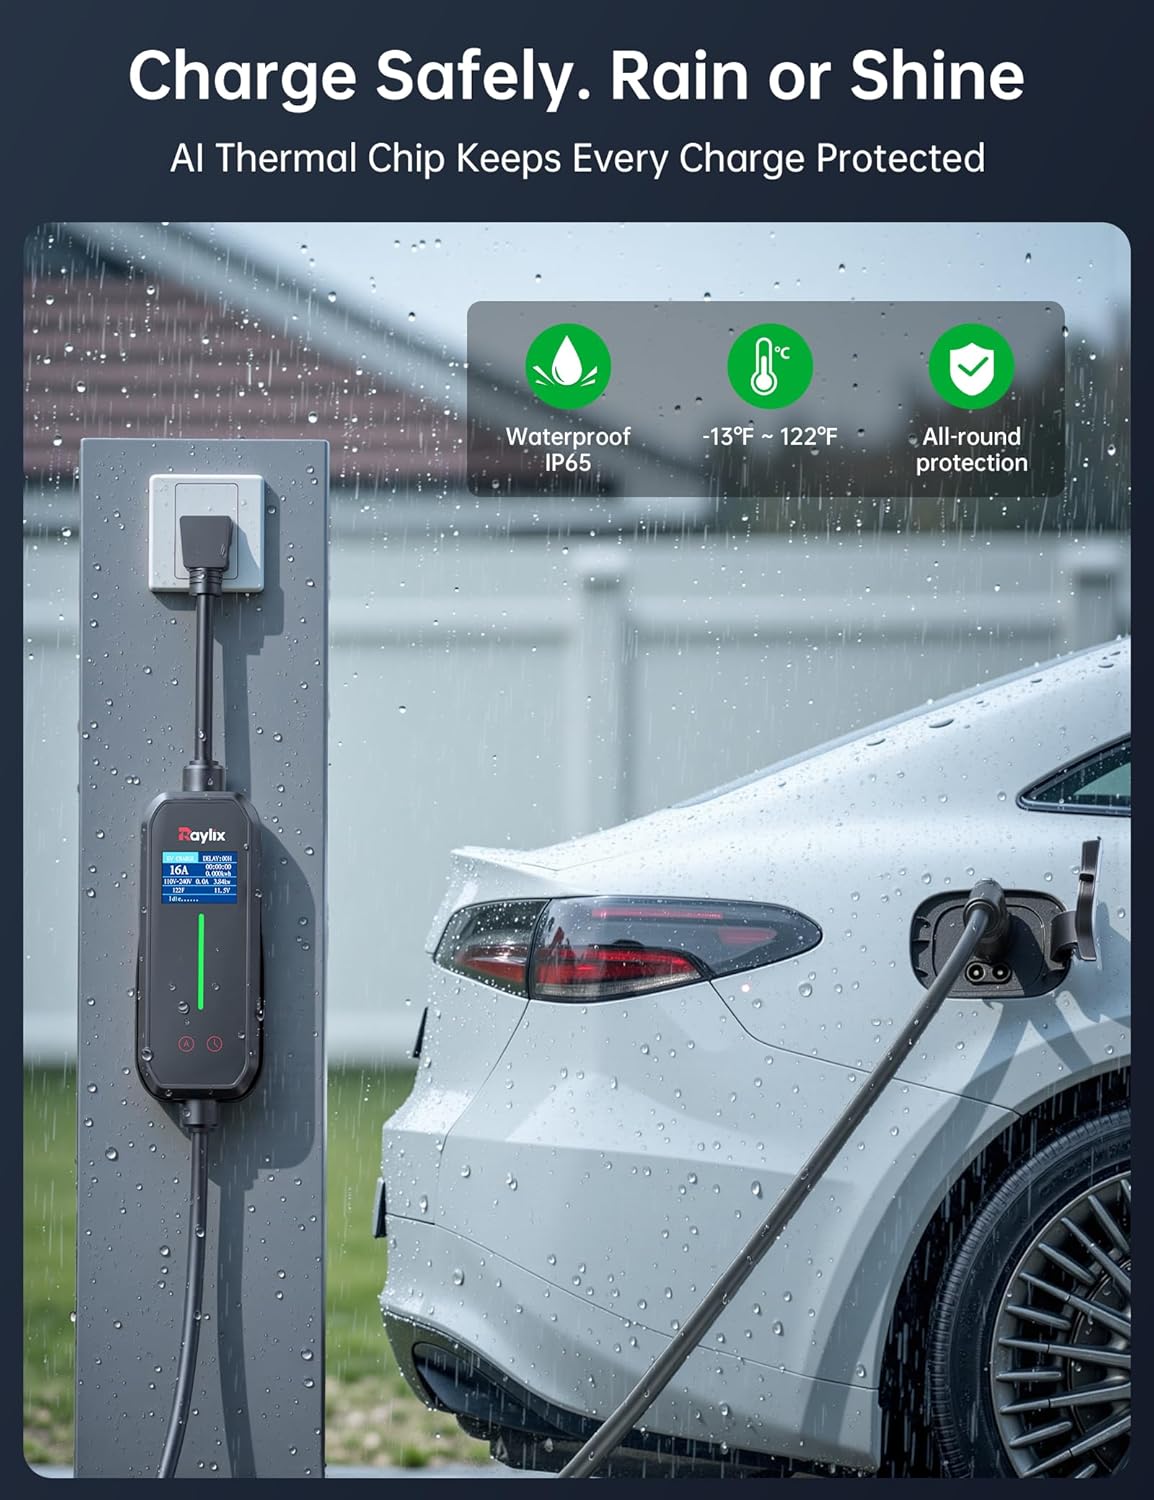
- Protection Features: The charger incorporates overvoltage, overcurrent, overheating, leakage, grounding, undervoltage, and overcharge protection.
- Certifications: The product is FCC and CE certified, meeting high safety standards.
- Environmental Resistance: Rated IP66 for water and dust resistance, and UL94V-0 for fire safety.
- Always ensure the charging environment is dry and free from obstructions.
- Do not attempt to disassemble or modify the charger.
- Avoid using the charger if any part is damaged.
Package Contents
Upon unpacking, please verify that all items listed below are present:
- Raylix Portable EV Charger Unit with integrated cable and J1772 connector
- NEMA 5-15 Plug (attached to charger)
- NEMA 6-20 Adapter
- Wall Mount Holder
- Carrying Case
- User Manual (this document)

Product Features
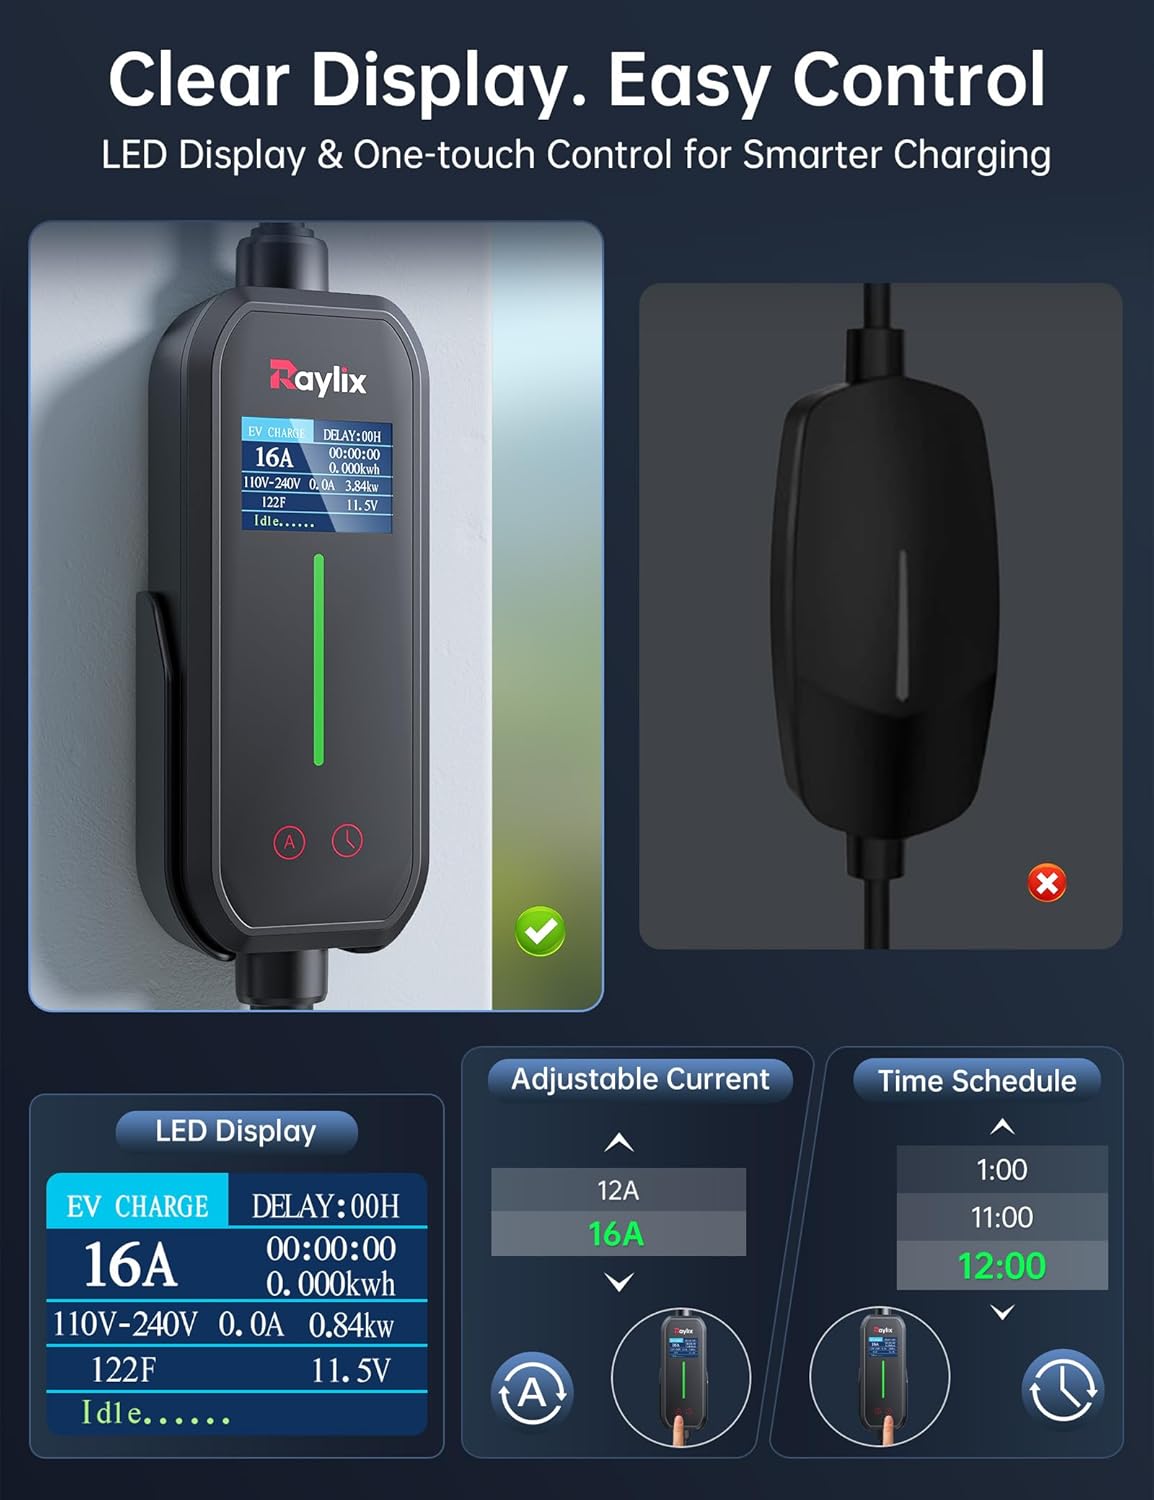
- User-Friendly Display: An integrated LED screen provides real-time charging status, current settings, and other vital information.
- Universal Compatibility: Equipped with an SAE J1772 connector, compatible with most electric vehicles and plug-in hybrids. For Tesla vehicles, a J1772 to Tesla adapter (sold separately) is required.
- Adjustable Current: Offers flexible current settings (16A, 12A) to match your charging needs. When connected to a 110V (NEMA 5-15) outlet, the current automatically limits to 12A for safety.
- Delayed Charging: Schedule charging sessions to begin at a preferred time, ideal for utilizing off-peak electricity rates.
- Portable Design: Lightweight and compact with a 21ft cable, making it suitable for home, work, or travel. Includes a convenient holder for storage.
- Robust Construction: Features a durable, crush-proof design, UL 2251-certified cable, and IP66 water/dust resistance for long-lasting performance.


Setup and Installation
The Raylix Portable EV Charger is designed for simple plug-and-charge operation. No complex wiring is required.
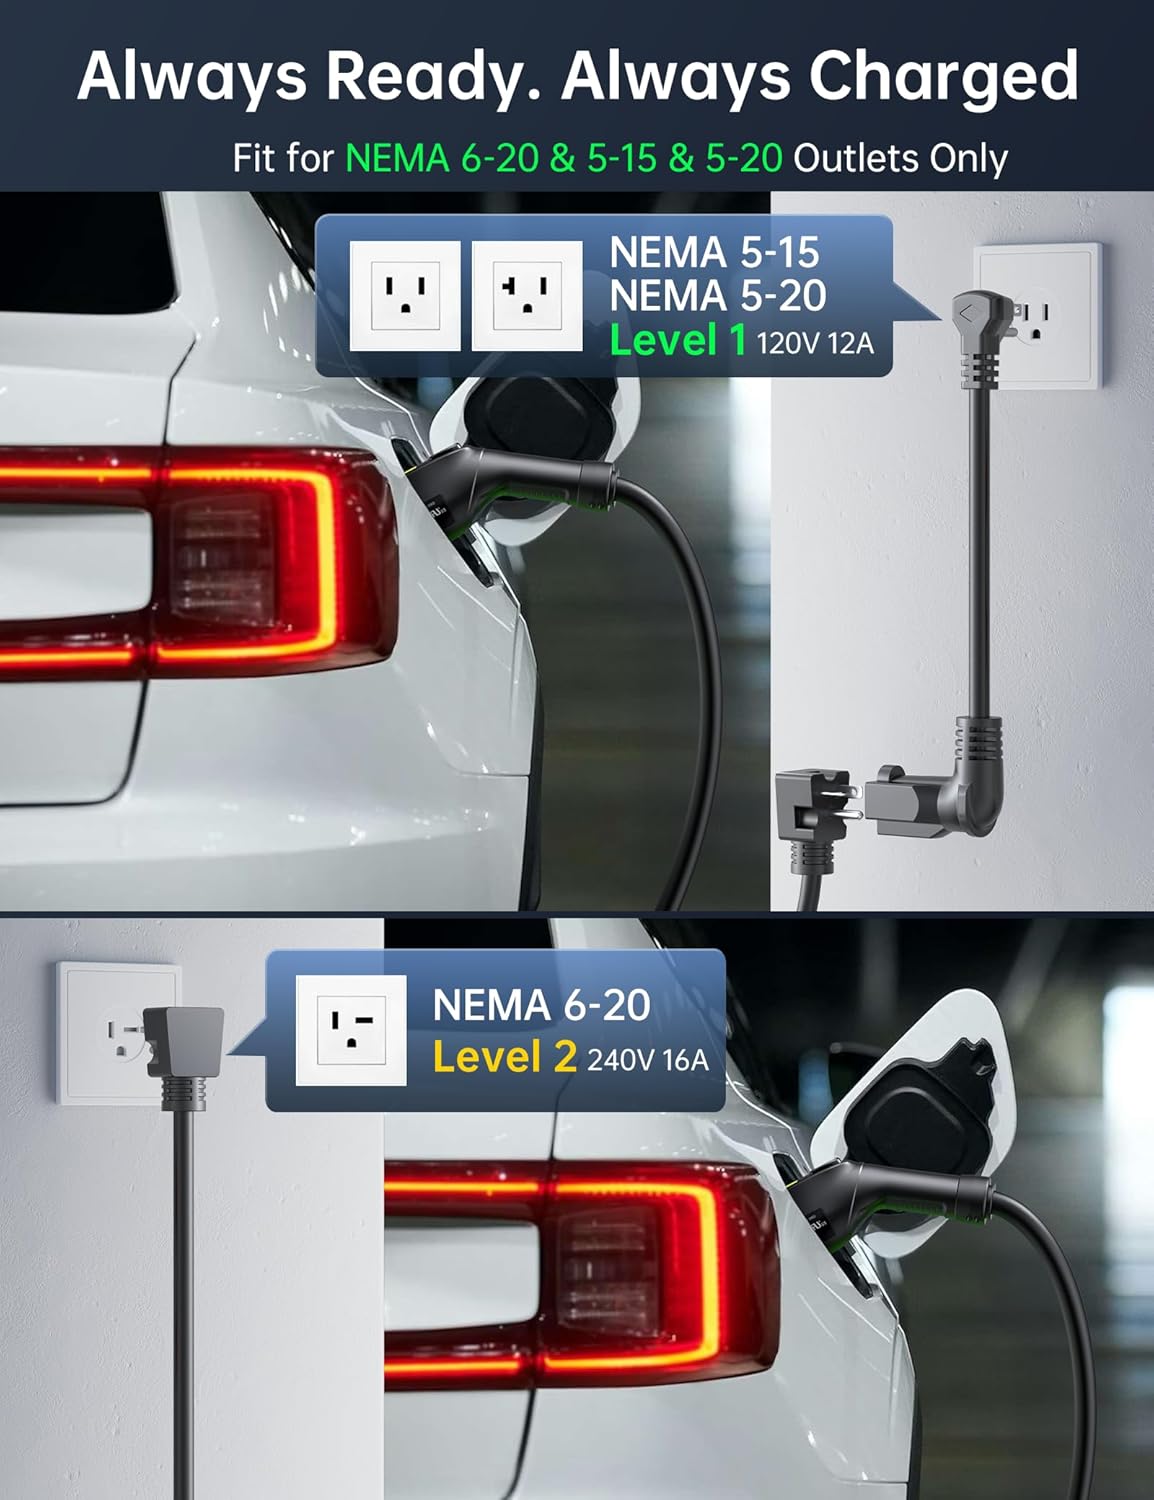
- Choose an Outlet: Identify a suitable 110V-240V outlet. The charger supports NEMA 5-15, NEMA 5-20 (Level 1, 120V 12A), and NEMA 6-20 (Level 2, 240V 16A) outlets.
- Connect to Power:
- For NEMA 5-15 or 5-20 outlets, plug the charger's integrated NEMA 5-15 plug directly into the wall outlet.
- For NEMA 6-20 outlets, attach the provided NEMA 6-20 adapter to the charger's plug, then insert it into the wall outlet.
- Mounting (Optional): Use the included wall mount holder to secure the charger unit off the ground, if desired.
- Vehicle Connection: Once the charger is powered, connect the J1772 connector to your electric vehicle's charging port.
Note: For 110V (NEMA 5-15/5-20) outlets, the charger will automatically limit the current to 12A. Always ensure the outlet and wiring can safely handle the charging load.
Operating Instructions
The Raylix EV Charger features an intuitive display and controls for managing your charging sessions.
- Initiating Charge: After connecting the charger to both the power outlet and your vehicle, charging will typically begin automatically. The LED display will show real-time charging information.
- Monitoring Display: The built-in display shows:
- Current (Amps)
- Voltage
- Power (kW)
- Charging Duration
- Temperature
- Charging Status (e.g., "Idle", "Charging")
- Adjusting Current (Amps):
- Press the 'A' button (Ampere icon) on the charger unit to cycle through available current settings (e.g., 12A, 16A).
- Select the desired current. The charger will adjust accordingly.
- Note: When using a 110V outlet, the maximum current is automatically limited to 12A, regardless of manual selection.
- Setting Delayed Charging:
- Press the 'Clock' button on the charger unit.
- Use the buttons to set the desired delay time before charging begins. This feature is useful for charging during off-peak electricity hours.
- Confirm your selection. The charger will display the delay countdown.
- Ending Charge: To stop charging, disconnect the J1772 connector from your vehicle first, then unplug the charger from the power outlet.

Maintenance
Proper maintenance ensures the longevity and safe operation of your Raylix EV Charger:
- Cleaning: Wipe the charger unit and cable with a soft, dry cloth. Do not use harsh chemicals or abrasive cleaners. Ensure the unit is unplugged before cleaning.
- Storage: When not in use, store the charger in its carrying case or on the wall mount holder in a dry, cool place, away from direct sunlight and extreme temperatures.
- Cable Inspection: Regularly inspect the charging cable and connectors for any signs of wear, cuts, or damage. If damage is found, discontinue use immediately and contact support.
- Connector Care: Keep the J1772 connector clean and free of debris. Ensure the protective cap is used when not connected to a vehicle.
Troubleshooting
If you encounter issues with your Raylix EV Charger, refer to the following common problems and solutions:
| Problem | Possible Cause | Solution |
|---|---|---|
| Charger not powering on. | No power from outlet; charger not fully plugged in. | Check the power outlet with another device. Ensure the charger is securely plugged into the outlet. |
| Charging not starting. | Vehicle not properly connected; delayed charging set; vehicle charging port issue. | Ensure the J1772 connector is fully inserted into the vehicle. Check the display for a delayed charging countdown. Verify the vehicle's charging port is functional. |
| Slow charging speed. | Charger set to lower amperage; 110V outlet in use; vehicle limitation. | Adjust the current setting to 16A if using a 240V outlet. Note that 110V outlets are limited to 12A. Consult your vehicle's manual for its charging capabilities. |
| Error message on display. | Internal fault; external electrical issue. | Note the error code/message. Unplug the charger from both the vehicle and the wall, wait 5 minutes, then reconnect. If the error persists, contact Raylix customer support. |
If the problem persists after attempting these solutions, please contact Raylix customer support for further assistance.
Specifications
| Feature | Detail |
|---|---|
| Brand | Raylix |
| Model | Raylix 12A-16A Level 1/2 EV Charger |
| Input Voltage | 110V-240V AC |
| Output Current | Adjustable 12A / 16A (auto-limited to 12A for 110V input) |
| Connector Type | SAE J1772 |
| Power Plugs | NEMA 5-15 (integrated), NEMA 6-20 (adapter) |
| Cable Length | 21 ft |
| Water/Dust Resistance | IP66 |
| Fire Rating | UL94V-0 |
| Certifications | FCC, CE |
| Item Weight | 6.84 pounds |
| Product Dimensions | Approximately 4"D x 13"W x 16"H (Control Box) |
Warranty and Support
Raylix is committed to providing reliable products and excellent customer service.
- Technical Support: Lifetime technical support is available for all Raylix products.
- Replacement Policy: Enjoy a 365-day replacement policy for eligible issues.
- Customer Service: Raylix offers 24/7 fast response customer service.
- Extended Protection Plans: Optional 2-year and 3-year protection plans are available for purchase to extend coverage beyond the standard warranty.
For support inquiries, please visit the official Raylix website or contact their customer service directly.