1. Introduction
The XAUCY V519 is a multifunctional vehicle fault diagnosis instrument designed to assist in quickly identifying and resolving vehicle issues. It supports nine standard OBDII/EOBD protocols, allowing for rapid reading of vehicle fault information and parameters. This manual provides detailed instructions for the proper use and maintenance of your V519 OBD2 Scanner.
Important Note:
- This product is not compatible with new energy vehicles, hybrid vehicles, or models that do not comply with the OBD2 protocol.
- Please read this manual carefully before operating the device.
2. Safety Information
Always observe the following safety precautions:
- Never operate the diagnostic tool while driving.
- Ensure the vehicle is parked safely with the ignition off before connecting or disconnecting the scanner.
- Wear appropriate eye protection when working around vehicle engines.
- Avoid contact with hot engine components or moving parts.
- Do not expose the device to extreme temperatures, moisture, or corrosive substances.
- Keep the device out of reach of children.
3. Package Contents
Verify that all items are present in your package:
- 1 x XAUCY V519 OBD2 Scanner Host
- 1 x OBDII Cable (Integrated)
- 1 x User Manual
- 1 x Silicone Protective Cover
4. Product Overview
The V519 OBD2 Scanner features a 2.8-inch screen, intuitive button layout, and an integrated OBDII cable for direct connection to your vehicle's diagnostic port.

Figure 4.1: Front view of the XAUCY V519 OBD2 Scanner, showing the display screen, function buttons (F1, F2, EXIT), navigation buttons (up, down, left, right, OK), and the integrated OBDII connector cable.
4.1 Key Functions
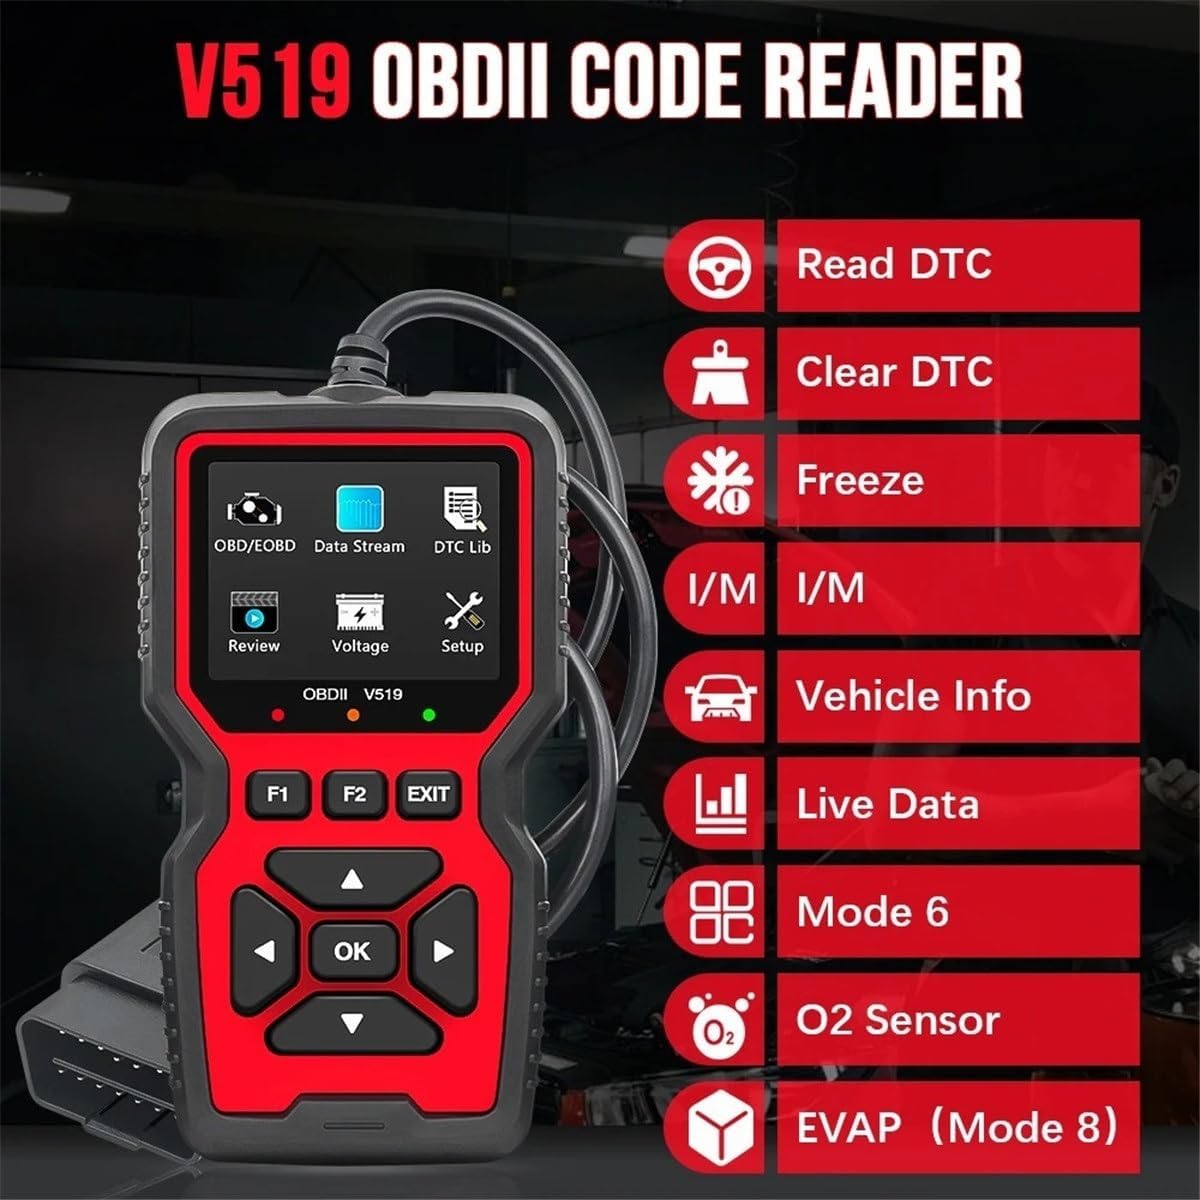
Figure 4.2: Diagram illustrating the main functions of the V519 OBDII Code Reader, including Read DTC, Clear DTC, Freeze Frame, I/M Readiness, Vehicle Info, Live Data, Mode 6, O2 Sensor, and EVAP (Mode 8).
4.2 Screen Display Overview

Figure 4.3: Examples of the V519 screen display, showing a data stream with parameters like DTC_CNT and LOAD_PCT(%), a voltage reading of 12.7V, a DTC lookup screen, and language selection options.
5. Setup
- Locate the OBDII Port: The OBDII port is typically located under the dashboard on the driver's side, though its exact position may vary by vehicle model. Refer to your vehicle's owner's manual if you cannot locate it.
- Connect the Scanner: With the vehicle's ignition off, firmly plug the V519 scanner's OBDII connector into the vehicle's OBDII port.
- Power On: Turn the vehicle's ignition to the "ON" position (do not start the engine unless instructed by a specific diagnostic procedure). The scanner will automatically power on and initiate communication with the vehicle's onboard computer.
- Language Selection: Upon first use, or if settings are reset, you may need to select your preferred language from the system settings menu.
6. Operating Instructions
The V519 offers various diagnostic functions accessible via the main menu. Use the navigation buttons (Up, Down, Left, Right) to move through options and the "OK" button to confirm selections. "EXIT" returns to the previous menu.
6.1 Reading and Clearing Diagnostic Trouble Codes (DTCs)

Figure 6.1: Image showing the V519 scanner connected to a vehicle, with an illustration of a dashboard indicating a check engine light being turned off after reading and clearing codes. The scanner reads and clears both generic and manufacturer-specific codes.
- From the main menu, select "OBD/EOBD" or "Read DTC".
- The scanner will display any stored Diagnostic Trouble Codes (DTCs).
- To clear codes, select "Clear DTC" from the menu. Confirm the action when prompted. This will turn off the Check Engine Light (MIL) if the underlying issue has been resolved.
6.2 Live Data Stream
View real-time operational parameters of the vehicle's engine. This data can help identify intermittent problems or monitor sensor performance.
- Select "Data Stream" from the main menu.
- The screen will display various parameters such as engine RPM, vehicle speed, coolant temperature, oxygen sensor readings, etc.
- Use the navigation buttons to scroll through the data pages.
6.3 Freeze Frame Data
When an emission-related fault occurs, the vehicle's computer stores a snapshot of operating conditions at the time of the fault. This is called Freeze Frame Data.
- Select "Freeze Frame" from the menu.
- The scanner will display the recorded parameters.
6.4 I/M Readiness Status

Figure 6.2: Screen display showing "Trouble Codes" (P2122 - Throttle / Pedal Position Sensor / Switch D Circuit Low) and "I/M Readiness" status indicators for various monitors (MIL, DTC, MIS, FUE, EVAP, AIR, O2S, CCM, CAT, HRT, HCAT, EGR). This function allows for quick assessment of emission system status.
This function checks the readiness of the vehicle's emission monitoring systems. It indicates if all monitors have completed their diagnostic cycles.
- Select "I/M Readiness" from the menu.
- The display will show the status of various monitors (e.g., "OK" for complete, "INC" for incomplete).
6.5 Vehicle Information
Retrieve vehicle identification information such as VIN (Vehicle Identification Number), CID (Calibration ID), and CVN (Calibration Verification Number).
- Select "Vehicle Info" from the menu.
- The scanner will display the available vehicle information.
6.6 Oxygen Sensor Test (Mode 06)
This function retrieves oxygen sensor monitoring test results for the most recently completed tests from the vehicle's onboard computer.
- Select "O2 Sensor Test" from the menu.
- Review the test results.
6.7 On-Board Monitor Test (Mode 08)
This function allows access to the results of on-board diagnostic monitoring tests for specific components/systems that are not continuously monitored.
- Select "Mode 8 Test" or "EVAP Test" from the menu.
- Review the test results.
6.8 Battery Test (Voltage)

Figure 6.3: The V519 scanner displaying a real-time voltage reading of 12.7V, with an illustration of a car battery. This function allows for a quick check of the vehicle's battery voltage.
The V519 can display the real-time voltage of your vehicle's battery.
- Select "Voltage" from the main menu.
- The current battery voltage will be displayed on the screen.
6.9 DTC Lookup
This feature allows you to search for definitions of Diagnostic Trouble Codes directly on the device.
- Select "DTC Lib" or "Fault Code Query" from the menu.
- Enter the DTC using the navigation buttons and "OK" to confirm.
- The scanner will display the definition of the code.
6.10 Data Playback
Review previously recorded diagnostic data.
- Select "Data Playback" or "Review" from the menu.
- Choose the data set you wish to review.
6.11 Printing Function
The V519 supports printing diagnostic data. This typically requires connecting the scanner to a computer with specific software installed (not included) to facilitate printing.
- Connect the scanner to a computer via a USB cable (not included).
- Follow the instructions provided by the companion software for printing.

Figure 6.4: A grid displaying various OBDII functions of the V519, including Read DTC, Clear DTC, Freeze Frame, Vehicle Info, Live Data, I/M Readiness, EVAP (Mode 8), Mode 6, and O2 Sensor. Each function is represented by an icon and text.
7. Maintenance
- Cleaning: Use a soft, dry cloth to clean the device. Do not use abrasive cleaners or solvents.
- Storage: Store the scanner in a dry, cool place away from direct sunlight and extreme temperatures.
- Software Updates: The V519 supports firmware upgrades. Check the manufacturer's website for available updates to ensure optimal performance and compatibility with newer vehicles.
8. Troubleshooting
| Problem | Possible Cause | Solution |
|---|---|---|
| Scanner does not power on. | Loose connection to OBDII port; vehicle ignition off; vehicle not OBDII compliant. | Ensure the OBDII cable is securely connected. Turn vehicle ignition to "ON". Verify vehicle is OBDII compliant (most vehicles 1996 and newer). |
| Communication error with vehicle. | Incorrect protocol; faulty connection; vehicle's ECU issue. | Check connection. Ensure vehicle is OBDII compliant. Try on another OBDII compliant vehicle if possible. |
| Cannot clear DTCs. | Underlying fault still present; ignition not in "ON" position. | Address the root cause of the fault first. Ensure ignition is "ON" (engine off). |
| Screen is blank or frozen. | Software glitch; power interruption. | Disconnect and reconnect the scanner. If issue persists, check for firmware updates. |
9. Specifications
| Product Model | V519 |
| Working Voltage | DC 12-16V |
| Working Current | 48-72mA |
| Operating Environment | -20°C to 65°C (-4°F to 149°F) |
| Storage Temperature | -30°C to 70°C (-22°F to 158°F) |
| Product Size | 155 x 87 x 24mm |
| Screen Size | 2.8 inches |
| Supported Protocols | OBDII/EOBD (9 standard protocols) |
| Supported Languages | English, German, French, Italian, Dutch, Portuguese, Russian, Spanish, Japanese, Chinese |
| Fault Code Library | 35901 codes |
10. Warranty and Support
The XAUCY V519 OBD2 Scanner comes with a commitment to quality. For specific warranty details, please refer to the purchase documentation or contact your retailer. For technical support, firmware updates, or further assistance, please visit the official XAUCY website or contact their customer service department.
Protection plans are available for extended coverage. Please refer to your purchase options for details on 3-Year or 4-Year protection plans.


