1. Introduction
This manual provides essential information for the safe and efficient operation of your DXZ A3 UV DTF Printer with Laminator. Please read this manual thoroughly before using the device to ensure proper setup, operation, and maintenance.
Key Features:
- All-in-One UV DTF Printing & Laminating: Integrates printing and laminating processes for direct application onto A film and automatic lamination with B film.
- Dual XP600 Print Heads: Equipped with two Epson XP600 print heads for high-speed, high-resolution printing with 12-channel CMYKWV output.
- Versatile Application: Capable of creating decals for various surfaces including metal, wood, plastic, glass, and leather.
- White Ink Stirring & Auto Cleaning System: Features continuous white ink agitation and automatic cleaning functions to prevent nozzle blockages and extend print head lifespan.
- Compact Design: Space-saving design with accessible side panels for maintenance.
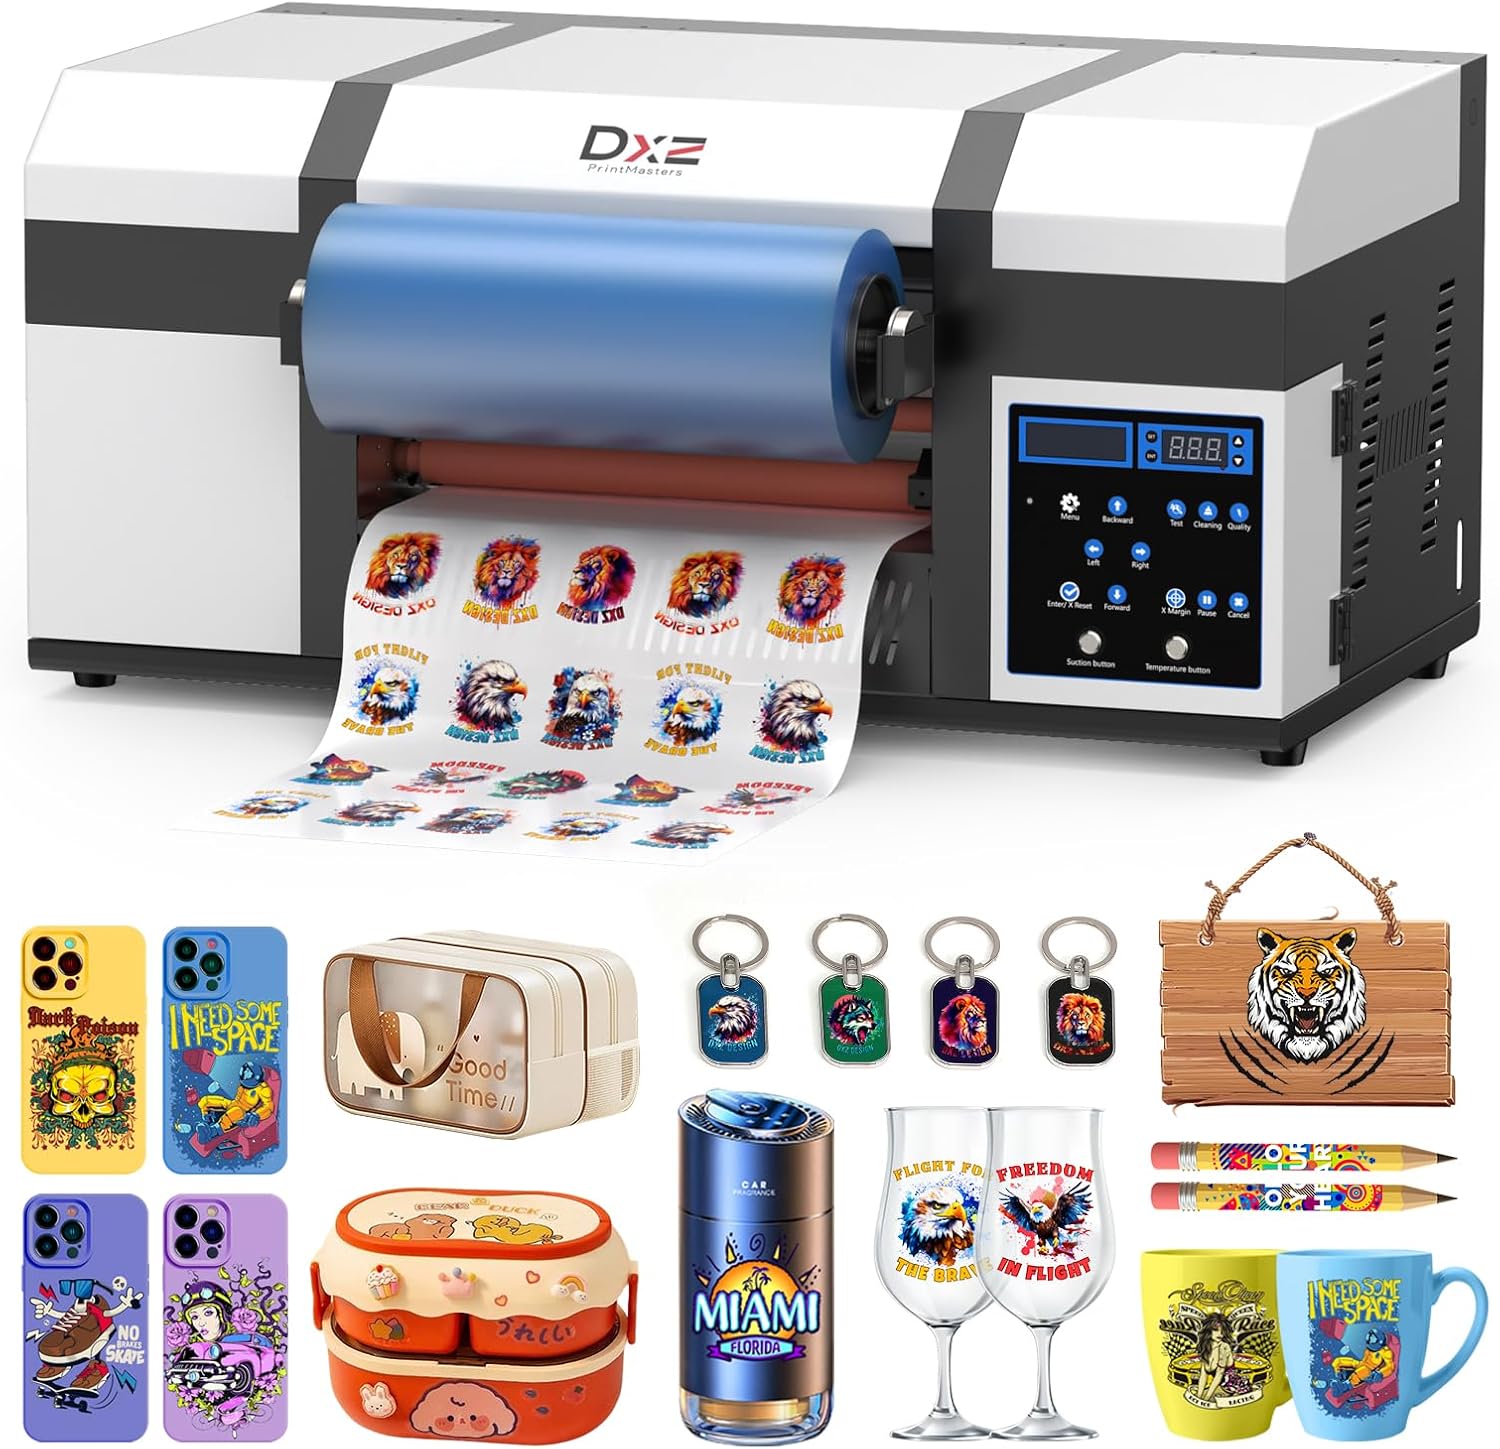
Image 1.1: DXZ A3 UV DTF Printer with examples of printed decals on various items.
2. Safety Information
Always observe the following safety precautions to prevent injury and damage to the printer:
- Ensure the printer is placed on a stable, level surface.
- Operate the printer in a well-ventilated area.
- Keep hands and loose clothing away from moving parts during operation.
- Do not expose the printer to direct sunlight, high temperatures, or excessive humidity.
- Use only DXZ-approved inks and cleaning solutions.
- Disconnect the power cord before performing any maintenance or cleaning.
3. What's in the Box
Upon unpacking, verify that all the following items are included:
- 1 x DXZ A3 UV DTF Printer with Laminator
- A Film Roll
- B Film Roll
- Set of UV Inks (CMYKWV)
- Cleaning Solution
- Power Cable
- USB Cable
- Software (RIP software)
- Instruction Manual
- Waste Ink Bottles
- Ink Sacks
- Waste Film Holder

Image 3.1: Overview of included accessories and components.
4. Product Overview and Components
Familiarize yourself with the main components and features of your DXZ A3 UV DTF Printer:

Image 4.1: Key functional areas of the printer.
- Multi-Function Control Panel: For navigating settings, initiating cleaning cycles, and controlling printer movement.
- Suction Platform System: Ensures stable film feeding during printing.
- Printhead Air Cooling System: Dissipates heat for stable print quality and extended printhead life.
- Ink Chain System: Protects ink lines, reduces wear, and lowers maintenance costs.
- One-Touch Auto Cleaning: Prevents white ink from settling and solidifying, ensuring consistent printing.
- White Ink Stirring System: Continuously agitates white ink to maintain consistency.
- Automatic Waste Film Collection: Collects used film for a cleaner workspace.

Image 4.2: Dual XP600 Printheads for enhanced precision and speed.

Image 4.3: All-in-One Integrated Design combining film peeling, printing, and lamination.

Image 4.4: Advanced UV Multi-Layer Printing process, including adhesive, white base, color, and varnish layers.
5. Setup Instructions
5.1 Initial Printer Placement and Connections
- Unpack the printer and place it on a sturdy, level surface in a well-ventilated area.
- Connect the power cable to the printer and a grounded electrical outlet.
- Connect the USB cable from the printer to your computer.
- Install the provided RIP software on your computer according to the software installation guide.
5.2 Ink Installation
- Carefully open the ink bottle caps.
- Fill the corresponding ink tanks with the correct UV inks (CMYK, White, Varnish). Ensure no cross-contamination.
- Close the ink tank caps securely.
- Perform an initial ink prime cycle as instructed by the printer's control panel or software.
5.3 Film Roll Installation
Follow these steps to properly install the A and B film rolls:

Image 5.1: Step-by-step diagram for installing the A and B film rolls.
- First, install the A film. Feed the adhesive layer into the machine, and the protective layer into the waste film collection holder.
- Next, pass the inner layer of the B film through the laminating device and align it with the adhesive layer of the A film.
6. Operating Instructions
The DXZ A3 UV DTF Printer simplifies the decal creation process into four main steps:
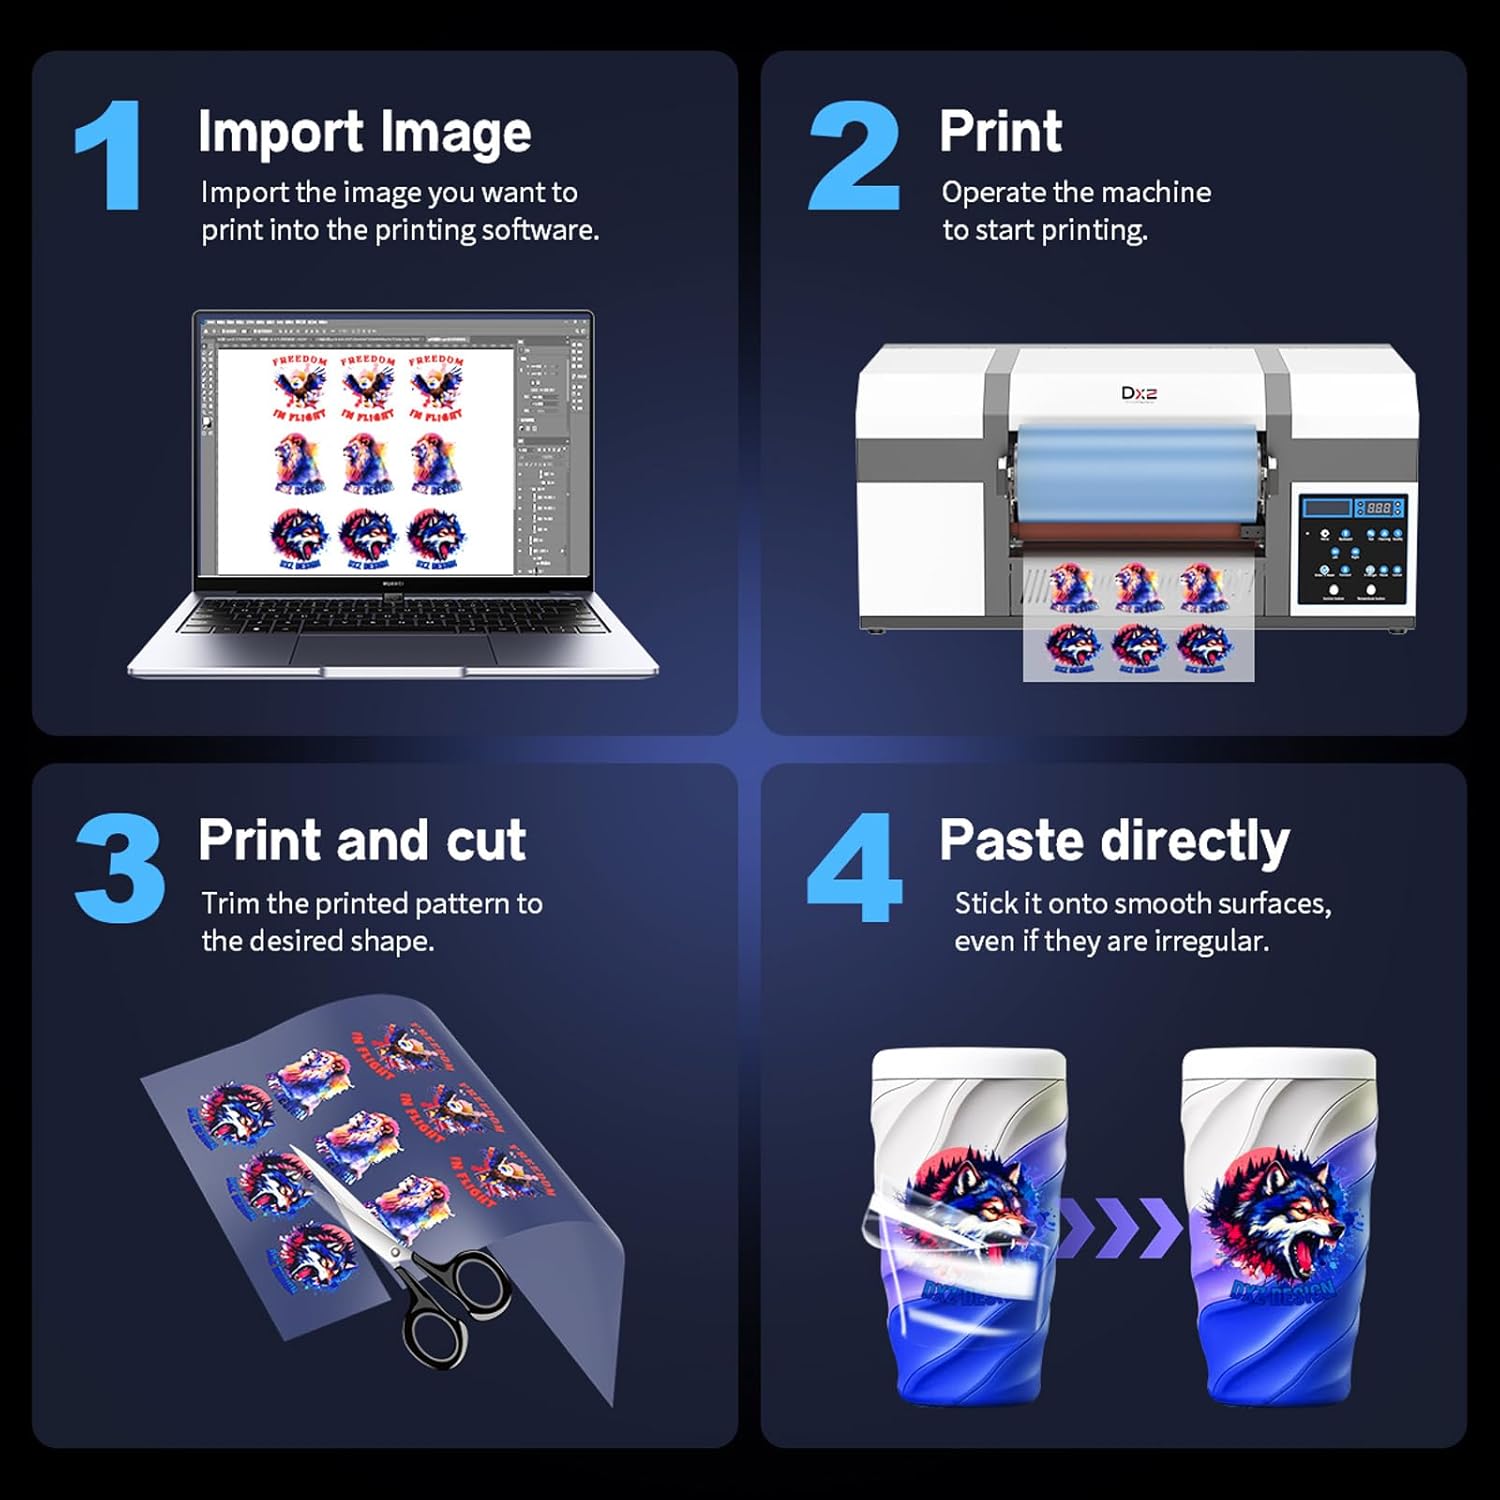
Image 6.1: Visual guide to the UV DTF printing and application process.
- Import Image: Import the desired image into the printing software (RIP software).
- Print: Operate the machine to start printing the design onto the A film. The printer will automatically laminate with the B film.
- Trim and Cut: Once printed and laminated, trim the pattern to the desired shape using scissors or a cutting tool.
- Paste Directly: Peel the decal from the film and stick it onto the target smooth surface.
7. Maintenance
Regular maintenance is crucial for optimal performance and longevity of your DXZ A3 UV DTF Printer.
7.1 Daily Maintenance
- Perform a nozzle check and head cleaning cycle daily or before each printing session.
- Ensure the white ink stirring system is active to prevent pigment settling.
- Wipe down the printer's exterior with a soft, lint-free cloth.
7.2 Weekly Maintenance
- Clean the printhead surface and capping station using a cleaning swab and cleaning solution.
- Inspect the ink lines for any blockages or leaks.
- Empty the waste ink tank as needed.
7.3 Long-Term Storage
If the printer will not be used for an extended period, perform a thorough cleaning cycle and follow the manufacturer's guidelines for printhead protection and storage.
8. Troubleshooting
This section addresses common issues you might encounter. For more complex problems, please contact customer support.
8.1 Common Printing Issues
- Poor Print Quality / Streaks: Perform a nozzle check and head cleaning. Check ink levels. Ensure printheads are not clogged.
- Ink Not Flowing: Verify ink tank levels. Check for air bubbles in ink lines. Ensure ink stirring system is functioning.
- Film Feeding Issues: Ensure film rolls are correctly installed and aligned. Check for any obstructions in the film path.
8.2 Software/Connectivity Issues
- Printer Not Detected: Ensure USB cable is securely connected. Reinstall printer drivers and RIP software. Restart both printer and computer.
- Software Errors: Refer to the RIP software manual for specific error codes. Ensure your operating system is compatible and updated.
9. Specifications
Technical specifications for the DXZ A3 UV DTF Printer:

Image 9.1: Detailed printer parameters and dimensions.
| Feature | Detail |
|---|---|
| Model | A3 UV DTF Printer |
| Print Head | EPSON XP600 (2 Pcs) |
| Printing Size | 12.6 inch |
| Software | Atusums Rip |
| Ink Color | CMYK+WW+VVVVV (12-channel) |
| Printing Accuracy | 1440X1440dpi |
| Printing Speed | A3 size 6 minutes |
| Compatible System | Windows 7/8/9/10/11 |
| Product Dimensions | 34.2"D x 20.8"W x 24.8"H (86.8cm D x 52.8cm W x 63cm H) |
| Item Weight | 151 pounds (68.5 kg) |
| Package Size | 34.2" x 24.8" x 20.8" (86.8cm x 63cm x 52.8cm) |
| Package Weight | 165 lbs (75 kg) |
10. Warranty and Support
DXZ is committed to providing excellent customer service and support for your product.
10.1 Warranty Information

Image 10.1: Overview of warranty coverage.
- 1 Year Warranty: Covers non-consumable parts from the date of purchase.
- 6 Month Warranty: Applies to the printhead (up to 1 printhead).
10.2 Technical Support
For setup assistance, operational guidance, or troubleshooting, DXZ offers dedicated engineer support.

Image 10.2: Contact details for DXZ technical support.
- One-on-One Tech Support: Lifetime support is provided to guide you through setup and operation.
- Technical Support Phone: +86 1587-472-8347
- Email: printmasters1@outlook.com


