
KATOOL 450combo
KATOOL ME Tire Changer Machine and Wheel Balancer Combo (450combo) User Manual
Model: 450combo
Introduction
This manual provides essential instructions for the safe and efficient operation, maintenance, and troubleshooting of your KATOOL ME Tire Changer Machine and Wheel Balancer Combo (Model 450combo). Please read this manual thoroughly before installation and use to ensure proper function and to prevent injury or damage.
The KATOOL 450combo is designed for professional and home garage use, offering capabilities for both tire changing and wheel balancing. It features a tire changer with outside clamping (10"-19") and inside clamping (12"-21"), and a computer wheel balancer.
Important Safety Instructions
Failure to follow these safety instructions may result in serious injury or death.
- Always wear appropriate personal protective equipment (PPE), including safety glasses, gloves, and steel-toed boots.
- Ensure the machine is installed on a level, stable surface and securely anchored to the floor before operation.
- Disconnect power before performing any maintenance or adjustments.
- Keep hands, feet, and clothing clear of moving parts during operation.
- Do not exceed the maximum tire diameter and width specifications.
- Ensure proper tire inflation procedures are followed to prevent blowouts.
- Only trained personnel should operate this equipment.
- Keep the work area clean and well-lit.
- Refer to local safety regulations and guidelines.
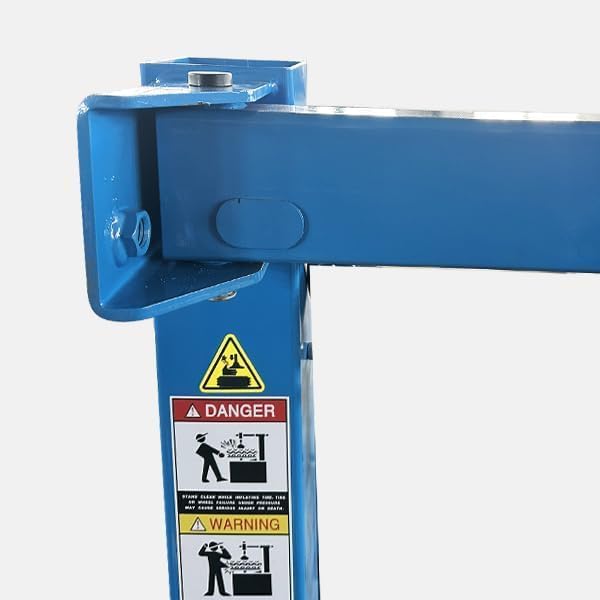
Image: Safety warning labels indicating potential hazards and precautions on the machine's column.
Package Contents
Upon receiving your KATOOL ME Tire Changer Machine and Wheel Balancer Combo, please verify that all components are present and undamaged.
- KATOOL ME Tire Changer Machine (ME-T450)
- KATOOL ME Wheel Balancer Machine (ME-620T)
- Mounting head (stainless steel)
- Spade cover
- Inflation gauge with pedal control
- Various accessories for tire changing and balancing (e.g., tire tools, cones, weights)
- User Manual

Image: The complete KATOOL ME Tire Changer and Wheel Balancer Combo, including the ME-T450 tire changer, ME-620T wheel balancer, and various tools and accessories.
Setup and Installation
1. Site Preparation
Choose a location with a solid, level concrete floor capable of supporting the weight of the machines and tires. Ensure adequate space around the machines for safe operation and movement.
2. Unpacking and Assembly
- Carefully unpack all components. Inspect for any shipping damage.
- Assemble the tire changer column and arm according to the diagrams. Ensure all bolts are securely tightened.
- Attach the mounting head. The mounting head is made of stainless steel and should be handled with care to avoid damage.
- Position the wheel balancer. It must be anchored to the floor and perfectly level for accurate balancing results.

Image: An illustrative diagram detailing the assembly and key dimensions of the KATOOL ME-T450 tire changer.
3. Electrical and Air Connections
- Connect the tire changer to a 110VAC power supply.
- Connect the air supply to the tire changer. The working pressure should be 0.8MPA.
- Connect the wheel balancer to its designated power supply.
Operating Instructions: Tire Changer (ME-T450)
1. Mounting and Demounting Tires
- Positioning the Wheel: Place the wheel on the turntable. The adjustable clamps can accommodate outside clamping (10"-19") and inside clamping (12"-21").
- Clamping the Wheel: Use the foot pedals to engage the clamps, securing the wheel firmly to the turntable.
- Bead Breaking: Position the tire against the bead breaker spade. Apply pressure using the foot pedal to break the tire bead from the rim. The bead breaker force is 5500 LBS.
- Mounting/Demounting: Swing the mounting arm into position. Use the mounting head and appropriate tire tools to carefully remove or install the tire. The mounting head is designed with a plastic cover to protect the rim.
- Inflation: Use the integrated inflation gauge with pedal control to inflate the tire to the manufacturer's recommended pressure.

Image: The KATOOL ME-T450 tire changer in operation, showing a tire being mounted onto a wheel.
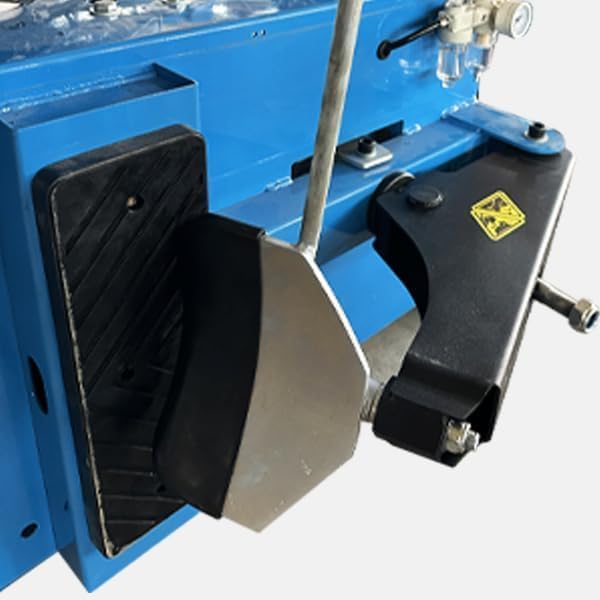
Image: A close-up view of the adjustable clamps on the turntable of the KATOOL tire changer, demonstrating their adaptability for various tire sizes.
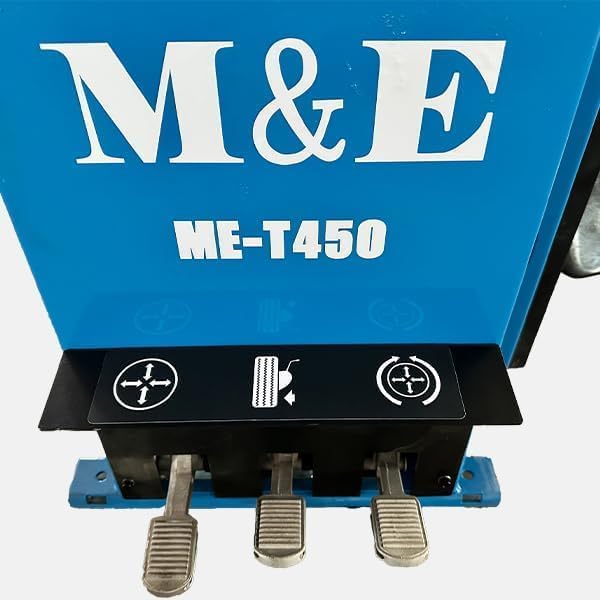
Image: The foot pedals of the KATOOL ME-T450 tire changer, used for controlling clamping, bead breaking, and turntable rotation.
Operating Instructions: Wheel Balancer (ME-620T)
1. Preparing for Balancing
- Mounting the Wheel: Securely mount the wheel onto the balancer's shaft using the appropriate cone and wing nut.
- Inputting Data: Use the control panel to input the wheel's diameter, width, and offset. Refer to the wheel manufacturer's specifications.

Image: The KATOOL ME-620T computer wheel balancer, showing the digital display and control buttons for data input and operation.
2. Balancing Procedure
- Start Cycle: Close the wheel guard (if applicable) and press the START button. The machine will spin the wheel and measure imbalances.
- Reading Results: The display will show the required weight and its location on both the inner and outer sides of the rim.
- Applying Weights: Attach the specified balance weights to the indicated positions on the rim.
- Re-check: Spin the wheel again to confirm proper balance. Repeat if necessary until the display shows zero or minimal imbalance.
Maintenance
Regular maintenance ensures the longevity and optimal performance of your KATOOL equipment.
- Daily: Clean the machines after each use. Remove any tire debris, dust, or grease.
- Weekly: Inspect all moving parts, bolts, and connections for wear or looseness. Tighten as needed.
- Monthly: Lubricate pivot points and moving components as recommended in the detailed maintenance schedule (refer to full manual for specifics). Check air lines and fittings for leaks.
- Motor: The motor features pure copper winding for durability. Ensure it is kept free from excessive dust and debris to facilitate heat dissipation.
- Mounting Head: The stainless steel mounting head is corrosion-resistant. Keep it clean and inspect for any damage to the plastic rim protection cover.
Troubleshooting
| Problem | Possible Cause | Solution |
|---|---|---|
| Tire Changer not powering on | No power supply; tripped circuit breaker; faulty wiring. | Check power connection; reset breaker; inspect wiring (contact qualified technician if needed). |
| Bead breaker not functioning | Insufficient air pressure; air leak; mechanical obstruction. | Verify air supply and pressure (0.8MPA); check air lines; clear obstructions. |
| Inaccurate balancing results | Machine not level; incorrect wheel data input; dirty wheel/rim. | Ensure balancer is level and anchored; re-enter wheel data accurately; clean wheel and rim thoroughly. |
| Excessive noise during operation | Loose components; lack of lubrication; worn bearings. | Inspect and tighten all fasteners; lubricate moving parts; contact support for worn component replacement. |
For issues not listed here, or if troubleshooting steps do not resolve the problem, please contact KATOOL customer support.
Specifications
KATOOL ME Tire Changer (ME-T450)
- Rim Clamping (Outside): 10" - 19"
- Rim Clamping (Inside): 12" - 21"
- Max. Tire Diameter: 960mm / 38"
- Max. Tire Width: 410mm / 17"
- Table Top Rotation Speed: 6 RPM
- Bead Breaker Force: 5500 LBS
- Working Pressure: 0.8 MPA
- Motor Power: 0.75kW - 1.1kW
- Working Noise: <70dB
- Gearbox Motor: 110V/220V/380V, 50/60Hz (Note: Specific voltage depends on model variant)
- Dimensions: 39" x 33" x 37"
- Shipping Weight: 510 LBS / 230 KG
KATOOL ME Wheel Balancer (ME-620T)
- Type: Computer Balancer
- Power: Powerful motor for strong motivation and low noise.
- Further detailed specifications for the balancer are not provided in the source data. Please refer to the full product documentation for complete details.
Warranty and Support
KATOOL products are designed for durability and performance. For warranty information, technical support, or to order replacement parts, please contact KATOOL customer service through their official website or the retailer where the product was purchased.
Protection plans are available for extended coverage:
- 2-Year Protection Plan
- 3-Year Protection Plan
Please retain your proof of purchase for warranty claims.
Related documents450combo


Ask a question about this manual
Ask about setup, troubleshooting, compatibility, parts, safety, or missing instructions. Manuals+ will review the question and use this page’s manual context to help answer it.