
1. Introduction
This manual provides detailed instructions for the operation and maintenance of your Bewinner Solar Powered DAB+ Radio. This versatile device combines DAB/DAB+ and FM radio reception with Bluetooth 5.0 connectivity, a 3W stereo speaker, and playback capabilities from USB drives and SD cards. Its integrated solar panel and 1200mAh battery make it suitable for home use, travel, and emergency preparedness.
2. Safety Information
- Do not expose the device to extreme temperatures, direct sunlight for prolonged periods (beyond charging), or high humidity.
- Avoid dropping or subjecting the radio to strong impacts.
- Do not disassemble or attempt to repair the device yourself. Refer all servicing to qualified personnel.
- Keep the device away from water and other liquids.
- Use only the specified charging cable and power adapter (if applicable) to prevent damage.
- Ensure proper ventilation when charging or operating the device.
3. Package Contents
Please check the package for the following items:
- Bewinner Solar Powered DAB+ Radio
- USB Charging Cable
- User Manual (this document)

Image: The Bewinner Solar Powered DAB+ Radio shown with its included USB charging cable.
4. Product Overview
Familiarize yourself with the various components and controls of your radio.

Image: Rear view of the radio highlighting the large solar charging panel, which allows for power replenishment using sunlight.

Image: Front view of the radio, emphasizing the speaker grille and display. The internal strong magnetic speaker is designed to produce clear audio.
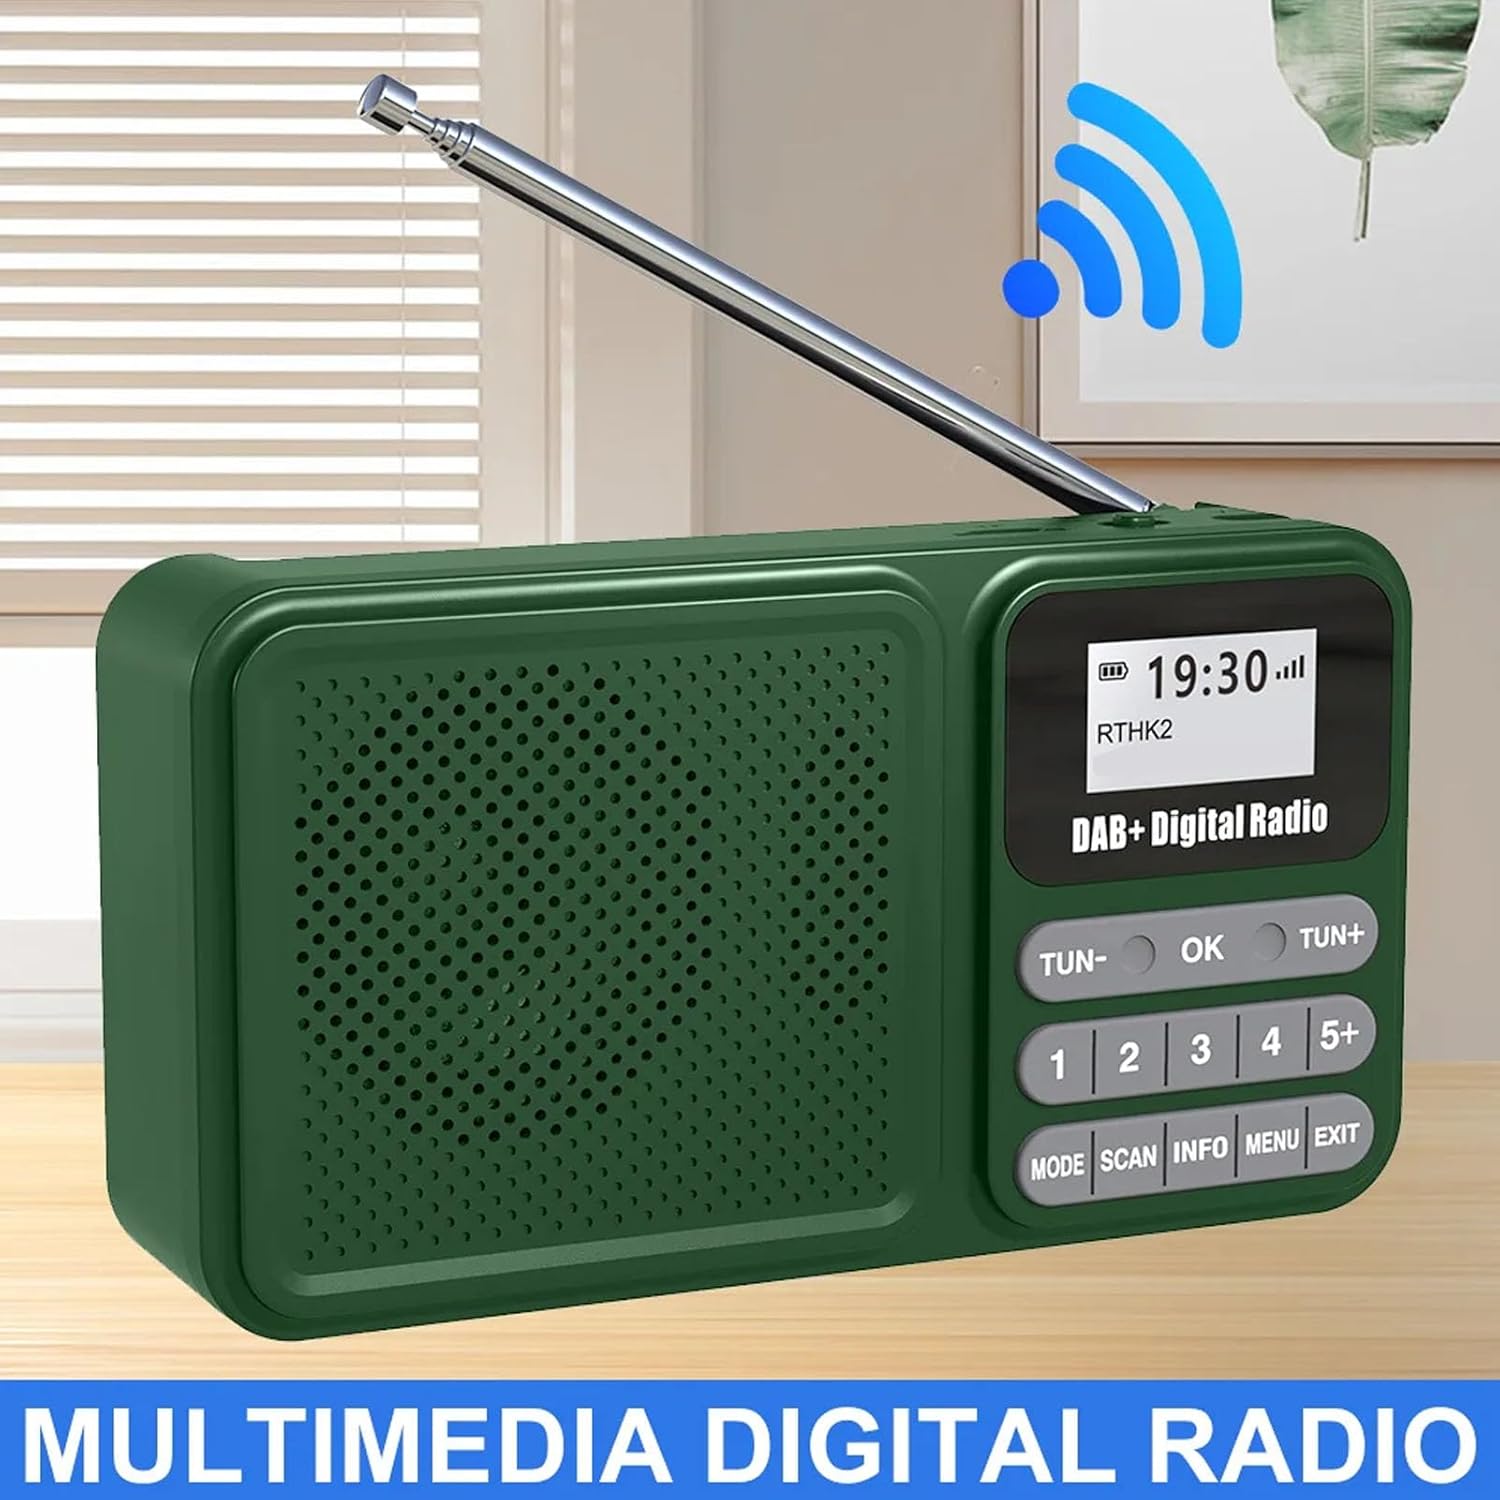
Image: A general front view of the radio with its antenna extended, showcasing its digital display and control buttons.

Image: The radio shown wirelessly connected to a smartphone via Bluetooth, demonstrating its capability as a Bluetooth speaker.

Image: A close-up view of the radio's telescopic antenna, illustrating its 360-degree rotation for optimal signal reception.

Image: Side view of the radio, pointing out the audio jack, USB port for playback, and the Type-C interface for charging.
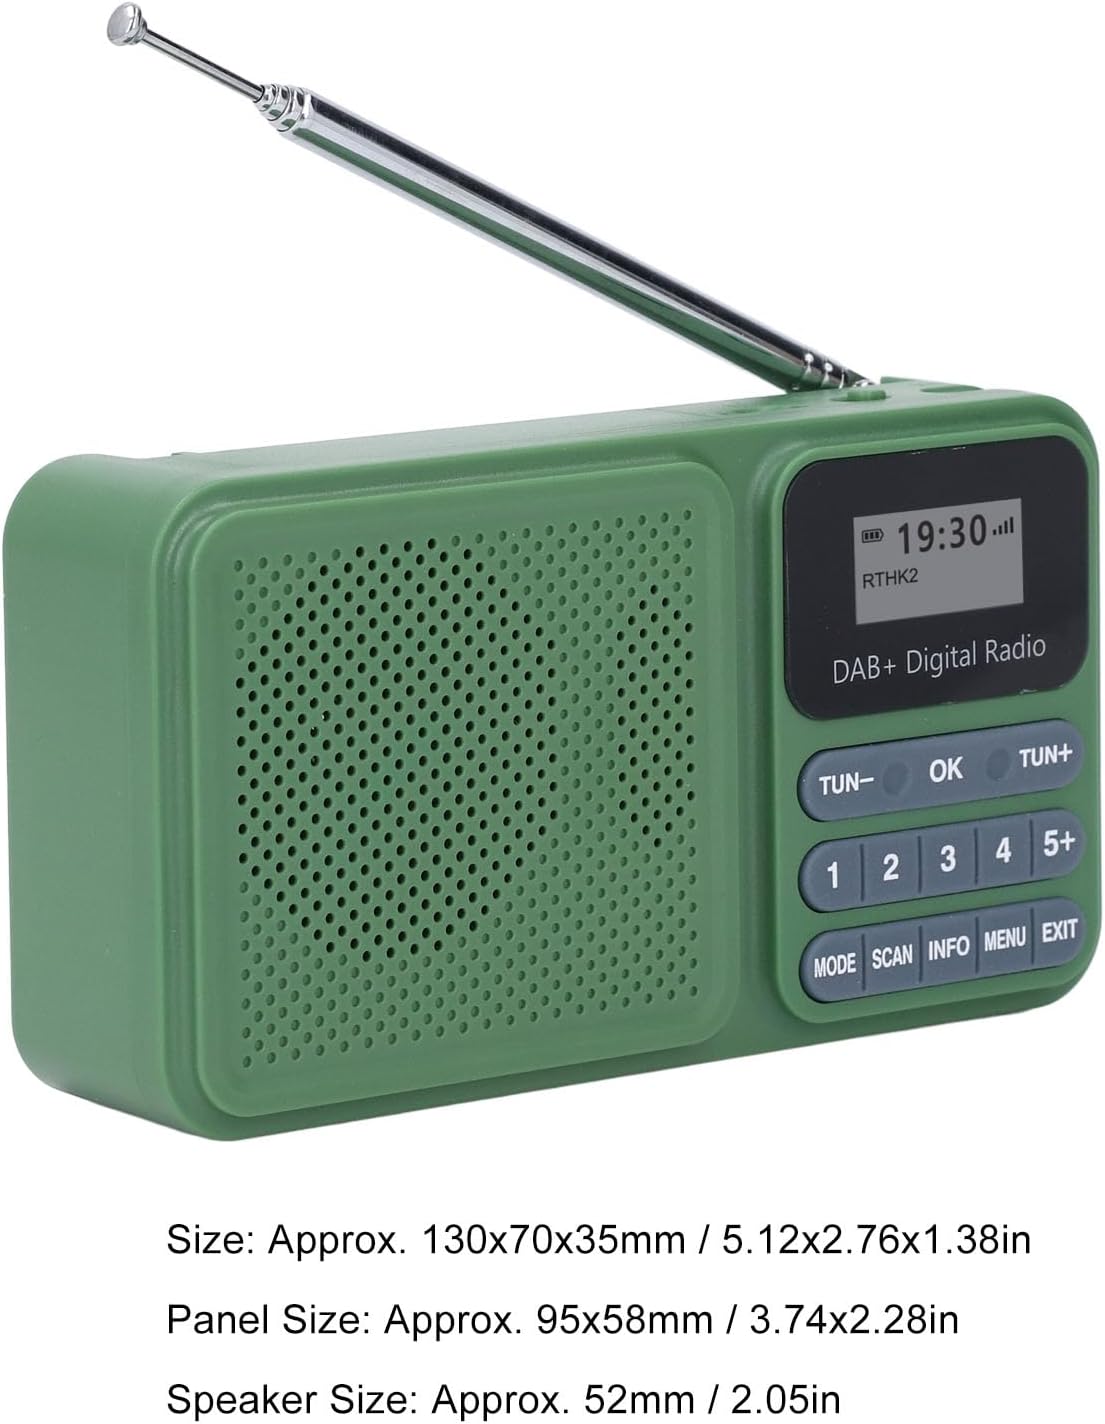
Image: The radio displayed with its approximate dimensions: 130x70x35mm (5.12x2.76x1.38 inches).
5. Setup
5.1 Initial Charging
Before first use, fully charge the radio's internal 1200mAh battery. Connect the provided USB Type-C cable to the radio's Type-C port and the other end to a standard USB power adapter (not included) or a computer's USB port. The charging indicator will show the charging status. A full charge typically takes several hours.
5.2 Solar Charging
For solar charging, place the radio with its solar panel facing direct sunlight. Ensure no obstructions block the panel. Solar charging is slower than USB charging and is ideal for maintaining battery life or for emergency power in outdoor settings.
Video: A short clip demonstrating the radio's solar charging capability in an outdoor environment, highlighting its portability and suitability for adventures.
5.3 Antenna Adjustment
Extend the telescopic antenna fully for optimal radio reception. Adjust its angle and direction for the best signal clarity, especially in DAB and FM modes.
6. Operating Instructions
6.1 Power On/Off
To power on the radio, slide the ON/OFF switch to the ON position. The display will illuminate. To power off, slide the switch to the OFF position.
6.2 Mode Selection
Press the MODE button repeatedly to cycle through available modes: DAB Radio, FM Radio, Bluetooth, USB Playback, and SD Card Playback.
6.3 DAB/DAB+ Radio Operation
- Switch to DAB mode using the MODE button.
- Press the SCAN button to perform an automatic scan for available DAB/DAB+ stations. The radio will store all found stations.
- Use the TUN- or TUN+ buttons to navigate through the list of available stations.
- To save a station as a preset, tune to the desired station, then press and hold one of the numbered preset buttons (1-5+). The display will confirm the preset has been saved. To recall a preset, simply press the corresponding numbered button.
- Press INFO to view station information (e.g., program type, signal strength).
6.4 FM Radio Operation
- Switch to FM mode using the MODE button.
- Press and hold the SCAN button to auto-scan and save FM stations. Alternatively, short press TUN- or TUN+ for manual tuning, or press and hold for auto-scan to the next strong station.
- Saving and recalling presets works similarly to DAB mode.
6.5 Bluetooth Pairing
- Switch to Bluetooth mode using the MODE button. The radio will enter pairing mode, indicated by a flashing Bluetooth icon on the display.
- On your smartphone or other Bluetooth device, enable Bluetooth and search for available devices.
- Select "Bewinner Radio" (or similar name) from the list to pair. Once paired, the radio will emit a confirmation sound, and the Bluetooth icon will stop flashing.
- You can now play audio from your connected device through the radio.
6.6 USB/SD Card Playback
- Insert a USB drive into the USB port or an SD card into the SD card slot.
- Switch to USB or SD mode using the MODE button. The radio will automatically detect and begin playing compatible audio files.
- Use the TUN- and TUN+ buttons to skip tracks.
6.7 Volume Control
Adjust the volume using the rotary volume knob located on the side of the radio. Rotate clockwise to increase volume (V+) and counter-clockwise to decrease volume (V-).
7. Maintenance
- Clean the radio with a soft, dry cloth. Do not use abrasive cleaners or solvents.
- Keep the solar panel clean to ensure efficient charging.
- When not in use for extended periods, store the radio in a cool, dry place and charge it periodically to maintain battery health.
8. Troubleshooting
| Problem | Possible Cause | Solution |
|---|---|---|
| Radio does not power on. | Battery is depleted. | Charge the radio using the USB Type-C cable or place it in direct sunlight for solar charging. |
| Poor radio reception. | Antenna not extended or poor signal area. | Fully extend and adjust the telescopic antenna. Try moving to a different location with better signal. |
| Bluetooth device cannot pair. | Radio not in pairing mode or device too far. | Ensure the radio is in Bluetooth mode and the Bluetooth icon is flashing. Move your device closer to the radio. Restart both devices. |
| USB/SD playback not working. | Incompatible file format or card/drive not inserted correctly. | Ensure audio files are in a compatible format (e.g., MP3). Reinsert the USB drive or SD card. Check if the radio is in the correct playback mode. |
9. Specifications
| Feature | Detail |
|---|---|
| Model Number | Bewinner24no1gx983 |
| Radio Modes | DAB, DAB+, FM |
| Bluetooth Version | 5.0 |
| Speaker Output | 3W Stereo |
| Playback Options | USB Drive, SD Card |
| Preset Stations | 30 (DAB/FM combined) |
| Battery Capacity | 1200mAh |
| Battery Life | Up to 8 hours continuous playback |
| Charging | USB Type-C, Solar Panel |
| Product Dimensions | 5.51 x 3.14 x 1.96 inches (130 x 70 x 35 mm) |
| Item Weight | 10.6 ounces |
10. Warranty and Support
For warranty information and technical support, please refer to the documentation provided at the time of purchase or contact Bewinner customer service through the retailer where the product was purchased. Keep your proof of purchase for warranty claims.