
1. Product Overview
The JetsBath Freestanding Outdoor Shower Faucet Set, Model JBFS110-MB, is designed for outdoor use in various environments such as backyards, gardens, poolsides, and beaches. Constructed from durable SUS316 stainless steel, it offers resistance to corrosion and harsh weather conditions. This system includes a wide rain shower head and an ergonomic handheld shower for a versatile showering experience.
Key Features:
- Robust Construction: Crafted from brass and SUS316 stainless steel for durability and corrosion resistance. Features a multi-layer electrophoresis process and a glazed surface to reduce fingerprints and limescale.
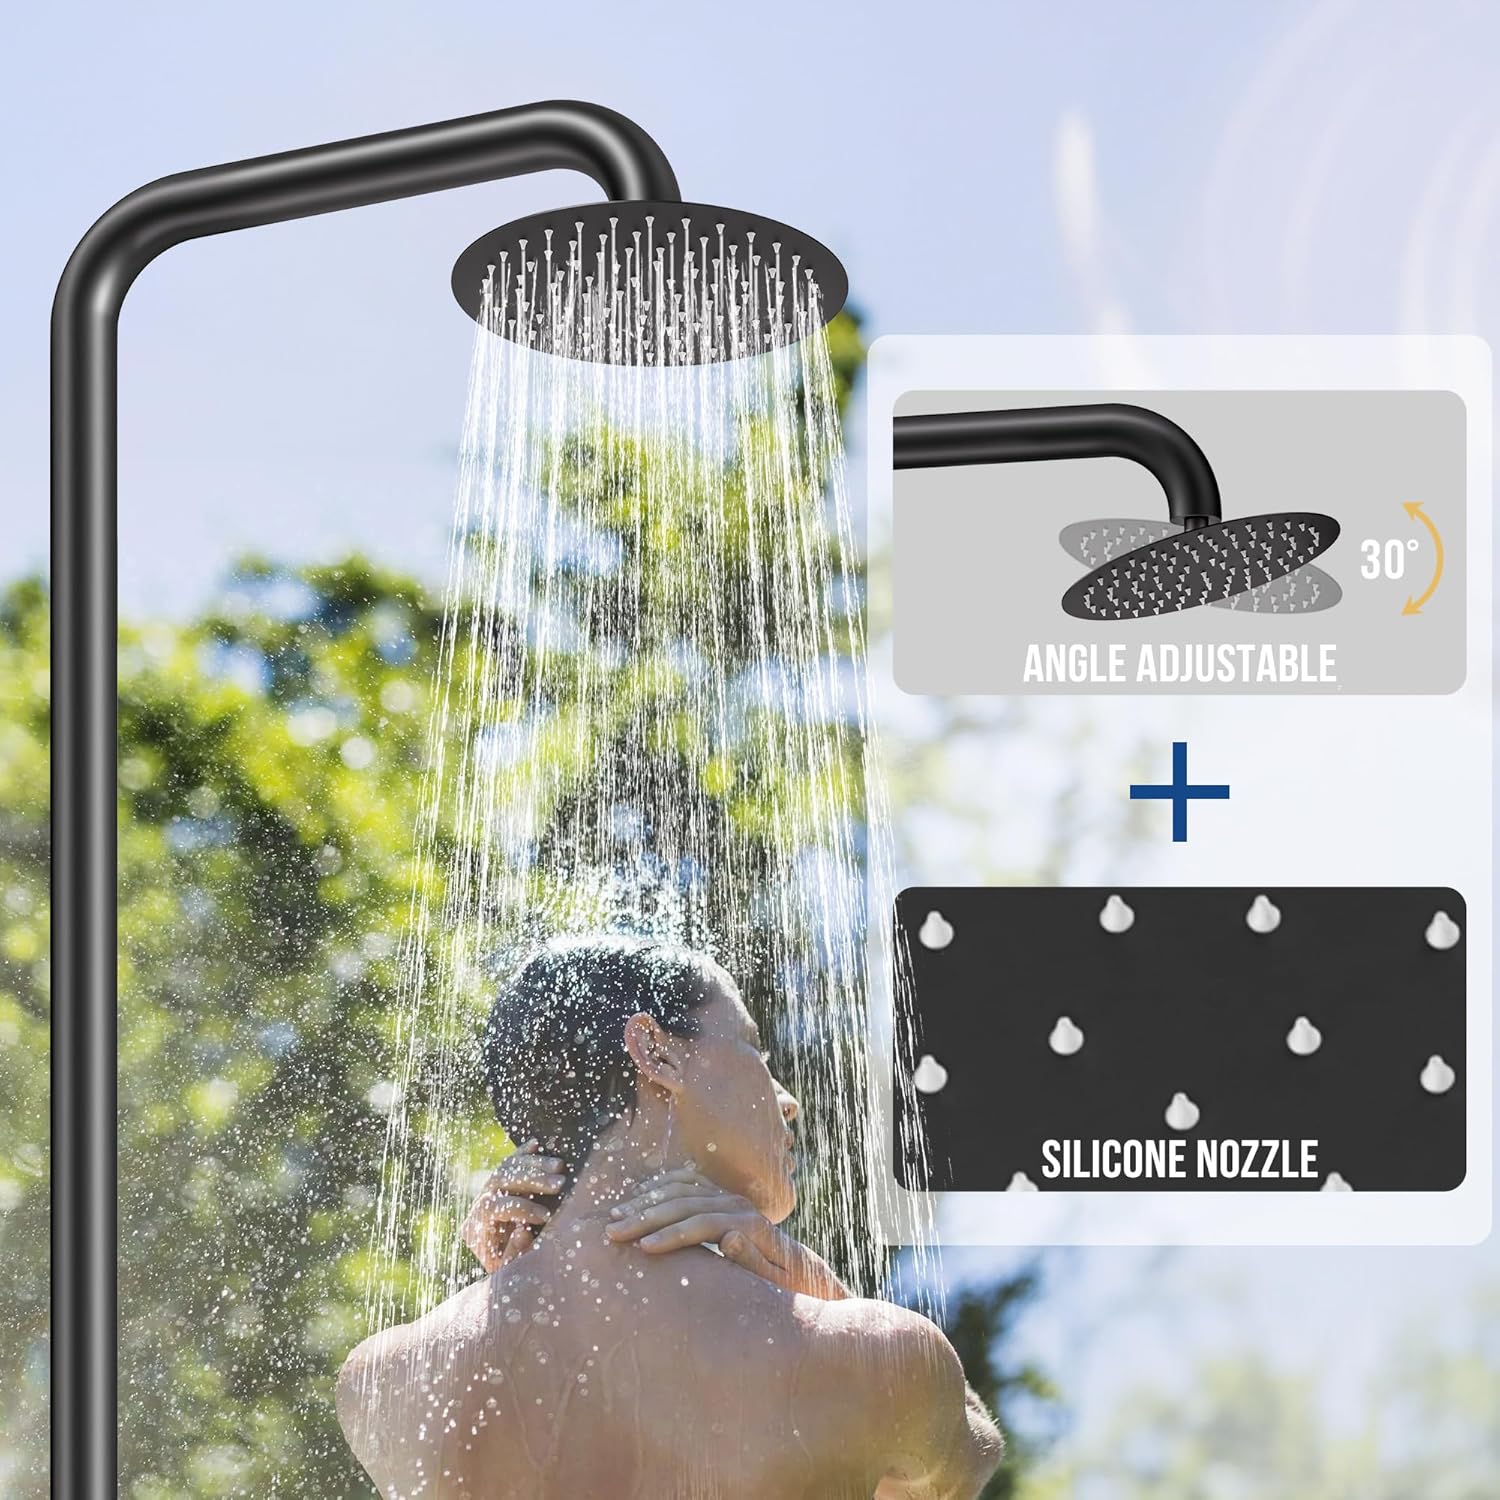
- Wide Pressure Boost Showerhead: A 10-inch showerhead provides full-body coverage with easy-to-clean silicone nozzles, ensuring high-pressure rain shower even in low water pressure environments.
- Ergonomic Handheld Shower: Pressurized handheld shower with a cylindrical grip and adjustable angle bracket for comfortable handling and targeted rinsing.
- cUPC Certified Cartridge: Reliable ceramic cartridge withstands outdoor environments, extreme cold, rapid temperature changes, and rainwater corrosion, ensuring smooth temperature and flow control.
- Easy Installation and Application: Comes with inlet pipes and 1/2" NPT connection threads, and a bottom mixing valve body for simple and quick installation.

2. Important Safety Information
Please read all instructions carefully before installation and use. Failure to follow these instructions may result in property damage, personal injury, or death.
- Ensure all local plumbing and building codes are met during installation.
- Turn off the main water supply before beginning any installation or maintenance.
- Do not use harsh chemicals or abrasive cleaners on the shower surface, as this may damage the finish.
- Protect the unit from freezing temperatures during winter months to prevent damage to pipes and internal components.
- Keep children and pets away from the installation area.
- Always test water temperature before stepping under the shower to prevent scalding or thermal shock.
3. Package Contents
Verify that all components are present and undamaged before beginning installation. If any parts are missing or damaged, contact customer support.
- 10" Shower Head
- Curved Pipe
- Straight Pipe (Short)
- Straight Pipe (Long)
- Flex Supply Hose
- Hot & Cold Supply Pipes
- Control Valve
- Decorative Cover
- Handheld Shower Head
- 59" Shower Hose
- Floor Mount Mixing Valve
- Elbows for Mixing Valve
- Valve Mounting Kit
4. Technical Specifications
| Feature | Specification |
|---|---|
| Brand | JetsBath |
| Model Number | JBFS110-MB |
| Color | Matte Black |
| Material | Stainless Steel (SUS316) |
| Finish Type | Matte |
| Number of Handles | 2 |
| Mounting Type | Free Standing |
| Flow Rate | 1.8 GPM |
| Maximum Pressure | 60 PSI |
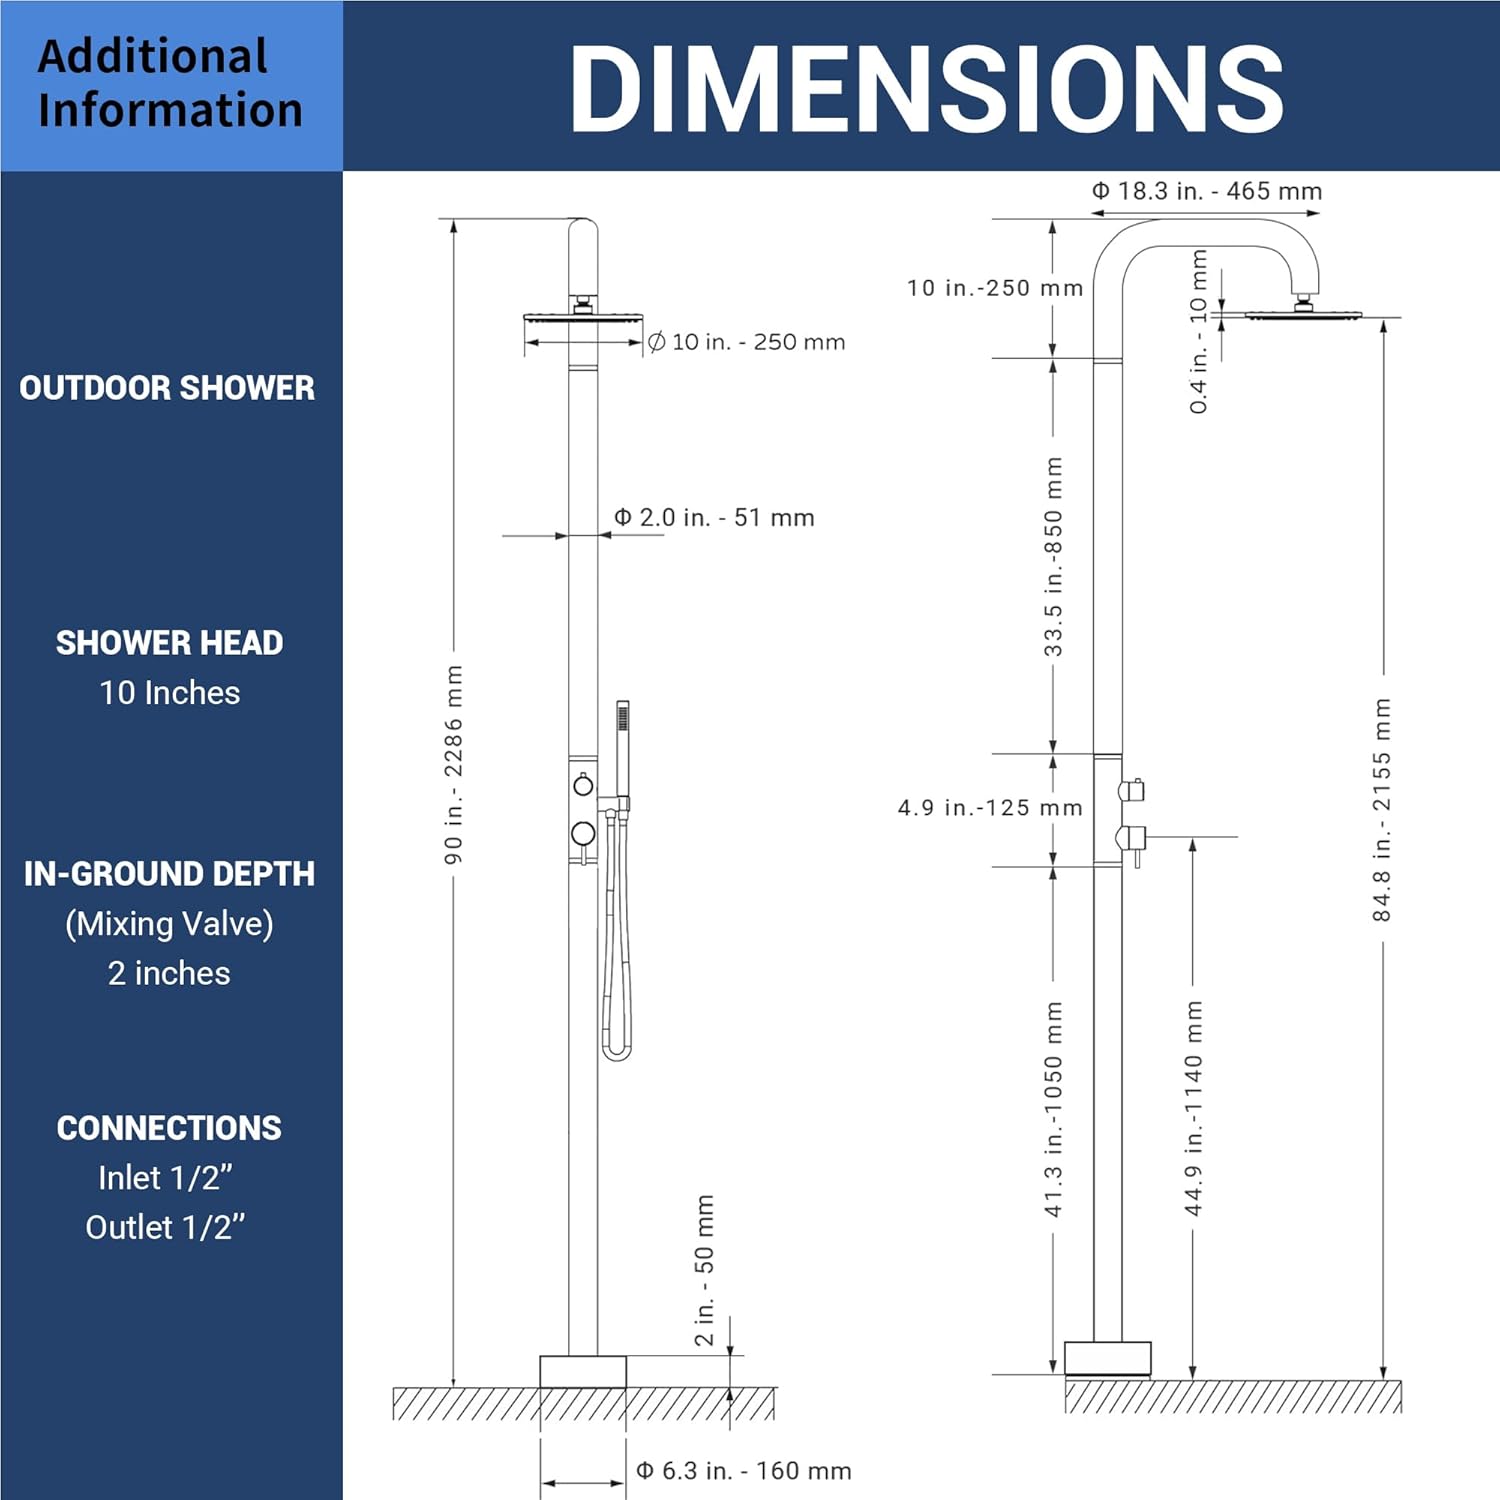
| Shower Head Size | 10 inches |
| Inlet/Outlet Connections | 1/2" NPT |
| Handheld Hose Length | 59 inches |
Refer to Figure 2 for detailed dimensions of the shower unit.
5. Setup and Installation
Pre-Installation Checklist:
- Ensure you have all necessary tools (e.g., wrench, pipe sealant, measuring tape).
- Confirm the installation location has adequate drainage and a stable, level surface.
- Verify access to hot and cold water supply lines with 1/2" NPT connections.
- Turn off the main water supply before starting.
Installation Steps:
- Prepare the Installation Site: Dig a suitable trench or prepare the ground for the floor mount mixing valve. Ensure the area is level and provides proper drainage.
- Install the Floor Mount Mixing Valve: Position the floor mount mixing valve (part 11 in Figure 2) in the desired location. Connect the hot and cold water supply lines to the 1/2" NPT inlet threads on the valve. Secure the valve using the provided valve mounting kit (part 13).
- Assemble the Shower Column: Connect the straight pipes (parts 3 and 4) to the curved pipe (part 2) and the main shower body. Ensure all connections are tight and sealed.
- Attach the Shower Head: Secure the 10" shower head (part 1) to the curved pipe.
- Connect Supply Pipes: Route the hot and cold supply pipes (part 6) from the floor mount mixing valve up through the shower column to the control valve (part 7).
- Install Control Valve and Handles: Attach the control valve (part 7) to the shower column and connect the handles.
- Install Handheld Shower: Connect the 59" shower hose (part 10) to the handheld shower head (part 9) and to the outlet on the control valve.
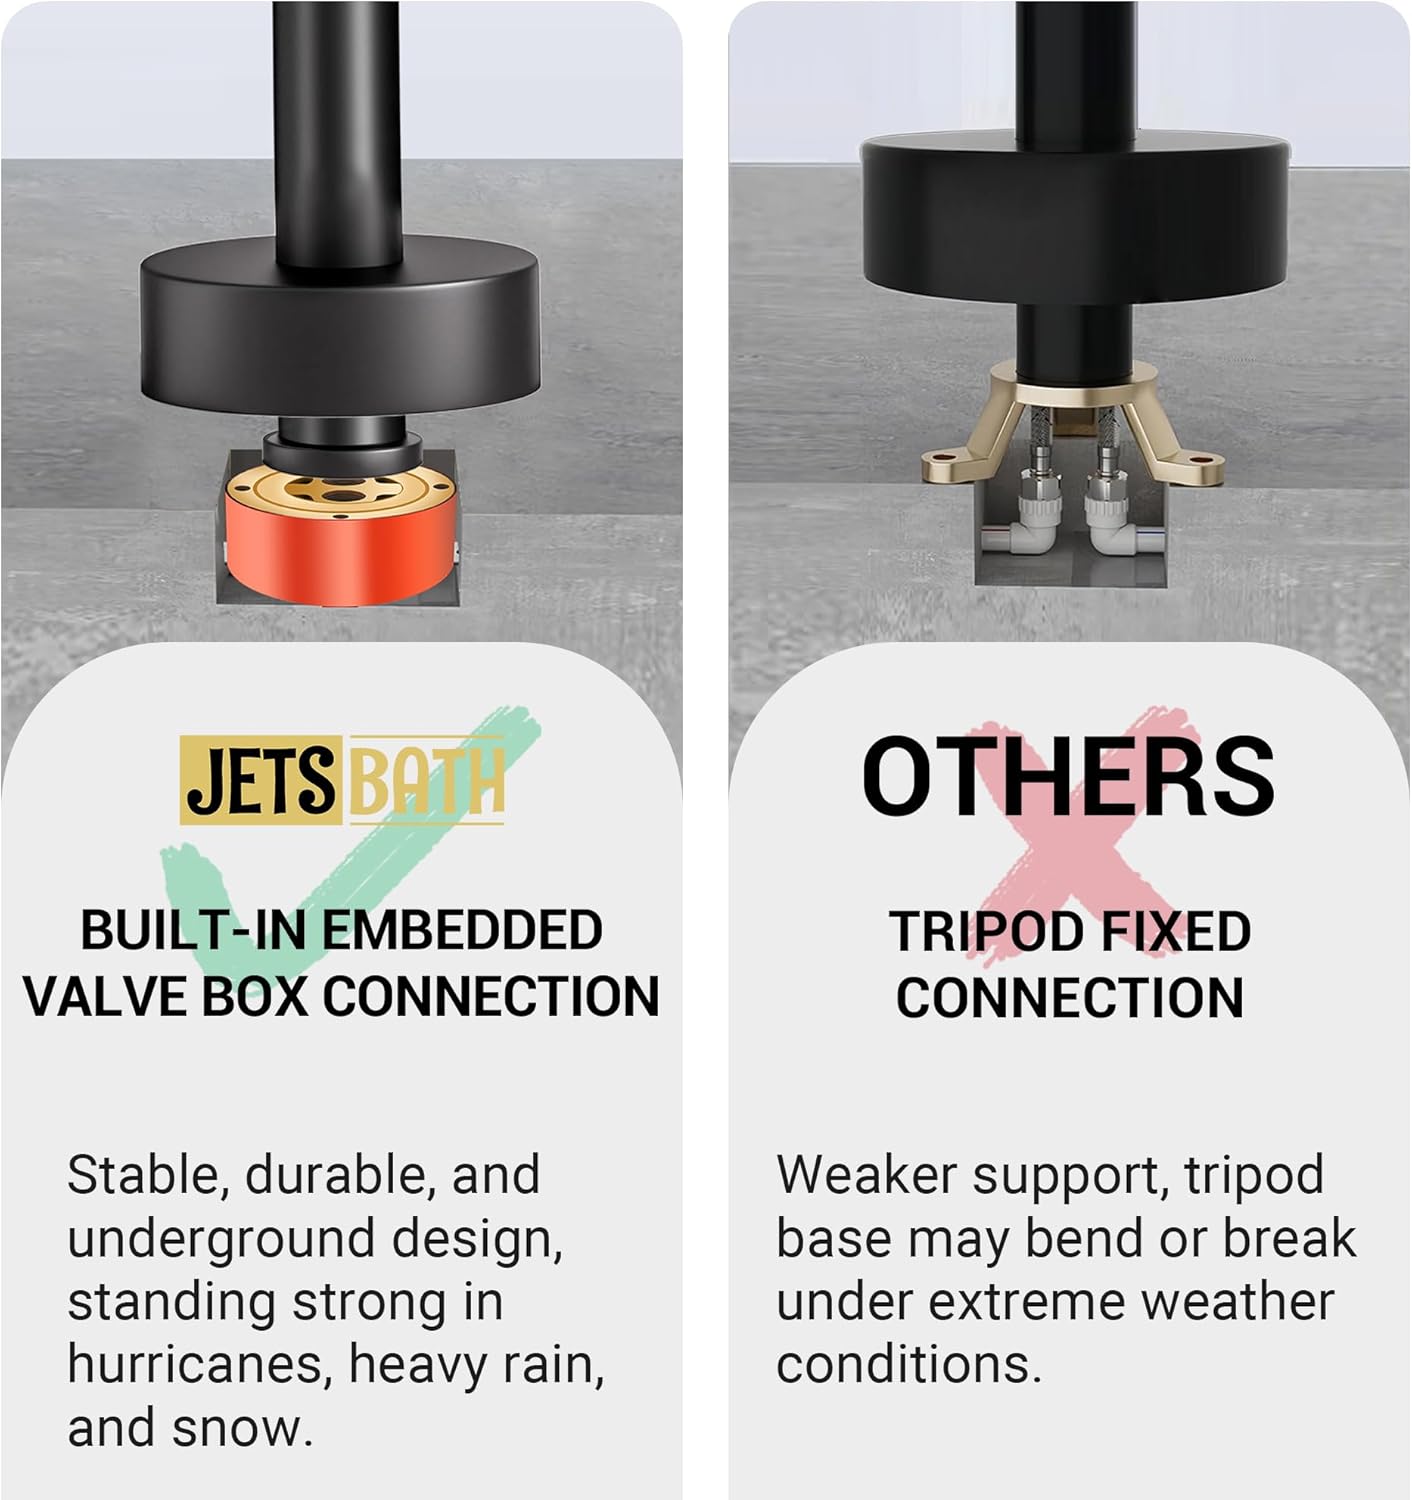
- Secure the Unit: Ensure the entire shower column is securely mounted and stable. The built-in embedded valve box connection provides stability against outdoor elements.
- Test for Leaks: Slowly turn on the main water supply and check all connections for leaks. Address any leaks immediately.

6. Operating Instructions
Temperature and Flow Control:
The shower features two handles for controlling water temperature and flow. Turn the handles to adjust the mix of hot and cold water to achieve your desired temperature. The cUPC certified ceramic cartridge ensures smooth and precise control.
Rain Shower Head:
To activate the rain shower head, turn the diverter knob to the shower head position. The 10-inch wide showerhead provides a refreshing, rain-like experience. The showerhead is angle adjustable for optimal coverage.
Handheld Shower:
To use the handheld shower, turn the diverter knob to the handheld shower position. The ergonomic design and adjustable angle bracket allow for comfortable and targeted rinsing, ideal for washing off sand or bathing pets.
7. Maintenance
Cleaning:
- Clean the shower regularly with a soft cloth and mild soap and water.
- Avoid abrasive cleaners, scouring pads, or harsh chemicals, as these can damage the matte black finish and stainless steel.
- The silicone nozzles on the showerhead are easy to clean; simply rub them to dislodge any mineral buildup.
- The glazed surface helps reduce fingerprints and limescale buildup, making cleaning easier.
Winterization:
For regions with freezing temperatures, proper winterization is crucial to prevent damage:
- Turn off the water supply to the outdoor shower.
- Open both hot and cold water handles on the shower to drain all water from the system.
- Disconnect the supply lines if possible and ensure all water is expelled.
- Store the handheld shower head and hose indoors if easily detachable.
- Consider using an air compressor to blow out any remaining water from the pipes.
Long-Term Care:
Periodically inspect all connections for tightness and signs of wear. The freestanding valve design allows for individual component replacement, simplifying maintenance.

8. Troubleshooting
This section addresses common issues you might encounter with your outdoor shower.
| Problem | Possible Cause | Solution |
|---|---|---|
| Low Water Pressure | Partially closed water supply valve; mineral buildup in showerhead nozzles. | Ensure water supply valves are fully open. Clean showerhead silicone nozzles by rubbing them. |
| Water Leaks from Connections | Loose connections; worn seals or O-rings. | Tighten all connections. If leaks persist, replace seals or O-rings. Use plumber's tape on threaded connections. |
| Inconsistent Water Temperature | Issue with hot/cold water supply; faulty ceramic cartridge. | Check hot and cold water supply lines. If problem persists, the cUPC certified ceramic cartridge may need inspection or replacement. |
| Diverter Not Switching Properly | Mineral buildup in diverter mechanism. | Flush the system. If necessary, disassemble and clean the diverter valve. |
9. Warranty and Customer Support
JetsBath products are manufactured to high-quality standards and are backed by a limited warranty. For specific warranty details, please refer to the warranty card included with your purchase or visit the official JetsBath website.
If you have any questions, require technical assistance, or need to order replacement parts, please contact JetsBath customer support:
- Website: Visit the JetsBath Store on Amazon
- Email: [Insert Customer Support Email Here, if available]
- Phone: [Insert Customer Support Phone Number Here, if available]
Please have your model number (JBFS110-MB) and purchase date ready when contacting support.