
Introduction
This manual provides detailed instructions for the installation, operation, and maintenance of your G.Skill GM3 ATX RGB PC Case. Please read this manual thoroughly before beginning assembly to ensure proper setup and optimal performance. This mid-tower PC case is designed for high-performance builds, offering extensive cooling support and versatile component compatibility.

Figure 1: G.Skill GM3 ATX RGB PC Case, showcasing its sleek black design and illuminated front RGB fans.
Setup Guide
Follow these steps for the proper assembly and installation of components within your G.Skill GM3 PC case.
1. Unpacking and Inspection
Carefully remove the PC case from its packaging. Inspect for any signs of damage during transit. Ensure all accessories, including screws, standoffs, and cable ties, are present.
2. Removing Panels
To access the interior, remove the tempered glass side panel and the rear metal side panel. The tempered glass panel is typically secured with thumb screws at the corners. The metal side panel slides off after removing its rear screws.
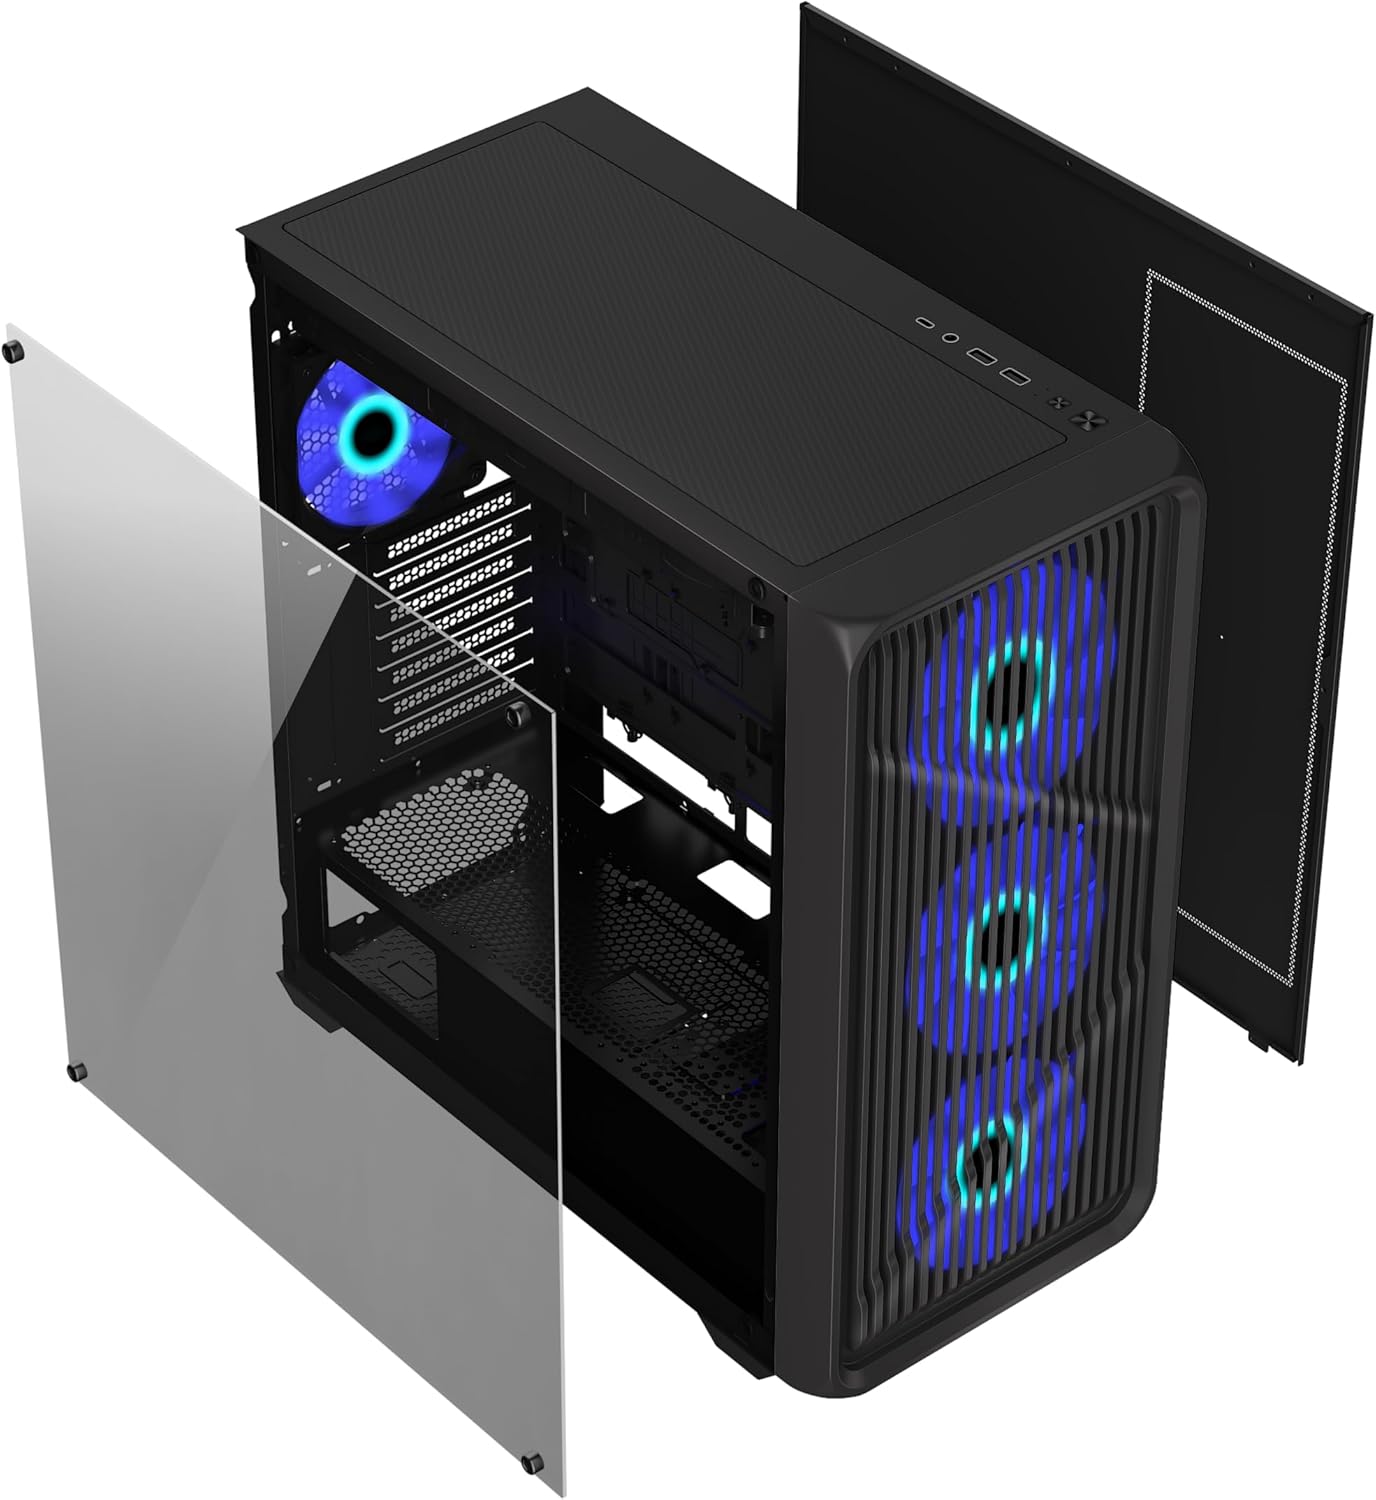
Figure 2: Exploded view illustrating the removal of the tempered glass side panel and the front panel for component installation and maintenance.
3. Motherboard Installation
Install the appropriate standoffs for your ATX or Micro ATX motherboard. Carefully align your motherboard with the standoffs and the I/O shield opening, then secure it with screws.

Figure 3: Interior view of the G.Skill GM3 case, showing the spacious layout for motherboard and component installation.
4. Power Supply Unit (PSU) Installation
Mount your PSU into the dedicated shroud at the bottom rear of the case. Secure it with screws from the rear of the case.
5. Storage Drive Installation
The case supports two 3.5" HDDs and two 2.5" SSDs. Install 3.5" drives in the drive cage located under the PSU shroud. 2.5" SSDs can be mounted on dedicated trays behind the motherboard tray.
6. Graphics Card (GPU) Installation
Remove the necessary expansion slot covers. Insert your graphics card into the PCIe slot on your motherboard and secure it with the provided screws.
7. Cooling System Installation (Optional)
The GM3 case supports up to 12 fans and radiators up to 360mm on the front and top. Install additional fans or liquid cooling radiators as desired. Ensure proper airflow direction for optimal cooling.

Figure 4: Internal layout highlighting various fan mounting points for enhanced airflow and cooling configurations.
8. Cable Management
Utilize the cable routing cutouts and tie-down points behind the motherboard tray to manage cables. This improves airflow and aesthetics.
9. Front I/O Connections
Connect the front panel cables (USB 3.2 Gen1, USB 3.2 Gen2 Type-C, audio, power, reset, LED) to the corresponding headers on your motherboard. Refer to your motherboard manual for header locations.
Operating Instructions
Once all components are installed and connected, you can power on your system.
Powering On
Press the power button located on the front I/O panel. The RGB fans will illuminate, and your system should begin to boot.
Front I/O Ports
The front panel provides convenient access to:
- 2 x USB 3.2 Gen1 ports
- 1 x USB 3.2 Gen2 Type-C port
- 1 x 2-in-1 Audio Jack (Headphone/Microphone)
These ports allow for easy connection of peripherals, external storage, and audio devices.
Maintenance
Regular maintenance helps ensure optimal performance and longevity of your PC case.
Dust Filter Cleaning
The G.Skill GM3 case features dust filters to prevent dust buildup inside your system. Regularly clean these filters to maintain optimal airflow and cooling efficiency.
- The front panel dust filter can be accessed by removing the front panel.
- The top panel typically has a magnetic dust filter that can be easily removed and cleaned.
- The PSU dust filter is located at the bottom of the case and slides out for cleaning.

Figure 5: Detached front panel and dust filter, demonstrating ease of access for cleaning and maintenance of the pre-installed RGB fans.
General Cleaning
Use a soft, dry cloth to wipe down the exterior surfaces of the case. For the tempered glass panel, use a glass cleaner and a microfiber cloth to avoid streaks.
Troubleshooting
This section addresses common issues you might encounter.
No Power / System Not Booting
- Ensure the power supply unit (PSU) is switched on at the back.
- Verify all power cables (24-pin ATX, CPU, GPU) are securely connected to the motherboard and components.
- Check front panel power button connection to the motherboard.
- Confirm the wall outlet is functional.
Fans Not Spinning / RGB Not Lighting Up
- Check fan power connections to the motherboard or fan controller.
- Verify RGB connections to the motherboard's RGB header or dedicated RGB controller.
- Ensure fan control software or BIOS settings are correctly configured.
Poor Airflow / Overheating
- Clean all dust filters regularly.
- Ensure fans are installed in the correct orientation for optimal airflow (intake/exhaust).
- Verify no cables are obstructing airflow paths inside the case.
- Consider adding more fans or upgrading to a liquid cooling solution if temperatures remain high.
Specifications
Detailed technical specifications for the G.Skill GM3 ATX RGB PC Case.
| Feature | Specification |
|---|---|
| Brand | G.SKILL |
| Model Name | GM3 |
| Item Model Number | GC-AKGW5-GM3 |
| Case Type | Mid Tower |
| Motherboard Compatibility | ATX, Micro ATX |
| Dimensions (LxWxH) | 16.34"D x 8.85"W x 18.5"H (415 x 225 x 470 mm) |
| Material | Tempered Glass, Steel |
| Color | Black |
| Pre-installed Fans | 4 x RGB Fans (typically 3 front, 1 rear) |
| Max Fan Support | Up to 12 fans |
| Radiator Support | Up to 360mm (Front, Top), Rear, Motherboard Side |
| Front I/O Ports | 2 x USB 3.2 Gen1, 1 x USB 3.2 Gen2 Type-C, 1 x 2-in-1 Audio Jack |
| 3.5" Drive Bays | 2 |
| 2.5" Drive Bays | 2 |
| Expansion Slots | 7 |
| Max GPU Length | 410mm |
| Max CPU Cooler Height | 160mm |
| Special Features | Built-In Fan, Dust Filter, Tempered Glass Panel |
Warranty and Support
For warranty information and technical support, please refer to the official G.SKILL website or contact their customer service directly. Keep your proof of purchase for warranty claims.
Official G.SKILL Website: www.gskill.com
For further assistance, you may also visit the G.SKILL Store on Amazon: G.SKILL Amazon Store