
Introduction
This manual provides detailed instructions for the LILYGO T-Embed SI4732 ESP32-S3 Development Board. It covers hardware overview, setup procedures, operational guidelines, programming information, and troubleshooting tips to help you effectively use your device.
Product Overview
The LILYGO T-Embed is a versatile development board featuring an ESP32-S3 dual-core microprocessor, integrated SI4732 radio receiver, a 1.9-inch IPS TFT LCD, microphone, and speaker. It supports Wi-Fi and BLE 5 connectivity, making it suitable for a wide range of embedded projects.
Key Features
- MCU: ESP32-S3 Dual-core LX7 microprocessor
- Wireless Connectivity: 2.4G Wi-Fi 802.11 b/g/n, BLE 5
- Radio Receiver: SI4732-A10 CMOS AM/FM/SW/LW/RDS radio receiver IC
- Display: 1.9 inch ST7789V IPS TFT LCD (170x320 resolution)
- Memory: 16MB Flash, 8MB PSRAM
- Audio: Integrated Microphone and Speaker
- Programming Platforms: Arduino-IDE, ESP-IDF
Component Identification
Familiarize yourself with the various components of the T-Embed board.
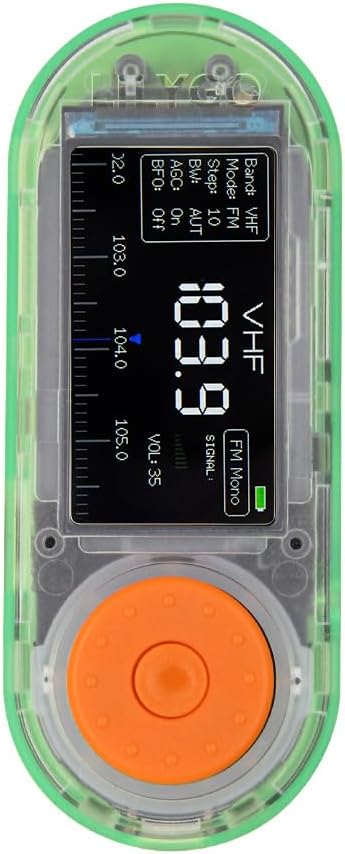
Figure 1: Front view of the LILYGO T-Embed, showing the 1.9-inch IPS TFT LCD and control knob.

Figure 2: Bottom view of the LILYGO T-Embed, highlighting the antenna connector.

Figure 3: LILYGO T-Embed SI4732 Pinmap, illustrating various connections including microphone, speaker, TF card slot, USB-C, and GPIO pins.
Specifications
| Feature | Detail |
|---|---|
| MCU | ESP32-S3 Dual-core LX7 microprocessor |
| Wireless Connectivity | 2.4G Wi-Fi 802.11 b/g/n, BLE 5 |
| Radio Receiver IC | SI4732-A10 (CMOS AM/FM/SW/LW/RDS) |
| Display | 1.9 inch ST7789V IPS TFT LCD, 170(H)x320(V) resolution |
| Flash Memory | 16MB |
| PSRAM | 8MB |
| Audio | Microphone, Speaker |
| Programming Platforms | Arduino-IDE, ESP-IDF |
| Connectivity | USB Type-C, GPIO |
| Supported Radio Bands | FM (64-108 MHz), AM (520-1710 KHz), SW (2.3-26.1 MHz), LW (153-279 KHz) |

Figure 4: Overview of LILYGO T-Embed's core specifications and supported radio bands.

Figure 5: Physical dimensions of the LILYGO T-Embed board and its telescopic antenna.
Setup Guide
- Unpacking: Carefully remove the LILYGO T-Embed board and included antenna from its packaging.
- Antenna Connection: Attach the provided telescopic antenna to the SMA connector located on the bottom of the board. Ensure it is securely fastened.

Figure 6: LILYGO T-Embed with the telescopic antenna connected.
- Power Supply: Connect the T-Embed to a power source using a USB Type-C cable. The USB-C port is located on the side of the board. This connection also allows for data transfer and programming.
- Initial Power-On: Once connected, the device should power on, and the 1.9-inch LCD will illuminate.
Operating Instructions
The LILYGO T-Embed typically comes with pre-installed firmware that allows for basic radio operation.
- Display: The 1.9-inch IPS TFT LCD shows current operating information, such as radio frequency, band, and signal strength.
- Control Knob: The integrated rotary encoder (control knob) is used for navigation and selection within the device's interface.
- Rotate: Turn the knob to scroll through options or adjust values (e.g., frequency, volume).
- Press: Press the knob to confirm a selection or toggle a setting.
- Antenna Extension: For optimal radio reception, extend the telescopic antenna fully.
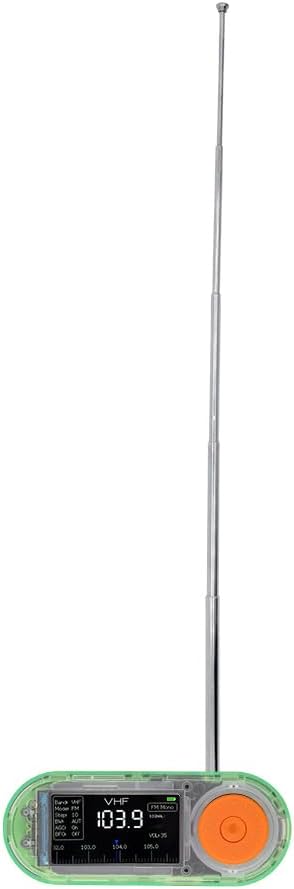
Figure 7: LILYGO T-Embed in operation with the antenna extended for improved reception.
Programming Information
The LILYGO T-Embed is a development board designed for custom applications. It supports programming using standard ESP32 development environments.
- Supported Platforms: The board is compatible with Arduino-IDE and ESP-IDF.
- Development Resources: For detailed programming guides, examples, and technical documentation, refer to the official LILYGO GitHub repository: github.com/Xinyuan-LilyGO/T-Embed.
- USB-C Interface: Use the USB Type-C port for flashing new firmware and serial communication during development.
Maintenance
- Cleaning: Use a soft, dry cloth to clean the device. Avoid using liquids or abrasive cleaners.
- Storage: Store the device in a cool, dry place away from direct sunlight and extreme temperatures.
- Antenna Care: Handle the telescopic antenna carefully to prevent bending or damage. Retract it when not in use or during transport.
Troubleshooting
- Device Not Powering On:
- Ensure the USB Type-C cable is securely connected to both the device and a working power source.
- Try a different USB-C cable or power adapter.
- Poor Radio Reception:
- Ensure the telescopic antenna is fully extended and securely connected.
- Move to an open area away from obstructions or sources of electromagnetic interference.
- Verify the correct radio band and frequency are selected.
- Display Issues:
- If the display is blank, check power connection.
- If the display shows unexpected behavior, a firmware re-flash might be necessary. Refer to the programming section.
- Programming Errors:
- Ensure correct drivers are installed for the USB-to-serial chip.
- Verify the correct board and port are selected in your IDE.
- Consult the LILYGO GitHub repository for common issues and solutions.
Support
For further assistance, technical inquiries, or suggestions regarding the LILYGO T-Embed, please refer to the official LILYGO resources or contact customer support.
- Online Resources: Visit the official LILYGO GitHub repository for documentation, code examples, and community support: github.com/Xinyuan-LilyGO/T-Embed.
- Customer Service: If you have specific product questions or require direct support, please contact the seller or LILYGO customer service.