Introduction
Thank you for choosing the TRIUMPHKEY Electric Height Adjustable Sit-Stand Desk. This desk is designed to provide a flexible and ergonomic workspace, allowing you to easily switch between sitting and standing positions throughout your day. This manual provides detailed instructions for assembly, operation, maintenance, and troubleshooting to ensure safe and optimal use of your new desk.

Image: The TRIUMPHKEY Electric Height Adjustable Sit-Stand Desk, designed for comfort and productivity.
Safety Information
Please read all safety instructions carefully before using the desk. Failure to follow these instructions may result in injury or damage to the product.
- Always activate the child safety system when the desk is not in use to prevent accidental operation.
- Ensure the automatic stop system functions correctly to prevent potential hazards, especially during height adjustments.
- Keep hands and objects clear of moving parts during operation.
- Do not overload the desk. The maximum load capacity is 80 kg.
- Ensure all cables are properly managed and do not interfere with the desk's movement.
- Do not sit or stand on the desk.
Package Contents
Before assembly, verify that all components listed below are present and undamaged. If any parts are missing or damaged, please contact customer support.

Image: All parts for easy installation, including tools.
- Desktop Panels (3 sections)
- Desk Legs (2)
- Foot Pads (2)
- Motor and Control Box
- Control Panel with Memory Functions
- Headphone Hook
- Assembly Hardware (screws, bolts, Allen wrench)
- Power Cable
- User Manual
Assembly Instructions
The TRIUMPHKEY desk is designed for straightforward assembly. All parts are pre-drilled, and detailed instructions are included in the package. Assembly typically takes less than 30 minutes.
- Unpack Components: Carefully remove all parts from the packaging and lay them out on a clean, soft surface to prevent scratches.
- Assemble Desk Frame: Attach the desk legs to the foot pads using the provided hardware. Ensure all connections are secure.
- Install Motor and Control Box: Mount the motor and control box to the designated positions on the desk frame according to the included diagrams.
- Attach Desktop Panels: Secure the three desktop panels to the assembled frame. Ensure they are aligned correctly and all screws are tightened.
- Connect Control Panel: Plug the control panel into the control box.
- Attach Headphone Hook: Install the headphone hook on the side of the desk as desired.
- Cable Management: Route all cables neatly using any provided cable ties or clips to prevent interference with desk movement.
- Power On: Connect the power cable to the control box and then to a power outlet.
Operating Instructions
Your TRIUMPHKEY desk features an intuitive control panel for easy height adjustment and memory functions.

Image: Multifunction control panel with memory settings.
Height Adjustment
- Raise Desk: Press and hold the Up Arrow button (▲) to raise the desk. Release the button when the desired height is reached.
- Lower Desk: Press and hold the Down Arrow button (▼) to lower the desk. Release the button when the desired height is reached.
- The desk can be adjusted between 71 cm and 119 cm.
- The motor operates quietly, with a noise level below 50 dB.
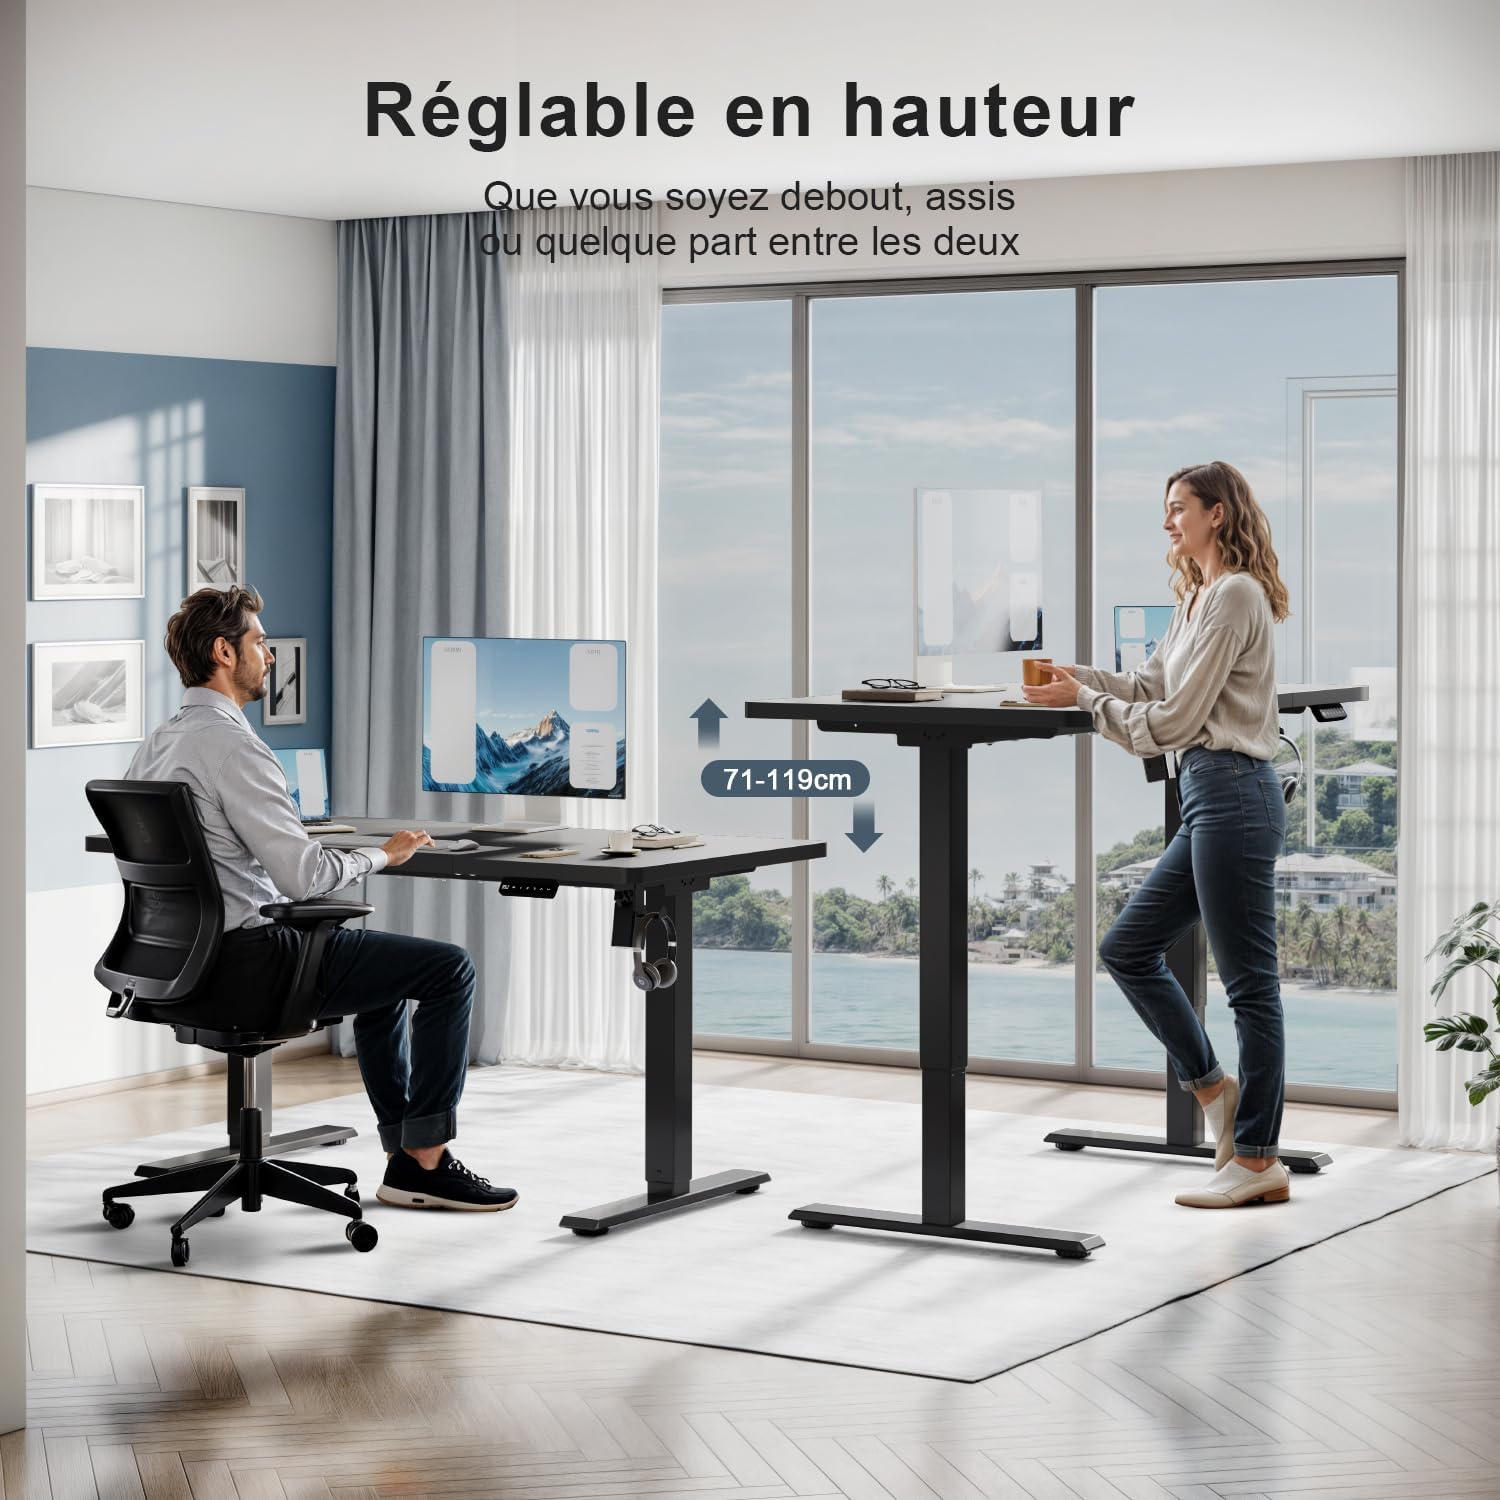
Image: Desk adjustable in height from 71 cm to 119 cm.
Memory Presets
The control panel allows you to save up to three preferred height settings.
- Set a Memory Position: Adjust the desk to your desired height using the Up/Down arrow buttons.
- Press the M button. The display will show "S-".
- Within 3 seconds, press one of the number buttons (1, 2, or 3). The display will show "S-1", "S-2", or "S-3" to confirm the position is saved.
- Recall a Memory Position: Simply press the corresponding number button (1, 2, or 3). The desk will automatically move to the saved height.
Child Safety Lock
To activate or deactivate the child safety lock, refer to the specific instructions in your included detailed manual. This feature prevents unintended height adjustments.
Maintenance
Regular maintenance ensures the longevity and optimal performance of your desk.
- Cleaning: Wipe the desk surface and frame with a soft, damp cloth. Avoid harsh chemicals or abrasive cleaners that could damage the finish.
- Check Connections: Periodically check all screws and bolts to ensure they are tight. Loose connections can affect stability.
- Cable Management: Ensure cables remain tidy and do not obstruct the desk's movement.
- Motor Care: The motor is maintenance-free. Do not attempt to open or lubricate it.
Troubleshooting
If you encounter any issues with your TRIUMPHKEY desk, please refer to the following common solutions. If the problem persists, contact customer support.
| Problem | Possible Cause | Solution |
|---|---|---|
| Desk does not move | Power cable disconnected; Child safety lock active; Overload. | Check power connection; Deactivate child safety lock; Reduce weight on desk. |
| Uneven height adjustment | Loose connections; Obstruction. | Check and tighten all screws; Remove any obstructions. |
| Desk stops during adjustment | Automatic stop system activated (anti-collision); Overheating. | Remove obstruction; Allow motor to cool down for 20 minutes. |
| Control panel unresponsive | Loose cable connection to control box. | Check and secure the control panel cable connection. |
Specifications
| Feature | Detail |
|---|---|
| Brand | TRIUMPHKEY |
| Model Number | HAD24-0788-110BK |
| Color | Black |
| Dimensions (L x W x H) | 110 x 60 x 71-119 cm |
| Weight | 16.6 Kilograms |
| Material | Engineered Wood (top), Industrial-grade Steel (frame) |
| Load Capacity | 80 kg |
| Height Adjustment Range | 71 cm to 119 cm |
| Noise Level | <50 dB |
| Special Features | Ergonomic, Height Adjustable, Electric, 3 Memory Presets, Headphone Hook, Anti-collision corners |
Warranty and Support
TRIUMPHKEY products are manufactured to high-quality standards. For warranty information or technical support, please refer to the documentation included with your purchase or contact TRIUMPHKEY customer service directly through the retailer where the product was purchased.
Please have your model number (HAD24-0788-110BK) and purchase date ready when contacting support.


