
Introduction
Thank you for choosing the Korfile 93" Two-Person Office Desk. This manual provides essential information for the safe assembly, operation, and maintenance of your new desk. Please read these instructions thoroughly before beginning assembly and retain them for future reference. This desk is designed to provide a spacious and functional workspace for two individuals, featuring integrated power outlets, LED lighting, removable storage drawers, and adjustable monitor stands.
Safety Information
- Weight Capacity: Do not exceed the maximum weight capacity of 180 pounds (approximately 81.6 kg) for the desktop. Distribute weight evenly.
- Assembly: Assemble the desk on a soft, clean surface to prevent scratches. Ensure all screws and fasteners are securely tightened before use. Periodically check and re-tighten fasteners as needed.
- Electrical Safety: The integrated power outlets are rated for 125V/12A. Do not overload the outlets. Ensure all electrical connections are dry and free from damage. Keep liquids away from power outlets.
- Stability: Use the adjustable feet to ensure the desk is stable on uneven floors. Do not climb or stand on the desk.
- Children: Keep small parts and packaging materials away from children. This product is not a toy.
Package Contents
Before assembly, verify that all components listed below are present and undamaged. If any parts are missing or damaged, please contact customer support.
- Desktop Panels (Engineered Wood)
- Metal Frame Components (Legs, Support Beams)
- Fabric Drawers (4 units)
- Monitor Stands (2 units)
- Integrated Power Outlet Unit (3 AC, 1 USB, 1 Type-C)
- LED Light Strips (2 units)
- Remote Control for LED Lights
- Assembly Hardware (Screws, Allen Wrench, etc.)
- Instruction Manual
Setup and Assembly Instructions
Follow these steps carefully for proper assembly. It is recommended to have two people for assembly.
- Prepare Workspace: Clear a spacious area and lay down a blanket or cardboard to protect the desk components and your floor.
- Identify Parts: Unpack all components and identify them using the provided parts list in the separate paper manual.
- Assemble Frame: Attach the metal legs to the main desktop panels using the provided screws. Ensure all connections are firm.
- Configure Desk Layout: This desk offers flexible configurations. Decide whether to assemble it as a long straight desk or an L-shaped desk. Refer to the diagrams below for visual guidance.

Figure 1: Desk Configuration Options and Dimensions. The image displays the overall dimensions of the desk in both straight and L-shaped configurations, highlighting its 92.91-inch length and various depth measurements.

Figure 2: Assembly Diagrams and Layout Variations. This image illustrates three different assembly possibilities for the desk, showing how the drawer unit and main desk sections can be arranged to form various layouts.
- Install Storage Unit: Attach the central storage unit, which houses the fabric drawers, according to your chosen configuration.
- Insert Drawers: Assemble the fabric drawers as shown in the diagram and slide them into the designated slots in the storage unit.

Figure 3: Fabric Drawer Assembly and Storage. This image provides a close-up of one of the four removable fabric drawers, detailing its dimensions (5.87"H x 8.39"W x 17.87"D) and a three-step visual guide for assembly.
- Attach Power Outlet: Secure the power outlet unit to the designated area on the desktop. Connect its power cord.
- Install LED Lights: Adhere the LED light strips to the underside of the monitor stands or desired locations on the desk. Connect them to the power source.
- Place Monitor Stands: Position the two removable monitor stands on the desktop as desired.
- Adjust Leveling Feet: Once the desk is in its final position, adjust the leveling feet at the bottom of the legs to ensure the desk is stable and level.
Operating Instructions
Power Outlets
The desk is equipped with a built-in power strip for convenient device charging and power access.
- AC Outlets: Use the 3 standard AC outlets for laptops, monitors, printers, or other electronic devices.
- USB Ports: The unit includes 1 USB-A port and 1 Type-C port for charging smartphones, tablets, and other USB-powered devices.
- Usage: Plug the desk's main power cord into a wall outlet. Then, connect your devices to the integrated outlets.
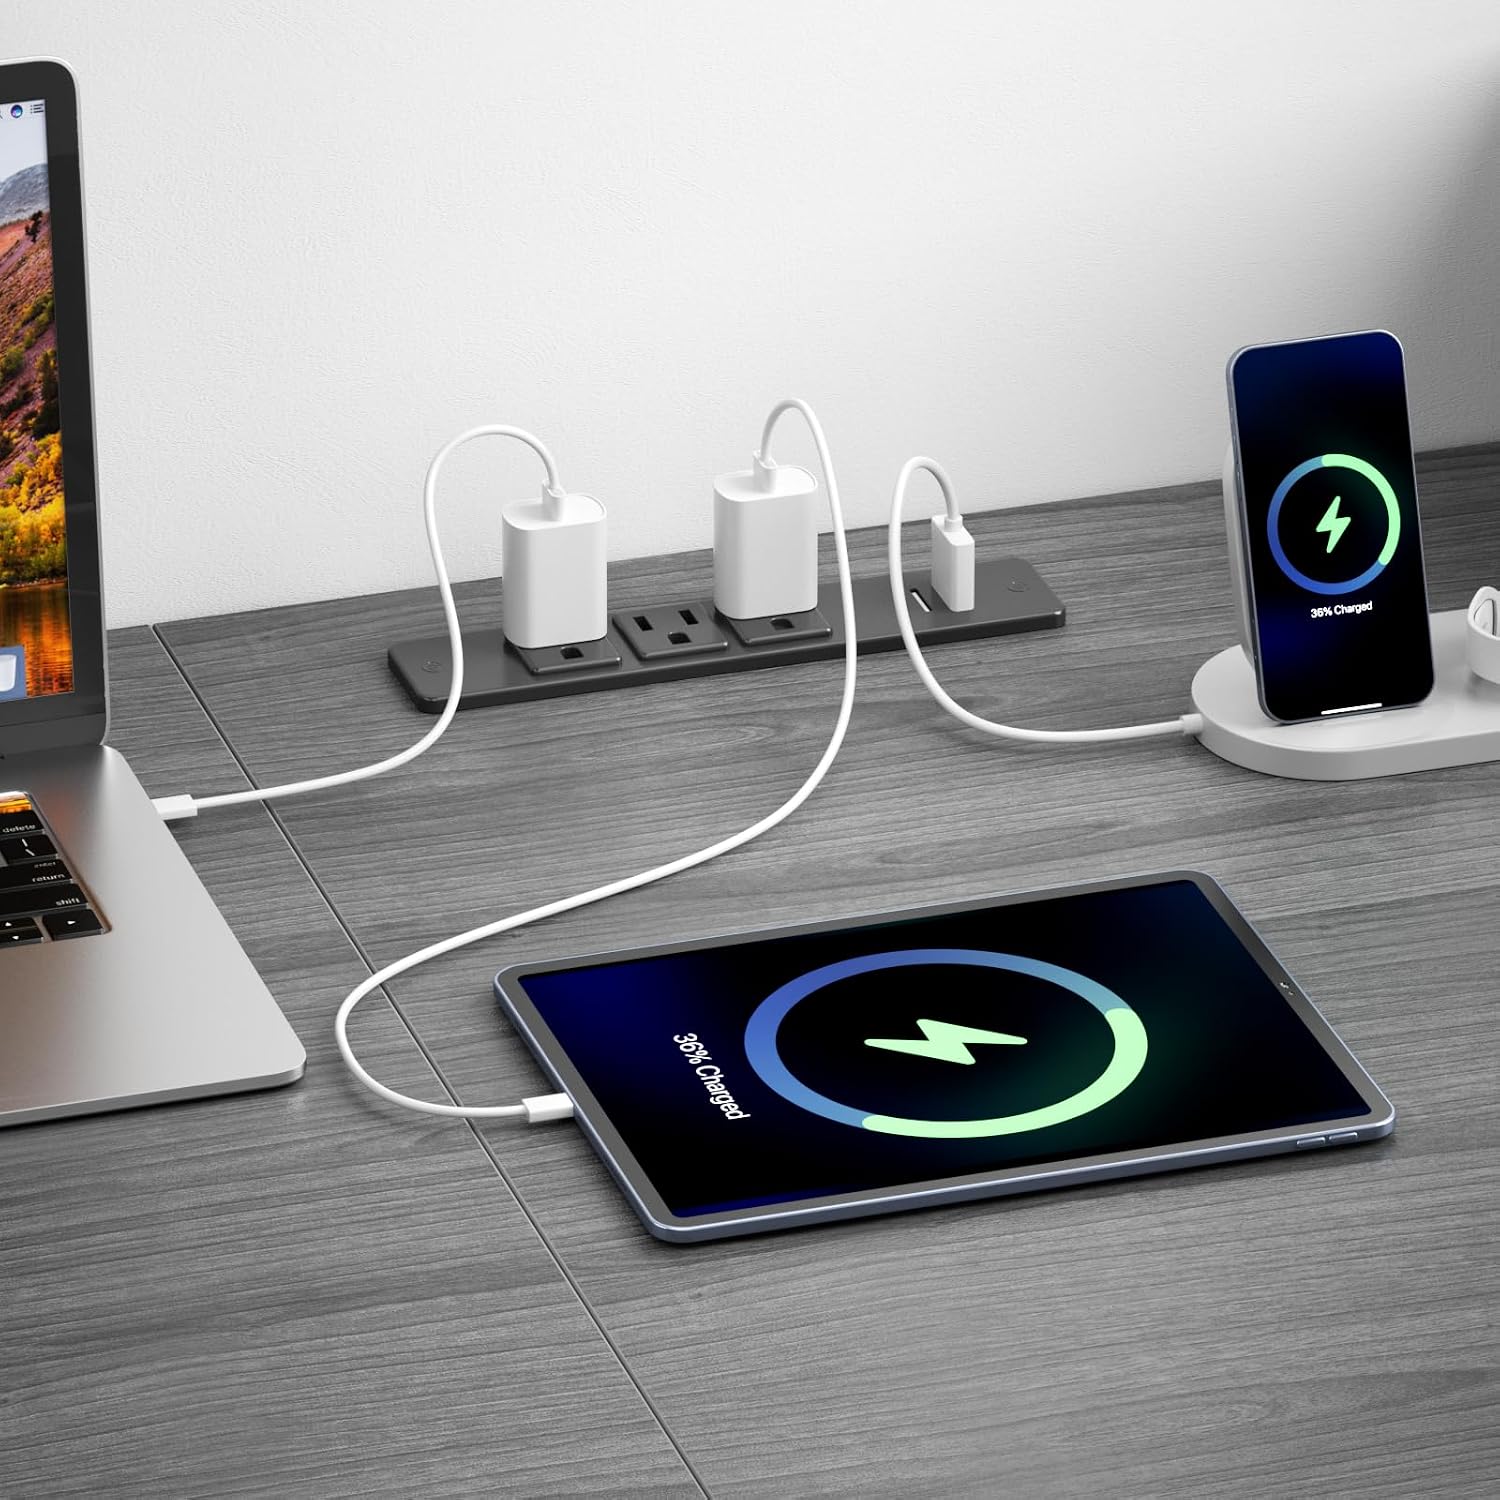
Figure 4: Integrated Power Outlet Usage. This image shows a laptop, tablet, and smartphone connected to the desk's built-in power strip, utilizing the AC, USB, and Type-C charging options.
LED Lights
The desk features two multi-color adjustable LED light strips to enhance your workspace ambiance.
- Control: The LED lights can be controlled via the included remote control or a compatible smartphone application.
- Features: Adjust between 20 colors, 22 dynamic modes, 5 brightness levels, and 10 flicker frequencies to customize your lighting experience.

Figure 5: LED Lighting Features and Power Hub. This image displays the desk with its LED lights active, along with an inset showing the remote control and icons representing 20 colors, 22 dynamic modes, 5 brightness levels, and 10 flicker frequencies.
Removable Drawers
The four fabric drawers provide flexible storage solutions.
- Usage: Store office supplies, documents, or personal items.
- Flexibility: The drawers are removable, allowing you to reconfigure your storage space or create room for a computer tower.
Removable Monitor Stands
The two monitor stands help optimize your viewing angle and posture.
- Ergonomics: Position your monitors at an optimal height to reduce neck and eye strain.
- Adjustability: The stands can be moved along the desktop to suit your preferred setup and screen arrangement.

Figure 6: Ergonomic Monitor Stand Placement. This image shows a user comfortably working at the desk with two monitors elevated on the removable stands, illustrating how they help maintain a good sitting posture.
Maintenance
- Cleaning Desktop: Wipe the engineered wood surface with a soft, damp cloth. Avoid harsh chemicals or abrasive cleaners that could damage the finish.
- Cleaning Metal Frame: Clean the metal frame with a damp cloth. Dry immediately to prevent rust.
- Cleaning Fabric Drawers: Spot clean fabric drawers with a mild detergent and damp cloth. Allow to air dry completely. Do not machine wash.
- Electrical Components: Ensure the power outlet unit and LED lights are kept dry. Do not attempt to disassemble or repair electrical components yourself.
- Fastener Check: Periodically check all screws and bolts to ensure they remain tight. Re-tighten if necessary to maintain stability.
Troubleshooting
- Desk is Unstable/Wobbly:
Solution: Ensure all assembly screws are tightened. Adjust the leveling feet at the bottom of the desk legs to compensate for uneven flooring. - Power Outlets Not Working:
Solution: Check if the desk's main power cord is securely plugged into a functional wall outlet. Ensure the power strip itself is not overloaded. Test with a different device. - LED Lights Not Turning On/Responding:
Solution: Check if the LED light strips are properly connected to their power source. Ensure the remote control has working batteries and is pointed directly at the receiver. Try controlling via the app if applicable. - Drawers Not Sliding Smoothly:
Solution: Ensure the fabric drawers are assembled correctly and are not overfilled. Check for any obstructions in the drawer slots.
If you encounter issues not listed here or require further assistance, please contact Korfile customer support.
Specifications
| Feature | Specification |
|---|---|
| Brand | Korfile |
| Model Number | DDHK-CD-039-CL-93-1-GO |
| Product Dimensions (D x W x H) | 30.7" x 92.81" x 28.74" |
| Material Type | Engineered Wood (Top), Metal (Base/Frame) |
| Color | Grey |
| Number of Drawers | 4 (Removable Fabric) |
| Monitor Stands | 2 (Removable) |
| Power Outlet | 3 AC Outlets, 1 USB Port, 1 Type-C Port (125V/12A) |
| LED Lights | Multi-color, adjustable via remote/APP (20 colors, 22 modes, 5 brightness, 10 flicker frequencies) |
| Weight Capacity | 180 pounds (approx. 81.6 kg) |
| Assembly Required | Yes |
Warranty and Support
Korfile products are manufactured to high-quality standards. For specific warranty details, please refer to the documentation included with your purchase or contact Korfile customer service directly. If you have any questions, require replacement parts, or need technical assistance, please reach out to our support team. We are committed to resolving any issues within 12 hours.
Contact Information: Please refer to the contact details provided on the Korfile official website or your purchase receipt for the most up-to-date support channels.