1. Product Overview
The Vente-unique JUNIKO II rectangular ceramic washbasin is designed to provide a modern and elegant aesthetic to your bathroom. This countertop basin features a pristine white finish with a distinctive gold rim, crafted from high-quality Grade A ceramic. Grade A certification ensures the product meets stringent quality controls and is free from manufacturing defects.

Figure 1: Front-top view of the Vente-unique JUNIKO II washbasin, showcasing its rectangular shape and gold rim.
Key Features:
- Material: High-quality Grade A ceramic for durability and easy cleaning.
- Design: Rectangular shape with a modern white finish and elegant gold rim.
- Installation Type: Countertop washbasin.
- Finish: Glossy.
- Drain Diameter: 4.5 cm (45 mm).
2. Specifications
| Attribute | Value |
|---|---|
| Brand | Vente-unique |
| Model | JUNIKO II |
| Type | Rectangular Countertop Washbasin |
| Material | Grade A Ceramic |
| Color | White with Gold Rim |
| Finish | Glossy |
| Length (L) | 50 cm |
| Depth (D) | 39 cm |
| Height (H) | 13 cm |
| Ceramic Thickness | 8 mm |
| Drain Hole Diameter | 4.5 cm (45 mm) |
| Product Weight | 12.5 kg |
| Faucet Included | No |
| Drain Stopper Included | No |

Figure 2: Technical drawing illustrating the dimensions of the JUNIKO II washbasin (Length 500mm, Depth 390mm, Height 130mm).
3. Installation Guide
3.1. Before You Begin
- Ensure all components are present and undamaged.
- Turn off the main water supply to the installation area.
- Gather necessary tools: sealant, wrench, screwdriver, measuring tape, level.
- Confirm the countertop is suitable for a surface-mounted washbasin and has the correct drain hole cut-out (minimum 4.5 cm diameter).
3.2. Installation Steps
- Position the Washbasin: Carefully place the washbasin on the desired location on the countertop, ensuring it is centered and aligned. Mark the position of the drain hole.
- Install the Drain Assembly: Follow the manufacturer's instructions for your chosen drain and waste trap. Apply a bead of silicone sealant around the drain hole on the washbasin's underside before inserting the drain assembly. Tighten securely, but do not overtighten.
- Secure the Washbasin: Apply a continuous bead of silicone sealant around the bottom edge of the washbasin where it will meet the countertop. Carefully lower the washbasin onto the countertop, aligning the drain with the hole. Press down firmly to ensure a good seal.
- Install Faucet (if applicable): If your faucet is deck-mounted, install it according to its specific instructions. Connect the hot and cold water supply lines to the faucet and the main water supply.
- Connect Waste Trap: Connect the waste trap to the drain assembly and the main waste pipe. Ensure all connections are tight and sealed to prevent leaks.
- Cure Sealant: Allow the silicone sealant to cure completely as per the sealant manufacturer's instructions (typically 12-24 hours) before using the washbasin.
- Test for Leaks: Once the sealant is cured, turn on the main water supply. Fill the washbasin with water and then drain it, carefully checking all connections for any signs of leaks.
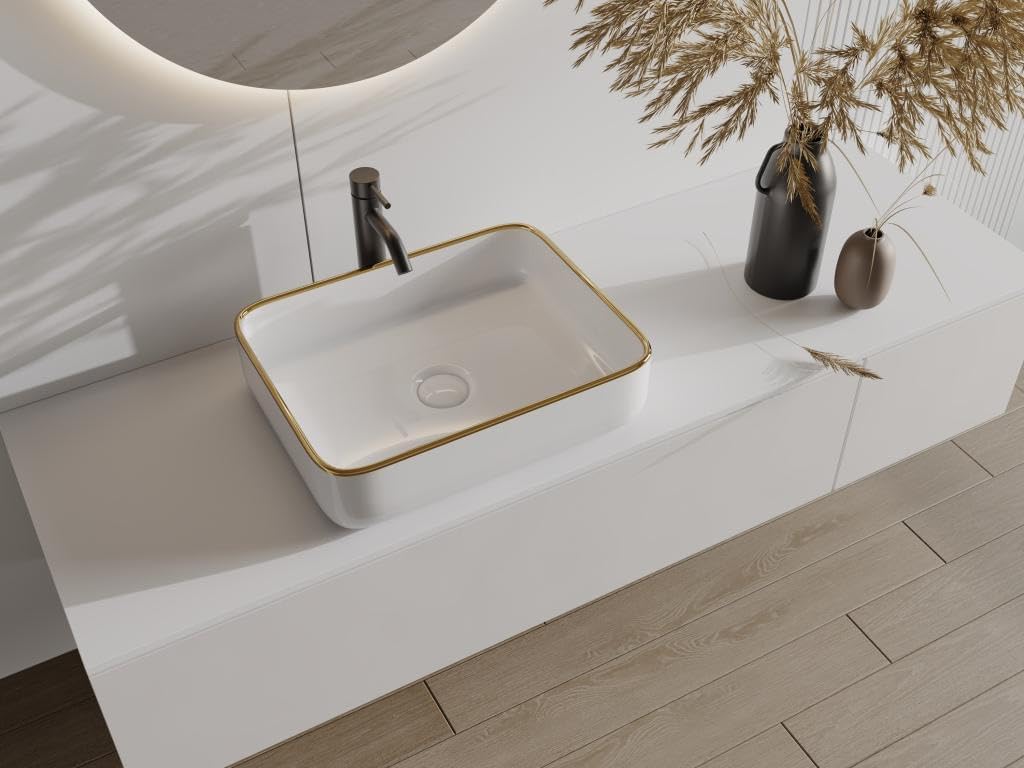
Figure 3: The JUNIKO II washbasin integrated into a modern bathroom environment.
4. Operation
The Vente-unique JUNIKO II washbasin operates like any standard bathroom sink. Use the faucet to control water flow and temperature. Ensure the drain stopper (if installed) is properly positioned to retain water or allow drainage.
- Water Flow: Adjust the faucet handle for desired water flow and temperature.
- Drainage: To drain water, ensure the drain stopper is open. To fill the basin, close the drain stopper.
5. Maintenance and Care
Proper care will ensure the longevity and appearance of your ceramic washbasin.
- Regular Cleaning: Clean the washbasin regularly with a soft cloth and mild, non-abrasive cleaner.
- Stubborn Stains: For more stubborn stains, use a ceramic-safe cleaner and a soft brush, then rinse thoroughly.
- Avoid Abrasives: Do not use abrasive cleaners, scouring pads, or harsh chemicals (e.g., strong acids or alkalis) as these can damage the ceramic surface and the gold rim.
- Gold Rim Care: The gold rim is delicate. Clean it gently with a soft, damp cloth and avoid any abrasive contact.
- Prevent Scratches: Avoid dropping heavy or sharp objects into the basin to prevent chips or scratches.
- Drain Maintenance: Periodically remove and clean the drain stopper and trap to prevent blockages.
6. Troubleshooting
This section addresses common issues you might encounter with your washbasin.
6.1. Leaks
- Around the Drain: Check if the drain assembly is properly tightened and if enough sealant was applied during installation. Re-tighten or re-seal as necessary.
- Between Basin and Countertop: Ensure the silicone sealant around the base of the washbasin is intact. Reapply sealant if there are gaps or cracks.
- Faucet Connections: If the leak is from the faucet, check its connections to the water supply lines. Tighten or replace washers/gaskets as needed.
- Waste Trap: Inspect the waste trap connections. Tighten any loose fittings or replace worn washers.
6.2. Slow Drainage or Clogging
- Drain Stopper: Remove and clean the drain stopper, as hair and debris can accumulate.
- Waste Trap: Disassemble and clean the waste trap. Use a bucket to catch any water and debris.
- Drain Pipe: If the clog persists, it may be further down the drain pipe. Consider using a plumbing snake or consulting a professional plumber. Avoid harsh chemical drain cleaners as they can damage pipes and the washbasin finish.
7. Warranty and Support
Vente-unique products are manufactured to high-quality standards. For any questions, concerns, or support regarding your JUNIKO II washbasin, please contact Vente-unique customer service.
You can find more information and contact details on the official Vente-unique website or through your purchase platform.


