1. Introduction
The Generic L106 GPS Folding Drone is designed for aerial exploration, offering a blend of advanced features and user-friendly operation. This manual will guide you through the setup, operation, and maintenance of your drone to ensure a safe and enjoyable experience.
- Extended Flight & Control: Experience up to 22 minutes of flight time and an impressive 3000-meter control range in open environments.
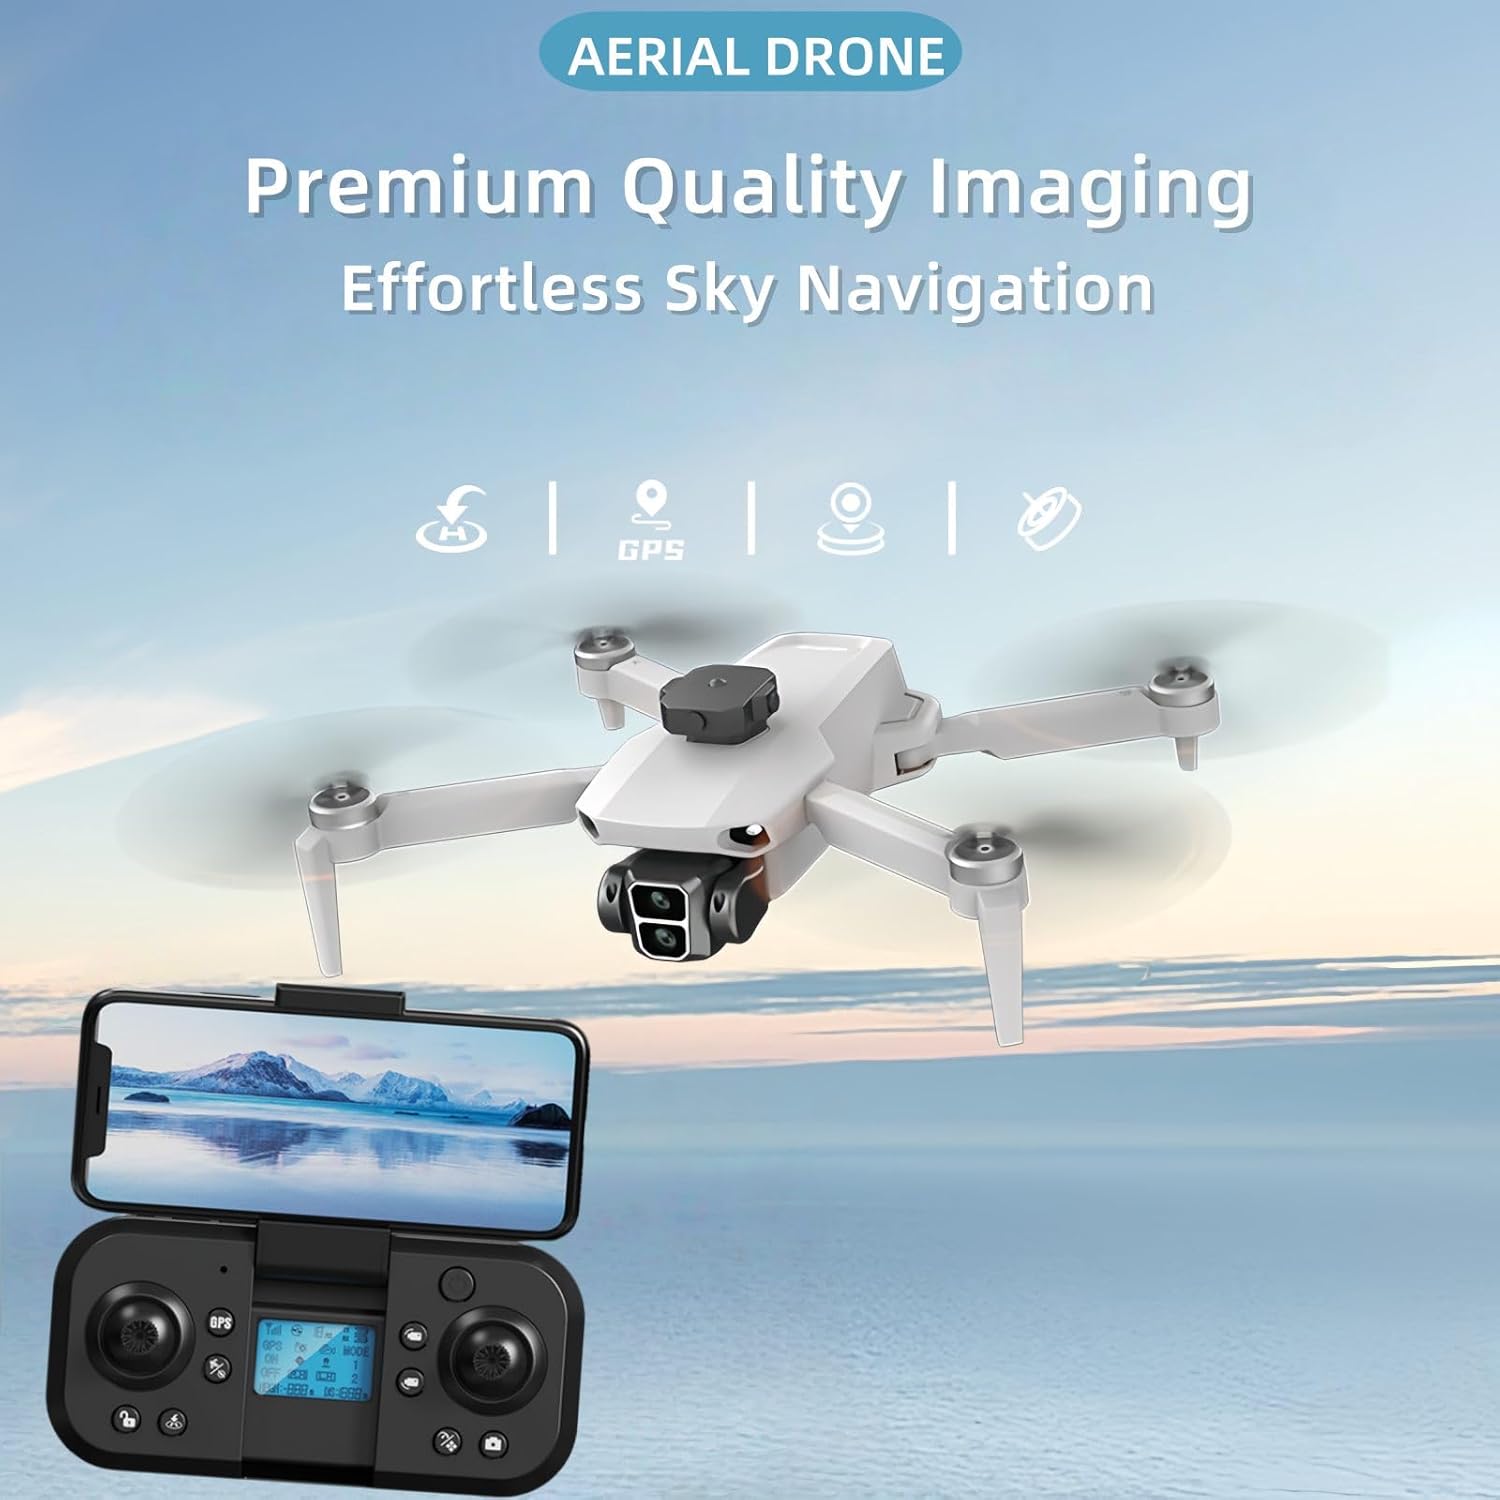
- Intelligent Navigation: Equipped with intelligent obstacle avoidance sensors and dual GPS technology for precise outdoor and indoor navigation, ensuring collision-free operation.
- High-Quality Imaging: Capture stunning visuals with an 8K HD dual camera system and a 120° ultra-wide-angle lens, providing dynamic photos and smooth video recording.
- Smart Features: Utilize one-touch smart features including gesture controls, automatic takeoff/landing, and customizable flight paths via the dedicated application.
- Portable Design: The drone features a compact, foldable design for easy transport and storage.
2. Package Contents
Verify that all items listed below are included in your package:
- Generic L106 GPS Folding Drone
- Remote Controller
- Rechargeable Batteries (2 included)
- Spare Propellers (8 pieces)
- USB Charging Cable
- Screwdriver
- Carrying Case
- User Manual

The image above displays the drone, remote controller, two batteries, spare propellers, charging cables, a screwdriver, and a carrying case.
Unboxing Video
Video 2.1: An unboxing video demonstrating the contents of the drone package, including the drone, remote, batteries, and accessories.
3. Setup
3.1 Drone Preparation
- Unfold the Drone: Carefully unfold the drone arms. Begin with the top arms, then the bottom arms, ensuring they lock into place.
- Install Battery: Insert a fully charged battery into the drone's battery compartment until it clicks securely.

The image illustrates the drone's foldable design, showing it both collapsed for portability and expanded with its arms extended for flight.
3.2 Remote Controller Preparation
- Install Joysticks: Screw the control sticks into the designated slots on the remote controller.
- Attach Phone Holder: Pull out the integrated phone holder from the top of the remote controller.
- Charge Controller: Connect the Type-C charging cable to the remote controller's charging port to ensure it is adequately powered.

This diagram labels the various controls on the remote, including the GPS switch, lens adjustment, levers, unlock button, one-click return, photo/video buttons, speed control, geomatic calibration, and horizontal calibration.
3.3 Pairing and Calibration
- Power On: Press and hold the power button on both the drone and the remote controller for approximately 3 seconds until they power on.
- GPS Connection: Ensure the drone is placed on a flat, open surface. The remote controller display will indicate when GPS is connected.
- Geomagnetic Calibration: Perform geomagnetic calibration as instructed by the remote controller or app to ensure accurate flight.

The image provides a close-up of the remote control's screen, detailing important flight information such as signal strength, GPS satellite count, drone and remote battery levels, current flight mode, altitude, and distance.
4. Operating Instructions
4.1 Basic Flight Controls
- One-Key Takeoff/Landing: Press the designated button on the remote for automatic takeoff or landing.
- Altitude Hold: The drone maintains a stable altitude when the throttle stick is released, thanks to its dual GPS and optical flow technology.
- Movement: Use the left joystick for throttle (up/down) and yaw (rotate left/right). Use the right joystick for forward/backward and left/right strafing.
4.2 Smart Flight Features
- Auto Return: With GPS enabled, the drone can automatically return to its takeoff point.
- Headless Mode: In this mode, the drone's orientation is irrelevant; it will move relative to the pilot's position.
- Gesture Controls: Utilize specific hand gestures for photo and video capture.
- Custom Flight Paths: Draw desired flight paths on the app interface, and the drone will follow them automatically.

This image demonstrates the drone's ability to navigate along a pre-defined path, allowing for seamless custom route creation through the accompanying application.
4.3 Camera Operation
- 8K HD Dual Cameras: The drone features an 8K camera for high-resolution photo and video capture.
- Adjustable Lens: Use the dedicated button on the remote controller to adjust the camera's tilt angle during flight.
- 120° Wide-Angle Lens: Capture expansive aerial views with the wide-angle lens.
The image highlights the drone's intelligent obstacle avoidance system, showing it detecting and maneuvering around obstacles to prevent collisions during flight.
5. Maintenance
5.1 Battery Care
- Charging: Use the provided USB charging cable to charge the drone batteries and remote controller.
- Storage: Store batteries in a cool, dry place away from direct sunlight and extreme temperatures.
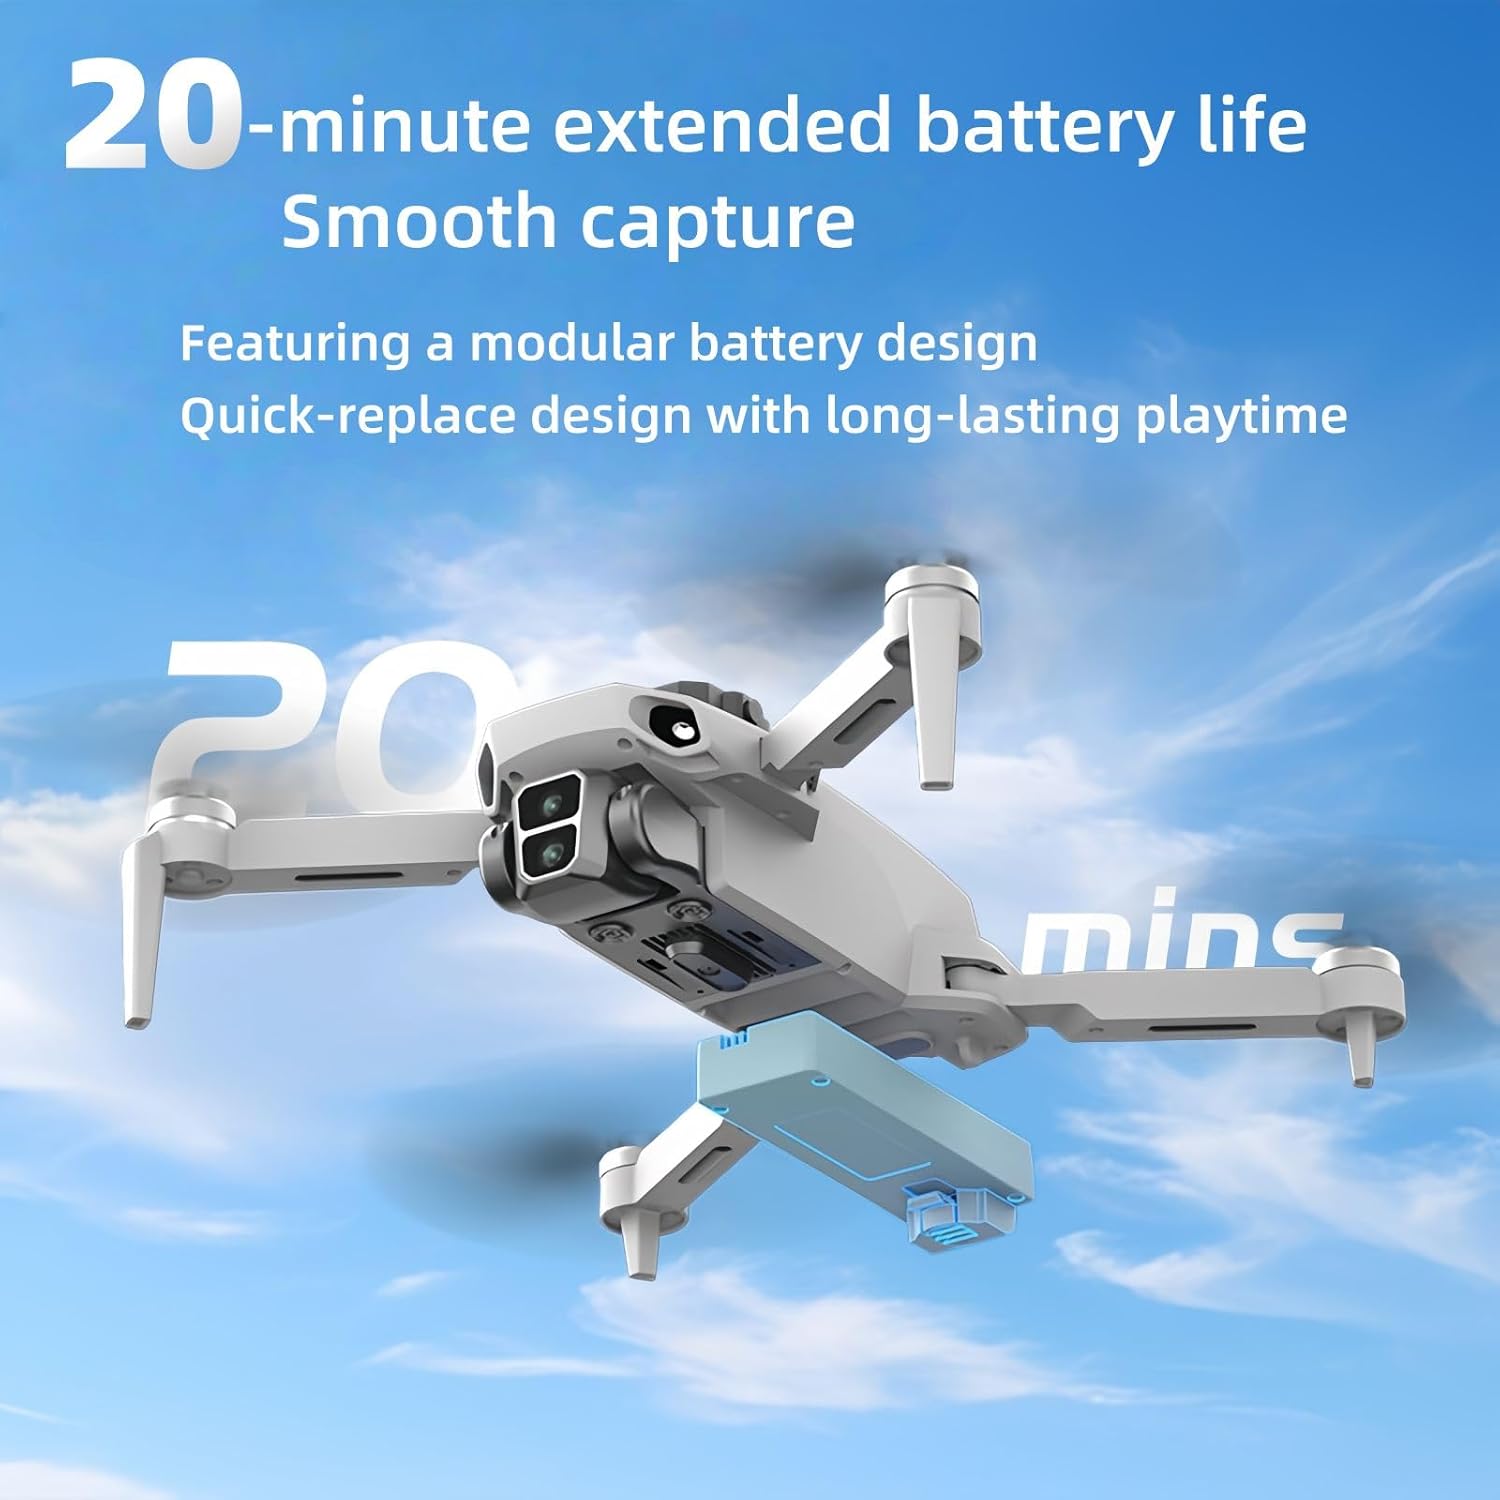
This image visually represents the drone's 22-minute extended flight capability, emphasizing its modular battery design for quick replacement and prolonged use.
5.2 Propeller Maintenance
- Inspection: Regularly inspect propellers for any signs of damage (cracks, bends).
- Replacement: Use the provided screwdriver and spare propellers to replace any damaged blades. Ensure correct orientation during installation.
5.3 Cleaning
- Wipe the drone's body and camera lens with a soft, dry cloth.
- Avoid using liquid cleaners or solvents that could damage components.
6. Troubleshooting
| Problem | Possible Cause | Solution |
|---|---|---|
| Drone does not power on | Low battery or incorrect installation | Ensure battery is fully charged and correctly inserted. Press and hold power button for 3 seconds. |
| Unstable flight/Drifting | Improper calibration or strong winds | Perform geomagnetic and horizontal calibration. Fly in calm weather conditions. |
| No GPS signal | Flying indoors or obstructed view of sky | Fly in an open outdoor area with a clear view of the sky. Wait for GPS indicator on remote. |
| Camera not recording/taking photos | No SD card or full SD card | Insert a compatible SD card (up to 128GB). Ensure SD card has sufficient free space. |
| Remote controller not connecting | Low battery or pairing issue | Charge remote controller. Power cycle both drone and remote, then attempt to pair again. |
7. Specifications
- Brand: Generic
- Model Name: L106 GPS
- Color: White
- Camera: 8K HD Dual Cameras (Video Capture Resolution: 480p)
- Connectivity Technology: Wi-Fi
- Skill Level: Beginner
- Item Weight: 500 Grams (1.1 pounds)
- Battery Cell Composition: Lithium Ion
- Batteries: 2 A batteries required (included)
- Product Dimensions: 10.4"L x 9.9"W x 2.6"H
- Manufacturer: Liye
- Manufacturer Part Number: MO-UI31
- Date First Available: May 15, 2025
8. Warranty and Support
The Generic L106 GPS Folding Drone comes with a 1-year warranty, as stated in the product features. For detailed warranty information, technical support, or service inquiries, please refer to the manufacturer's official website or contact your retailer.


