Introduction
This manual provides detailed instructions for the setup, operation, maintenance, and troubleshooting of your AOBOCAM A12 Mini Security Camera. Please read this manual thoroughly before using the device to ensure proper functionality and to maximize its performance. Keep this manual for future reference.

Image: The AOBOCAM A12 Mini Security Camera, showcasing its compact size and a smartphone displaying its live monitoring capabilities. The camera is small enough to be held between two fingers.
Safety Information
- Indoor Use Only: This camera is designed for indoor use. Do not expose it to water, moisture, or extreme temperatures.
- Power Source: Use only the specified power adapter (5V) to charge the camera.
- Avoid Obstructions: Ensure the camera's lens is not obstructed to maintain clear video quality.
- Operating Temperature: Operate the camera within the recommended temperature range to prevent damage.
- Disassembly: Do not attempt to disassemble or modify the camera. This will void the warranty.
- Children and Pets: Keep the camera and its accessories out of reach of small children and pets to prevent accidental ingestion or damage.
Package Contents
Please verify that all items are present in your package:
- AOBOCAM A12 Mini Security Camera (1 unit)
- USB Charging Cable (1 unit)
- Magnetic Bracket (1 unit)
- User Manual (this document)
- Note: Micro SD card is not included and must be purchased separately.
Product Overview
Familiarize yourself with the components of your AOBOCAM A12 Mini Security Camera.

Image: An illustration of the AOBOCAM A12 Mini Camera, highlighting its compact dimensions (approximately 3.5cm x 3cm x 3cm) and key features such as HD 1080P resolution, magnetic mounting, motion detection, and mini DV capability.
- Camera Lens: Captures video and images.
- Infrared LEDs: Provide illumination for night vision.
- Micro USB Port: For charging and continuous power.
- SD Card Slot: Insert Micro SD card for local storage.
- Power Button: Turns the camera on/off.
- Indicator Light: Displays camera status (e.g., charging, recording, Wi-Fi connection).
- Magnetic Base: Allows for easy attachment to the included magnetic bracket or other metallic surfaces.
Setup Guide
1. Charging the Camera
Before initial use, fully charge the camera. Connect the provided USB cable to the camera's Micro USB port and the other end to a 5V USB power adapter (not included) or a computer USB port. The indicator light will show charging status and turn off when fully charged. A full charge provides approximately 90 minutes of continuous operation.
2. Inserting a Micro SD Card
For local video storage, insert a Micro SD card (8GB-256GB, Class 10 or higher recommended) into the SD card slot. Ensure the camera is powered off before inserting or removing the card. Push the card in until it clicks into place.
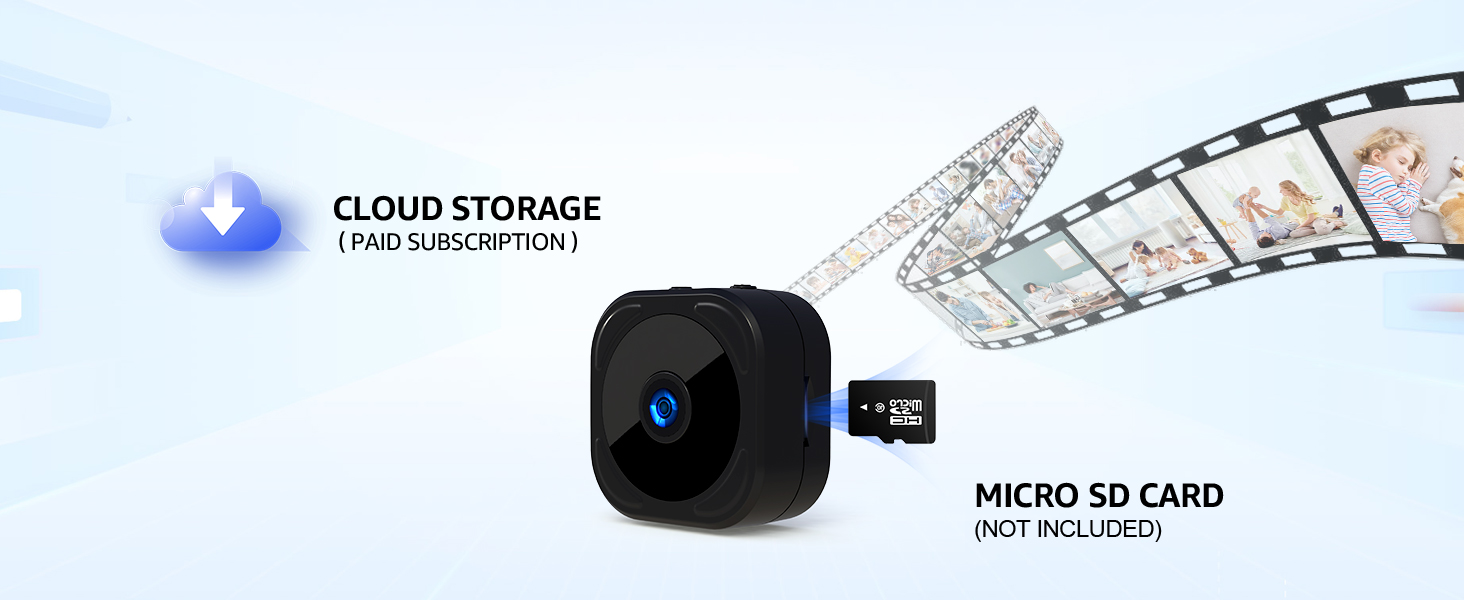
Image: Visual representation of the camera's storage options, including the Micro SD card slot for local storage (card not included) and the optional cloud storage service.
3. App Installation and Connection
The AOBOCAM A12 camera utilizes a mobile application for control and monitoring. Search for the recommended app (e.g., "HIDVCAM" or as specified in the packaging) on your smartphone's app store (App Store for iOS, Google Play Store for Android) and install it.
- Step 1: Sign into the app. Create an account if you are a new user.
- Step 2: Turn on the A12 camera by pressing and holding the power button until the indicator light illuminates.
- Step 3: Open the app and follow the on-screen instructions to add your device. The A12 camera supports both Wi-Fi and Bluetooth dual connection for faster pairing. Select your home Wi-Fi network (2.4GHz only) and enter the password.

Image: A visual guide demonstrating the three-step process for connecting the AOBOCAM A12 camera to your smartphone via Bluetooth and Wi-Fi for initial setup.

Image: A smartphone screen showing the successful dual connection via Wi-Fi and Bluetooth, with a live feed of a cat resting on a sofa, illustrating the camera's pet monitoring capability.
4. Mounting the Camera
The A12 camera features a magnetic base, allowing for flexible placement. Attach the camera to the included magnetic bracket, which can then be placed on any flat surface or mounted to a wall using adhesive or screws (not included). The magnetic design allows for easy adjustment of the viewing angle.

Image: Various scenarios demonstrating the versatile magnetic placement of the AOBOCAM A12 camera, including on a bookshelf, attached to a metal surface, near stairs, and on a desk, highlighting its adaptability.
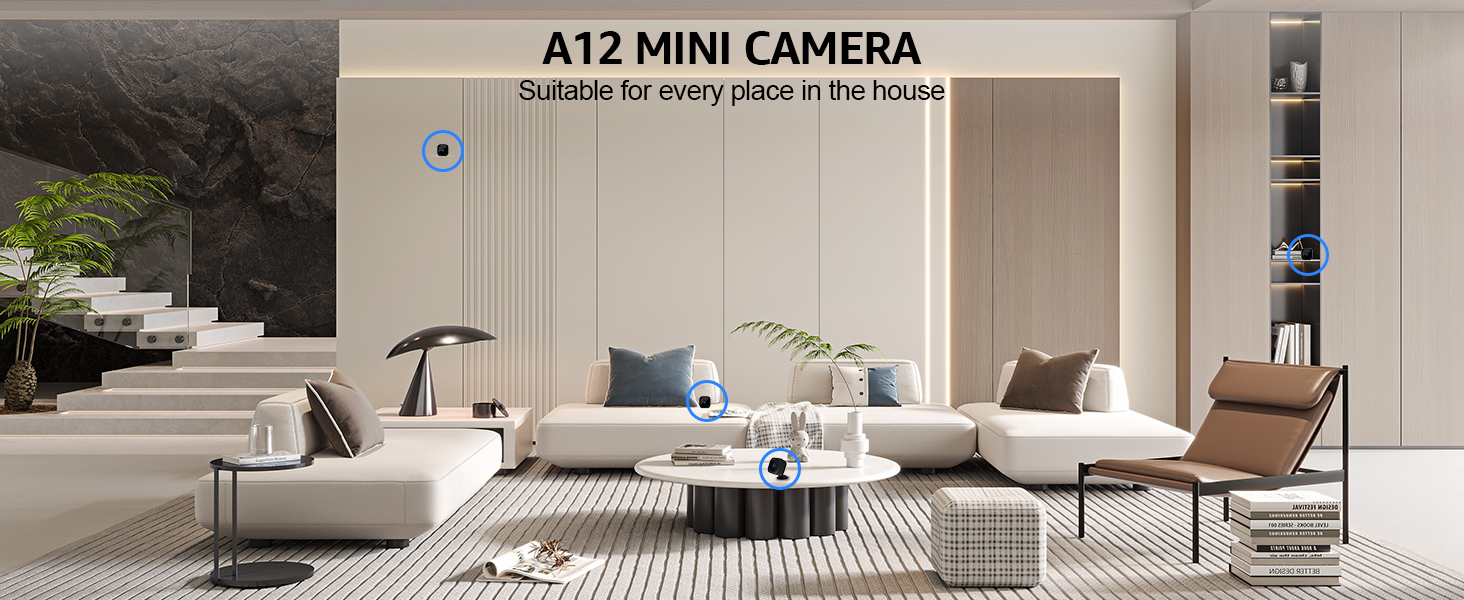
Image: The A12 Mini Camera discreetly integrated into different areas of a home, illustrating its suitability for various indoor surveillance needs without being obtrusive.
Operating Instructions
1. Live View
Once connected, open the app to access the live video feed from your camera. You can view the 1080P HD video in real-time from anywhere with an internet connection.

Image: A smartphone screen showing a live feed from the camera, demonstrating the ability to monitor your home or pets remotely.
2. Recording Modes
The camera supports various recording options:
- Manual Recording: Start and stop recording directly from the app.
- Continuous Recording: If an SD card is inserted, the camera can record continuously. Older footage will be overwritten by new footage when the SD card is full (loop recording).
- Motion-Activated Recording: The camera will automatically begin recording when motion is detected.
3. Motion Detection and Alerts
Configure motion detection sensitivity within the app. When motion is detected, the camera will trigger an alert and send a notification to your smartphone, allowing you to respond promptly.

Image: A smartphone displaying a motion detection alert notification, indicating suspicious activity detected by the camera in a room.

Image: A scene depicting children running, with a smartphone displaying a motion detection notification, illustrating how the camera captures and alerts users to movement.
4. Night Vision
The A12 camera is equipped with infrared LEDs for clear night vision, allowing it to capture images and video even in low-light or complete darkness up to 6 meters. The camera automatically switches to night vision mode when ambient light is insufficient.

Image: A side-by-side comparison demonstrating the clarity of the AOBOCAM A12's HD night vision, showing a dog in both well-lit and low-light conditions.

Image: A split image showing the camera's 1080P daytime image quality versus its HD night vision capability, both depicting a sleeping child with clarity.
Maintenance
- Cleaning: Use a soft, dry cloth to clean the camera lens and body. Do not use liquid cleaners or abrasive materials.
- Battery Care: For optimal battery life, avoid fully discharging the camera frequently. If storing for extended periods, charge the battery to about 50% every few months.
- Firmware Updates: Periodically check the app for available firmware updates. Keeping the firmware updated ensures optimal performance and access to new features. Follow the in-app instructions for any updates.
- Storage: Store the camera in a cool, dry place away from direct sunlight and extreme temperatures when not in use.
Troubleshooting
| Problem | Possible Cause | Solution |
|---|---|---|
| Camera not turning on. | Low battery; power button not pressed correctly. | Charge the camera for at least 2 hours. Press and hold the power button firmly. |
| Unable to connect to Wi-Fi. | Incorrect Wi-Fi password; 5GHz Wi-Fi network; camera too far from router. | Ensure correct 2.4GHz Wi-Fi password. Move camera closer to router. Restart camera and router. |
| Poor video quality. | Dirty lens; insufficient lighting; weak Wi-Fi signal. | Clean the lens. Ensure adequate lighting or check night vision settings. Improve Wi-Fi signal strength. |
| Motion detection not working. | Sensitivity too low; feature disabled in app. | Adjust motion detection sensitivity in the app settings. Ensure motion detection is enabled. |
| SD card not recognized. | Card not inserted correctly; incompatible card; card corrupted. | Reinsert the SD card. Try a different compatible SD card (8-256GB, Class 10). Format the SD card via the app if possible. |
Specifications
| Feature | Detail |
|---|---|
| Model Name | A12 |
| Video Capture Resolution | 1080p HD |
| Viewing Angle | 120 Degrees |
| Night Vision Range | 6 Meters |
| Connectivity Technology | Wireless (2.4GHz Wi-Fi, Bluetooth) |
| Storage Options | Micro SD Card (8-256GB, not included), Cloud Storage (optional) |
| Power Source | Battery Powered (built-in Lithium Polymer), 5V USB input for continuous power |
| Battery Life (continuous) | Up to 90 minutes |
| Dimensions (L x W x H) | 35 x 30 x 30 millimeters |
| Item Weight | 20 g |
| Material | Plastic |
| Special Features | HD Resolution, Motion Sensor, Night Vision, Portable, Magnetic Mounting |
| Indoor/Outdoor Usage | Indoor |
| Compatible Devices | Smartphone (Android, iPhone) |
Warranty and Support
The AOBOCAM A12 Mini Security Camera comes with a 1-year warranty from the date of purchase. This warranty covers manufacturing defects and malfunctions under normal use. It does not cover damage caused by misuse, accidents, unauthorized modifications, or improper installation.
For technical support, warranty claims, or further assistance, please contact AOBOCAM customer service through the contact information provided on the product packaging or the official AOBOCAM website. Please have your product model number (A12) and purchase details ready when contacting support.
Important Note Regarding Videos
No official product videos were provided in the available data for embedding in this manual.


