
1. Introduction
This manual provides detailed instructions for the installation, operation, and maintenance of your ANNKE 2MP Security Camera System. This system includes an 8-channel 4K DVR recorder and eight 1080P wired turret cameras, designed for comprehensive surveillance with advanced features like AI motion detection and smart dual light technology. Please read this manual thoroughly before using the product to ensure proper setup and functionality.
2. What's in the Box
Verify that all components listed below are present in your package:
- 1x 8-Channel 4K DVR (with 4TB HDD pre-installed)
- 8x 2MP Wired Turret Cameras
- 8x BNC Cables (60 ft each)
- 3x 12V Power Adapters
- 2x 1-to-4 Power Splitters
- 1x HDMI Cable
- 1x Network Cable
- 1x USB Mouse
- 1x User Manual
- 1x Wall Sticker
- 8x Screw Kits for camera mounting

Figure 2.1: Package Contents
3. System Specifications
3.1 DVR Specifications
- Video Input: 8-channel (TVI/AHD/CVI/CVBS/IPC input, 5-in-1 compatibility)
- Video Output: 4K (8MP) high definition live viewing
- Recording & Playback: 4K (8MP) resolution
- AI Features: Deep learning-based motion detection 2.0 for all analog channels, Deep learning-based perimeter protection
- Video Compression: Advanced H.265+
- Audio: Audio via coaxial cable support
- Storage: Pre-installed 4TB HDD (supports up to 10TB)
- Remote Monitoring: Supports iPhone, iPad, Android mobile devices
- Connectivity: Wired
- Compatible Devices: Cameras, Laptops, Personal Computers, Tablets
- Dimensions: 17.32 x 13.39 x 7.09 inches
- Weight: 13.89 pounds
3.2 Camera Specifications
- Resolution: 2 MP, 1920×1080 (1080p)
- Lens: 3.6 mm fixed focal lens
- Night Vision: Up to 20 m (66 ft) IR distance for bright night imaging, Up to 20 m (66 ft) white light distance for bright night imaging
- Smart Dual Light: IR light operates normally, switches to white light upon human or vehicle detection at night for color night vision.
- Weather Resistance: Water and dust resistant (IP67)
- Color: Black
4. Setup Guide
4.1 Physical Connection
Follow these steps to connect your security system components:
- Connect Cameras: Attach each camera to the DVR using the provided BNC cables. Ensure a secure connection.
- Power Cameras: Use the 1-to-4 power splitters and 12V power adapters to supply power to the cameras. Connect the power adapters to an electrical outlet.
- Connect DVR to Monitor: Use the HDMI cable to connect the DVR to a monitor or TV for local viewing.
- Connect DVR to Network: Connect the DVR to your router using the provided network cable for internet access and remote viewing capabilities.
- Connect USB Mouse: Plug the USB mouse into the DVR's USB port for navigation and control.
- Power DVR: Connect the DVR's power adapter to an electrical outlet. The system will power on automatically.
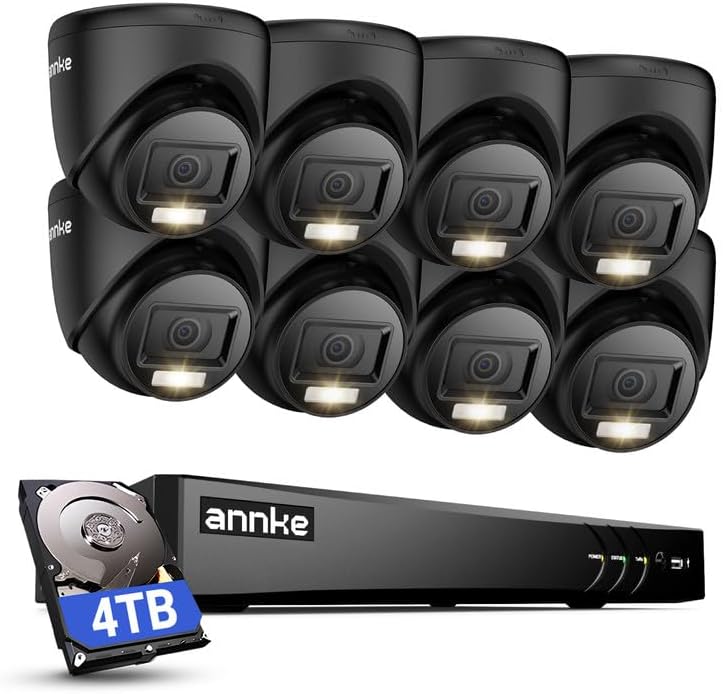
Figure 4.1: System Components Overview
4.2 Initial Configuration
Upon first power-up, the DVR will guide you through an initial setup wizard. This typically includes setting the language, time zone, creating a password, and configuring network settings. Follow the on-screen prompts to complete the setup.
5. Operating Instructions
5.1 Live View and Recording
Once the system is set up, you can view live camera feeds on your connected monitor. The DVR continuously records footage to the pre-installed 4TB hard drive. You can access playback options through the DVR's menu using the USB mouse.

Figure 5.1: 1080P Full HD Video Quality
5.2 AI Motion Detection 2.0
The system features advanced AI-powered motion detection. This technology differentiates between human and vehicle movements, reducing false alarms caused by environmental factors. You can configure specific detection areas and sensitivity settings within the DVR menu. Smart searching in recordings allows for quick retrieval of human or vehicle-related events.

Figure 5.2: Person/Vehicle Detection
5.3 Night Vision Modes (Smart Dual-Light)
The cameras are equipped with Smart Dual-Light technology, offering flexible night vision options:
- IR Mode: Default black and white night vision using infrared illumination.
- Color Night Vision: When human or vehicle motion is detected at night, the cameras automatically activate their white light, providing full-color video footage. This mode can also be manually set.

Figure 5.3: Flexible Night Vision Options
5.4 Remote Monitoring
Download the ANNKE mobile application on your iPhone, iPad, or Android device to enable remote monitoring. After setting up the app and linking it to your DVR, you can view live feeds, play back recordings, and receive instant notifications on your smartphone when motion is detected.
5.5 Video Compression (H.265+)
The system utilizes advanced H.265+ video compression technology. This significantly reduces file sizes, saving storage space on the hard drive and consuming less bandwidth for smoother remote viewing, without compromising video quality.

Figure 5.4: H.265+ Compression Efficiency
5.6 DVR/NVR Modes
The DVR supports flexible operating modes:
- DVR Mode: Supports 8 BNC cameras and can integrate up to 4 additional IP cameras.
- NVR Mode: Can function as a Network Video Recorder, supporting up to 12 IP cameras.

Figure 5.5: DVR/NVR Mode Flexibility
6. Maintenance
Regular maintenance ensures optimal performance and longevity of your security system:
- Camera Cleaning: Periodically clean camera lenses with a soft, damp cloth to remove dust, dirt, or water spots that may obstruct the view. Avoid harsh chemicals.
- DVR Ventilation: Ensure the DVR unit has adequate ventilation to prevent overheating. Do not block ventilation openings.
- Firmware Updates: Check the ANNKE official website or your mobile app for available firmware updates for the DVR and cameras. Keeping firmware updated can improve performance and add new features.
- Cable Inspection: Periodically inspect all cables for wear, damage, or loose connections.
- Hard Drive Health: The DVR's menu typically includes an option to check the health status of the hard drive. Monitor this to prevent data loss.

Figure 6.1: IP67 Weatherproof Camera
7. Troubleshooting
This section addresses common issues you might encounter:
| Problem | Possible Cause | Solution |
|---|---|---|
| No video signal from a camera | Loose cable connection, no power to camera, faulty camera/cable | Check BNC and power connections. Ensure power adapter is working. Test with a different cable or camera if available. |
| DVR not powering on | Power adapter disconnected, faulty power adapter | Verify power adapter is securely connected to DVR and outlet. Test outlet with another device. |
| Cannot access remote viewing | No internet connection, incorrect network settings, app not configured | Check DVR's network cable and router connection. Verify network settings in DVR. Ensure mobile app is correctly linked to DVR. |
| Poor night vision quality | Dirty lens, IR/white lights obstructed, insufficient ambient light | Clean camera lens. Ensure no obstructions block the IR/white lights. Adjust camera position if necessary. |
| Frequent false motion alarms | High sensitivity, environmental factors (e.g., moving branches, insects) | Adjust motion detection sensitivity and detection zones in DVR settings. Utilize AI human/vehicle detection to filter out irrelevant movements. |
8. Warranty and Support
ANNKE products typically come with a limited warranty. For specific warranty terms and conditions, please refer to the warranty card included in your package or visit the official ANNKE website. If you encounter any issues not covered in this manual or require further assistance, please contact ANNKE customer support through their official website or the contact information provided in your product documentation.
For the latest support resources, FAQs, and contact details, please visit: www.annke.com/support