1. Introduction
This manual provides comprehensive instructions for the assembly, operation, and maintenance of your Polibi Twin Daybed with Trundle, Storage, and Charging Station. Please read this guide thoroughly before assembly and use to ensure safe and correct operation. Keep this manual for future reference.

Figure 1: Polibi Twin Daybed with trundle extended, showcasing the integrated storage and charging station.
2. Safety Information
WARNING: Failure to follow these safety instructions may result in injury or damage to the product.
- Carefully handle the trundle mechanism to avoid injury during extension or retraction.
- Ensure all components are properly assembled and tightened according to the instructions to prevent instability or collapse.
- Do not exceed the weight capacity of the daybed or trundle. Consult the specifications section for details.
- Keep children away from the assembly area. Small parts may pose a choking hazard.
- Only use the provided power outlet and USB ports for charging compatible electronic devices. Do not overload the charging station.
- Place the daybed on a flat, stable surface.
3. Package Contents
Verify that all parts and hardware are present before beginning assembly. If any items are missing or damaged, contact Polibi customer support.
- Daybed Frame Components (Headboard, Footboard, Side Rails)
- Trundle Bed Frame Components
- Wooden Slats for Daybed and Trundle
- Integrated Storage Shelves and Drawer Unit
- Charging Station Unit (USB Ports & Power Outlet)
- Assembly Hardware (Screws, Bolts, Wrenches, etc.)
- Instruction Manual
4. Setup and Assembly
Two-person assembly is recommended for this product, with an estimated assembly time of approximately 90 minutes. All necessary tools are included. Follow the numbered steps carefully.
4.1 Unpacking and Preparation
- Clear a spacious area for assembly.
- Carefully unpack all components and lay them out on a soft, clean surface to prevent scratches.
- Identify all parts and hardware using the provided parts list in the separate assembly guide.
4.2 Frame Assembly
Follow the detailed diagrams in the separate assembly guide for connecting the headboard, footboard, and side rails. Ensure all bolts are securely tightened.

Figure 2: View of the daybed frame structure, including wooden slats and the trundle bed mechanism.
4.3 Trundle Assembly
Assemble the trundle bed frame separately, ensuring the wheels are correctly attached for smooth operation. The trundle is designed to slide underneath the main daybed frame.

Figure 3: Side view illustrating the trundle bed fully extended from beneath the main daybed.
4.4 Storage and Charging Station Installation
Integrate the storage shelves and drawer unit into the headboard section. Connect the charging station unit to the designated cutout and ensure the power cord is accessible for connection to a wall outlet.

Figure 4: Detail of the built-in charging station, featuring two USB ports and two standard power outlets.
4.5 Final Checks
Before use, double-check all connections and ensure the daybed and trundle are stable. Place twin mattresses (sold separately) on both the main daybed and the trundle.
5. Operating Instructions
5.1 Trundle Bed Operation
- To Extend: Gently pull the fabric handles located on the front of the trundle bed. The trundle will roll out on its casters. Lift the trundle frame to its elevated position if desired, ensuring the locking mechanisms engage.
- To Retract: Lower the trundle frame if it was elevated. Push the trundle back underneath the main daybed until it is fully concealed.

Figure 5: The daybed with the trundle retracted, highlighting the integrated storage shelves and central drawer.
5.2 Charging Station Usage
Plug the daybed's power cord into a standard wall outlet. The two USB ports and one AC power outlet on the charging station are now active. Use these to charge mobile phones, tablets, and other small electronic devices.
CAUTION: Do not plug high-power appliances into the integrated power outlet to avoid overloading the circuit.
5.3 Storage Shelves and Compartments
The headboard features open shelves for displaying items and a central flip-top compartment for concealed storage. Utilize these areas to organize books, personal items, or decorative accents.
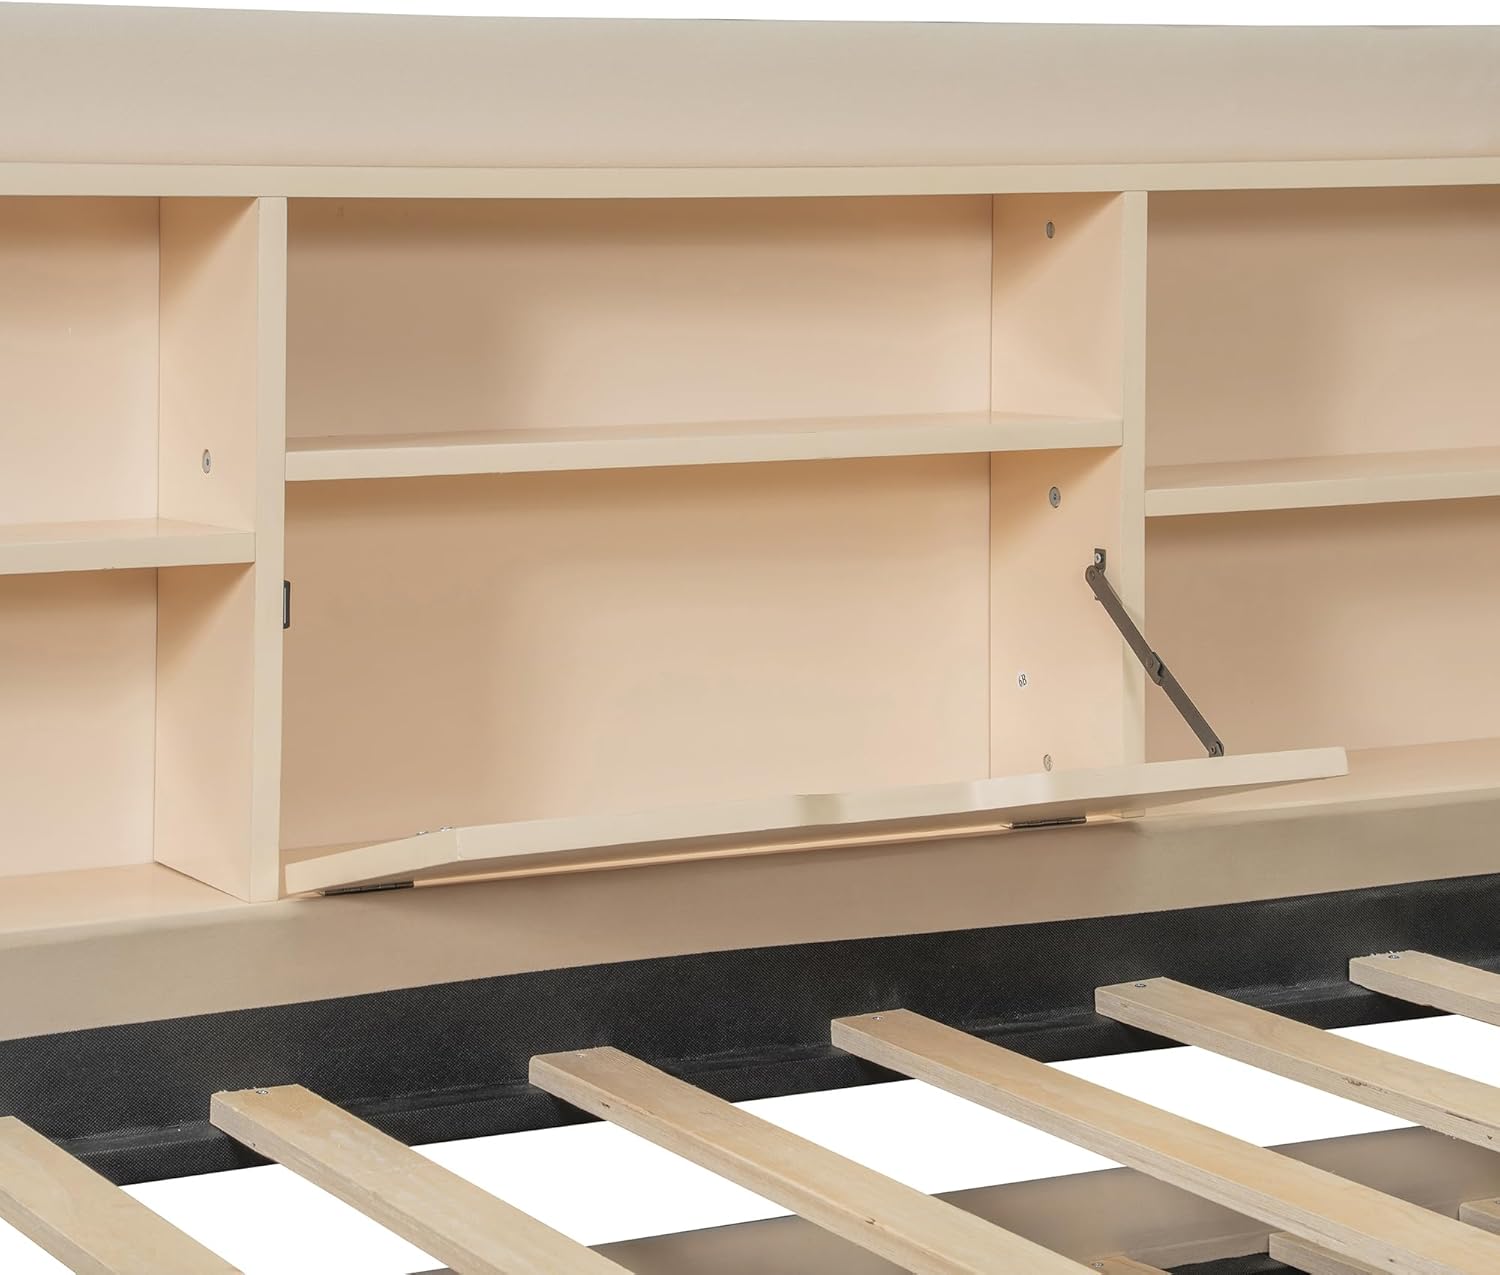
Figure 6: Detail of the flip-top storage compartment, providing discreet storage space within the headboard.
6. Maintenance
- Cleaning: Wipe the frame with a soft, damp cloth. For fabric surfaces, use a mild fabric cleaner as needed. Avoid harsh chemicals or abrasive materials.
- Hardware: Periodically check all bolts and screws to ensure they remain tight. Re-tighten as necessary to maintain stability.
- Trundle Mechanism: Keep the trundle wheels and tracks free of debris to ensure smooth operation.
7. Troubleshooting
| Problem | Possible Cause | Solution |
|---|---|---|
| Trundle does not slide smoothly. | Debris in tracks; loose wheels; uneven floor. | Clean tracks; check wheel attachment; move daybed to a level surface. |
| Charging station not working. | Power cord unplugged; wall outlet not active; device incompatibility. | Ensure power cord is securely plugged in; test wall outlet with another device; verify device compatibility with USB/AC power. |
| Daybed feels unstable. | Loose hardware; incorrect assembly. | Re-tighten all bolts and screws; review assembly instructions for any missed steps. |
8. Specifications
| Feature | Detail |
|---|---|
| Product Dimensions (L x W x H) | 80.3" x 40.2" x 38" |
| Size | Twin |
| Compatible Mattress Size | Twin (for both daybed and trundle) |
| Special Features | Trundle Bed, Built-in Storage, Charging Station (2 USB, 1 AC Outlet) |
| Assembly Required | Yes |
| Manufacturer | Polibi |
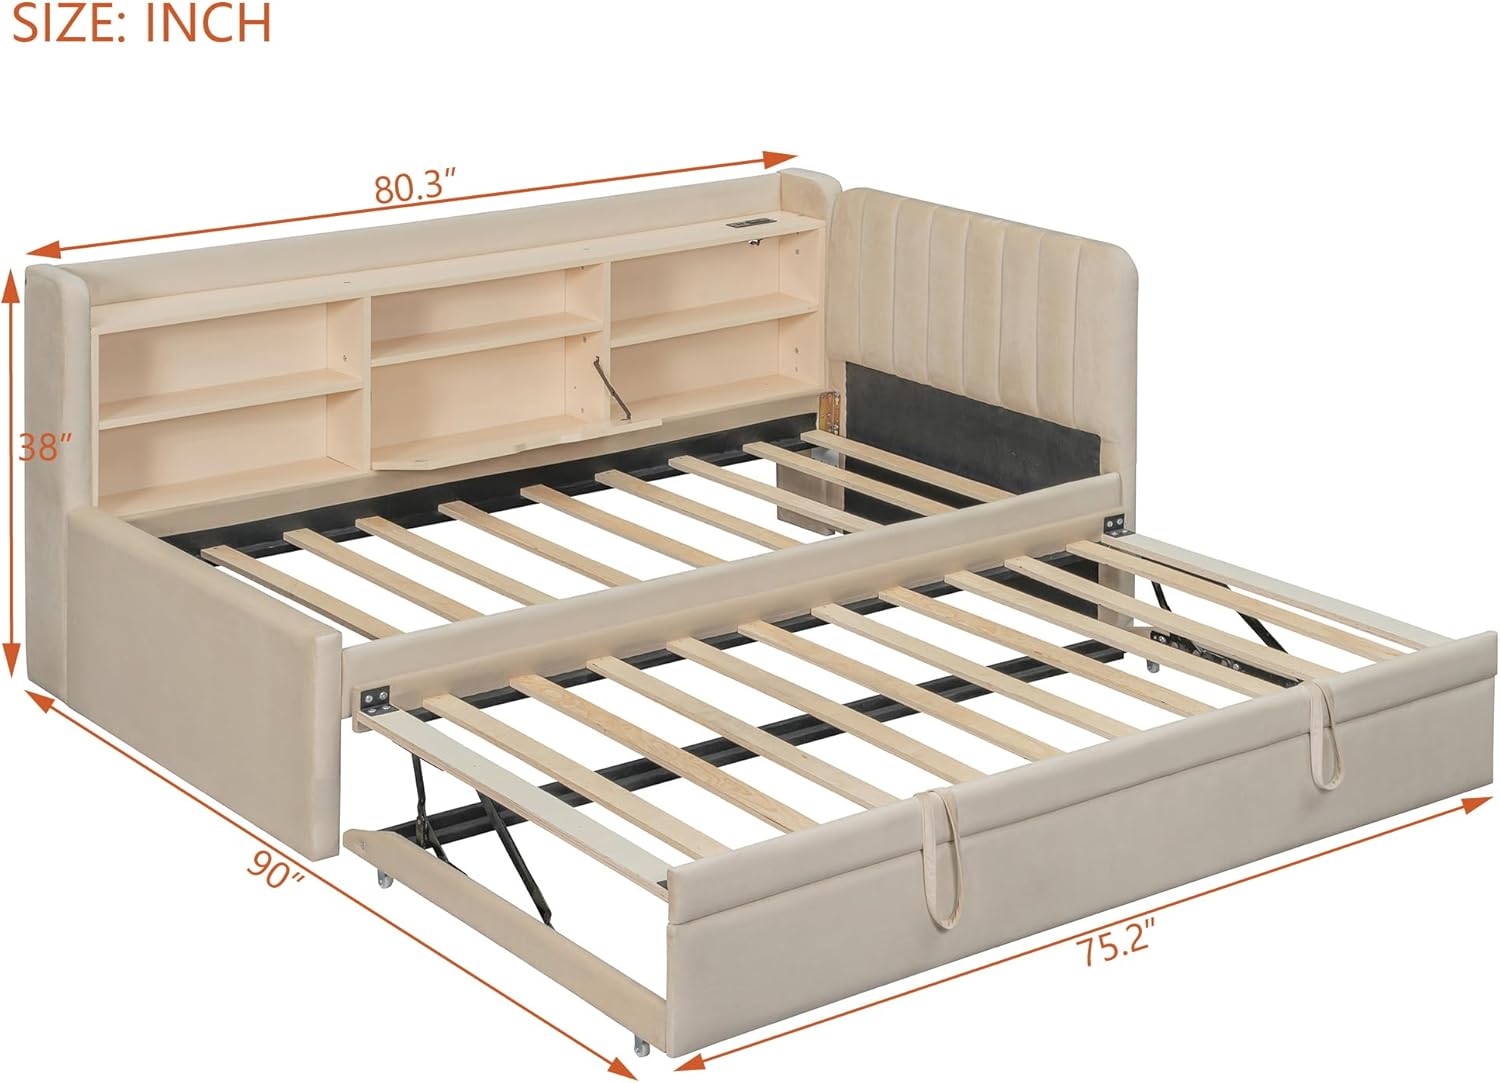
Figure 7: Dimensional diagram of the Polibi Twin Daybed, indicating length, width, and height measurements.
9. Warranty and Support
For warranty information, product support, or to order replacement parts, please contact Polibi customer service. Refer to your purchase documentation for specific warranty terms and contact details.
Polibi Customer Support: Please visit the official Polibi website or refer to the contact information provided with your purchase.


