
1. Introduction
This manual provides essential information for the safe and efficient installation, operation, and maintenance of your Speroni CAM 198 Self-priming Jet Water Pump. Please read these instructions thoroughly before attempting to install or operate the pump. Retain this manual for future reference.
2. Safety Information
Adherence to safety guidelines is crucial to prevent injury and damage. Always observe the following:
- Ensure the pump is installed by qualified personnel in accordance with local electrical and plumbing codes.
- Disconnect power before performing any maintenance or service.
- Do not operate the pump with damaged electrical cords or connections.
- Protect the pump from freezing temperatures.
- Ensure proper ventilation around the motor to prevent overheating.
- The pump is designed for clean water. Do not use it for flammable, corrosive, or abrasive liquids.
3. Product Overview
The Speroni CAM 198 is a self-priming jet water pump designed for high hydraulic performance and significant pressure capacity. It is suitable for water lifting and distribution in domestic fittings, particularly with small and medium-sized tanks. The pump can draw water from depths up to 8 meters and is constructed with durable materials such as a stainless steel AISI 304 pump body and impeller.
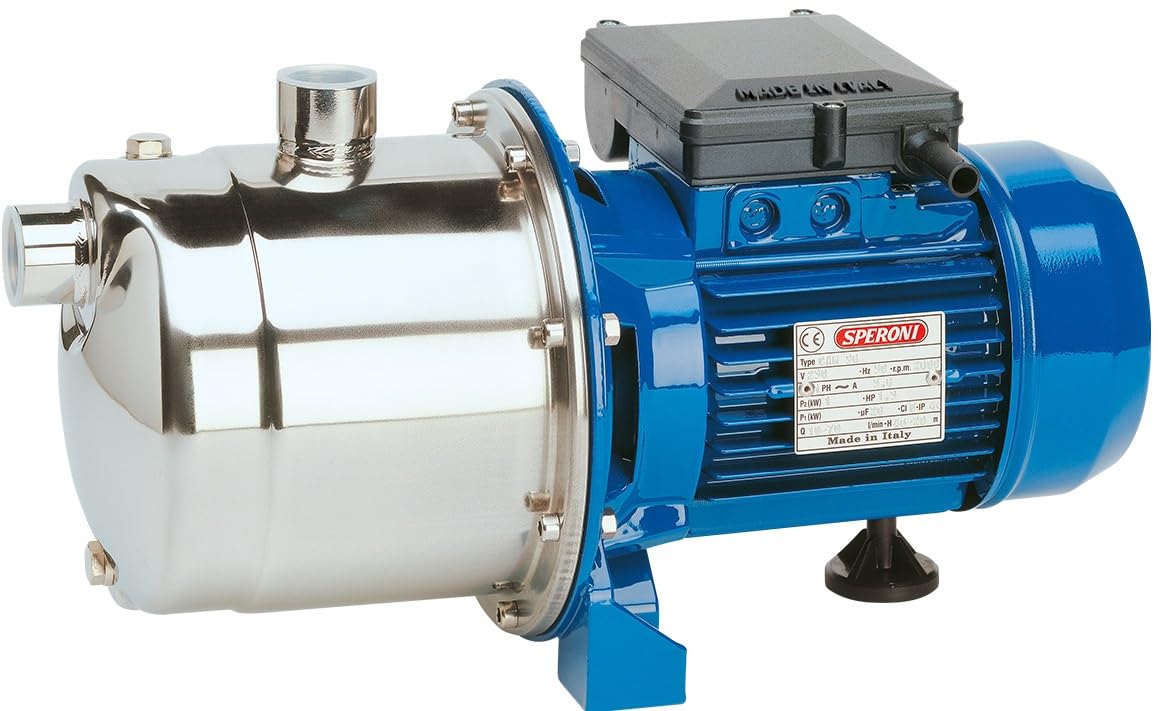
This image displays the Speroni CAM 198 self-priming jet water pump. The pump features a polished stainless steel housing for the pump body on the left, connected to a blue electric motor on the right. A black electrical connection box is mounted on top of the motor. The pump is designed for water lifting and distribution.
4. Specifications
| Parameter | Value |
|---|---|
| Model | CAM 198 |
| Manufacturer Part Number | 1811115 |
| Voltage | 230V |
| Ampere | 7.5A (Product Title) / 5A (Description) - Using 7.5A from title for consistency with motor details |
| Phase | Single Phase |
| Nominal Power | 1.6HP / 1.1kW |
| Power Consumption | 1.7kW |
| Frequency | 60Hz |
| Motor Type | Two-Pole Induction Motor |
| RPM | 3450 min-1 |
| Max. Suction Depth | 8 meters |
| Max. Liquid Temperature | 35°C |
| Pump Body Material | Stainless Steel AISI 304 |
| Impeller Material | Stainless Steel AISI 304 |
| Motor Support | Aluminum |
| Diffuser | Noryl |
| Shaft with Rotor | Stainless Steel AISI 304 |
| Mechanical Seal | Ceramic/Graphite/NBR |
| Protection Rating | IP 44 |
| Insulation Class | F |
| Item Weight | 14.4 kg (31 pounds) |
5. Setup and Installation
Proper installation is critical for pump performance and longevity. Follow these general guidelines:
- Location: Install the pump in a dry, well-ventilated area, protected from direct sunlight, rain, and freezing temperatures. Ensure sufficient space for maintenance.
- Mounting: Secure the pump to a stable, level surface using appropriate fasteners to minimize vibration.
- Piping: Use pipes of adequate diameter to minimize friction losses. Ensure all connections are airtight, especially on the suction side, to prevent air ingress. Install a foot valve with a strainer at the end of the suction pipe.
- Electrical Connection: Connect the pump to a dedicated electrical circuit with appropriate overcurrent protection. Ensure the voltage and frequency match the pump's specifications (230V, 60Hz, Single Phase). Wiring must comply with local electrical codes.
- Priming: Before first use, or if the pump has run dry, fill the pump casing and the suction line completely with water through the priming port until water overflows. Close the priming port securely.
6. Operating Instructions
Once installed and primed, the pump is ready for operation:
- Initial Start-up: After priming, switch on the power supply to the pump. The pump should start drawing water and build pressure.
- Monitoring: Observe the pump during the first few minutes of operation. Check for unusual noises, leaks, or excessive vibration.
- Continuous Operation: The pump is designed for continuous duty within its specified operating limits. Avoid running the pump dry, as this can cause severe damage to the mechanical seal and other components.
- Shut-down: To stop the pump, switch off the power supply.
7. Maintenance
Regular maintenance ensures optimal performance and extends the pump's lifespan:
- Check for Leaks: Periodically inspect all connections and the pump casing for any signs of water leakage. Tighten connections as needed.
- Clean Strainer/Foot Valve: If a foot valve with a strainer is used, regularly check and clean the strainer to prevent blockages and maintain efficient water flow.
- Winterization: In areas prone to freezing, drain the pump completely and store it in a frost-free environment to prevent damage from ice expansion.
- Motor Inspection: Ensure the motor's ventilation fins are clear of debris to allow for proper cooling.
- Mechanical Seal: The mechanical seal is a wear part. If persistent leaks occur from the pump shaft area, the seal may need replacement by a qualified technician.
8. Troubleshooting
Refer to the following table for common issues and their potential solutions:
| Problem | Possible Cause | Solution |
|---|---|---|
| Pump does not start | No power supply; Motor overload; Seized impeller | Check power connection and circuit breaker; Allow motor to cool and reset thermal protector; Inspect impeller for obstructions. |
| Pump runs but no water delivery | Pump not primed; Air leak in suction line; Suction lift too high; Clogged foot valve/strainer | Re-prime the pump; Check all suction connections for leaks; Reduce suction lift if possible; Clean foot valve/strainer. |
| Low pressure or flow | Partial blockage in piping; Worn impeller; Air in system | Inspect and clear piping; Have impeller checked by technician; Check for air leaks and re-prime. |
| Pump is noisy | Cavitation (air in water); Bearing wear; Loose mounting | Ensure proper priming and no air leaks; Contact service for bearing inspection; Tighten mounting bolts. |
9. Warranty and Support
This Speroni CAM 198 pump is covered by a manufacturer's warranty against defects in materials and workmanship. For specific warranty terms, duration, and conditions, please refer to the documentation provided at the time of purchase or contact your authorized dealer. For technical assistance, spare parts, or service inquiries, please reach out to your product supplier or an authorized service center.