1. Product Overview
The meite HM515 is a manual frame point driver designed for securing backing boards, artwork, and glass within picture frames. This tool is suitable for both professional framers and DIY enthusiasts, offering a reliable method for frame assembly. It operates without the need for an external power source or air compressor.
Key Features:
- Manual Operation: No gas or power supply required.
- Ergonomic Design: Features a comfort grip for reduced fatigue during extended use.
- Adjustable Depth: Allows for precise control over point insertion depth.
- Flexible Points: Compatible with 5/8 inch (15mm) flexible steel points, designed for easy installation and removal.
- Durable Construction: Built with an alloy body for longevity.
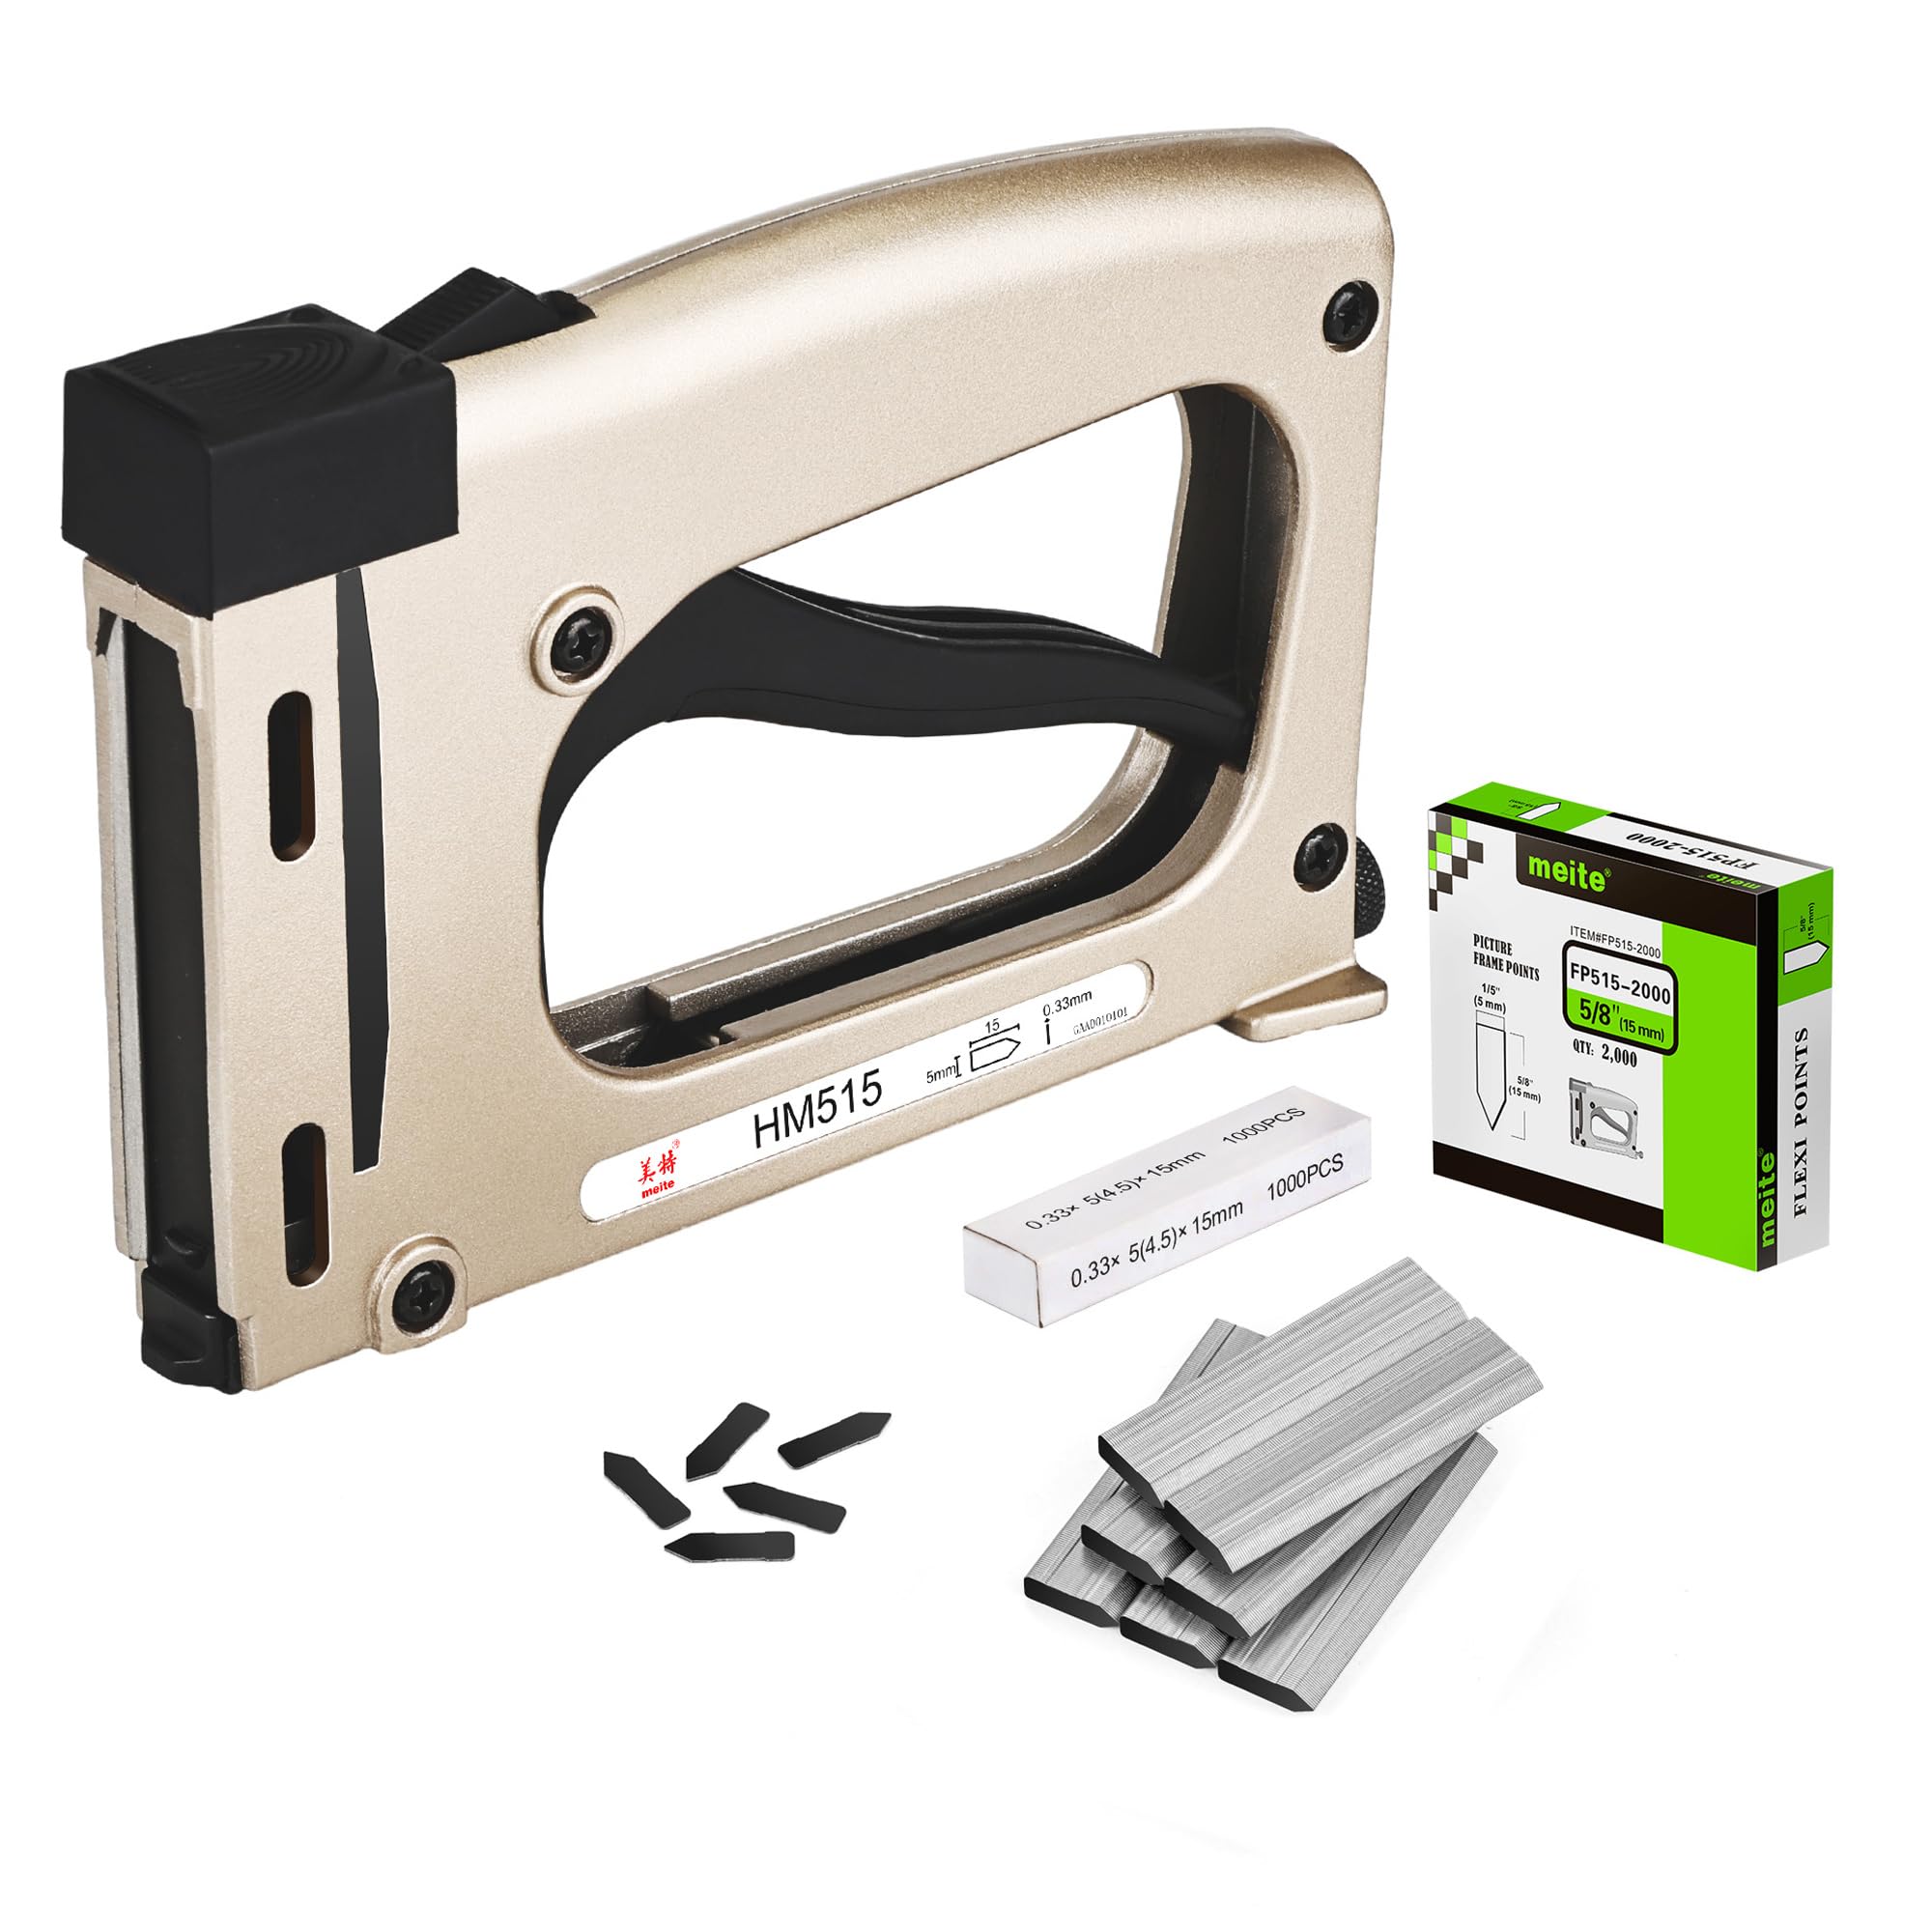
Figure 1: meite HM515 Frame Point Driver Components. This image displays the various parts of the point driver, including the binding button, full-grip trigger, alloy body, visualization window, nail exit area, and nail adjustment knob.
2. Setup and Loading Points
Before operating the meite HM515, ensure you have the correct 5/8 inch (15mm) flexible steel points. Always wear appropriate safety glasses when using this tool.
Loading Flexible Points:
- Open the Magazine: Press the binding button located at the rear top of the tool to release and open the nail magazine.
- Pull Out the Nail Rod: Gently pull the nail rod fully backward until it locks into place.
- Insert Points: Place a strip of flexible points into the magazine with the nail tips facing forward, ensuring they sit correctly within the channel.
- Close the Magazine: Push the nail rod forward until the magazine closes securely. Verify that the points are properly seated and ready for firing.
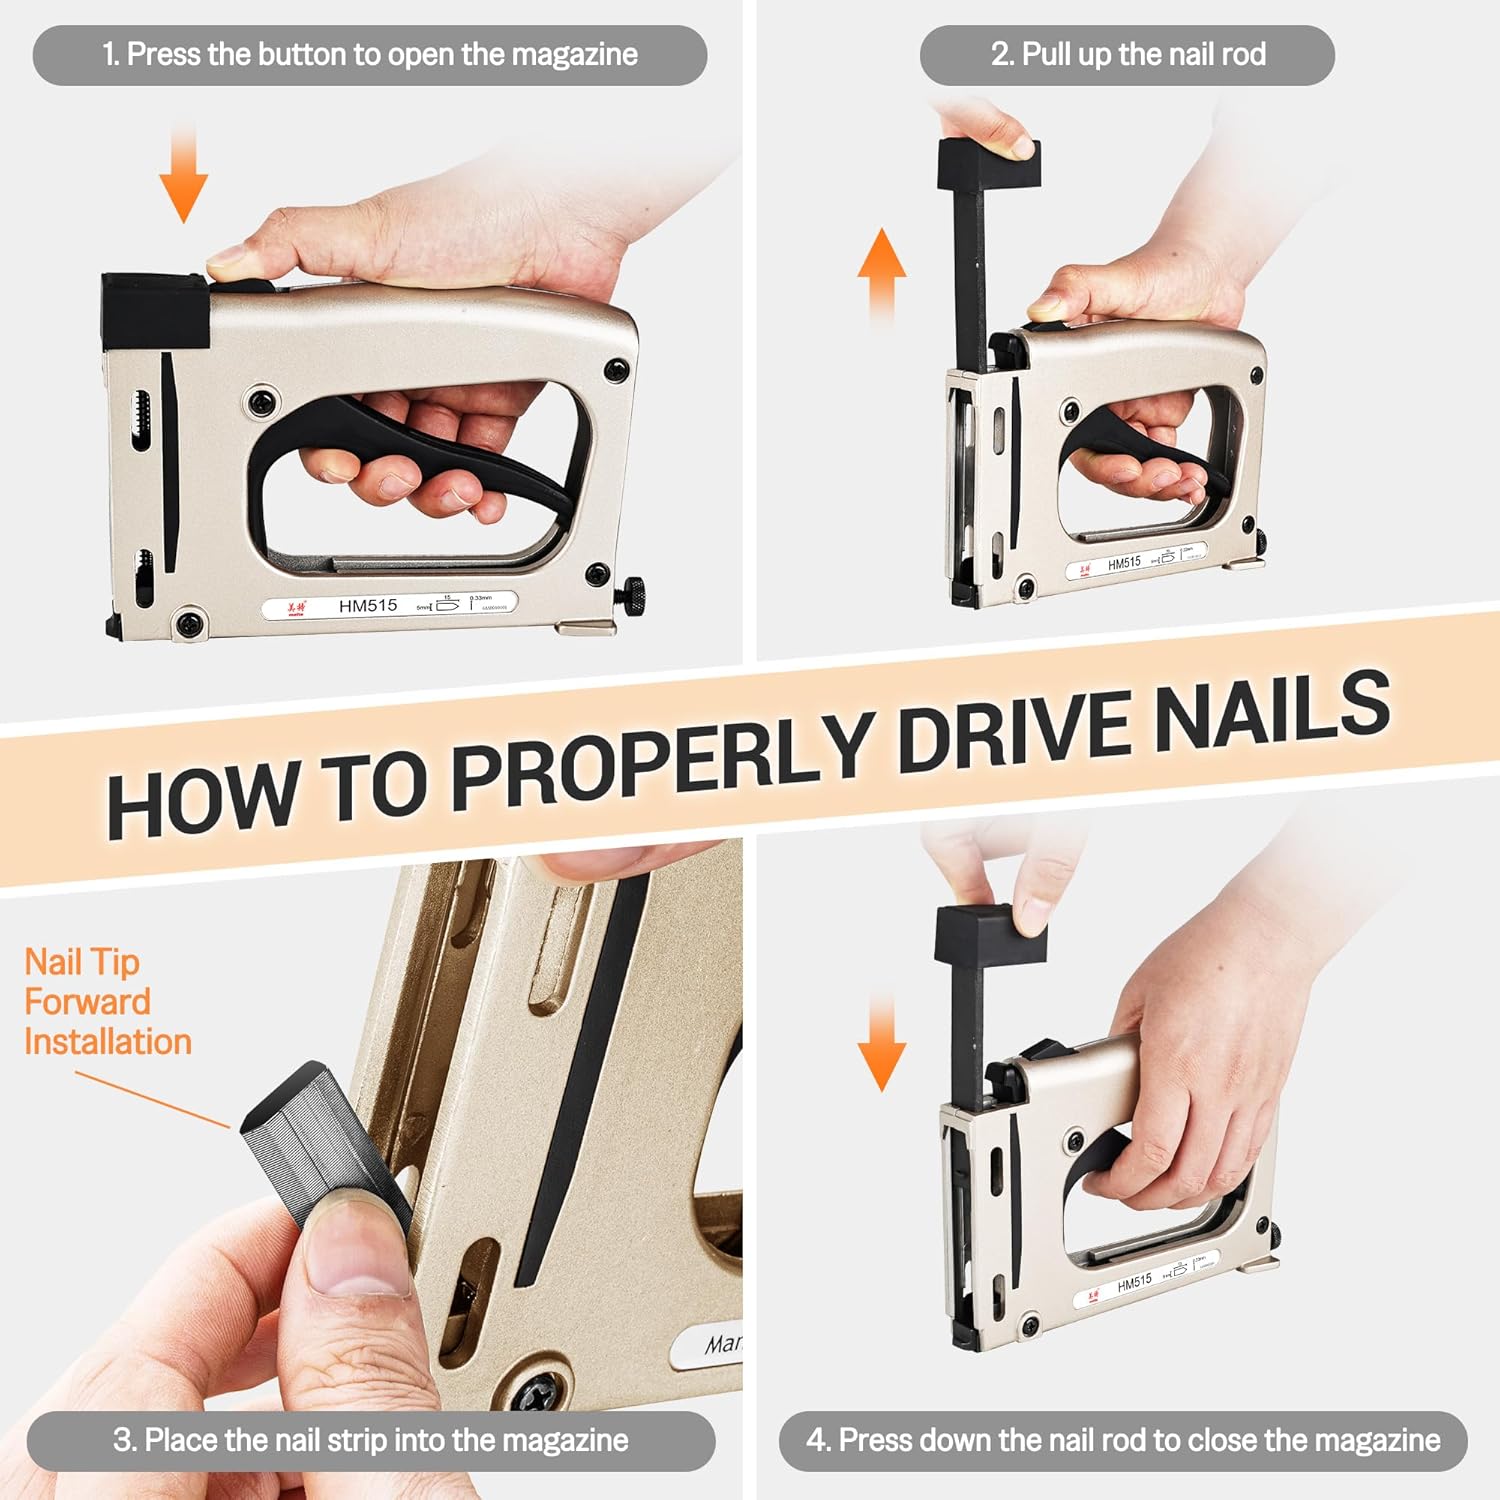
Figure 2: Steps for Loading Flexible Points. This image illustrates the process of opening the magazine, pulling the nail rod, inserting the point strip, and closing the magazine.
3. Operating Instructions
Follow these steps for safe and effective operation of your meite HM515 point driver.
Driving Points:
- Position the Tool: Place the front of the point driver firmly against the backing board or material where you intend to insert a point. Ensure the tool is perpendicular to the surface for optimal point insertion.
- Engage the Trigger: Squeeze the full-grip trigger to drive a flexible point into the material. Apply steady pressure.
- Repeat: Drive additional points as needed around the perimeter of the frame to secure the contents.
Adjusting Point Driving Depth:
The HM515 features a nail adjustment knob to control how deep the points are driven into the material.
- Deeper Insertion: Turn the nail adjustment knob clockwise to increase the driving depth.
- Shallower Insertion: Turn the nail adjustment knob counter-clockwise to decrease the driving depth.
Test the depth adjustment on a scrap piece of material before applying it to your final project.

Figure 3: Point Driving Depth Adjustment. This image illustrates how to adjust the driving depth of the points using the knob on the tool.
Applications:
The meite HM515 is ideal for various framing and DIY projects, including:
- Securing backing boards in photo frames.
- Assembling art frames.
- Constructing shadow boxes.

Figure 4: Typical Applications. This image demonstrates the point driver in use on a picture frame and shows examples of different framing projects.
4. Maintenance
Proper maintenance ensures the longevity and optimal performance of your meite HM515 point driver.
- Cleaning: Regularly wipe down the tool with a clean, dry cloth to remove dust and debris. Avoid using harsh chemicals or solvents.
- Storage: Store the point driver in a dry, cool place, away from direct sunlight and moisture. Keep it out of reach of children.
- Inspection: Periodically inspect the tool for any signs of wear or damage. Ensure all moving parts operate smoothly.
5. Troubleshooting
If you encounter issues with your meite HM515, refer to the following common problems and solutions:
| Problem | Possible Cause | Solution |
|---|---|---|
| Points not driving fully | Insufficient pressure applied; Depth adjustment set too shallow; Incorrect point size. | Apply more firm pressure to the tool; Adjust the depth knob clockwise for deeper insertion; Ensure you are using 5/8" (15mm) flexible points. |
| Points jamming in magazine | Points incorrectly loaded; Debris in magazine. | Re-load points ensuring they are properly seated; Clear any debris from the magazine channel. |
| Tool feels stiff or difficult to operate | Lack of lubrication; Internal debris. | Apply a small amount of light machine oil to moving parts (e.g., trigger pivot); Clean the tool thoroughly. |
6. Specifications
Tool Specifications:
| Feature | Detail |
|---|---|
| Model | HM515 |
| Operation Mode | Manual |
| Dimensions (L x W x H) | 7.5 x 1.57 x 4.9 inches (190 x 40 x 125 mm) |
| Weight | 1.37 lbs (0.62 kg) |
| Body Material | Alloy |
| Color | Black |

Figure 5: HM515 Tool Dimensions and Weight. This image provides a visual representation of the tool's physical specifications.
Compatible Flexible Points Specifications:
| Feature | Detail |
|---|---|
| Type | Flexible Steel Points |
| Length | 5/8 inch (15 mm) |
| Width | 0.177 inch (4.5 mm) |
| Thickness | 0.013 inch (0.35 mm) |

Figure 6: Flexible Point Dimensions. This image provides precise measurements for the compatible flexible points.
7. Safety Information
Always prioritize safety when using any tool. Adhere to the following guidelines:
- Eye Protection: Always wear safety glasses to protect your eyes from flying debris.
- Keep Hands Clear: Ensure hands and fingers are clear of the point exit area and trigger mechanism during operation.
- Stable Work Surface: Work on a stable and level surface to prevent accidental slips or movement of the workpiece.
- Proper Storage: Store the tool in a secure location, out of reach of children and unauthorized users.
- Inspect Before Use: Before each use, inspect the tool for any damage or loose parts. Do not use a damaged tool.


