
1. Introduction
Thank you for purchasing the Manker E02 III Pocket Flashlight. This compact and versatile flashlight is designed for everyday carry and various outdoor activities, featuring a magnetic tail, reversible clip, and USB-C rechargeable capability. This manual provides essential information for the safe and effective use of your flashlight.
2. Safety Information
- Battery Safety: Use only recommended AAA or 10440 batteries. Ensure correct polarity during installation. Do not mix old and new batteries, or different types of batteries. Remove batteries if the flashlight will not be used for an extended period.
- Heat Warning: The flashlight may become hot during prolonged use at high output levels. Avoid direct contact with hot surfaces to prevent burns.
- Eye Protection: Do not shine the light directly into eyes. The high intensity beam can cause temporary vision impairment or damage.
- Children: Keep out of reach of children.
- Disassembly: Do not attempt to disassemble the flashlight head or other sealed parts, as this may damage the light and void the warranty.
3. Package Contents
- Manker E02 III Pocket Flashlight
- Headband
- USB-C Charging Cable
- User Manual
- Spare O-rings
- Lanyard

Image: The Manker E02 III flashlight in orange, shown alongside its included gray and orange headband.
4. Product Overview
The Manker E02 III is a compact, right-angle flashlight designed for versatility. It features a durable aluminum body, a powerful LED emitter, and a user-friendly interface.
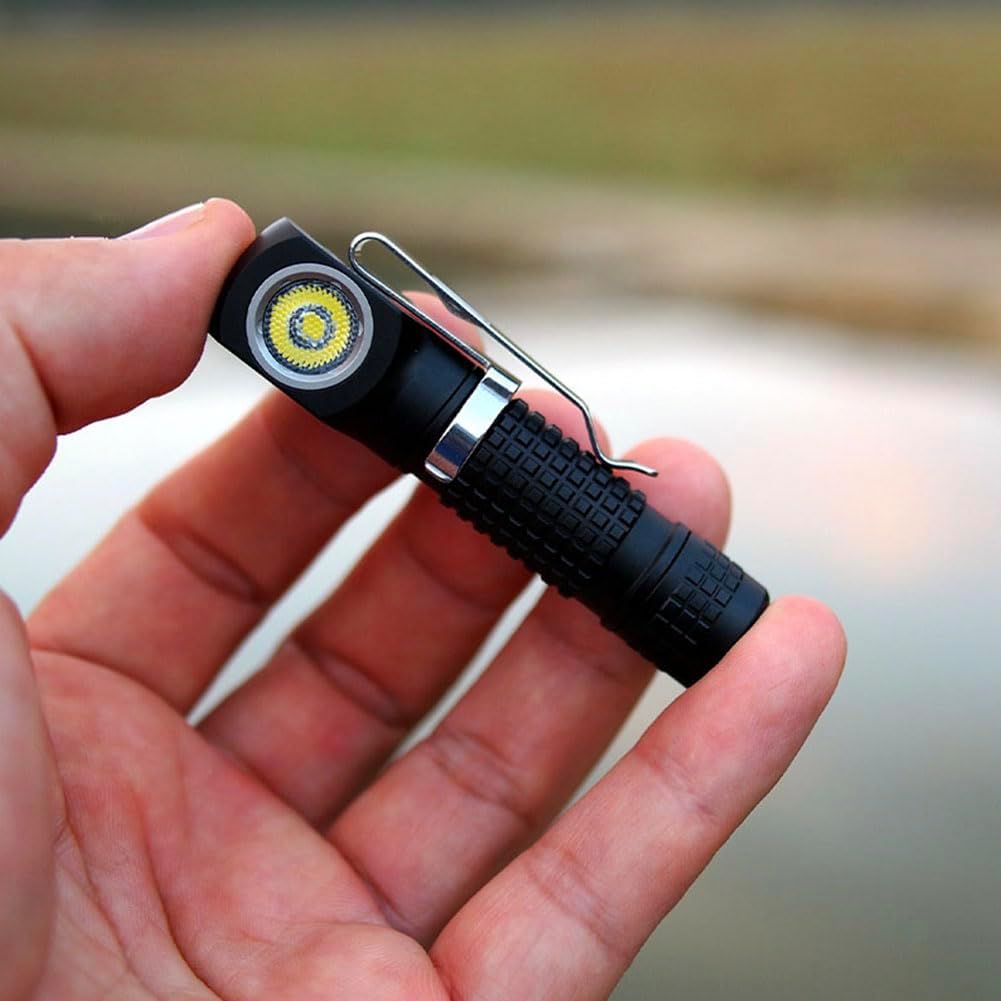
Image: A black Manker E02 III flashlight with its reversible clip, held in a person's hand, demonstrating its compact size.
Key Components:
- LED Emitter: Located at the front, providing the light source.
- Side Switch: Controls all flashlight functions.
- USB-C Charging Port: Integrated for convenient battery recharging (under a protective cover).
- Magnetic Tail Cap: Allows the flashlight to attach to metal surfaces for hands-free operation.
- Reversible Pocket Clip: For secure attachment to pockets, belts, or hats.

Image: A close-up view of the magnetic tail caps of several Manker E02 III flashlights in different colors, showing the integrated magnet.
5. Setup
5.1 Battery Installation
- Unscrew the tail cap of the flashlight.
- Insert one AAA or 10440 battery with the positive (+) end facing towards the head of the flashlight.
- Screw the tail cap back on tightly to ensure proper contact and water resistance.
5.2 Attaching the Headband
The Manker E02 III can be used as a headlamp with the included headband.
- Slide the flashlight into the silicone mount on the headband. Ensure the light is securely seated.
- Adjust the elastic strap for a comfortable and secure fit on your head.

Image: A Manker E02 III flashlight, in a dark color, securely mounted in its headband, resting on a wooden surface.
6. Operating Instructions
The Manker E02 III features a single side switch for all operations.
6.1 Basic Operation
- Turn On/Off: Single click the side switch to turn the flashlight on or off.
- Mode Cycling: When the light is on, press and hold the side switch to cycle through Low → Medium → High. Release the switch to select the desired mode.
- Mode Memory: The flashlight will remember the last used general mode (Low, Medium, High) when turned off and on again.
6.2 Special Modes
- Moonlight Mode: From OFF, press and hold the side switch for approximately 1 second to activate Moonlight mode.
- Turbo Mode: From ON, double-click the side switch to activate Turbo mode. Double-click again to return to the previous mode.
- Strobe Mode: From OFF, double-click the side switch to activate Strobe mode. Single click to turn off.
- Lockout Function: From OFF, rapidly triple-click the side switch to activate lockout. The light will flash once to confirm. To unlock, rapidly triple-click again. This prevents accidental activation.
7. Charging
The Manker E02 III features a built-in USB-C charging port for convenient recharging of compatible 10440 Li-ion batteries. AAA batteries are not rechargeable via the flashlight's USB-C port.
- Locate the USB-C charging port on the flashlight body (usually covered by a silicone plug).
- Open the silicone plug and connect the provided USB-C cable to the flashlight and a USB power source (e.g., wall adapter, power bank, computer).
- The indicator light on the flashlight will show charging status (e.g., red for charging, green for fully charged).
- Once charging is complete, disconnect the cable and securely close the silicone plug to maintain water resistance.
8. Maintenance
- Cleaning: Clean the flashlight body with a soft, damp cloth. Do not use abrasive cleaners or solvents.
- Threads and O-rings: Periodically lubricate the screw threads and O-rings with silicone grease to maintain water resistance and smooth operation. Replace worn O-rings with the provided spares.
- Battery Care: Remove batteries if the flashlight is not used for extended periods to prevent leakage.
9. Troubleshooting
- Flashlight not turning on:
- Check battery installation for correct polarity.
- Ensure the tail cap is screwed on tightly.
- Check if the battery is charged.
- Ensure the flashlight is not in lockout mode (triple-click to unlock).
- Light output is dim or flickering:
- Battery may be low; recharge or replace.
- Clean battery contacts and threads.
- Charging not working:
- Ensure a 10440 Li-ion battery is installed (AAA batteries are not rechargeable via USB-C).
- Check the USB-C cable and power source.
- Ensure the charging port is clean and free of debris.
10. Specifications
The Manker E02 III is available with different LED options. This manual refers to the Cool White 6500K version.

Image: A comparison showing the beam profiles of two Manker E02 III flashlights, one with a Cool White 6500K LED and another with a Nichia 519A-v1 R9080 4000K LED.
General Specifications:
- LED Type: Customized Cool White LED (6500K)
- Max Output: 560 Lumens
- Max Beam Distance: 80 meters
- Water Resistance: IP68 (2 meters submersible)
- Impact Resistance: 2 meters
- Battery Compatibility: 1 x AAA Alkaline, 1 x AAA Ni-MH, or 1 x 10440 Li-ion (USB-C rechargeable for 10440 only)
- Dimensions: 72.3 mm (Length) x 16.8 mm (Head Diameter) x 15.2 mm (Body Diameter) / 2.85"D x 0.66"W x 0.6"H
- Weight: 35.3 grams (1.25 ounces) without battery
Performance Data (Cool White LED):

Image: A detailed table showing the technical performance data for the Manker E02 III flashlight with both Cool White LED and Nichia 519A LED, across various battery types (10440 Li-ion, AAA Ni-MH, AAA Alkaline) and modes (Moonlight, Low, Medium, High, Turbo, Strobe), including lumens, runtime, beam distance, and peak beam intensity.
Note: The above data has been measured in accordance with international flashlight testing standards ANSI / NEMA FL-1. Performance may vary slightly during real-world use due to battery type, individual usage habits, and environmental factors.
11. Warranty and Support
Mankerlight products are manufactured with high quality standards. For warranty information, product support, or service inquiries, please contact your authorized Mankerlight dealer or visit the official Mankerlight website. Please retain your proof of purchase for warranty claims.
Website: www.mankerlight.com