
Korfile GR010
Korfile Portable Clothes Rack GR010 Instruction Manual
Model: 2-Big Shelf + 3-Small Shelf
1. Introduction
Thank you for choosing the Korfile Portable Clothes Rack GR010. This instruction manual provides essential information for the safe assembly, operation, and maintenance of your new clothing storage solution. Please read this manual thoroughly before assembly and retain it for future reference.

Image 1.1: The Korfile Portable Clothes Rack GR010, fully assembled and in use, showcasing its hanging rods and multiple shelves for organized storage.
The Korfile GR010 is a versatile and sturdy freestanding clothing rack designed for organizing garments, shoes, and accessories. It features a robust metal frame, multiple hanging rods, and shelves, making it suitable for bedrooms, cloakrooms, laundry rooms, or retail spaces.
2. Package Contents
Before beginning assembly, please verify that all components listed below are present and undamaged. If any parts are missing or damaged, do not proceed with assembly and contact customer support.
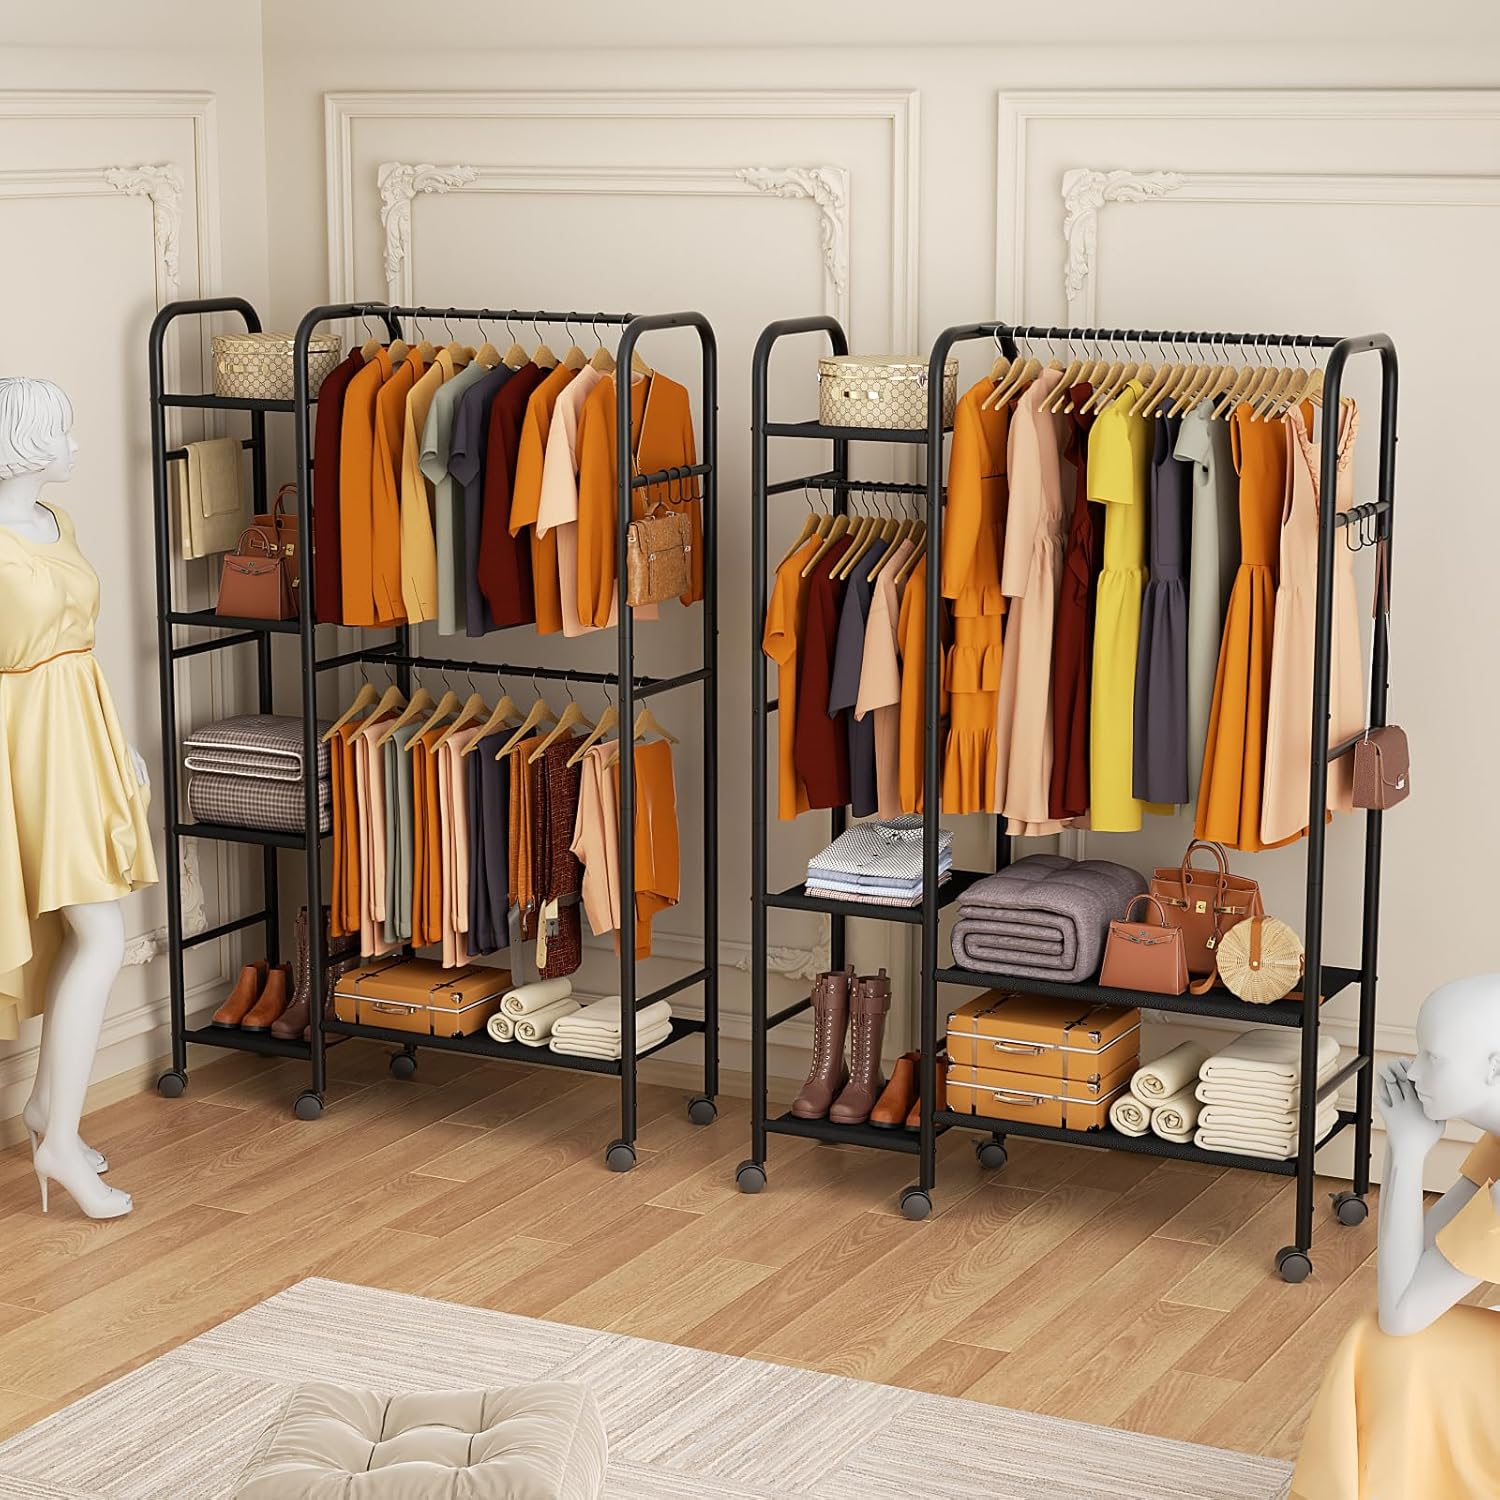
Image 2.1: All components of the Korfile Portable Clothes Rack laid out before assembly, including metal tubes, shelves, wheels, and hardware.
- Metal Frame Tubes (various lengths and shapes for vertical supports, horizontal rods, and shelf frames)
- Mesh Shelves (2 large, 3 small)
- Hanging Rods (2 reinforced)
- 360° Swivel Wheels (4 total, 2 with locking mechanism)
- Adjustable Leveling Feet (optional alternative to wheels)
- Accessory Hooks (bonus items for side hanging)
- Anti-Tip Kit (wall anchor strap and screws)
- Assembly Hardware (screws, Allen wrench)
- Instruction Manual
3. Assembly Instructions
Assembly is required for this product. Please follow these steps carefully. It is recommended to assemble the unit on a soft, clean surface to prevent scratches.
3.1 Step-by-Step Assembly
- Unpack and Identify Parts: Lay out all components from the package and compare them with the 'Package Contents' list and Image 2.1. Ensure all parts are present.
- Assemble Base Frames: Connect the bottom horizontal tubes to the vertical support tubes using the provided screws and Allen wrench. Ensure connections are secure.
- Attach Wheels or Leveling Feet: Screw the 360° swivel wheels (2 with locks) into the designated holes at the bottom of the base frames. Alternatively, if you prefer a stationary unit, attach the adjustable leveling feet.
- Install Lower Shelves: Place the mesh shelves onto the designated support bars on the lower sections of the frame. Secure them with screws if applicable.
- Attach Vertical Extensions: Connect the upper vertical support tubes to the lower sections, ensuring they align correctly.
- Install Hanging Rods: Insert the two reinforced hanging rods into their respective slots on the upper frame.
- Install Upper Shelves: Place the remaining mesh shelves onto their designated support bars in the upper sections.
- Attach Accessory Hooks: Clip or screw the bonus accessory hooks onto the side bars as desired for additional hanging space.
- Final Tightening: Once all components are in place, carefully tighten all screws to ensure the rack is stable and secure. Do not overtighten.
3.2 Anti-Tip Kit Installation (Recommended)
To enhance stability and safety, especially in households with children or pets, it is highly recommended to install the anti-tip kit.

Image 3.1: Detail of the anti-tip kit, showing a strap securing the rack's frame to a wall anchor for enhanced stability.
- Position the clothes rack in its desired location.
- Mark the wall through the bracket of the anti-tip strap, ensuring it aligns with a sturdy part of the rack's frame.
- Drill a pilot hole in the marked spot on the wall (use appropriate drill bit for your wall type).
- Secure the wall anchor and bracket to the wall using the provided screws.
- Attach the strap to the rack's frame and the wall bracket, ensuring it is taut.
4. Operating Instructions
The Korfile Portable Clothes Rack is designed for intuitive use. Here are guidelines for maximizing its storage capabilities.

Image 4.1: The clothes rack fully utilized, displaying hanging clothes, folded items on shelves, and shoes on the bottom, demonstrating its multi-functional storage.
4.1 Hanging Garments
- Use the two reinforced hanging rods for coats, dresses, shirts, and other garments.
- Distribute weight evenly across the rods to maintain stability.
- The open-access design allows for easy selection and retrieval of clothing.
4.2 Utilizing Shelves

Image 4.2: Detailed view of the rack's features, including the wide hanging rod, dedicated shoe storage area, side hooks, and multi-tier shelving for various items.
- The rack includes 2 large shelves and 3 small shelves. Use these for folded items, bags, storage boxes, or other accessories.
- The bottom shelf provides dedicated space for shoes, keeping them organized and accessible.
- Utilize the bonus accessory hooks on the side for hanging belts, scarves, handbags, or other small items.
4.3 Mobility and Stability

Image 4.3: Illustration of the rack's mobility features, highlighting the 360° swivel wheels (with lockable option), adjustable feet for stability, and silent rolling capability.
- The four 360° swivel wheels allow for easy relocation of the rack.
- Two of the wheels are lockable. Engage the locks when the rack is in its desired position to prevent unintended movement.
- If using the adjustable leveling feet, rotate them to ensure the rack is stable and level on uneven surfaces.
5. Maintenance
Proper care will extend the life and appearance of your Korfile Portable Clothes Rack.
5.1 Cleaning
- Wipe the metal frame and shelves with a soft, damp cloth.
- For stubborn dirt, a mild soap solution can be used, followed by wiping with a clean, dry cloth.
- Avoid using abrasive cleaners, harsh chemicals, or scouring pads, as these can damage the powder-coated finish.
5.2 General Care
- Regularly check all screws and connections to ensure they remain tight. Retighten if necessary.
- Avoid overloading the hanging rods or shelves beyond their capacity to prevent bending or damage.
- Keep the rack in a dry environment to prevent rust, although the powder-coated finish offers rust resistance.
6. Troubleshooting
If you encounter any issues with your clothes rack, refer to the following common problems and solutions.
| Problem | Possible Cause | Solution |
|---|---|---|
| Rack is wobbly or unstable. | Loose screws; uneven floor; overloaded. | Ensure all screws are tightened. If using leveling feet, adjust them until stable. Distribute weight evenly. Consider installing the anti-tip kit. |
| Wheels do not roll smoothly. | Debris in wheels; wheel locks engaged. | Check for and remove any debris from the wheels. Ensure wheel locks are disengaged. |
| Hanging rod appears to sag. | Overloaded rod. | Reduce the number or weight of garments on the rod. Distribute clothes more evenly across both rods. |
| Difficulty assembling a part. | Incorrect orientation; wrong part. | Refer to the assembly diagrams and ensure parts are oriented correctly. Verify you are using the correct components for each step. |
7. Specifications
Detailed specifications for the Korfile Portable Clothes Rack GR010 (2-Big Shelf + 3-Small Shelf).
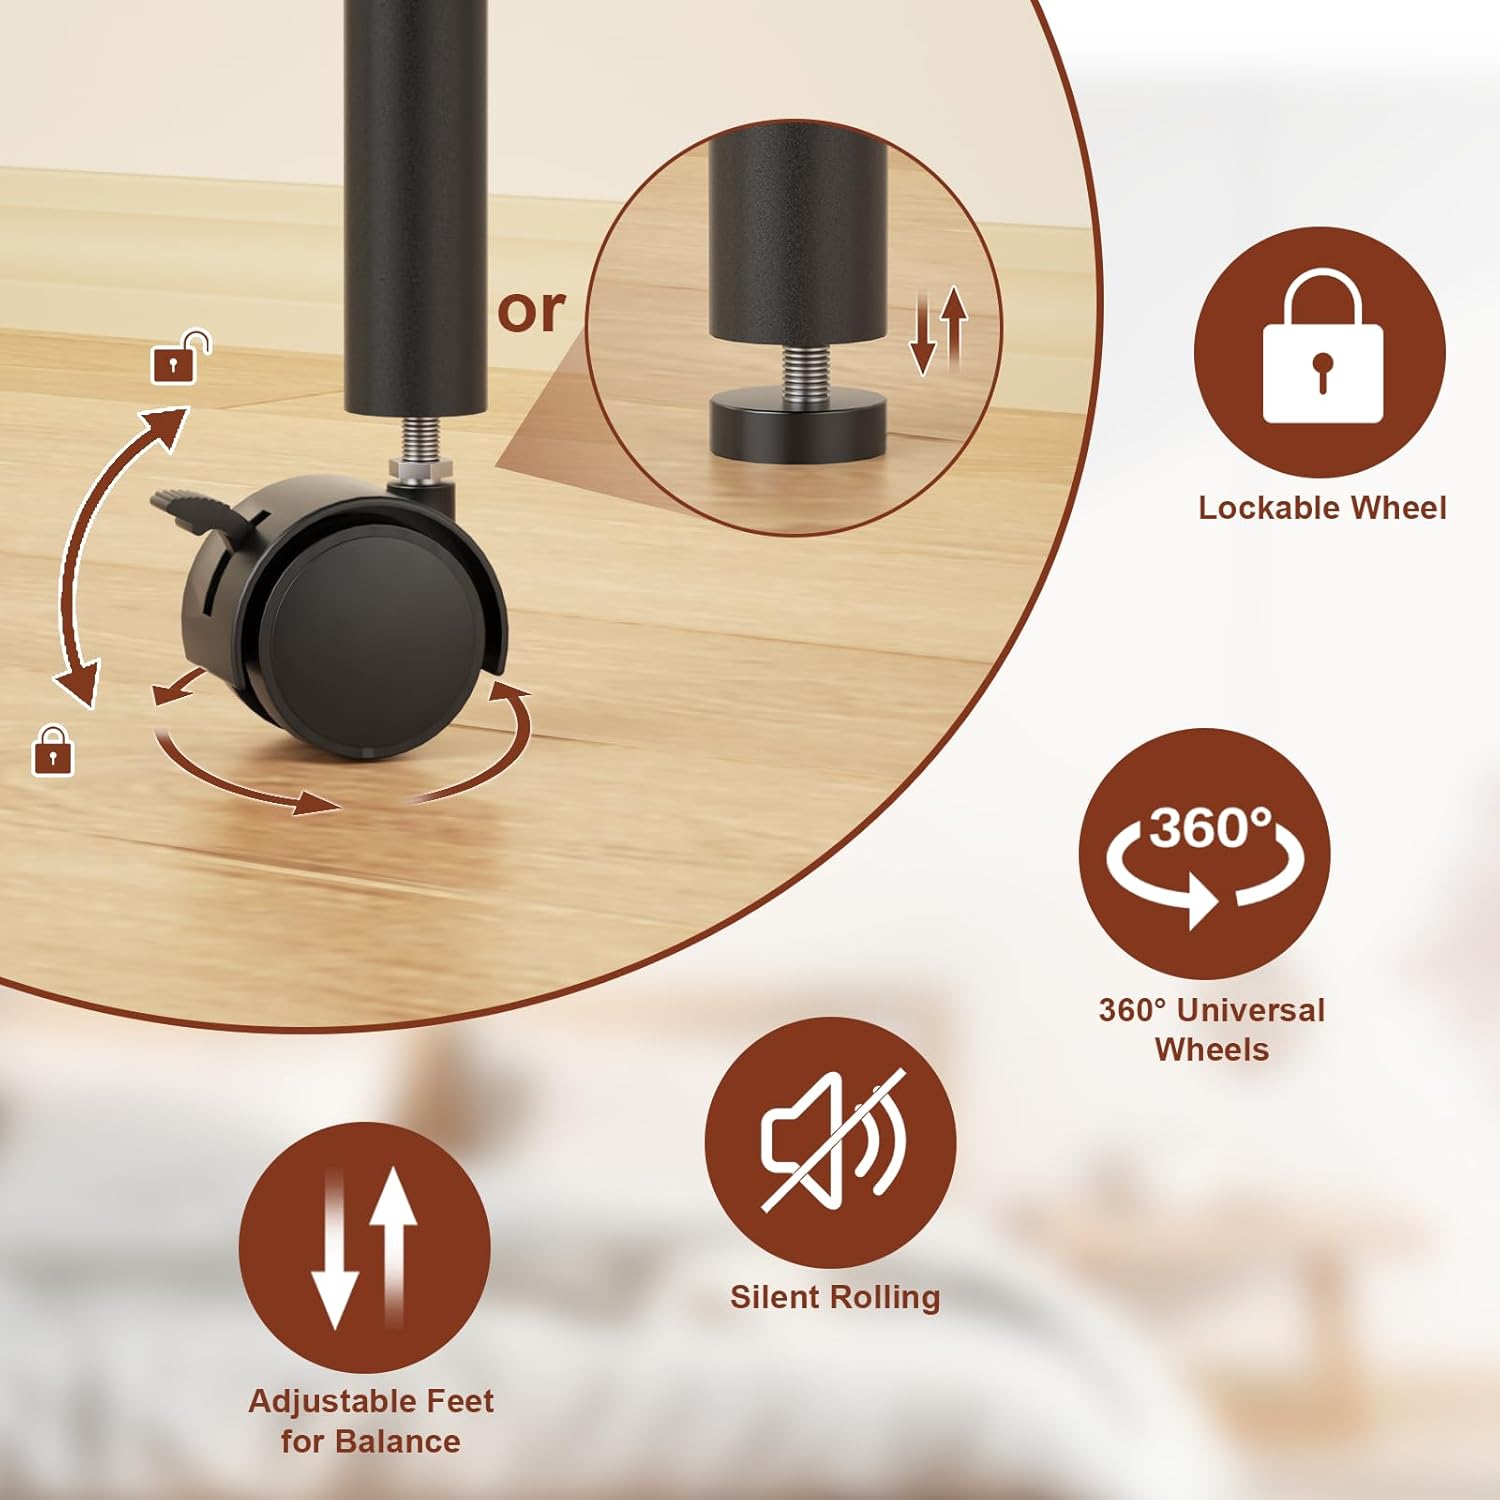
Image 7.1: Technical diagram illustrating the precise measurements of the clothes rack, including height, width, depth, and shelf spacing.
- Brand: Korfile
- Model: GR010 (2-Big Shelf + 3-Small Shelf)
- Material: Metal, Alloy Steel
- Product Dimensions (Overall): Approximately 45" L x 16" W x 69" H (114.3 cm L x 40.6 cm W x 175.3 cm H)
- Item Weight: Approximately 14.1 pounds (6.4 kg)
- Number of Shelves: 5 (2 large, 3 small)
- Installation Type: Free Standing
- Special Features: Portable, 360° Swivel Wheels (2 lockable), Adjustable Leveling Feet, Anti-Tip Kit, Accessory Hooks
- Assembly Required: Yes
8. Warranty and Support
Korfile is committed to providing high-quality products. For specific warranty details, please refer to the warranty card included with your purchase or contact Korfile customer support directly.
If you have any questions, require assistance with assembly, or need to report missing/damaged parts, please contact our customer support team. Contact information can typically be found on the product packaging or on the official Korfile website.
Ask a question about this manual
Ask about setup, troubleshooting, compatibility, parts, safety, or missing instructions. Manuals+ will review the question and use this page’s manual context to help answer it.