
1. Introduction
This manual provides essential information for the setup, operation, and maintenance of your Cirutrontek UNO R3 Electronic Kit. This kit is designed for STEM projects, offering a comprehensive collection of components for learning electronics, coding, and robotics.
The kit includes an UNO R3 controller board, compatible with Arduino UNO R3 and UNO R4, along with a wide array of modules and components. All modules are pre-soldered for direct use in experiments.
2. Kit Contents
The Cirutrontek UNO R3 Electronic Kit contains over 200 components, including:
- Cirutrontek UNO R3 Controller Board (1 PCS)
- USB Cable (1 PCS)
- 830 Tie-Points Breadboard (1 PCS)
- Power Supply Module (1 PCS)
- Servo Motor SG90 (1 PCS)
- Stepper Motor (1 PCS) and ULN2003 Stepper Motor Driver Module (1 PCS)
- Various LEDs (White, Yellow, Blue, Green, Red, RGB)
- Resistors of various values (10R, 100R, 220R, 330R, 1K, 2K, 5K1, 10K, 100K, 1M)
- Capacitors (Ceramic, Electrolytic)
- Sensors: HC-SR501 PIR Module, Joystick Module, GY-521 Module, Water Level Detection Sensor, Sound Sensor Module, DHT11 Temperature and Humidity Module, Photoresistor, Thermistor
- Display Modules: MAX7219 Module, 1-Digit 7-Segment Display, 4-Digit 7-Segment Display, LCD1602 Module
- Other Components: Membrance Switch Module, 5V Relay, IR Receiver Module, Remote, Breadboard Jumper Wires, 9V 1A Adapter, RC522 RFID Module, Diode Rectifier, NPN Transistors, Tilt Ball Switch, Small Buttons, L293D, SN74HC595 IC, Active Buzzer, Passive Buzzer, DS1307 RTC Module, Potentiometer, Rotary Encoder Module, 9V Battery, DC Motor with Fan Blade.

Image: All components included in the Cirutrontek UNO R3 Electronic Kit, neatly arranged.
3. Setup Instructions
To begin using your Cirutrontek UNO R3 Electronic Kit, follow these general steps. For detailed, project-specific setup instructions, refer to the comprehensive PDF tutorial provided by Cirutrontek.
3.1. Initial Connection
- Unpack Components: Carefully remove all components from the storage box.
- Connect UNO R3 Board: Connect the Cirutrontek UNO R3 Controller Board to your computer using the provided USB cable. This will power the board and establish a data connection.
- Install IDE: Ensure you have the Arduino IDE (Integrated Development Environment) installed on your computer. This software is compatible with the UNO R3 board and is necessary for programming.
3.2. Accessing the Tutorial
The kit includes a detailed PDF tutorial with 33 lesson links and corresponding code. This tutorial is crucial for learning how to use each module and build projects.
- Tutorial Access: The tutorial is typically provided via a download link. If you do not have access to the PDF tutorial, please contact Cirutrontek customer support at cirutrontekservice@outlook.com.
- Follow Lessons: Each lesson in the PDF tutorial will guide you through connecting specific components to the UNO R3 board and breadboard, uploading code, and observing the results.

Image: Overview of the Cirutrontek UNO R3 Electronic Kit, showing the main board and various components with example circuit diagrams.
4. Operating the Kit
Operating the Cirutrontek UNO R3 Electronic Kit involves following the instructions in the provided PDF tutorial for each project. Each lesson will detail the necessary wiring, component placement, and code to upload to the UNO R3 board.
4.1. Basic Operation Flow
- Review Lesson: Read through the current lesson in the PDF tutorial to understand the project objective and required components.
- Assemble Circuit: Connect the components on the breadboard and to the UNO R3 board as shown in the tutorial's schematic diagrams. Pay close attention to polarity and pin assignments.
- Load Code: Open the provided code for the lesson in the Arduino IDE.
- Upload Code: Connect the UNO R3 board to your computer via USB, select the correct board and port in the Arduino IDE, and upload the code.
- Test Project: Observe the circuit's behavior and verify it functions as described in the tutorial.
4.2. Example Projects

Image: An UNO R3 board connected to an LED matrix display, demonstrating a basic output project.
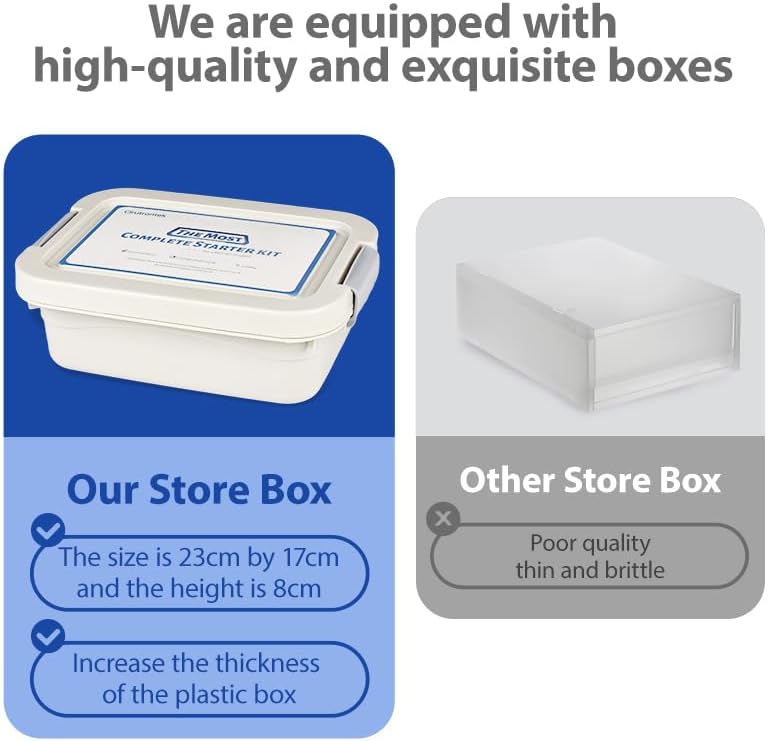
Image: An UNO R3 board connected to an ultrasonic sensor, illustrating a distance measurement input project.

Image: An UNO R3 board connected to an RFID module, showing an example of an identification project.
4.3. Instructional Video
Video: An unboxing and tutorial experiment video for the Cirutrontek UNO R3 kit, demonstrating various functionalities and setup procedures.
5. Maintenance
Proper maintenance ensures the longevity and functionality of your electronic kit components.
- Storage: Store all components in the provided transparent 6-grid box or a similar organized container when not in use. This prevents loss and damage.
- Handling: Handle electronic components with care. Avoid bending pins excessively or applying undue force.
- Cleanliness: Keep the components free from dust and moisture. Use a soft, dry cloth for cleaning if necessary.
- Power Off: Always disconnect power from the UNO R3 board before making any changes to the circuit.

Image: The durable storage box for the Cirutrontek UNO R3 Electronic Kit, designed for organization and protection of components.
6. Troubleshooting
If you encounter issues while using your Cirutrontek UNO R3 Electronic Kit, consider the following troubleshooting steps:
- No Power to Board:
- Ensure the USB cable is securely connected to both the UNO R3 board and your computer.
- If using an external power supply, verify it is correctly connected and providing the correct voltage (9V 1A adapter).
- Check if the power LED on the UNO R3 board is illuminated.
- Code Upload Failure:
- In the Arduino IDE, ensure the correct board type ("Arduino Uno") is selected under Tools > Board.
- Verify the correct serial port is selected under Tools > Port. This is often labeled as "COMx" on Windows or "/dev/tty.usbmodemxxxx" on macOS.
- Close any other programs that might be using the serial port.
- Circuit Not Functioning as Expected:
- Double-check Wiring: Compare your circuit carefully with the schematic in the PDF tutorial. Ensure all connections are correct, especially power (VCC/5V) and ground (GND).
- Component Orientation: Verify that polarized components (LEDs, diodes, electrolytic capacitors, ICs) are inserted in the correct orientation.
- Breadboard Connections: Ensure components are firmly seated in the breadboard and that connections are made to the correct rows/columns.
- Code Logic: Review the uploaded code for any errors or discrepancies with the tutorial.
- Missing Tutorial/Resources:
- If you did not receive the PDF tutorial or a link to it, please contact Cirutrontek customer support directly for assistance.
7. Specifications
| Feature | Detail |
|---|---|
| Brand | Cirutrontek |
| Model Number | UNO R3 Electronic kit |
| Educational Objective | STEM |
| Unit Count | 200+ Components |
| Item Dimensions (L x W x H) | 9.65 x 6.7 x 3.14 inches |
| Item Weight | 1.6 pounds |
| Compatibility | Arduino UNO R3, UNO R4, Arduino IDE |
8. Warranty Information
The Cirutrontek UNO R3 Electronic Kit comes with a 1-year manufacturer warranty. For warranty claims or detailed information regarding the terms and conditions, please contact Cirutrontek customer support.
9. Support and Contact
For any questions, technical assistance, or support regarding your Cirutrontek UNO R3 Electronic Kit, please contact our customer service team:
- Email: cirutrontekservice@outlook.com
- Online Resources: Refer to the provided PDF tutorial for comprehensive project guides and code examples.
When contacting support, please provide your product model number (UNO R3 Electronic kit) and a detailed description of your issue.