1. Introduction
Thank you for choosing the Ortis In-Wall Humidity Sensor Switch. This device is designed to automatically control ventilation fans or humidifiers based on ambient humidity levels, ensuring a comfortable and healthy indoor environment. It features advanced digital sensing technology for accurate moisture detection and offers both automatic and manual operating modes. Please read this manual carefully before installation and operation to ensure proper use and safety.
2. Safety Information
- WARNING: Risk of Electric Shock. Installation must be performed by a qualified electrician in accordance with all local and national electrical codes.
- Disconnect power at the circuit breaker before installing or servicing the switch.
- This device requires a neutral wire for operation. Ensure a neutral wire is present in your electrical box.
- Do not use this device with loads exceeding its specified ratings (16 Amps, 120V/220V).
- Do not attempt to disassemble or modify the switch. There are no user-serviceable parts inside.
- Keep the device away from water and excessive moisture during installation and operation, except for its intended use in humid environments.
3. Product Overview
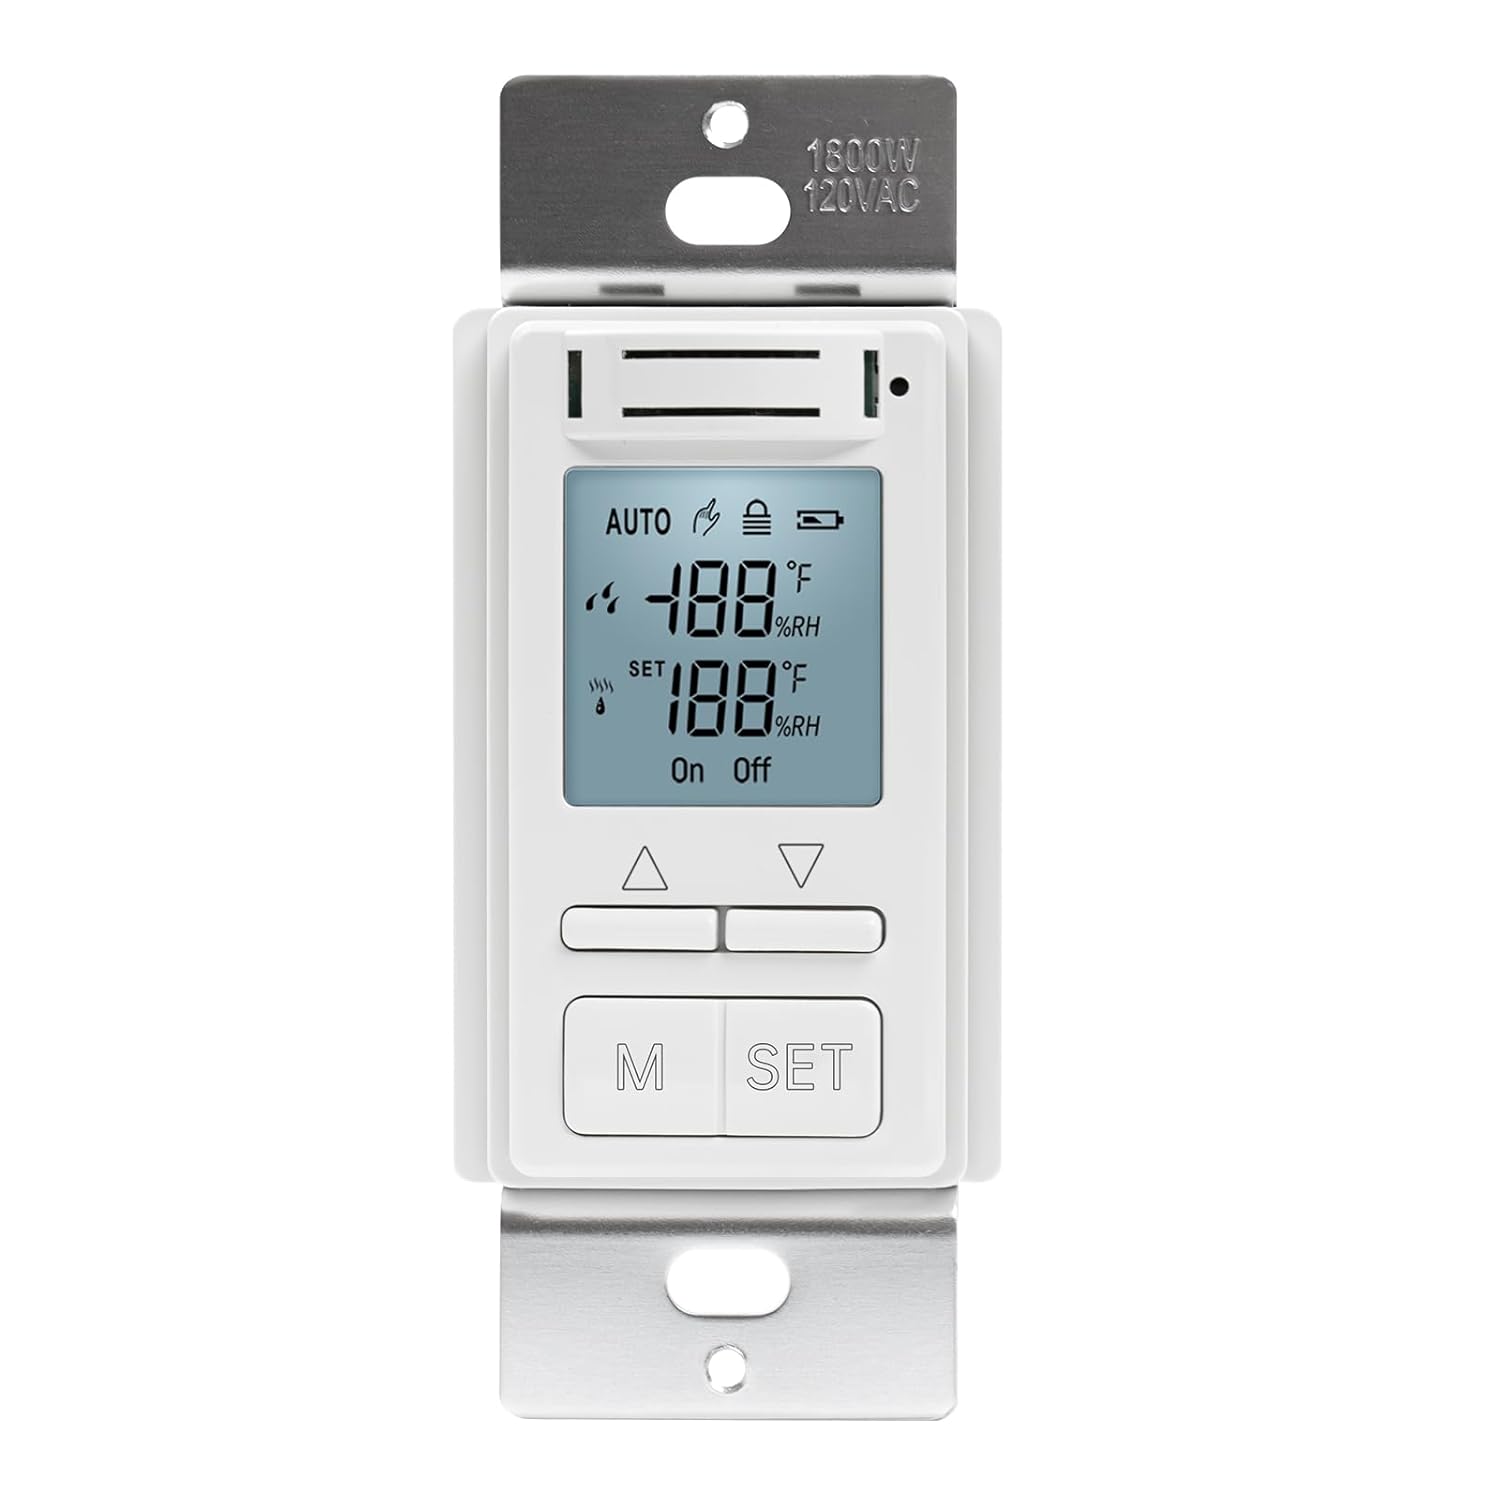
Front view of the Ortis In-Wall Humidity Sensor Switch, showing its LCD display and control buttons.
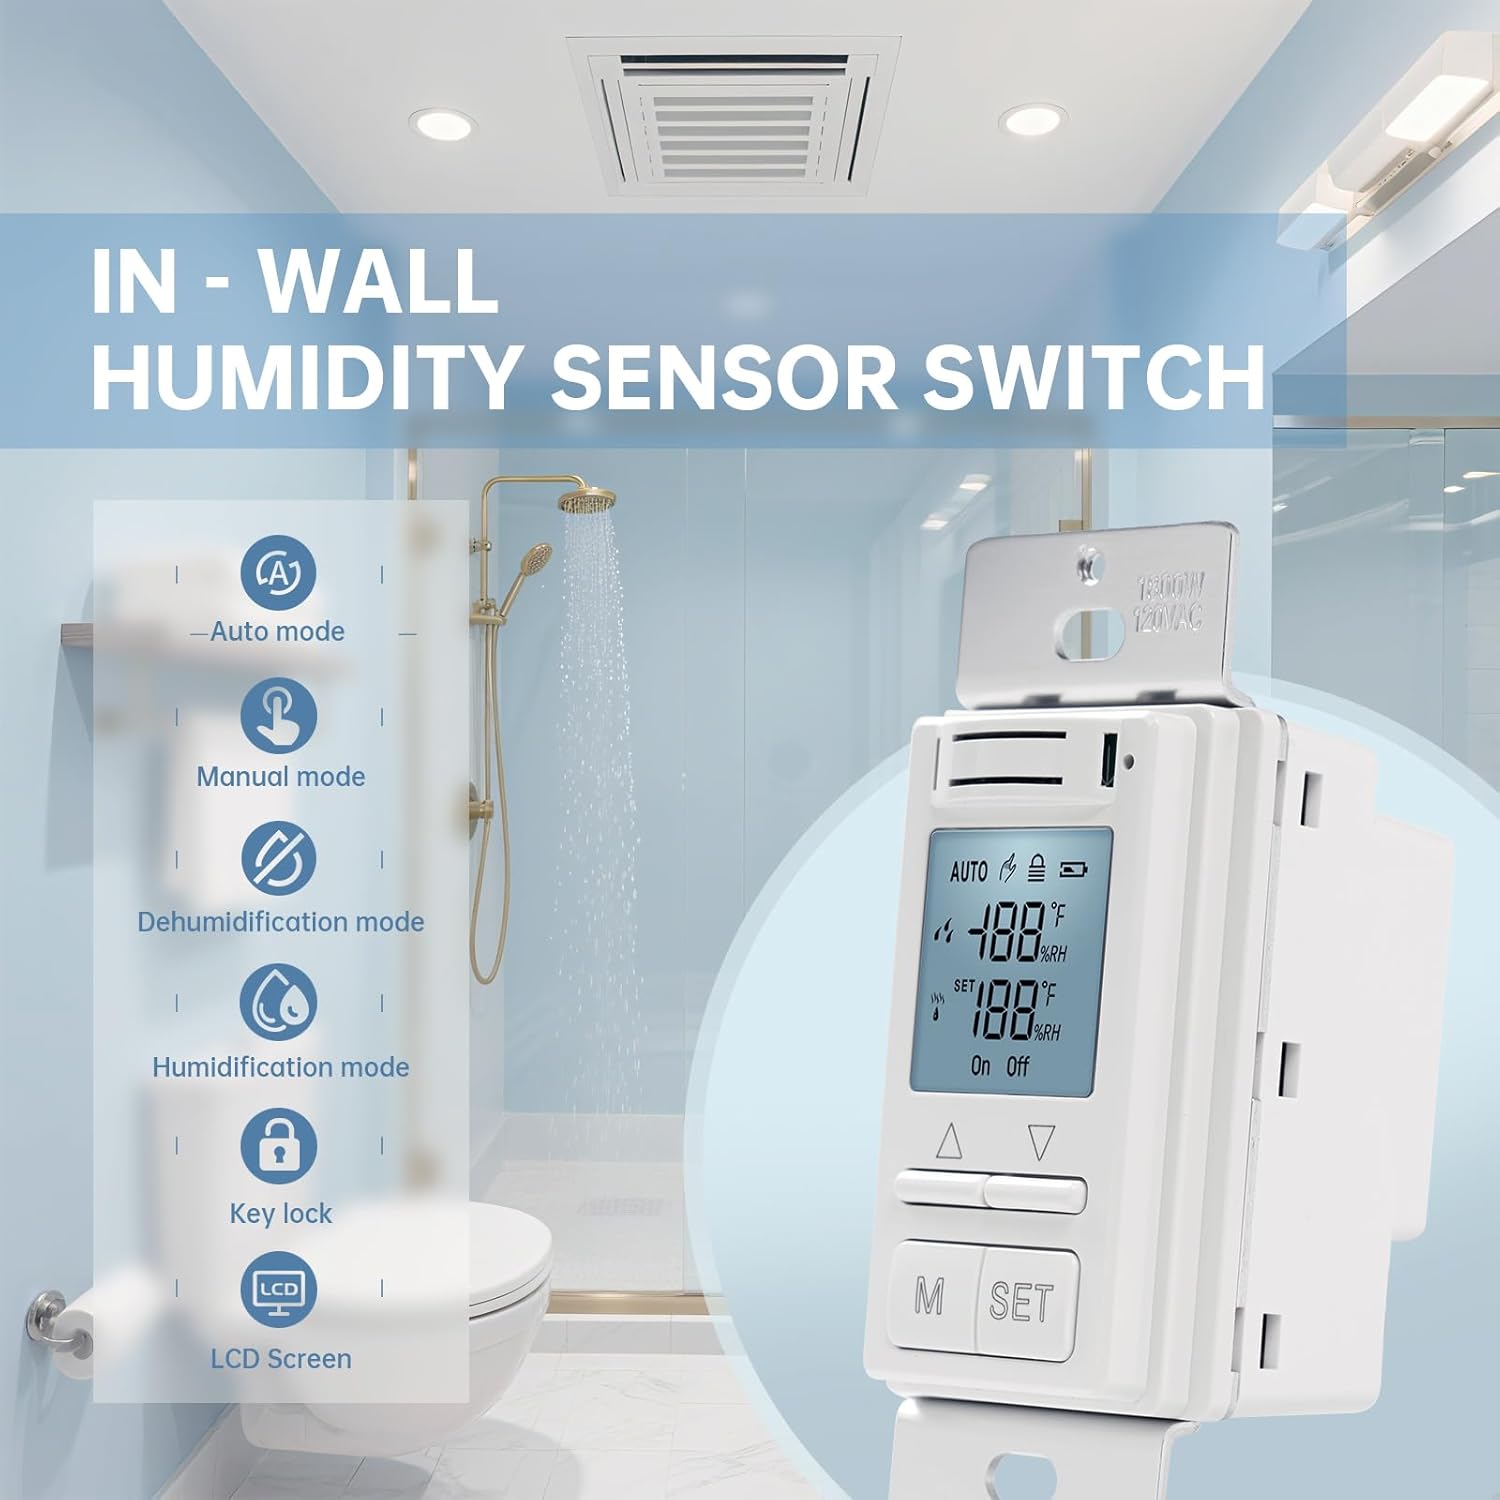
An illustration of the Ortis In-Wall Humidity Sensor Switch installed in a bathroom, highlighting its key features: Auto mode, Manual mode, Dehumidification mode, Humidification mode, Key lock, and LCD Screen.
3.1 Key Features
- Dehumidification Function: Built-in humidity sensors with advanced microprocessor and digital sensing technology accurately monitor indoor moisture levels. Automatically activates the fan when humidity rises to keep bathrooms dry.
- Humidification Control: Also supports humidifier control for added comfort during dry weather.
- Auto Mode: Intelligently detects room humidity and automatically turns the fan on or off. Adjustable minimum fan run time (1–60 minutes) after each activation.
- Manual Mode: Includes Manual Run (fan runs for 1–99 minutes, default: always on) and Manual Off (fan shuts off for 1–24 hours, default: always off). Automatically returns to Auto Mode after the timer ends.
- Easy-to-Read Display: LCD screen shows real-time humidity levels.
- Child Lock: Prevents accidental touches and ensures stable settings.
- Wide Application: Suitable for bathrooms, basements, laundry rooms, greenhouses, garages, and pantries.
- Easy Setup: Fits standard wall boxes, supports 110V/220V (neutral wire required).
3.2 Components and Controls

A close-up view of the Ortis Humidity Sensor Switch's LCD screen, showing real-time humidity and temperature readings, and various status icons.

An image demonstrating the child lock feature on the Ortis Humidity Sensor Switch, which prevents accidental changes to settings.
The switch features an intuitive LCD display showing current humidity, set humidity, and operating mode. Control buttons include:
- M Button: Mode selection (Auto/Manual).
- SET Button: Enter/confirm settings.
- Up/Down Arrows: Adjust values and navigate settings.
4. Installation
4.1 Wiring Diagram

A clear wiring diagram for the Ortis Humidity Sensor Switch, illustrating connections for 120VAC power, a fan, and emphasizing the requirement for a neutral wire.
Follow the wiring diagram carefully. This switch requires a neutral wire for proper operation. If your electrical box does not have a neutral wire, consult a qualified electrician.
- Turn off power at the circuit breaker before beginning installation.
- Identify the Line (hot), Load (to fan/humidifier), and Neutral wires in your electrical box.
- Connect the switch wires to the corresponding house wires using wire nuts:
- Black wire (Switch) to Line (hot) wire (House).
- Blue wire (Switch) to Load wire (to fan/humidifier).
- White wire (Switch) to Neutral wire (House).
- Green/Bare copper wire (Switch) to Ground wire (House).
- Ensure all connections are secure.
4.2 Mounting
- Carefully push the wired switch into the wall box.
- Secure the switch to the wall box using the provided screws.
- Attach the wall plate (not included, typically standard) over the switch.
- Restore power at the circuit breaker.

Technical drawing showing the dimensions of the Ortis Humidity Sensor Switch in inches, along with included screws and wire nuts.
5. Operation
5.1 Display Overview
The LCD display shows the current humidity, set humidity, temperature, and various icons indicating the operating mode, fan status, and child lock status.
5.2 Auto Mode

A detailed view of the switch's display in Auto Mode, explaining smart humidity detection, automatic fan activation, and adjustable minimum fan run time (1-60 minutes).
In Auto Mode, the switch automatically activates or deactivates the connected fan/humidifier based on the detected humidity level and your set humidity threshold.
- Press the 'M' button until 'AUTO' is displayed on the screen.
- Press 'SET' to enter Auto Mode settings.
- Use the Up/Down arrows to adjust the desired humidity threshold. The fan will activate when the humidity rises above this set point (for dehumidification) or falls below (for humidification, if configured).
- Press 'SET' again to adjust the minimum fan run time (1-60 minutes). This ensures the fan runs for a set duration after activation, even if humidity drops quickly.
- Press 'SET' to confirm and exit settings.
5.3 Manual Mode

An illustration showing the Manual Mode operation of the switch, detailing Manual Run (1-99 minutes) and Manual Off (1-24 hours) functions, and its automatic return to Auto Mode.
Manual Mode allows you to manually control the fan/humidifier for a set duration.
- Press the 'M' button until 'MANUAL' is displayed on the screen.
- Press 'SET' to enter Manual Mode options.
- Manual Run: Use Up/Down arrows to set the fan run duration (1-99 minutes). Default is 'always on'. The fan will run for the set time and then return to Auto Mode.
- Manual Off: Use Up/Down arrows to set the fan off duration (1-24 hours). Default is 'always off'. The fan will remain off for the set time and then return to Auto Mode.
- Press 'SET' to confirm and exit settings.
5.4 Child Lock Function
To prevent accidental changes to settings, you can activate the child lock.
- Activate: Press and hold both the Up and Down arrow buttons simultaneously for 3 seconds until a lock icon appears on the display.
- Deactivate: Press and hold both the Up and Down arrow buttons simultaneously for 3 seconds until the lock icon disappears.
6. Maintenance
The Ortis Humidity Sensor Switch requires minimal maintenance.
- Periodically wipe the surface of the switch and LCD screen with a soft, dry cloth to remove dust and smudges.
- Do not use abrasive cleaners, solvents, or harsh chemicals, as these may damage the finish or internal components.
- Ensure the ventilation slots on the switch are not obstructed to allow for accurate humidity sensing.
7. Troubleshooting
| Problem | Possible Cause | Solution |
|---|---|---|
| Switch does not power on. | No power at the circuit breaker; incorrect wiring; neutral wire not connected. | Check circuit breaker; verify wiring connections (refer to Section 4.1); ensure neutral wire is properly connected. |
| Fan/Humidifier does not turn on in Auto Mode. | Humidity level is below/above set point; incorrect set point; fan/humidifier issue. | Adjust humidity set point; check if fan/humidifier is working independently; ensure minimum run time is set appropriately. |
| Fan/Humidifier does not turn off. | Humidity level remains high/low; manual mode set to 'always on'. | Ensure proper ventilation; check for continuous moisture source; verify Manual Mode settings. |
| Display is blank or flickering. | Loose wiring connection; power fluctuation. | Turn off power, check wiring connections; if problem persists, consult an electrician. |
| Buttons are unresponsive. | Child lock is active. | Deactivate child lock (refer to Section 5.4). |
8. Specifications
| Specification | Value |
|---|---|
| Brand | Ortis |
| Model | In-Wall Humidity Sensor Switch |
| Operating Voltage | 120V / 220V AC |
| Current Rating | 16 Amps |
| Operation Mode | ON-OFF |
| Contact Type | Normally Open |
| Circuit Type | 1-way |
| Connector Type | Plug In |
| Terminal | Screw |
| Contact Material | Metal |
| Product Dimensions (L x W x H) | 2 x 1 x 1 inches |
| Weight | 4.16 ounces |
| Neutral Wire Required | Yes |
9. Warranty and Customer Support
9.1 Limited Warranty
Ortis warrants this product against defects in materials and workmanship for a period of one (1) year from the original date of purchase. This warranty does not cover damage resulting from improper installation, misuse, abuse, natural disasters, or unauthorized modifications. Proof of purchase is required for all warranty claims.
9.2 Customer Support
For technical assistance, troubleshooting, or warranty inquiries, please contact Ortis Customer Support:
- Email: support@ortis.com (Example)
- Phone: 1-800-XXX-XXXX (Example)
- Website: Visit the Ortis Store on Amazon
10. Wide Application Examples

Examples of various locations where the Ortis Humidity Sensor Switch can be effectively used, including greenhouses, laundry rooms, basements, bathrooms, garages, and pantries.
The Ortis In-Wall Humidity Sensor Switch is versatile and can be used in various environments to manage humidity levels effectively:
- Bathrooms: Automatically activate exhaust fans to prevent mold and mildew after showers.
- Basements: Control dehumidifiers to prevent dampness and musty odors.
- Laundry Rooms: Manage humidity from dryers to maintain air quality.
- Greenhouses: Regulate humidity for optimal plant growth.
- Garages: Prevent moisture buildup that can affect tools and stored items.
- Pantries: Maintain ideal humidity for food storage.