Introduction
Thank you for choosing the Ottimo Single Serve Ice Coffee Maker. This manual provides essential information for the safe and efficient operation, maintenance, and troubleshooting of your new appliance. Please read it thoroughly before first use and keep it for future reference.
Important Safety Instructions
- Read all instructions before using the appliance.
- Do not immerse the appliance, cord, or plug in water or other liquids.
- Close supervision is necessary when any appliance is used by or near children.
- Unplug from outlet when not in use and before cleaning. Allow to cool before putting on or taking off parts, and before cleaning the appliance.
- Do not operate any appliance with a damaged cord or plug, or after the appliance malfunctions or has been damaged in any manner.
- The use of accessory attachments not recommended by the appliance manufacturer may result in fire, electric shock, or injury to persons.
- Do not use outdoors.
- Do not let cord hang over edge of table or counter, or touch hot surfaces.
- Do not place on or near a hot gas or electric burner, or in a heated oven.
- To disconnect, turn any control to "off", then remove plug from wall outlet.
- Do not use appliance for other than intended use.
Parts Identification
Familiarize yourself with the components of your coffee maker.
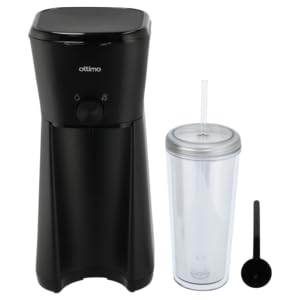
Image: The product packaging displays the black single-serve coffee maker, a clear double-layer tumbler with a straw, and highlights features such as "Iced/Hot coffee in mins", "Nylon filter", "Water tank capacity: 350ML", and "Double layer travelling cup capacity: 600ML". The brand "Ottimo" is prominently featured.
- Coffee Maker Unit (Main body)
- Water Reservoir (350ml capacity)
- Brew Basket with Nylon Filter
- Brewing Switch/Button
- Drip Tray
- Double-Layer Tumbler with Lid and Straw (600ml capacity)
- Coffee Scoop
Setup
- Unpack: Carefully remove all components from the packaging.
- Clean: Before first use, wash the tumbler, lid, straw, and brew basket with warm, soapy water. Rinse thoroughly and dry. Wipe the exterior of the coffee maker with a damp cloth.
- Position: Place the coffee maker on a stable, flat, heat-resistant surface near an electrical outlet.
- First Brew Cycle (Cleaning): Fill the water reservoir with clean water up to the MAX fill line (350ml). Place the empty tumbler on the drip tray. Run a brew cycle without coffee grounds to clean the internal components. Discard the water.
Operating Instructions
Brewing Coffee (Hot or Iced)
- Prepare Water: Open the water reservoir lid and fill with fresh, cold water. For iced coffee, you may fill with less water to account for ice, or use the recommended amount for a stronger brew over ice. Do not exceed the MAX fill line (350ml).
- Add Coffee Grounds: Place the nylon filter into the brew basket. Add your desired amount of ground coffee (typically 1-2 scoops using the provided coffee scoop) into the filter. Close the brew basket lid securely.
- Position Tumbler: Place the included 600ml tumbler (or your preferred travel mug) on the drip tray, ensuring it is centered under the coffee dispenser. For iced coffee, add ice to the tumbler before brewing.
- Start Brewing: Plug the coffee maker into a standard electrical outlet. Press the brewing switch/button to start the brewing cycle. The indicator light will illuminate.
- Automatic Shut-off: The coffee maker will automatically shut off once the brewing cycle is complete. The indicator light will turn off.
- Serve: Carefully remove the tumbler. If brewing iced coffee, stir gently. Enjoy your freshly brewed coffee.
Note: The coffee maker is designed for single-serve use. Do not attempt to brew multiple cups consecutively without allowing the unit to cool down for a few minutes.
Maintenance and Cleaning
Regular cleaning ensures optimal performance and extends the life of your coffee maker.
- Unplug: Always unplug the appliance from the power outlet and allow it to cool completely before cleaning.
- Wash Removable Parts: The tumbler, lid, straw, and brew basket with nylon filter can be washed in warm, soapy water. Rinse thoroughly and dry. These parts are generally top-rack dishwasher safe, but hand washing is recommended for longevity.
- Clean Exterior: Wipe the exterior of the coffee maker with a soft, damp cloth. Do not use abrasive cleaners or scouring pads.
- Descaling (Monthly or Bi-Monthly): Depending on water hardness, mineral deposits can build up. To descale, fill the water reservoir with a mixture of white vinegar and water (1:2 ratio). Run a brew cycle without coffee grounds. Repeat with clean water to rinse.
- Storage: Ensure all parts are clean and dry before storing the coffee maker in a cool, dry place.
Caution: Never immerse the main coffee maker unit in water or any other liquid.
Troubleshooting
| Problem | Possible Cause | Solution |
|---|---|---|
| Coffee not brewing. | No power; Water reservoir empty; Brew button not pressed. | Check power connection; Fill water reservoir; Press brew button. |
| Coffee tastes weak. | Not enough coffee grounds; Too much water. | Add more coffee grounds; Use less water. |
| Coffee overflows. | Too much water in reservoir; Tumbler not positioned correctly. | Do not exceed MAX fill line; Ensure tumbler is centered. |
| Slow brewing. | Mineral buildup (scaling). | Perform descaling procedure as described in Maintenance section. |
Specifications
- Model: Single Serve Ice Coffee Maker
- Brand: Ottimo
- Power: 600 Watts
- Water Tank Capacity: 350 ml
- Tumbler Capacity: 600 ml
- Material: Plastic
- Color: Black
- Dimensions: Approximately 16.5 cm (D) x 12.7 cm (W) x 30.5 cm (H)
- Special Features: Portable, Single Serve, Travel Tumbler Included, Automatic Shut-off
Warranty and Support
This product is covered by a standard manufacturer's warranty against defects in materials and workmanship. For specific warranty terms, conditions, and duration, please refer to the warranty card included with your purchase or contact the retailer. For technical support or service inquiries, please contact the point of purchase or the manufacturer's customer service department.
Keep your purchase receipt as proof of purchase for warranty claims.


