1. Introduction
This manual provides essential information for the safe and efficient assembly, operation, and maintenance of your HOOBRO WT01SC01 Shoe Cabinet. Please read these instructions carefully before beginning assembly and retain this manual for future reference.
2. Safety Information
WARNING: Always secure the cabinet to the wall using the anti-tip kit provided to prevent tipping. Do not overload the shelves. Keep the area around the cabinet clear to avoid potential hazards, especially if children or pets are present.
Ensure all screws and fasteners are tightened securely during assembly. Periodically check all connections to ensure they remain tight.

Image: Anti-Tipping Device Installation. This diagram illustrates how to properly install the anti-tipping device to secure the cabinet to a wall, enhancing stability and safety.
3. Package Contents
Before assembly, verify that all components listed below are present and undamaged. If any parts are missing or damaged, please contact customer support.
- 1 x Shoe Storage Cabinet (main unit)
- 1 x Accessory Kit (hardware, screws, etc.)
- 1 x Anti-Tip Kit
- 1 x Instructions Manual (this document)
4. Assembly Instructions
Assembly of the HOOBRO WT01SC01 Shoe Cabinet is designed to be straightforward. All parts are labeled, and the necessary tools (small screwdriver and Allen wrench) are included. Follow the graphic instruction manual provided in the accessory kit for detailed step-by-step guidance.
- Unpack all components and lay them out on a clean, soft surface to prevent scratches.
- Identify each part using the labels and the parts list in the graphic manual.
- Follow the sequential steps in the graphic manual to assemble the cabinet frame.
- Install the adjustable shelves according to your desired height for different footwear types.
- Attach the doors and handles, ensuring they open and close smoothly.
- Secure the anti-tip device to the cabinet and then to a sturdy wall stud using the provided hardware.
Note: Some users have reported that careful review of the graphic instructions for interior dividers is necessary to ensure proper alignment for the back panel installation. Ensure the interior 'wall' or divider is oriented correctly to avoid blocking the back panel.
5. Operating Instructions
Your HOOBRO WT01SC01 Shoe Cabinet is designed for versatile shoe storage and organization.
5.1 Adjustable Shelves
The cabinet features multiple adjustable shelves, allowing you to customize the storage space to accommodate various footwear sizes, from slippers and flats to boots and high heels. To adjust a shelf, remove any items, lift the shelf, reposition the metal support pegs to the desired height, and then place the shelf back onto the pegs.

Image: Adjustable/Removable Shelves. This image demonstrates the flexibility of the interior shelving, accommodating different shoe heights and other items like hats or storage boxes.
5.2 Multi-Functional Use
Beyond shoe storage, the cabinet's spacious top surface can be used to hold everyday essentials such as wallets, keys, decorative items, or a lamp. The concealed storage behind the three doors helps maintain a tidy appearance in your entryway, hallway, or closet.

Image: Spacious Top with Guardrails. The image highlights the functional top surface of the cabinet, suitable for placing various items while keeping them secure.
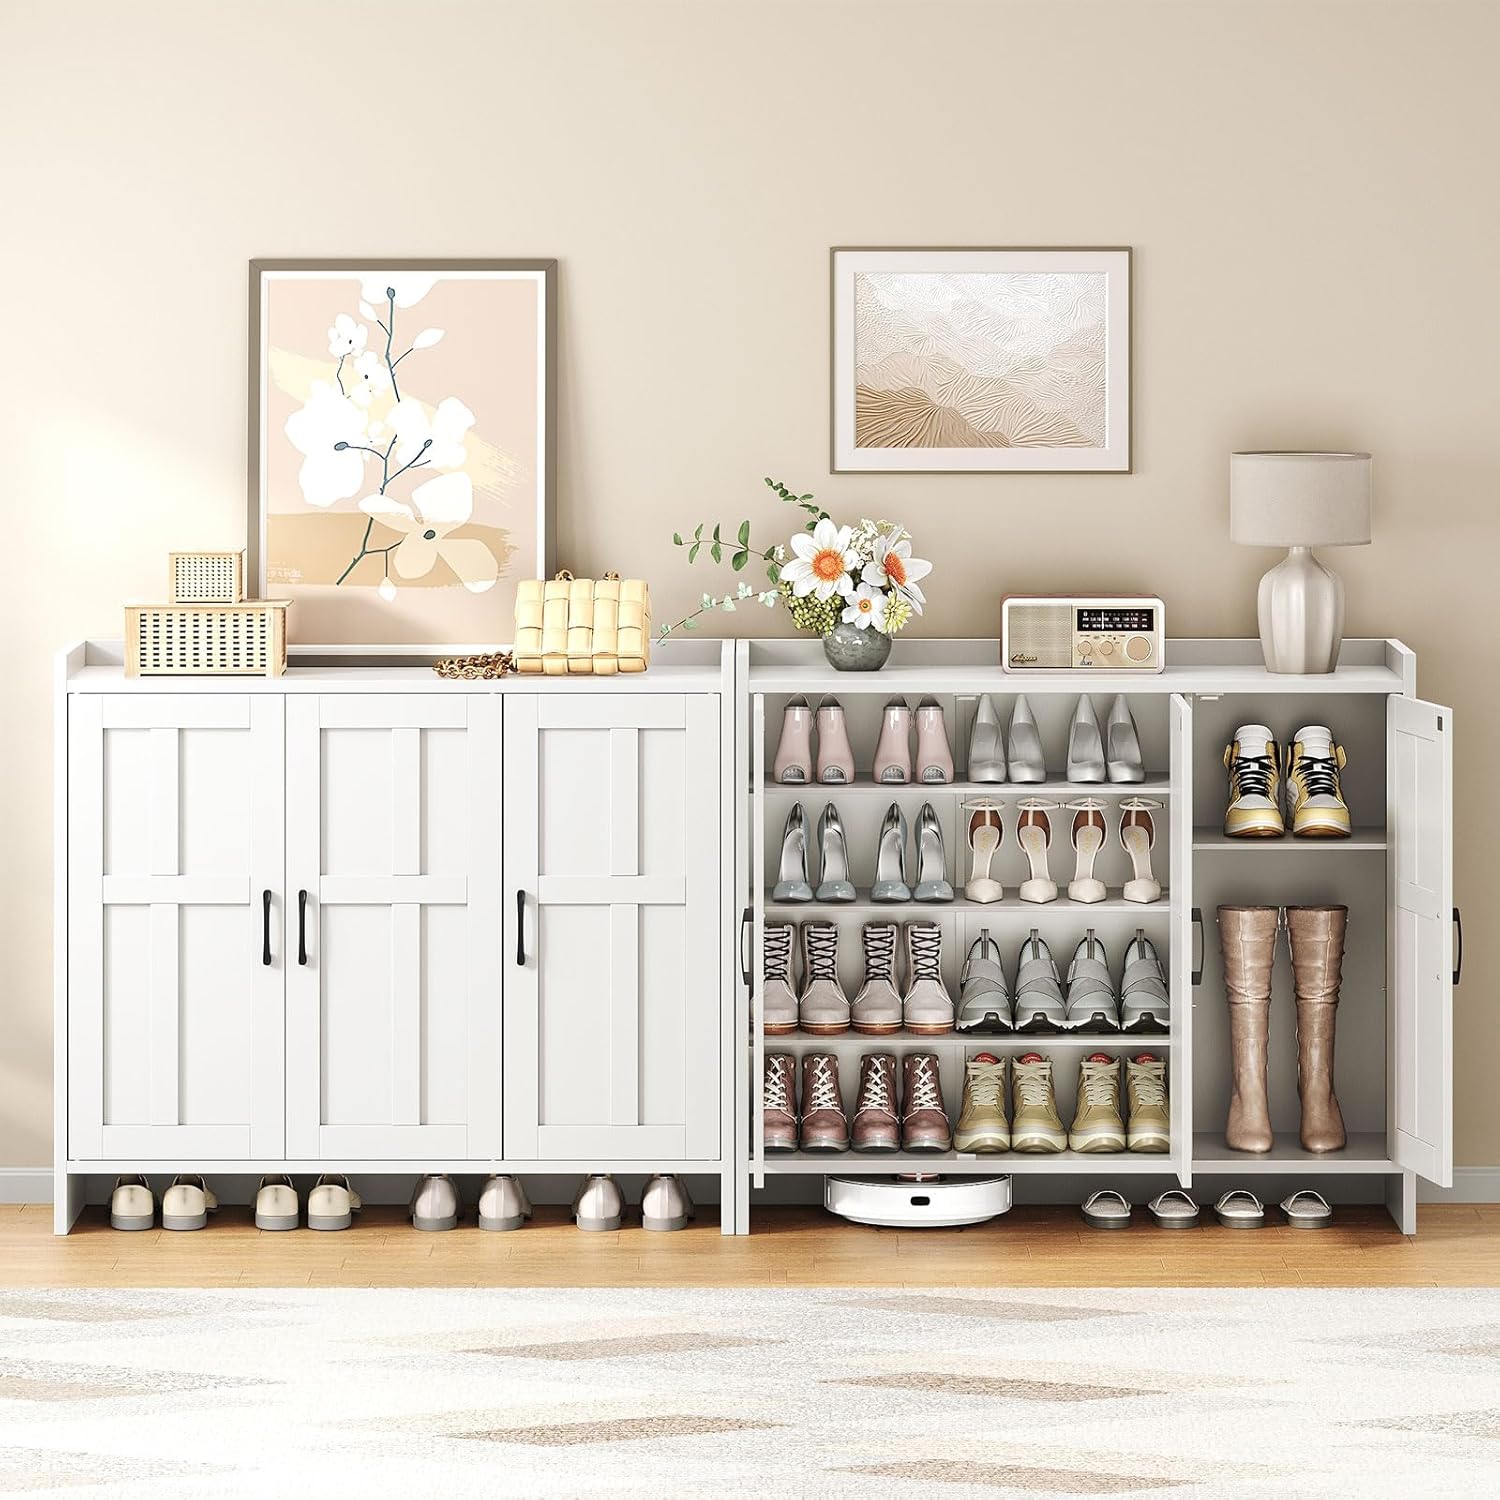
Image: Organized Shoe Storage. This view shows the interior of the cabinet with doors open, demonstrating how shoes can be neatly stored on the adjustable shelves.
6. Maintenance
To maintain the appearance and longevity of your HOOBRO shoe cabinet, follow these simple maintenance guidelines:
- Cleaning: For routine cleaning, simply wipe the surface with a soft, damp cloth. Avoid using harsh chemicals or abrasive cleaners, which can damage the finish.
- Spills: Immediately wipe up any spills to prevent staining or water damage to the particleboard material.
- Inspection: Periodically check all hardware connections (screws, hinges) to ensure they are tight. Retighten if necessary.
- Sunlight: Avoid prolonged exposure to direct sunlight to prevent fading or discoloration of the finish.
7. Troubleshooting
If you encounter any issues with your shoe cabinet, refer to the following common solutions:
- Wobbly Cabinet: Ensure the cabinet is placed on a level surface. Adjust the anti-slip foot nails if necessary. Verify that all assembly screws are fully tightened. Confirm the anti-tip device is securely installed.
- Doors Not Closing Properly: Check the alignment of the door hinges. Loosen the hinge screws slightly, adjust the door position, and then retighten. Ensure no items inside the cabinet are obstructing the door's closure.
- Difficulty During Assembly: Double-check the graphic instruction manual for any missed steps or incorrect part orientations. Ensure you are using the correct hardware for each step. If issues persist, contact customer support.
8. Specifications
Below are the technical specifications for the HOOBRO WT01SC01 Shoe Cabinet:
| Brand | HOOBRO |
| Model Name | Shoe Cabinet |
| Model Number | WT01SC01 |
| Color | White |
| Material | Engineered Wood (Particleboard) |
| Product Dimensions (D x W x H) | 14.2"D x 42.1"W x 36.8"H (36cm D x 107cm W x 93.5cm H) |
| Item Weight | 62.1 Pounds |
| Number of Doors | 3 |
| Number of Shelves | 4 (adjustable) |
| Mounting Type | Floor Mount (Freestanding) |
| Assembly Required | Yes |

Image: Product Dimensions. This diagram provides precise measurements of the shoe cabinet, including height, width, and depth, as well as internal shelf spacing.
9. Product Overview Video
Watch this short video for a visual overview of the HOOBRO Shoe Cabinet's features and functionality.
Video: HOOBRO Shoe Cabinet Storage. This video demonstrates the key features of the shoe cabinet, including its design, adjustable shelves, and overall storage capacity.
10. Warranty
HOOBRO products are manufactured with quality and durability in mind. This product comes with a standard manufacturer's warranty covering defects in materials and workmanship. Please refer to the warranty card included in your package or visit the official HOOBRO website for detailed warranty terms and conditions.
11. Customer Support
If you have any questions, require assistance with assembly, or need to report missing/damaged parts, please contact HOOBRO customer support:
- Website: Visit the official HOOBRO website for FAQs and contact information.
- Email: Refer to your purchase documentation for customer service email.
- Phone: Refer to your purchase documentation for customer service phone number.
Please have your model number (WT01SC01) and purchase date ready when contacting support.