
1. Introduction
This manual provides detailed instructions for the setup, operation, and maintenance of your GEEKOM Air12 Lite Mini PC. Please read this manual thoroughly before using the device to ensure proper functionality and longevity.
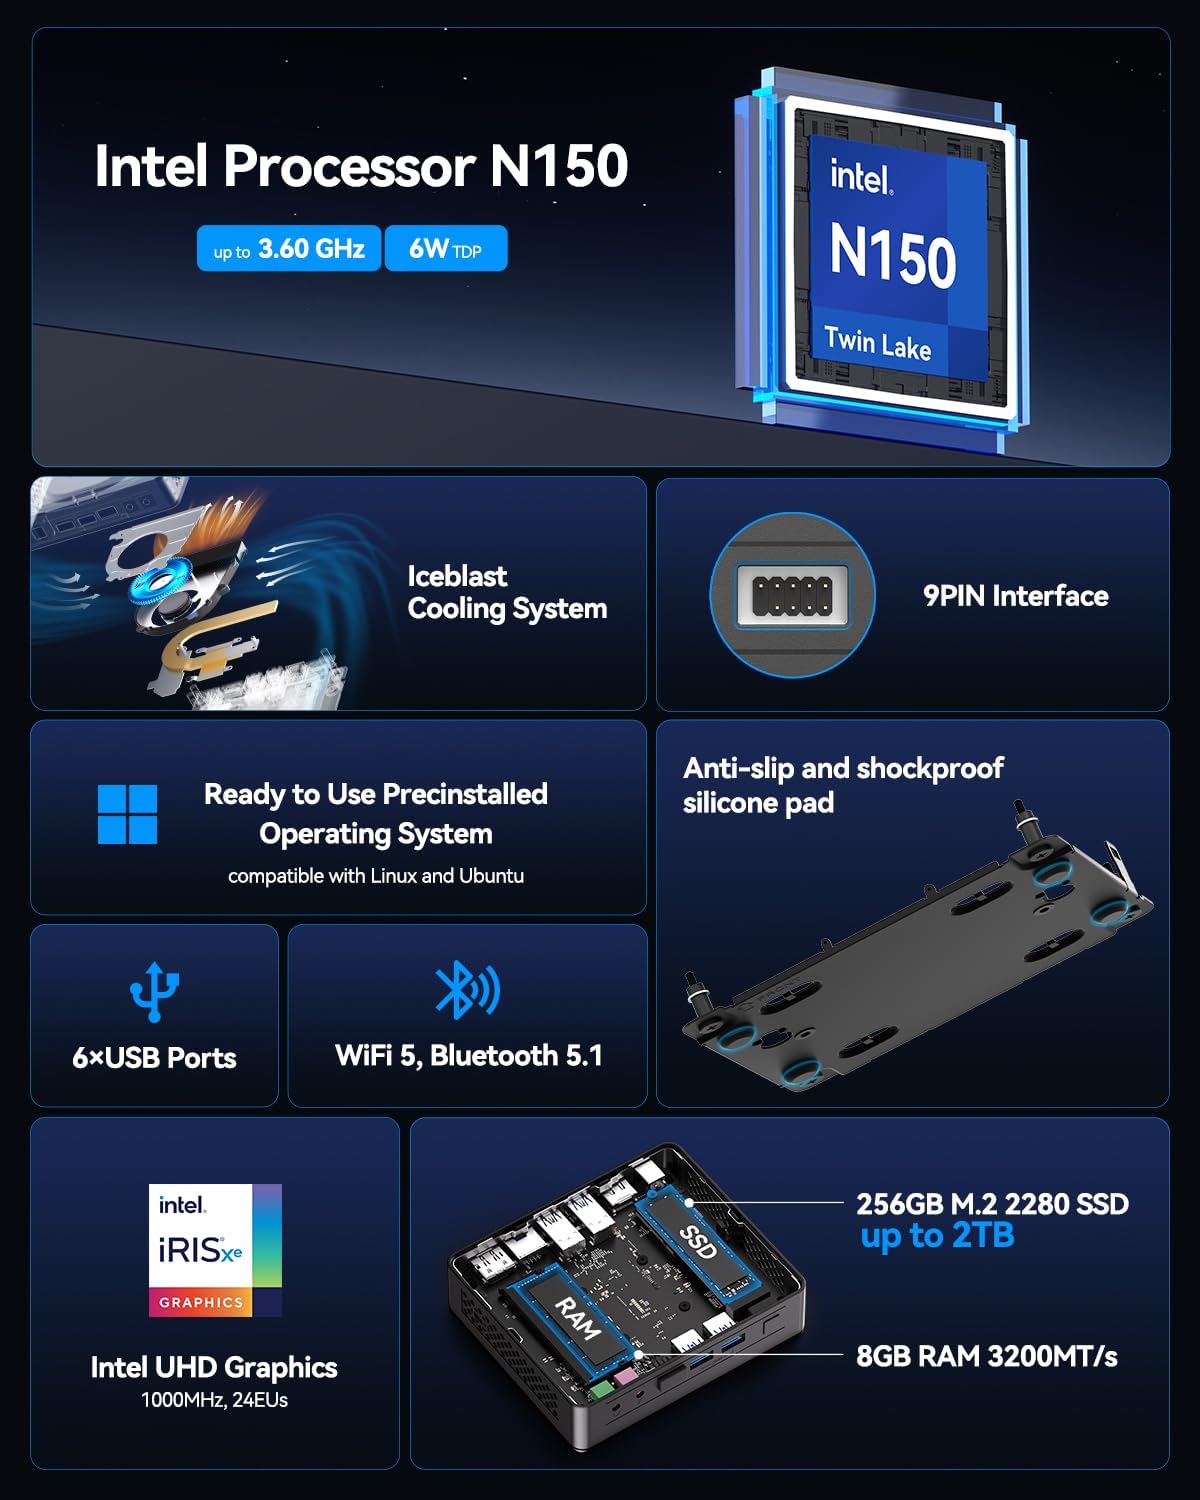
The GEEKOM Air12 Lite is a compact and efficient mini PC powered by the Intel 12th Gen Twin Lake N150 processor. It offers robust performance for various tasks, from office productivity to media streaming, and supports dual 4K displays. Its versatile connectivity, including multiple USB ports and a 9-pin serial interface, makes it suitable for both modern and legacy equipment.
2. Package Contents
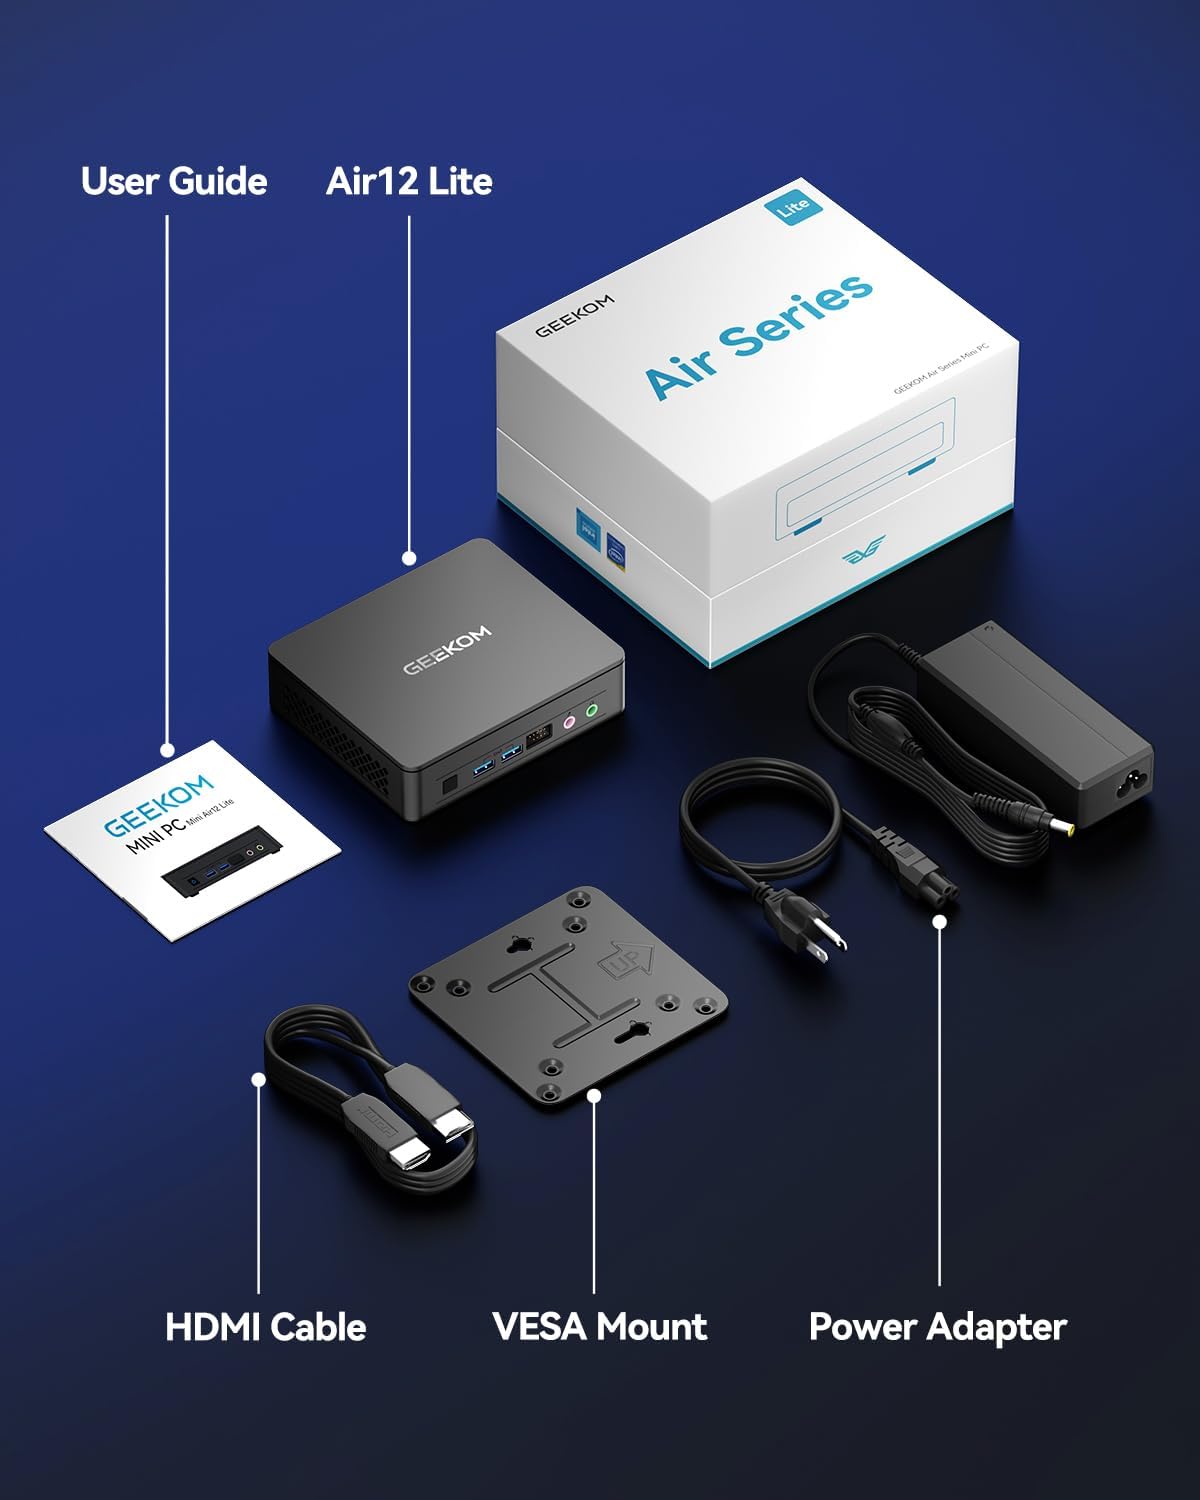
Verify that all items listed below are present in your package:
- 1 x GEEKOM Mini Air12 Lite
- 1 x User Guide
- 1 x HDMI Cable
- 1 x VESA Mount
- 1 x Power Adapter
3. Product Overview
3.1 Front Panel
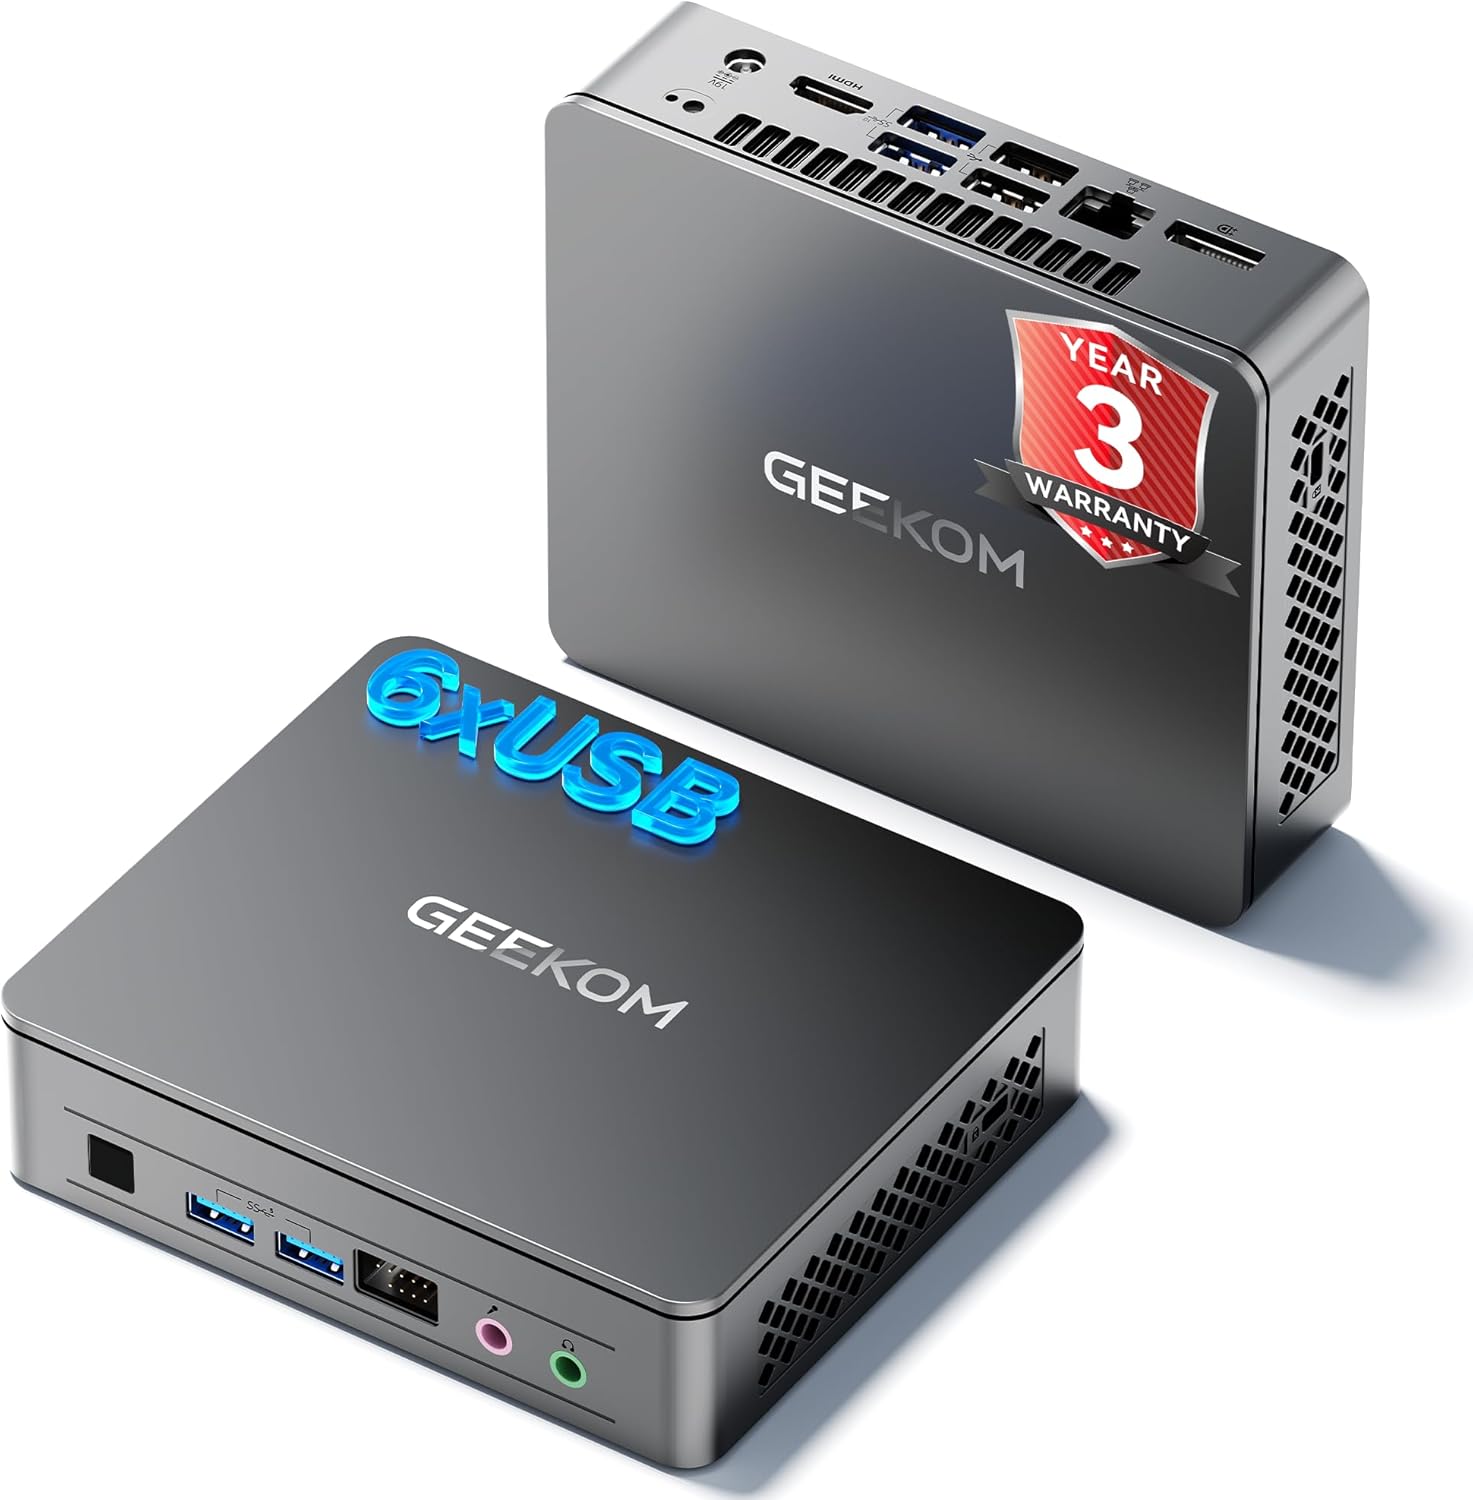
- Power Button: Press to turn the device on or off.
- USB 3.2 Gen 1 Type-A Port (x2): For connecting USB devices.
- 3.5mm Headphone Jack: For audio output.
- 3.5mm Microphone Jack: For audio input.
- Front 9-pin Expansion Jack: For specialized peripheral connections.
3.2 Rear Panel
- Power Input (DC IN): Connect the power adapter here.
- HDMI 2.0 Port: For connecting to a display.
- DisplayPort 1.4 (DP1.4): For connecting to a second display.
- USB 3.2 Gen 2 Type-A Port (x2): For high-speed USB devices.
- USB 2.0 Type-A Port (x2): For standard USB devices.
- RJ45 Ethernet Port: For wired network connection.
3.3 Side Panel
- SD Card Reader: For reading SD memory cards.
- Kensington Lock Slot: For securing the device.

4. Setup Instructions
- Connect Display: Connect your monitor(s) to the HDMI and/or DisplayPort on the rear panel using the provided HDMI cable or a compatible DisplayPort cable.
- Connect Peripherals: Connect your keyboard, mouse, and other USB devices to the available USB ports.
- Connect Network (Optional): For a wired internet connection, connect an Ethernet cable to the RJ45 port. Alternatively, the device supports Wi-Fi.
- Connect Power: Plug the power adapter into the DC IN port on the rear panel, then plug the adapter into a power outlet.
- Power On: Press the power button on the front panel to turn on the Mini PC.
- Initial Setup: Follow the on-screen instructions to complete the operating system setup (e.g., Windows 11).
4.1 VESA Mount Installation
The GEEKOM Air12 Lite includes a VESA mount for attaching the Mini PC to the back of a compatible monitor or to a wall, saving desk space.
- Attach the VESA mount bracket to the back of your monitor using the provided screws, aligning with the VESA mounting holes.
- Slide the Mini PC onto the bracket until it clicks securely into place.
5. Operating Instructions
5.1 Power On/Off
- To Power On: Press the power button once.
- To Shut Down: From the operating system, select "Shut down". Alternatively, press and hold the power button for 5 seconds to force a shutdown (use only when necessary).
- Sleep Mode: Briefly press the power button to put the PC into sleep mode. Press again to wake it up.
5.2 Dual Display Setup
The Air12 Lite supports connecting two 4K displays simultaneously via its HDMI 2.0 and DisplayPort 1.4 outputs. This allows for an extended desktop experience.
- Connect your primary monitor to the HDMI port.
- Connect your secondary monitor to the DisplayPort.
- Once both monitors are connected and powered on, the operating system should automatically detect them.
- Adjust display settings (resolution, orientation, extension/duplication) through your operating system's display settings.

5.3 Operating System Compatibility
The GEEKOM Air12 Lite comes with Windows pre-installed and is fully compatible with Ubuntu and other Linux distributions.
6. Maintenance
6.1 Cleaning
- Ensure the device is powered off and unplugged before cleaning.
- Use a soft, dry cloth to wipe the exterior of the Mini PC.
- For stubborn marks, lightly dampen the cloth with water or a mild, non-abrasive cleaner.
- Avoid spraying liquids directly onto the device or into any openings.
- Use compressed air to gently clear dust from ventilation grilles.
6.2 Cooling System
The Air12 Lite features GEEKOM's Iceblast cooling system. To ensure optimal performance and longevity:
- Ensure proper airflow around the device. Do not block ventilation openings.
- Operate the Mini PC in a well-ventilated area.
- Regularly check and clean dust from the vents to prevent overheating.

6.3 Component Upgrades
The Air12 Lite supports tool-free upgrades for certain components. Refer to the detailed exploded view for component locations.

7. Troubleshooting
- No Power:
- Ensure the power adapter is securely connected to both the Mini PC and a working power outlet.
- Verify the power outlet is functional by plugging in another device.
- Try a different power outlet.
- No Display:
- Check that the HDMI/DisplayPort cable is securely connected to both the Mini PC and the monitor.
- Ensure the monitor is powered on and set to the correct input source (HDMI/DisplayPort).
- Try connecting to a different monitor or using a different cable.
- Slow Performance:
- Close unnecessary applications running in the background.
- Check for available operating system updates and install them.
- Ensure the Mini PC has adequate ventilation and is not overheating.
- Run a disk cleanup or defragmentation tool (if applicable to your storage type).
- Peripheral Not Detected:
- Ensure the peripheral is properly connected to the correct port.
- Try connecting the peripheral to a different USB port.
- Update or reinstall the drivers for the peripheral.
8. Specifications
| Feature | Specification |
|---|---|
| Processor | Intel 12th Gen Twin Lake N150 (4 Cores / 4 Threads, up to 3.6GHz, 6MB Cache) |
| Graphics | Intel UHD Graphics (Integrated) |
| RAM | 8GB DDR4 3200MHz SDRAM |
| Storage | 256GB M.2 2280 SSD (PCIE x 4) |
| Operating System | Windows (Pre-installed), compatible with Ubuntu/Linux |
| Video Output | 1x HDMI 2.0, 1x DisplayPort 1.4 (Supports Dual 4K@60Hz) |
| USB Ports | 2x USB 3.2 Gen 1 Type-A (Front), 2x USB 3.2 Gen 2 Type-A (Rear), 2x USB 2.0 Type-A (Rear) |
| Other Ports | 1x 9-pin Serial Interface, 1x RJ45 Ethernet, 1x 3.5mm Headphone Jack, 1x 3.5mm Microphone Jack, 1x SD Card Reader |
| Wireless Connectivity | 802.11ax (Wi-Fi), Bluetooth 5.1 |
| Dimensions (LxWxH) | Approx. 5.3 x 4.5 x 1.4 inches (13.5 x 11.5 x 3.5 cm) |
| Weight | Approx. 2.81 pounds (1.27 kg) |
9. Warranty and Support
GEEKOM provides a 3-year warranty for the Air12 Lite Mini PC from the date of purchase. This warranty covers failures caused by design or craftsmanship.
9.1 Customer Support
For technical assistance, warranty claims, or any other inquiries, please contact GEEKOM customer service:
- Email: shirley.li@geekom.tw
- Online: Visit the official GEEKOM website or your Amazon order page to find seller contact options.
When contacting support, please provide your product model (Air12 Lite) and purchase details to expedite assistance.