1. Introduction
This manual provides comprehensive instructions for the installation, operation, and maintenance of your ZMISHIBO 60-inch Ceiling Fan with Light. Please read all instructions carefully before beginning installation and retain this manual for future reference. This ceiling fan is designed for indoor use in spacious areas such as living rooms, bedrooms, and kitchens, offering both powerful airflow and adjustable LED lighting.
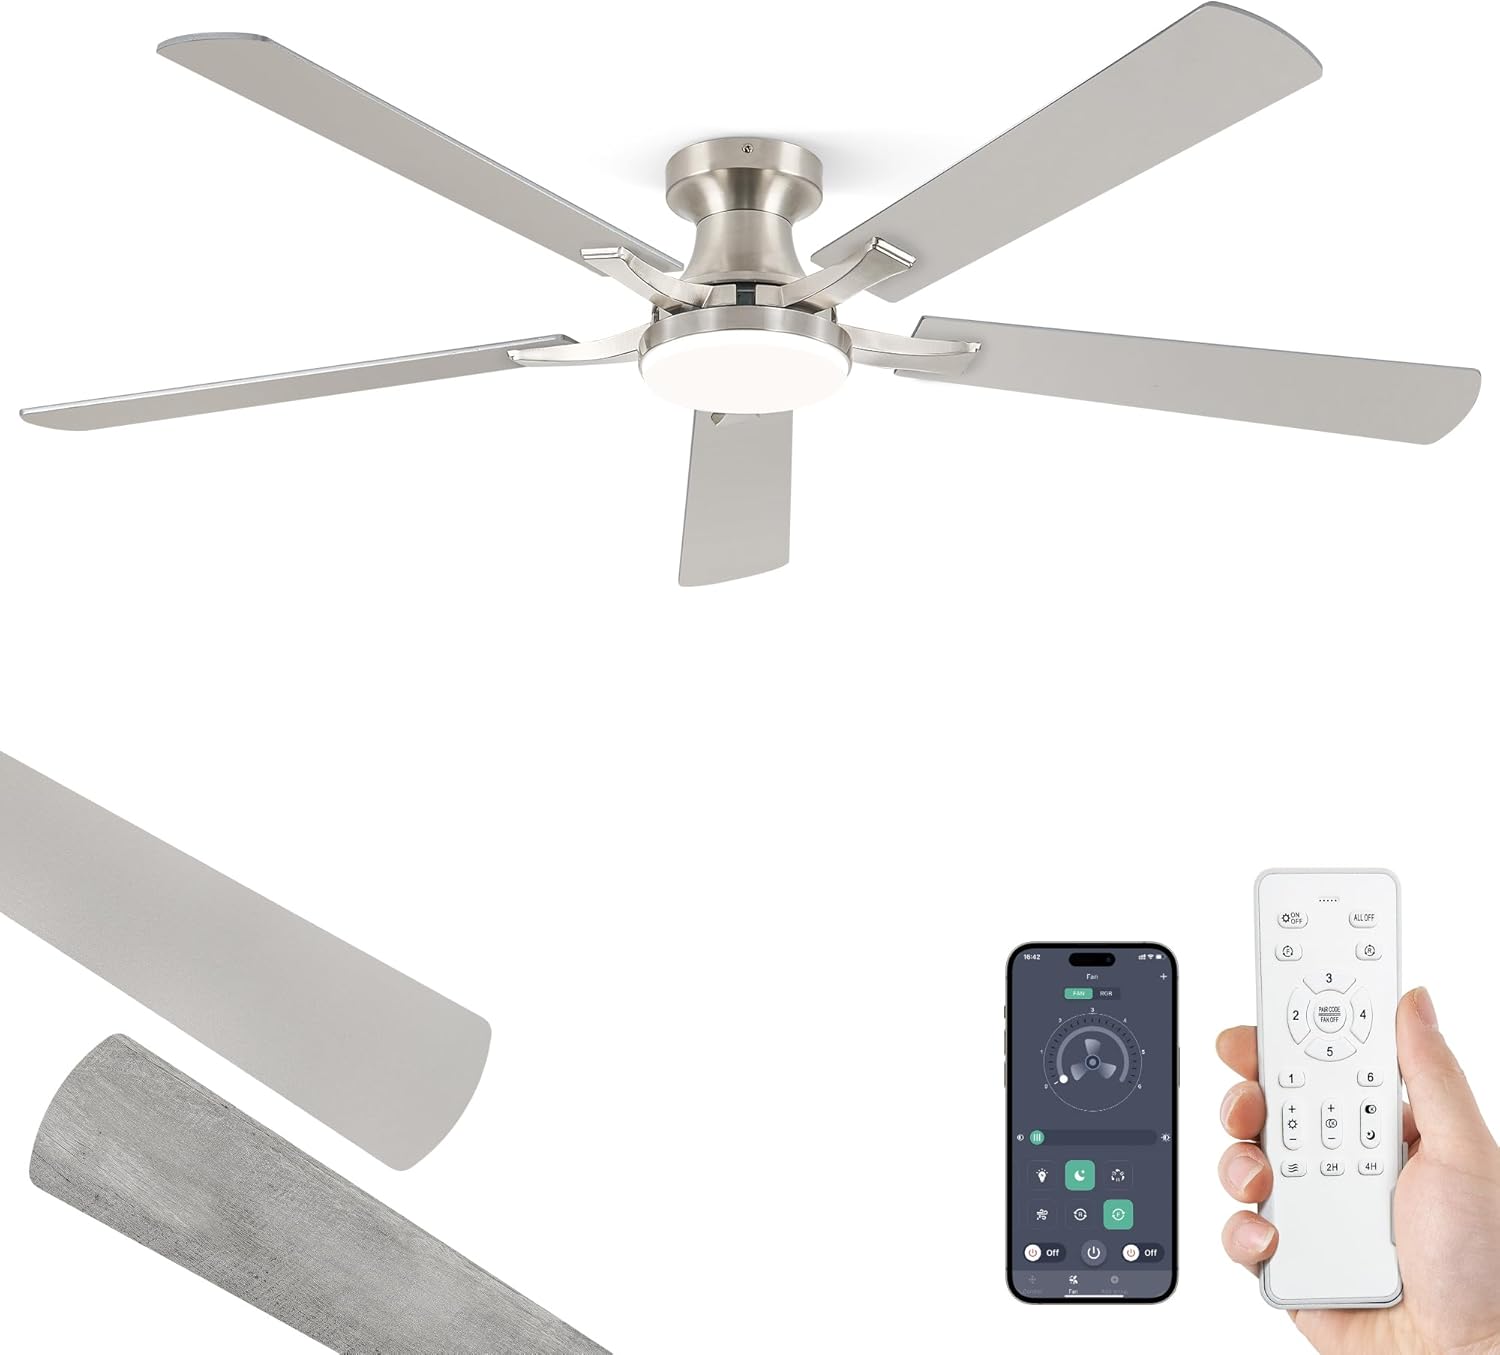
Figure 1: ZMISHIBO 60-inch Nickel Ceiling Fan with Integrated LED Light.
2. Important Safety Information
To reduce the risk of electrical shock, fire, or personal injury, always follow these basic precautions:
- Read all instructions before installing the fan.
- Ensure all electrical connections comply with local codes, ordinances, and the National Electrical Code (NEC).
- Disconnect power at the main circuit breaker before installation or servicing.
- The fan must be mounted to a ceiling joist or support structure capable of supporting a minimum of 35 lbs (15.9 kg).
- Do not bend the blade holders during installation, balancing, or cleaning.
- Keep hands, tools, and other objects clear of the fan blades when in operation.
- Do not operate the fan if there is any visible damage to the blades or motor housing.
3. Package Contents
Verify that all components are present before beginning installation:
- Ceiling Fan Motor Host
- Fan Blades (5x)
- Blade Arms (5x)
- LED Light Kit
- Remote Control (with 2 AAA batteries)
- Mounting Bracket
- Canopy
- Receiver
- Hardware Pack (screws, wire nuts, safety rope, blade balancing kit)
- User Manual

Figure 2: Overview of ZMISHIBO Ceiling Fan components, including the fan unit, remote control, and a visual representation of the app interface.
4. Setup and Installation
Follow these steps for proper assembly and installation. It is recommended to have a qualified electrician perform the installation if you are not comfortable with electrical wiring.
4.1. Prepare the Fan Blades
- Attach each blade arm to a fan blade using the provided screws. Ensure they are securely fastened. Note that the blades are reversible, offering two finish options (e.g., Nickel and Wood Grain). Choose your desired finish before assembly.

Figure 3: Detail of the fan blades, highlighting the high-quality plywood construction and the dual-sided finish options.
4.2. Assemble the Fan Motor
- Remove the pre-installed screws from the motor host where the blade arms will attach.
- Securely attach the assembled fan blades (with arms) to the motor host using the screws removed in the previous step.
- Install the LED lamp panel into the motor housing, connecting the lamp wire.
- Attach the lampshade by screwing it onto the motor housing.

Figure 4: Illustration of the easy installation process, emphasizing the quick assembly of the fan unit.
4.3. Mount the Bracket and Wiring
- Mount the ceiling bracket to the electrical junction box in the ceiling, ensuring it is securely fastened to a structural support.
- Hang the fan motor assembly onto the bracket using the safety rope.
- Connect the electrical wires: Neutral (white), Live (black), and Ground (green/bare copper) wires from the ceiling to the corresponding wires on the fan. Use wire nuts to secure connections.
- Connect the receiver and fan motor wires as per the wiring diagram in the detailed manual.
4.4. Final Assembly
- Carefully tuck all wires into the junction box.
- Raise the canopy to cover the mounting bracket and secure it with the provided screws.
- Ensure all connections are tight and the fan is stable before restoring power.
5. Operating Instructions
Your ZMISHIBO ceiling fan can be controlled via the included remote control or a smartphone app.
5.1. Remote Control Operation
The remote control allows for convenient adjustment of fan speed, light settings, and other functions:
- Fan ON/OFF: Press the fan button to turn the fan on or off.
- Fan Speed: Select from 6 fan speeds (1-6) to adjust airflow.
- Light ON/OFF: Press the light button to turn the LED light on or off.
- Dimming: Use the brightness buttons (+/-) to adjust the light intensity (10-100%).
- Color Temperature: Change the light color from warm white (3000K) to cool white (6500K) using the color temperature buttons.
- Reversible Motor: Activate the reversible function for summer (downward airflow) or winter (upward airflow) modes.
- Timer: Set the fan to turn off automatically after 2 or 4 hours.
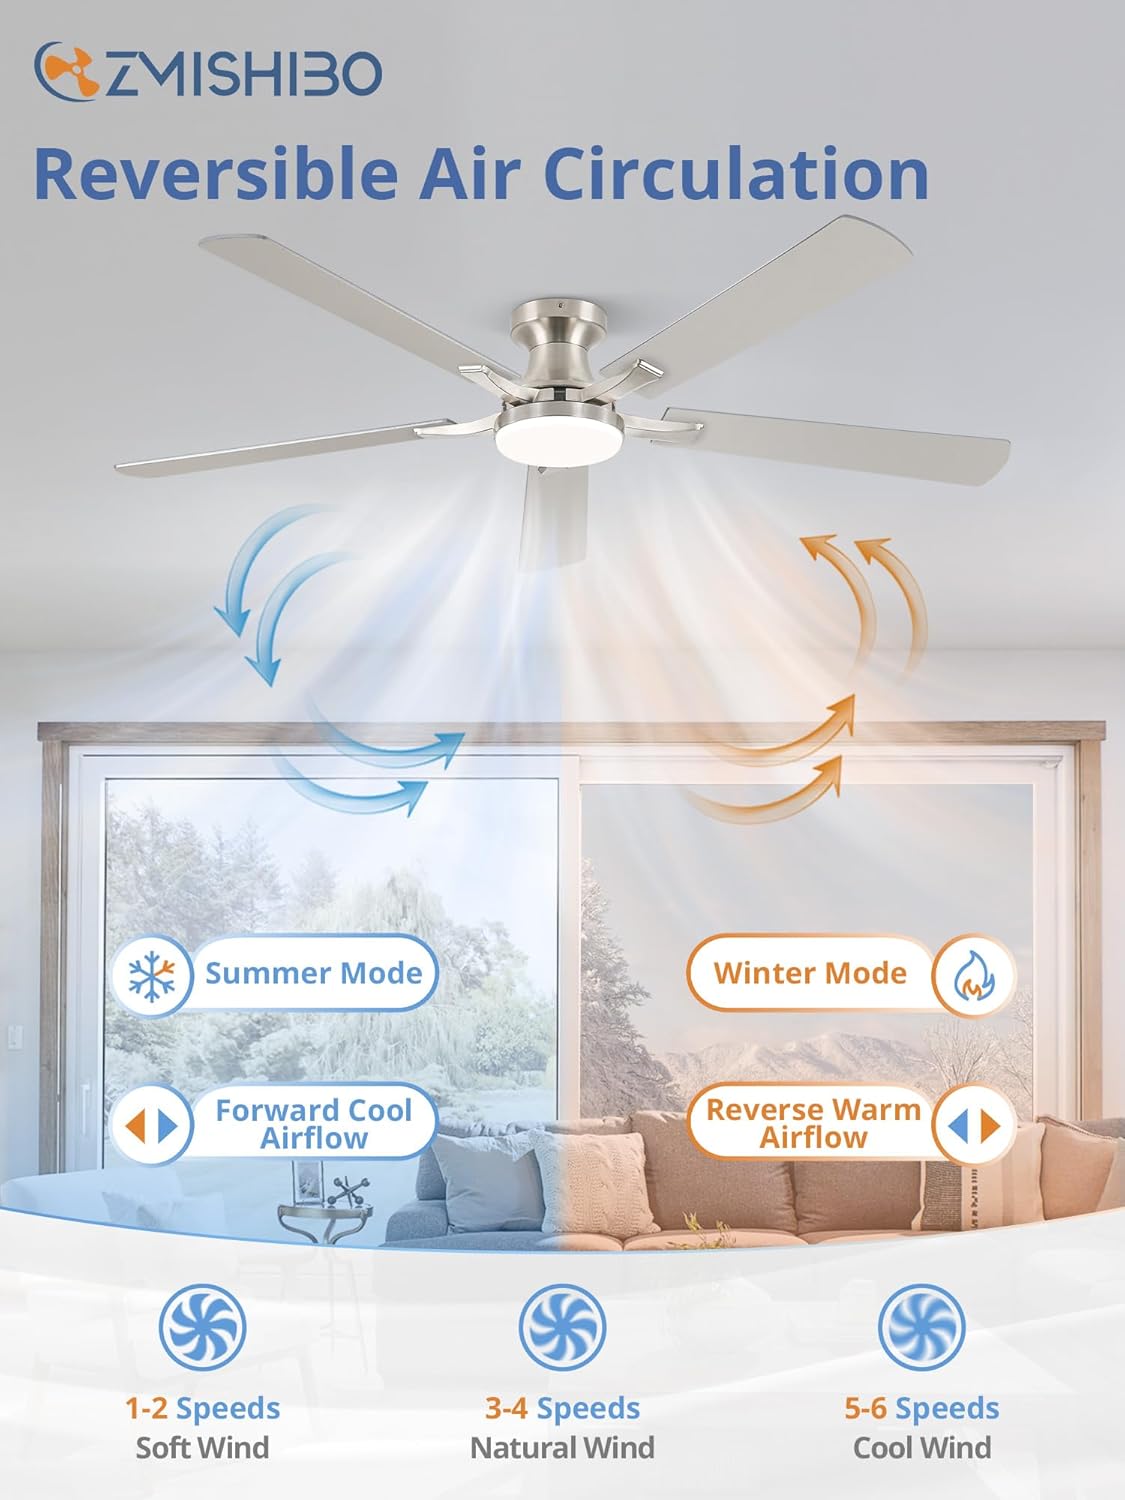
Figure 5: Illustration of the reversible air circulation feature, providing comfort year-round.
5.2. Smart Home App Control
For enhanced control, download the "Smart Home Light Pro" app (for iPhone) or scan the QR code (for Android) to connect your fan via Bluetooth. The app offers all remote control functions plus additional smart features.
Video 1: Connection Tutorial for Smart Home Light APP. This video demonstrates how to connect your ZMISHIBO ceiling fan to the Smart Home Light app for convenient smartphone control.
- Download the "Smart Home Light Pro" app from your device's app store or by scanning the QR code provided in the product packaging.
- Ensure Bluetooth is enabled on your smartphone.
- Open the app and allow it to access Bluetooth.
- In the app, click the plus sign to add a new device/group. Select "Fan" from the options.
- Power on the fan using the wall switch (not the remote).
- Quickly click the "Pairing" button in the app once within 5 seconds. The fan light will blink twice to confirm successful pairing.
- Once paired, you can control all fan and light functions directly from your smartphone.
6. Key Features
- Perfect Size: 60-inch span ideal for large rooms (up to 18ft x 18ft, 8ft-11ft height).
- Dimmable LED Light: Integrated 20W 2000LM LED light with 10-100% stepless dimming.
- Adjustable Color Temperature: Seamless transition from warm white (3000K) to cool white (6500K).
- Memory Function: Retains your last light settings when turned off and on.
- Quiet Reversible DC Motor: Operates at a low noise level (approx. 30 dB) while providing strong airflow (4304 CFM). Reversible function for year-round use.
- High-Quality Plywood Blades: Durable and lightweight, with dual-sided finishes to match various decors.
- Multiple Control Options: Conveniently control via remote or smartphone app.
- Timer Function: 2-hour and 4-hour automatic shut-off settings.

Figure 6: Visual representation of the stepless color temperature and smooth dimming capabilities of the integrated LED light.
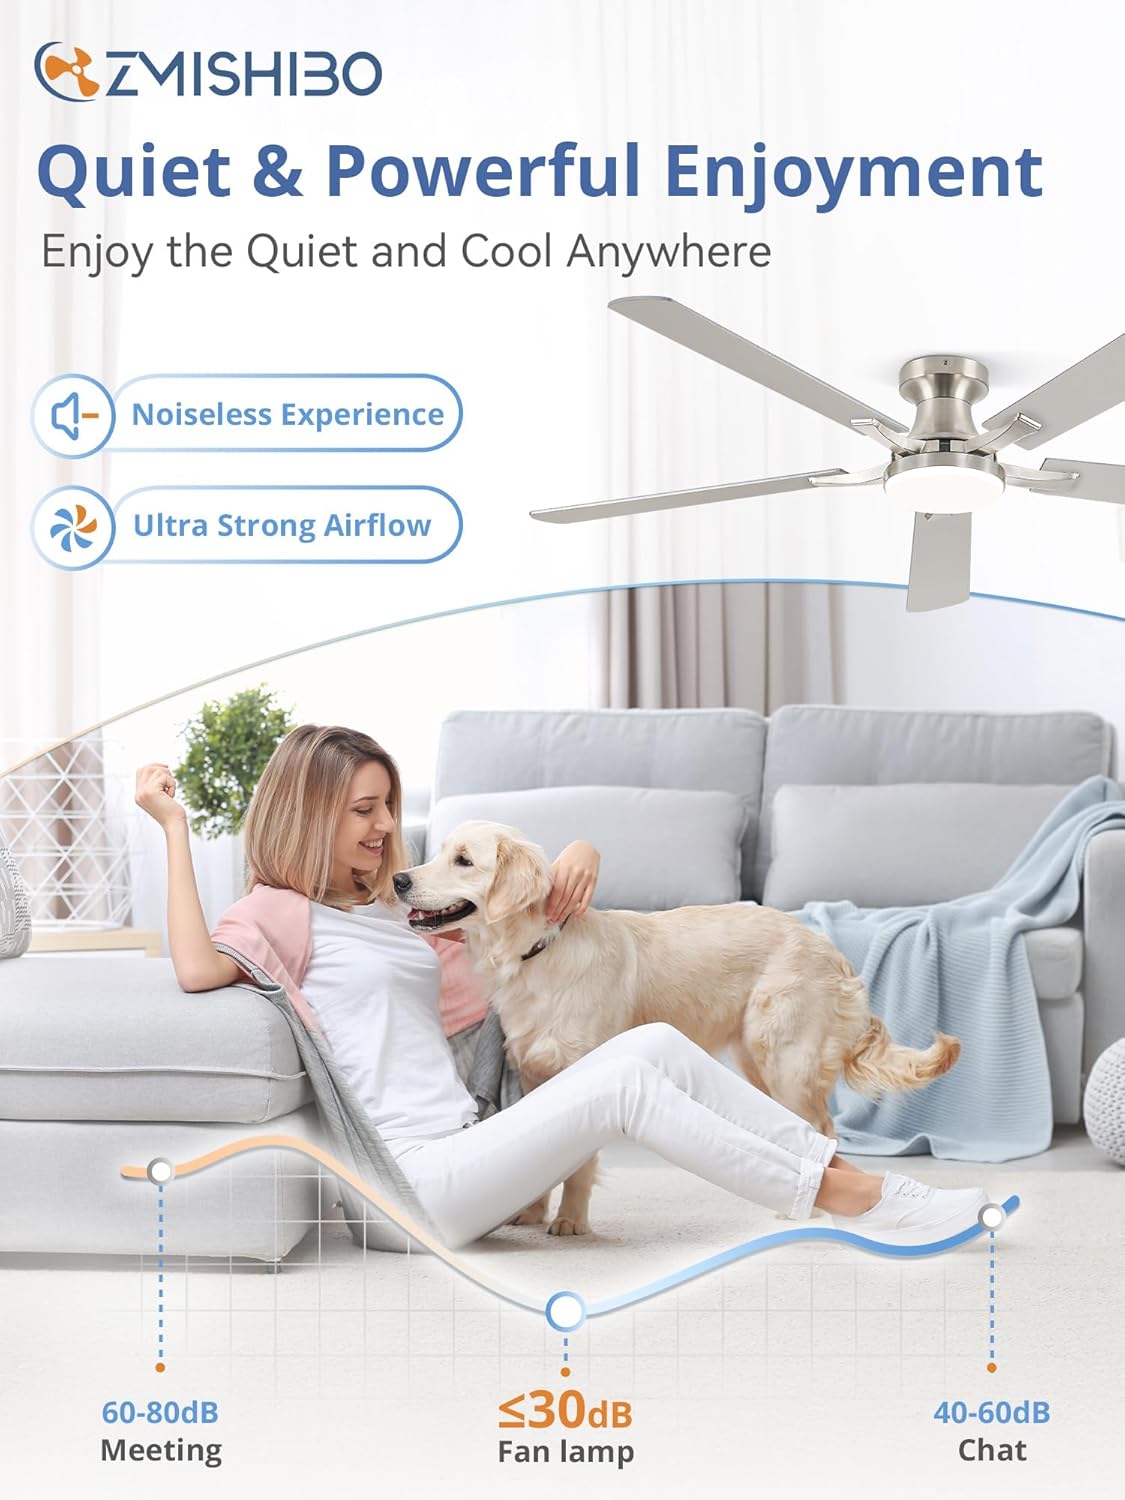
Figure 7: Demonstrates the quiet operation of the fan, with a noise level of approximately 30 dB, ensuring peaceful enjoyment.
7. Maintenance
Regular maintenance ensures optimal performance and longevity of your ceiling fan:
- Cleaning: Use a soft, damp cloth to clean the fan blades and motor housing. Do not use abrasive cleaners or solvents.
- Blade Balancing: If the fan wobbles, use the included blade balancing kit to correct it.
- Tighten Screws: Periodically check and tighten all screws on the fan blades and mounting hardware.
- Light Source: The integrated LED light is designed for long life. If replacement is needed, contact customer support.
8. Troubleshooting
If you experience issues with your fan, refer to the following common problems and solutions:
| Problem | Possible Cause | Solution |
|---|---|---|
| Fan does not start | No power to the fan; Loose wiring; Remote not paired. | Check circuit breaker; Ensure all wires are securely connected; Re-pair remote control or app. |
| Light does not work | Loose wiring; LED driver failure. | Check light kit wiring; Contact customer support for LED driver replacement. |
| Fan wobbles excessively | Loose blade screws; Unbalanced blades; Improper mounting. | Tighten all blade screws; Use blade balancing kit; Ensure mounting bracket is secure. |
| Noisy operation | Loose screws; Fan rubbing against ceiling. | Check and tighten all screws; Ensure proper clearance from ceiling. |
| Remote control not working | Dead batteries; Remote not paired; Obstruction. | Replace batteries; Re-pair remote; Ensure clear line of sight to fan. |
9. Specifications
| Feature | Detail |
|---|---|
| Brand | ZMISHIBO |
| Model Name | BJ60 |
| Size | 60 Inch |
| Color | Nickel (Blades are reversible with wood grain option) |
| Electric Fan Design | Ceiling Fan |
| Power Source | DC Motor |
| Mounting Type | Flush Mount |
| Special Features | App Operable, LED Light, Quiet Operation, Remote Controlled, Timer |
| Noise Level | 30 Decibels |
| Wattage | 20 watts (LED Light) |
| Number of Blades | 5 |
| Air Flow Capacity | 4304 Cubic Feet Per Minute |
| Included Components | Cord, Light Kit, Remote |
| Item Weight | 11.68 pounds |
10. Warranty and Support
ZMISHIBO Ceiling Fans with Light come with a 5-year motor support and a 2-year support on other parts. We are committed to upholding the highest standards for all our products. For any questions, technical assistance, or warranty claims, please contact ZMISHIBO customer support.


