ARCCAPTAIN 135A MIG Welder User Manual
Model: MIG135
Brand: ARCCAPTAIN
1. Introduction
This manual provides essential information for the safe and effective operation of your ARCCAPTAIN 135A MIG Welder. Please read this manual thoroughly before operating the machine to ensure proper usage, maximize performance, and prevent injury or damage.
The ARCCAPTAIN 135A MIG Welder is a versatile 3-in-1 welding machine designed for Flux Core Gasless MIG, Lift TIG, and MMA (Stick) welding. It features a large LED display, synergistic settings for ease of use, and robust safety protections.
2. Safety Information
Always prioritize safety when operating welding equipment. Failure to follow safety guidelines can result in serious injury or death.
- Electric Shock Can Kill: Do not touch live electrical parts. Wear dry welding gloves and protective clothing. Ensure the work area is dry.
- Fumes and Gases Can Be Hazardous: Keep your head out of the fumes. Use ventilation or exhaust to remove fumes from the breathing zone.
- Arc Rays Can Burn Eyes and Skin: Wear a welding helmet with a proper shade filter. Wear protective clothing to protect skin.
- Fire and Explosion Hazard: Remove all flammable materials from the welding area. Have a fire extinguisher readily available.
- Hot Parts Can Cause Severe Burns: Allow welded materials and equipment to cool before handling.
- Read the Entire Manual: Understand all instructions and safety precautions before operation.

Figure 2.1: Safety Features - The ARCCAPTAIN 135A MIG Welder includes built-in overheating, overcurrent, and overload protection, along with an IP21S water rating for enhanced safety and durability.
3. Package Contents
Verify that all items are present in the package:
- 1 x ARCCAPTAIN MIG135 Flux Core Welder
- 1 x 6.5ft MIG Gun
- 1 x 9.8ft Ground Clamp
- 1 x 9.8ft Electronic Holder
- 1 x 0.35"/2lbs Flux Core Wire
- 1 x Wire Feed Roller (K .030-.035)
- 2 x Contact Tips (.030 & .035)
- 1 x Brush & Hammer
- 1 x Shoulder Straps

Figure 3.1: Package Contents - A visual representation of all items included with your ARCCAPTAIN MIG135 Welder.
4. Product Overview
The ARCCAPTAIN 135A MIG Welder is a compact and powerful welding solution. Key features include:
- Large LED Digital Display: Provides clear visibility of welding parameters, even in low-light conditions, simplifying setup and monitoring.
- 3-in-1 Multi-Functionality: Supports Flux Core Gasless MIG, Lift TIG (torch sold separately), and MMA (Stick) welding.
- Beginner Friendly: Features synergistic settings that automatically match wire feeding speed and voltage based on wire size and metal thickness.
- Precise Manual Adjustment: Allows experienced welders to fine-tune wire feeding speed, voltage (±1V in MIG), Hot Start, and Arc Force (0-60A in Stick).
- Excellent Welding Effect: Engineered with a fully digital MCU and robust circuit design for improved arc starts, higher efficiency, and consistent weld beads.
- Light & Portable: Weighing approximately 9.48 lbs, with a carrying handle and shoulder strap for easy transport.
- High Quality & Safe: Built-in over-current, over-load, overheating, and over-voltage protection to extend machine lifespan.

Figure 4.1: ARCCAPTAIN 135A MIG Welder - Front view of the welding machine with accessories.
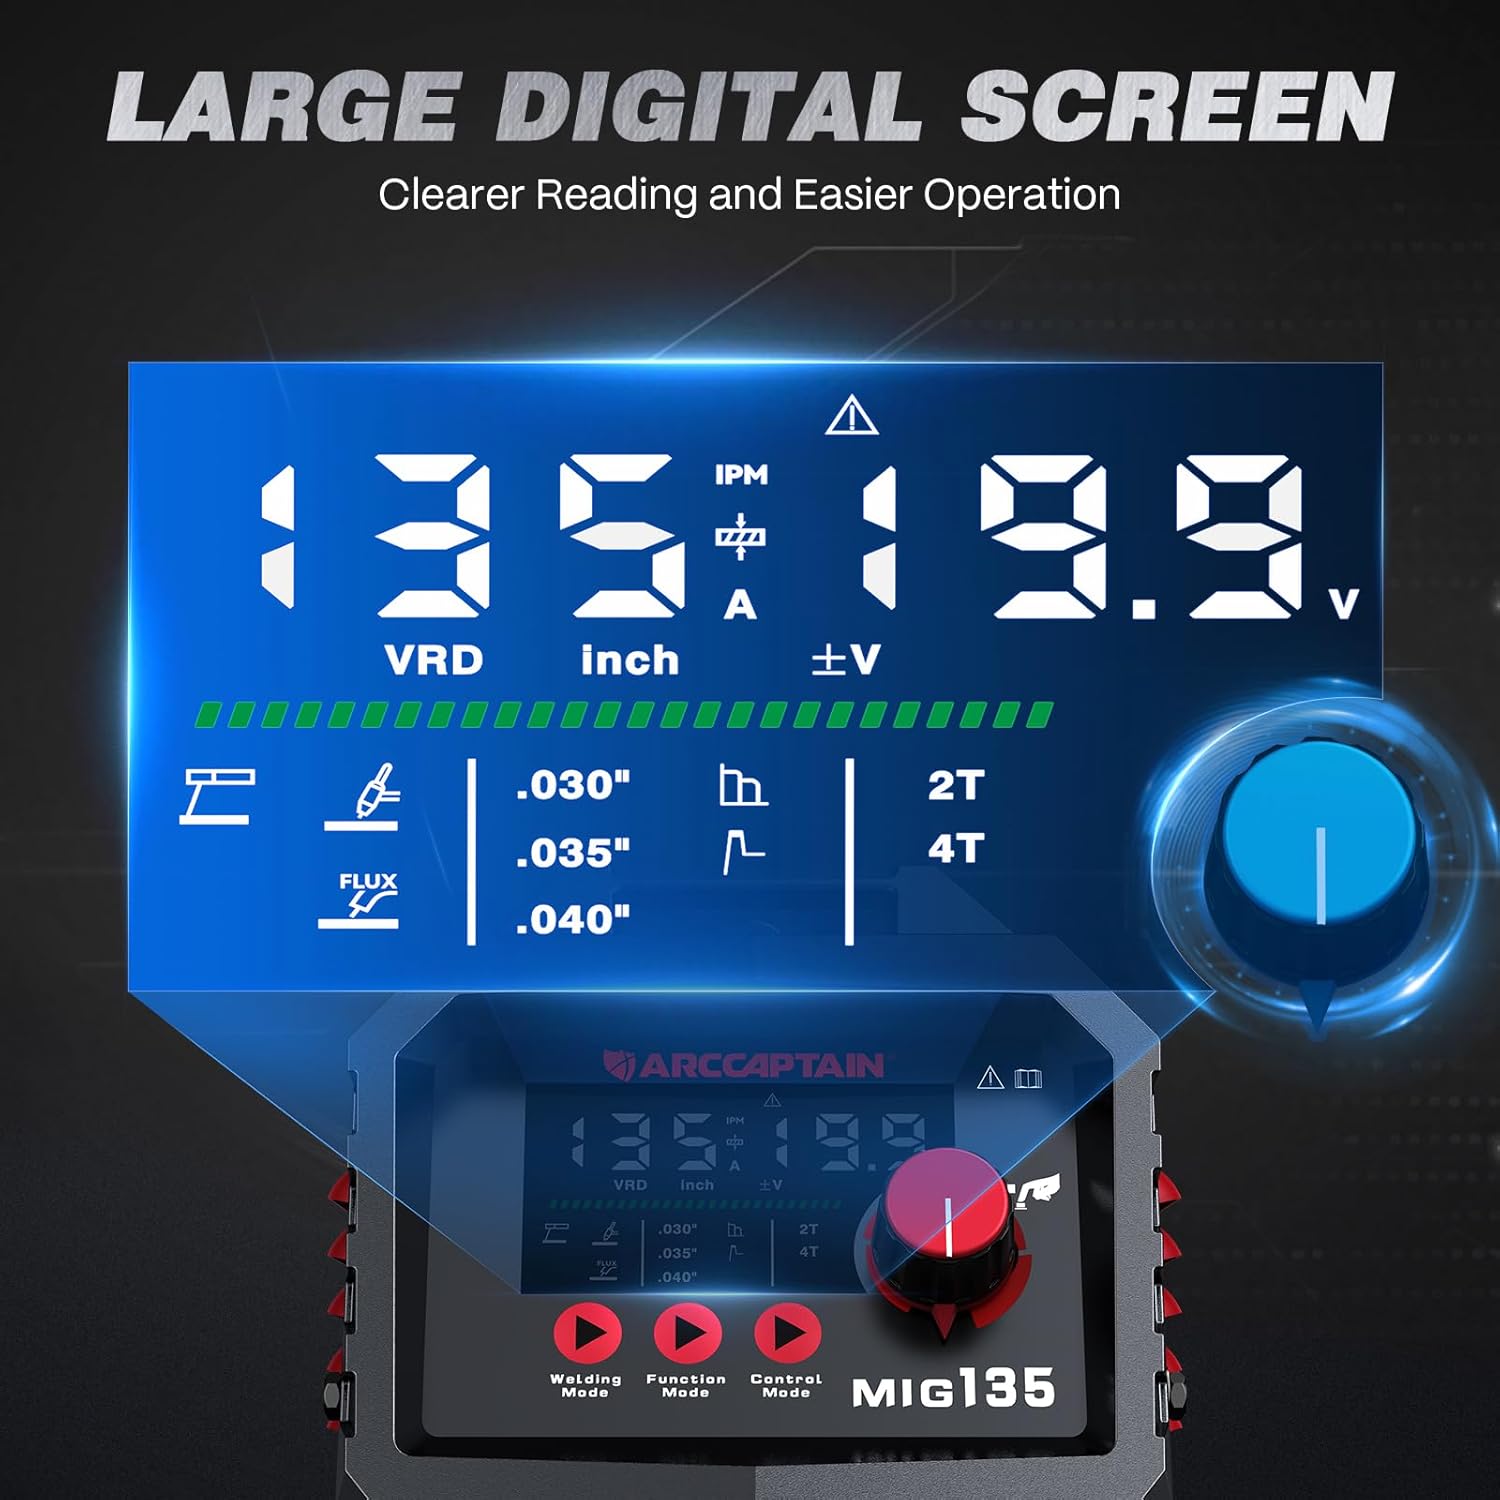
Figure 4.2: Large LED Digital Display - The clear display for easy parameter monitoring.

Figure 4.3: 3-in-1 Welding Capabilities - Illustrates the versatility of the machine across different welding types.
5. Setup
5.1 Power Connection
The ARCCAPTAIN MIG135 operates on 110V AC power. Ensure your power source meets the machine's requirements.
- Connect the power cord to a grounded 110V outlet.
- Verify the power switch on the back of the unit is in the OFF position before connecting.
5.2 MIG Welding Setup (Flux Core Gasless)
- Install Flux Core Wire: Open the wire feed compartment. Place the flux core wire spool onto the spindle. Thread the wire through the guide and into the drive roller mechanism. Ensure the correct groove on the drive roller is selected for your wire size (e.g., .030" or .035").
- Connect MIG Gun: Attach the MIG gun cable to the positive (+) terminal on the front panel.
- Connect Ground Clamp: Attach the ground clamp cable to the negative (-) terminal on the front panel. Secure the ground clamp to the workpiece or welding table, ensuring good electrical contact.
- Feed Wire: With the MIG gun pointed away from yourself and others, press and hold the trigger to feed the wire through the gun liner until it exits the contact tip.
- Install Contact Tip: Once the wire is fed, install the appropriate contact tip (.030" or .035") and nozzle onto the MIG gun.
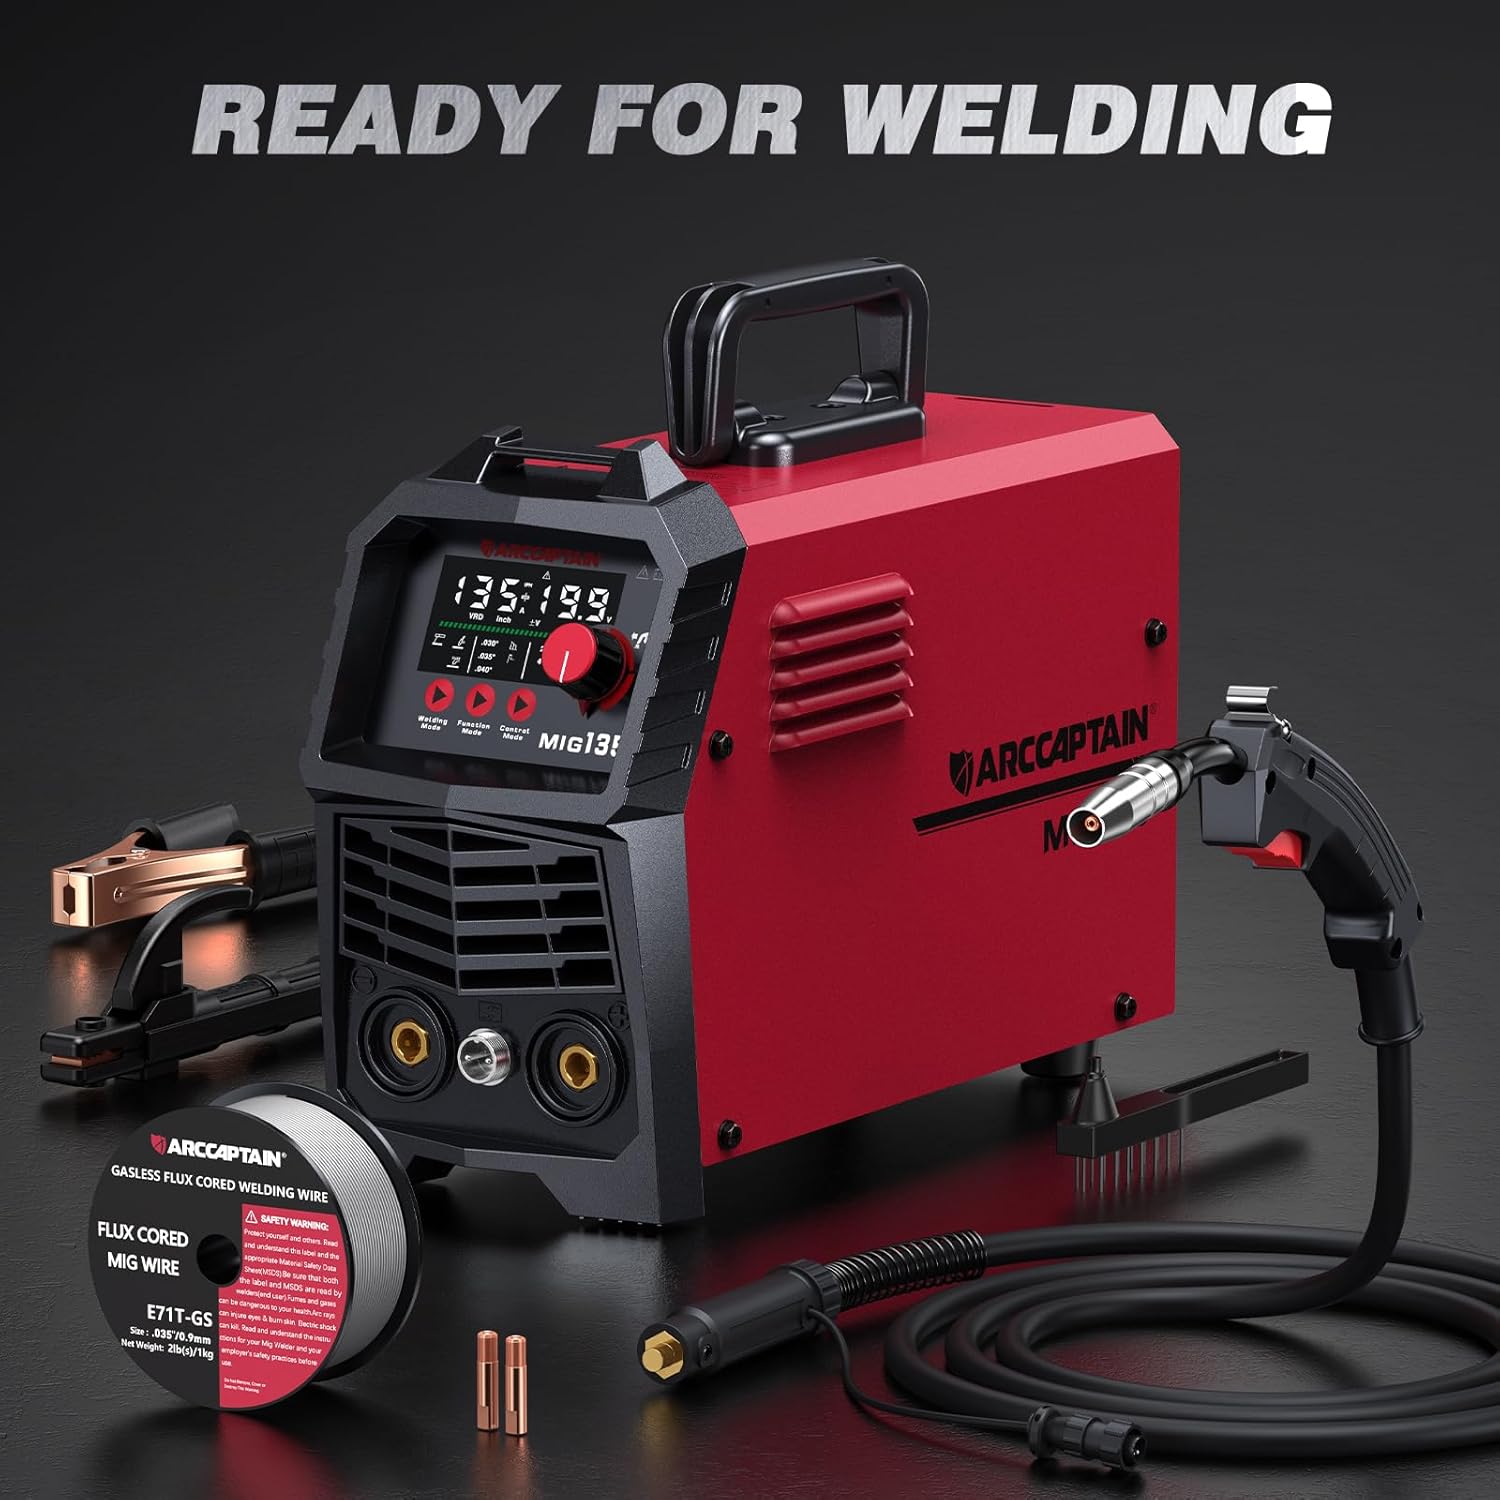
Figure 5.1: Ready for Welding - All components prepared for setup.

Figure 5.2: Connection Diagrams - Visual guide for connecting accessories for different welding processes.
5.3 Lift TIG Welding Setup (Optional)
A Lift TIG torch is required and sold separately for this mode.
- Connect TIG Torch: Connect the TIG torch cable to the negative (-) terminal on the front panel.
- Connect Ground Clamp: Attach the ground clamp cable to the positive (+) terminal on the front panel.
- Gas Connection: If using shielding gas (e.g., 99.9% Argon), connect the gas hose from your regulator to the gas inlet on the machine (if applicable, consult TIG torch manual for specific connections).
- Install Tungsten: Insert the appropriate tungsten electrode into the TIG torch collet and tighten.
5.4 MMA (Stick) Welding Setup
- Connect Electrode Holder: Attach the electrode holder cable to the positive (+) terminal on the front panel.
- Connect Ground Clamp: Attach the ground clamp cable to the negative (-) terminal on the front panel.
- Insert Electrode: Securely insert the welding electrode into the electrode holder.
6. Operating Instructions
6.1 Powering On and Mode Selection
- Ensure all connections are secure.
- Turn the power switch to the ON position. The LED display will illuminate.
- Use the "Welding Mode" button to cycle through Flux Core MIG, Lift TIG, and MMA (Stick) modes.

Figure 6.1: Control Panel - The main interface for setting welding parameters.
6.2 Flux Core MIG Welding
This mode is ideal for general fabrication and repairs without the need for external shielding gas.
- Synergistic Settings (Beginner Friendly):
- Select the wire size (.030", .035", or .040") and metal thickness on the display.
- The machine will automatically set recommended wire feeding speed and voltage.
- Manual Adjustment (Experienced Welders):
- Adjust the wire feeding speed (30-260 IPM) using the main knob.
- Fine-tune the voltage between -1V and +1V using the voltage trimming function.
- Select "2T" (two-touch) for standard trigger operation or "4T" (four-touch) for continuous welding without holding the trigger.
- Welding Process: Position the MIG gun at the start of your weld. Press the trigger to initiate the arc and begin welding. Maintain a consistent travel speed and gun angle.

Figure 6.2: Adjustable Parameters - Details on controlling wire feed speed, current, voltage, and arc characteristics.

Figure 6.3: Flux Core Welding - Demonstrates the process and expected weld quality.
6.3 Lift TIG Welding
This mode is suitable for precise welding, especially on stainless steel. (Lift TIG torch not included).
- Select Lift TIG mode.
- Set the desired welding current using the main knob.
- To initiate the arc, gently touch the tungsten electrode to the workpiece and then lift it slightly. The arc will start.
- Maintain a consistent arc length and feed filler rod manually if required.

Figure 6.4: Lift TIG Welding - Illustrates the TIG welding process and its results.
6.4 MMA (Stick) Welding
This mode is robust for various materials and outdoor conditions.
- Select MMA (Stick) mode.
- Set the desired welding current using the main knob.
- Adjust Hot Start and Arc Force (0-60A) for optimal arc performance.
- Strike the electrode against the workpiece to initiate the arc. Maintain a consistent arc length and travel speed.
- Note: Can be welded with E6013 & E7018 electrodes; CAN NOT be welded with E6010 & E6011.

Figure 6.5: Stick Welding - Depicts the stick welding process and its outcome.
7. Maintenance
Regular maintenance ensures the longevity and optimal performance of your welder.
- Cleaning: Regularly clean the machine's exterior with a dry, soft cloth. Use compressed air to blow out dust and debris from cooling vents.
- Wire Feed System: Inspect the wire feed rollers and liner for wear or blockages. Clean or replace as necessary to ensure smooth wire feeding.
- Contact Tips and Nozzles: Replace worn contact tips and clean spatter from nozzles regularly to maintain good arc performance.
- Ground Clamp: Ensure the ground clamp connection is clean and free of rust or paint for effective grounding.
- Storage: Store the welder in a dry, clean environment when not in use.
8. Troubleshooting
This section addresses common issues you might encounter.
| Problem | Possible Cause | Solution |
|---|---|---|
| No power to the machine | Power cord unplugged, circuit breaker tripped, machine switch off. | Check power connections, reset breaker, turn machine switch ON. |
| No arc / Weak arc | Poor ground connection, incorrect settings, worn contact tip, wrong electrode. | Ensure good ground, adjust parameters, replace contact tip, use correct electrode. |
| Wire feeding issues | Kinked liner, incorrect drive roller tension, wrong drive roller groove, spool tangled. | Straighten liner, adjust tension, verify groove, untangle spool. |
| Overheat protection activated | Exceeded duty cycle, blocked cooling vents. | Allow machine to cool down, clear vents. |
9. Specifications
Technical specifications for the ARCCAPTAIN MIG135 Welder:
| Parameter | Value |
|---|---|
| Model | MIG135 |
| Input Voltage | 110 Volts AC |
| Item Weight | 10 pounds |
| Product Dimensions | 14.9 x 5.3 x 9.7 inches |
| Material | Metal+Plastic |
| Included Components | 135A Flux Welder (main unit) |
| IP Rating | IP21S |

Figure 9.1: Technical Parameters - Detailed electrical specifications for the MIG135.

Figure 9.2: Quality Assurance - The welder has passed over 300 authoritative laboratory tests.
10. Warranty & Support
ARCCAPTAIN products typically come with a manufacturer's warranty. For specific warranty details and customer support, please refer to the warranty card included with your product or visit the official ARCCAPTAIN website.
For technical assistance, troubleshooting beyond this manual, or parts inquiries, please contact ARCCAPTAIN customer service.
ARCCAPTAIN Official Store: Visit Store