1. Important Safety Instructions
Read all instructions carefully before using the appliance. Keep this manual for future reference.
- Gas Safety: Ensure proper ventilation. Do not store flammable materials near the hob. In case of a gas leak, turn off the main gas supply, open windows, and do not operate electrical switches.
- Electrical Safety: The electronic ignition requires an electrical connection. Ensure the power supply matches the appliance's requirements (240 Volts).
- Installation: Installation must be performed by a qualified technician in accordance with local regulations and standards.
- Children and Vulnerable Persons: This appliance is not intended for use by persons with reduced physical, sensory or mental capabilities, or lack of experience and knowledge, unless they have been given supervision or instruction concerning use of the appliance by a person responsible for their safety.
- Hot Surfaces: Burners and pan supports become very hot during use. Always use oven mitts and allow the appliance to cool before cleaning.
- Cleaning: Disconnect the appliance from the power supply and turn off the gas supply before cleaning.
2. Product Overview
The Cecotec Bolero Squad G 4400S is a 4-burner gas hob designed for efficient and precise cooking. It features a durable stainless steel finish, robust cast iron grates, and a powerful triple WOK burner.
Key features include:
- 8 kW Total Power: Provides rapid heating and precise temperature control.
- Stainless Steel Finish: Enhances kitchen aesthetics and offers easy cleaning.
- Individual Cast Iron Grates: Ensures stability for cookware and even heat distribution.
- Triple WOK Burner: Ideal for high-intensity cooking.
- Electronic Ignition: For quick and safe burner startup.
- Safety Valves: Automatically cut off gas supply if the flame extinguishes.
- Gas Conversion Accessory: Allows flexibility between natural gas and butane.

Figure 1: Top-down view of the Cecotec Bolero Squad G 4400S gas hob in use, showing a pan on one of the burners.
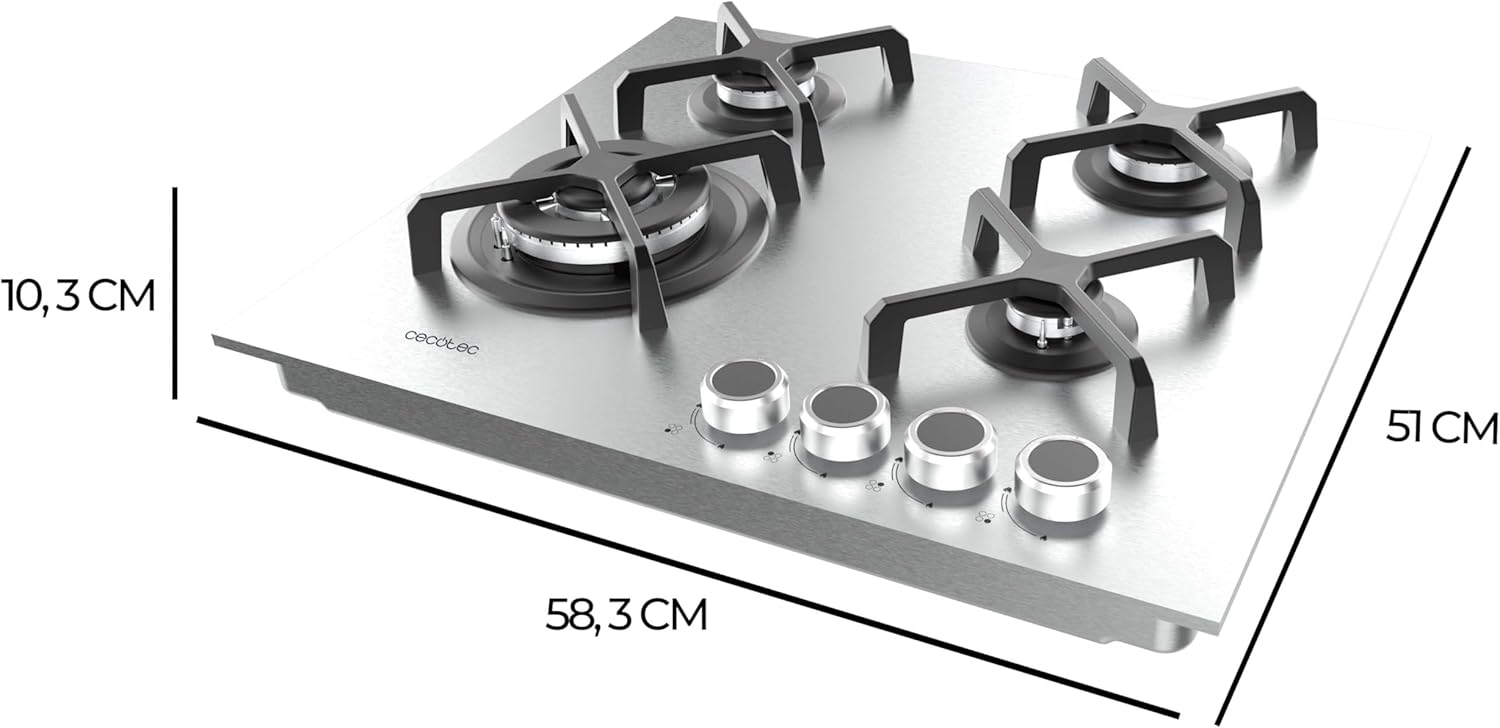
Figure 2: Front view of the gas hob, illustrating its overall dimensions (58.3 cm width, 51 cm depth, 10.3 cm height).
3. Installation and Setup
Important: Installation must be carried out by a qualified professional and comply with all local regulations and gas safety standards.
3.1 Unpacking
Carefully remove the hob from its packaging. Check for any damage during transit. Ensure all components listed in the "What's in the Box" section are present.
- 1x Gas Hob
- 1x Instruction Manual
- Gas conversion accessory
3.2 Countertop Cut-out Dimensions
Prepare the countertop opening according to the specified dimensions. Ensure adequate clearance around the hob for ventilation and safety.

Figure 3: Installation diagram showing recommended cut-out dimensions (560mm x 480mm) and clearances for the hob.
- Hob Dimensions: 51.2 cm (Depth) x 58.6 cm (Width) x 10.3 cm (Height)
- Cut-out Dimensions: Approximately 560 mm (Width) x 480 mm (Depth)
- Minimum Clearance: Refer to the diagram for minimum distances to walls, overhead cabinets, and range hood.
3.3 Gas Connection
The appliance is supplied configured for Natural Gas. An accessory for conversion to Butane gas is included. The gas connection must be performed by a certified technician.
- Ensure the gas supply pressure is compatible with the appliance.
- Use appropriate gas hoses and fittings that comply with local standards.
- Check for gas leaks using a soapy water solution after connection.

Figure 4: The gas hob with an icon indicating its compatibility with gas conversion (Natural Gas to Butane).
3.4 Electrical Connection
The electronic ignition requires a 240 Volt electrical supply. Connect the appliance to a properly grounded electrical outlet.
- Ensure the electrical circuit is protected by a suitable fuse or circuit breaker.
- Do not use extension cords or adapters.
4. Operating Instructions
4.1 Lighting a Burner
- Place your cookware centrally on the chosen burner's grate.
- Push down and turn the corresponding control knob counter-clockwise to the maximum flame position (large flame symbol).
- Hold the knob down for a few seconds until the flame ignites. The electronic ignition will click automatically.
- Once lit, release the knob. If the flame goes out, repeat the process, holding the knob down slightly longer.
- Adjust the flame size by turning the knob between the maximum and minimum flame positions (large and small flame symbols).
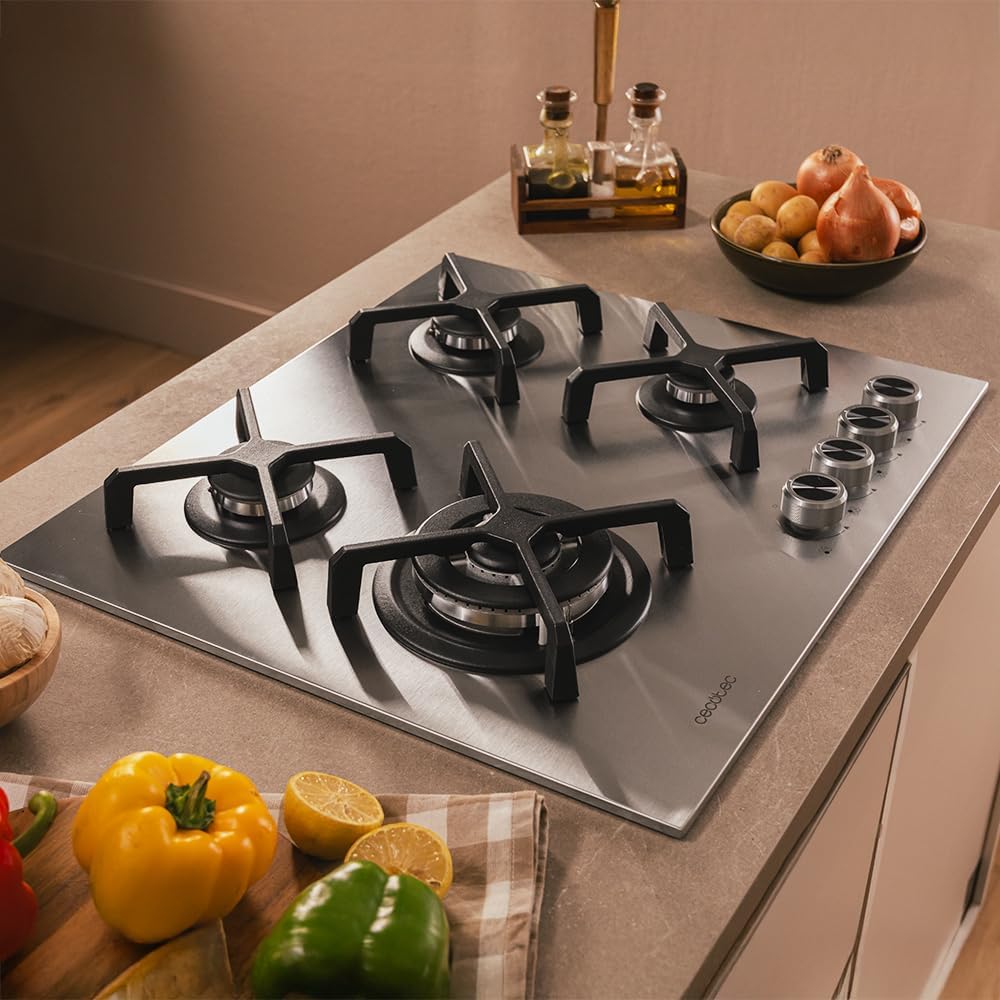
Figure 5: Close-up view of an ignited gas burner, showing the blue flame indicating proper combustion.
4.2 Using the WOK Burner
The triple WOK burner provides concentrated heat, ideal for stir-frying and large pots. Ensure your WOK or large pan is stable on the dedicated WOK support (if provided, or ensure it fits the grate securely).
4.3 Turning Off a Burner
Turn the control knob clockwise until it clicks into the "off" position (dot symbol). Ensure the flame is completely extinguished.
4.4 Safety Valve Function
Each burner is equipped with a safety valve that automatically cuts off the gas supply if the flame accidentally extinguishes (e.g., due to a draft or liquid overflow). If this occurs, wait a few moments before attempting to re-ignite the burner.
5. Cleaning and Maintenance
Regular cleaning and maintenance will ensure the longevity and optimal performance of your gas hob.
5.1 General Cleaning
- Always ensure the hob is cool and disconnected from the gas and electrical supply before cleaning.
- Wipe the stainless steel surface with a soft cloth and a mild detergent. Avoid abrasive cleaners, scouring pads, or harsh chemicals that can scratch the surface.
- For stubborn stains, use a specialized stainless steel cleaner, following the product instructions.
- Dry the surface thoroughly to prevent water spots.
5.2 Cleaning Burners and Grates
- Remove the cast iron grates and burner caps/crowns when cool.
- Wash grates and burner components in warm soapy water. For heavily soiled parts, soak them before scrubbing with a non-abrasive brush.
- Ensure burner ports are clear of food debris. Use a small brush or needle if necessary.
- Dry all components completely before reassembling them. Moisture can affect ignition.
- Ensure burner caps are correctly seated on the burner bases to ensure proper flame distribution.
6. Troubleshooting
Before contacting customer service, please refer to the following common issues and solutions:
| Problem | Possible Cause | Solution |
|---|---|---|
| Burner does not ignite. | No gas supply, power outage (for electronic ignition), clogged burner ports, wet burner components, control knob not held down long enough. | Check gas supply. Check power supply. Clean burner ports. Dry burner components. Hold control knob down for 3-5 seconds after ignition. |
| Flame is uneven or yellow. | Clogged burner ports, incorrect burner cap placement, wrong gas type. | Clean burner ports. Ensure burner cap is correctly seated. Verify correct gas type for the appliance. |
| Gas smell detected. | Gas leak. | Immediately turn off main gas supply. Open windows. Do not operate electrical switches. Contact a qualified technician. |
| Electronic ignition continuously clicks. | Moisture around igniter, igniter dirty, faulty igniter. | Ensure area around igniter is dry. Clean igniter gently. If problem persists, contact service. |
7. Specifications
| Feature | Detail |
|---|---|
| Brand | Cecotec |
| Model Number | A01_EU01_100490 |
| Product Dimensions (D x W x H) | 51.2 cm x 58.6 cm x 10.3 cm |
| Item Weight | 9.84 Kilograms |
| Number of Burners | 4 |
| Total Power | 8000 Watts (8 kW) |
| Voltage | 240 Volts |
| Fuel Type | Natural Gas (convertible to Butane) |
| Burner Type | Open (includes Triple WOK burner) |
| Ignition Type | Electronic |
| Safety Features | Safety Valves (Flame Failure Device) |
| Included Components | 1x Gas Hob, 1x Instruction Manual, Gas conversion accessory |
| Spare Parts Availability | 10 Years |
8. Warranty and Support
This Cecotec appliance is manufactured to high-quality standards. For warranty information, please refer to the specific terms and conditions provided with your purchase or visit the official Cecotec website.
Spare Parts: Spare parts for this model are available for a period of 10 years from the date of purchase.
For technical assistance, repairs, or any questions not covered in this manual, please contact Cecotec customer support. Have your model number (A01_EU01_100490) and purchase details ready.
You can visit the official Cecotec store for more information: Cecotec Store


