1. Introduction
This manual provides comprehensive instructions for the assembly, installation, operation, and maintenance of your Virubi 24-inch Bathroom Vanity with Ceramic Sink. Please read all instructions carefully before beginning assembly and retain this manual for future reference.
1.1 Safety Information
- Always follow local plumbing and building codes.
- Ensure all parts are present and undamaged before assembly. Do not proceed if any parts are missing or damaged.
- Assembly may require two people for safe handling of larger components.
- Wear appropriate safety gear, such as gloves and eye protection, during assembly and installation.
- Do not overtighten fasteners, as this may damage the product.
- Keep small parts away from children to prevent choking hazards.
2. Package Contents
Verify that all components listed below are included in your package:
- Vanity Cabinet (pre-assembled frame with drawers)
- Ceramic Sink Top
- Open Storage Shelf
- Hardware Pack (screws, connectors, drawer pulls)
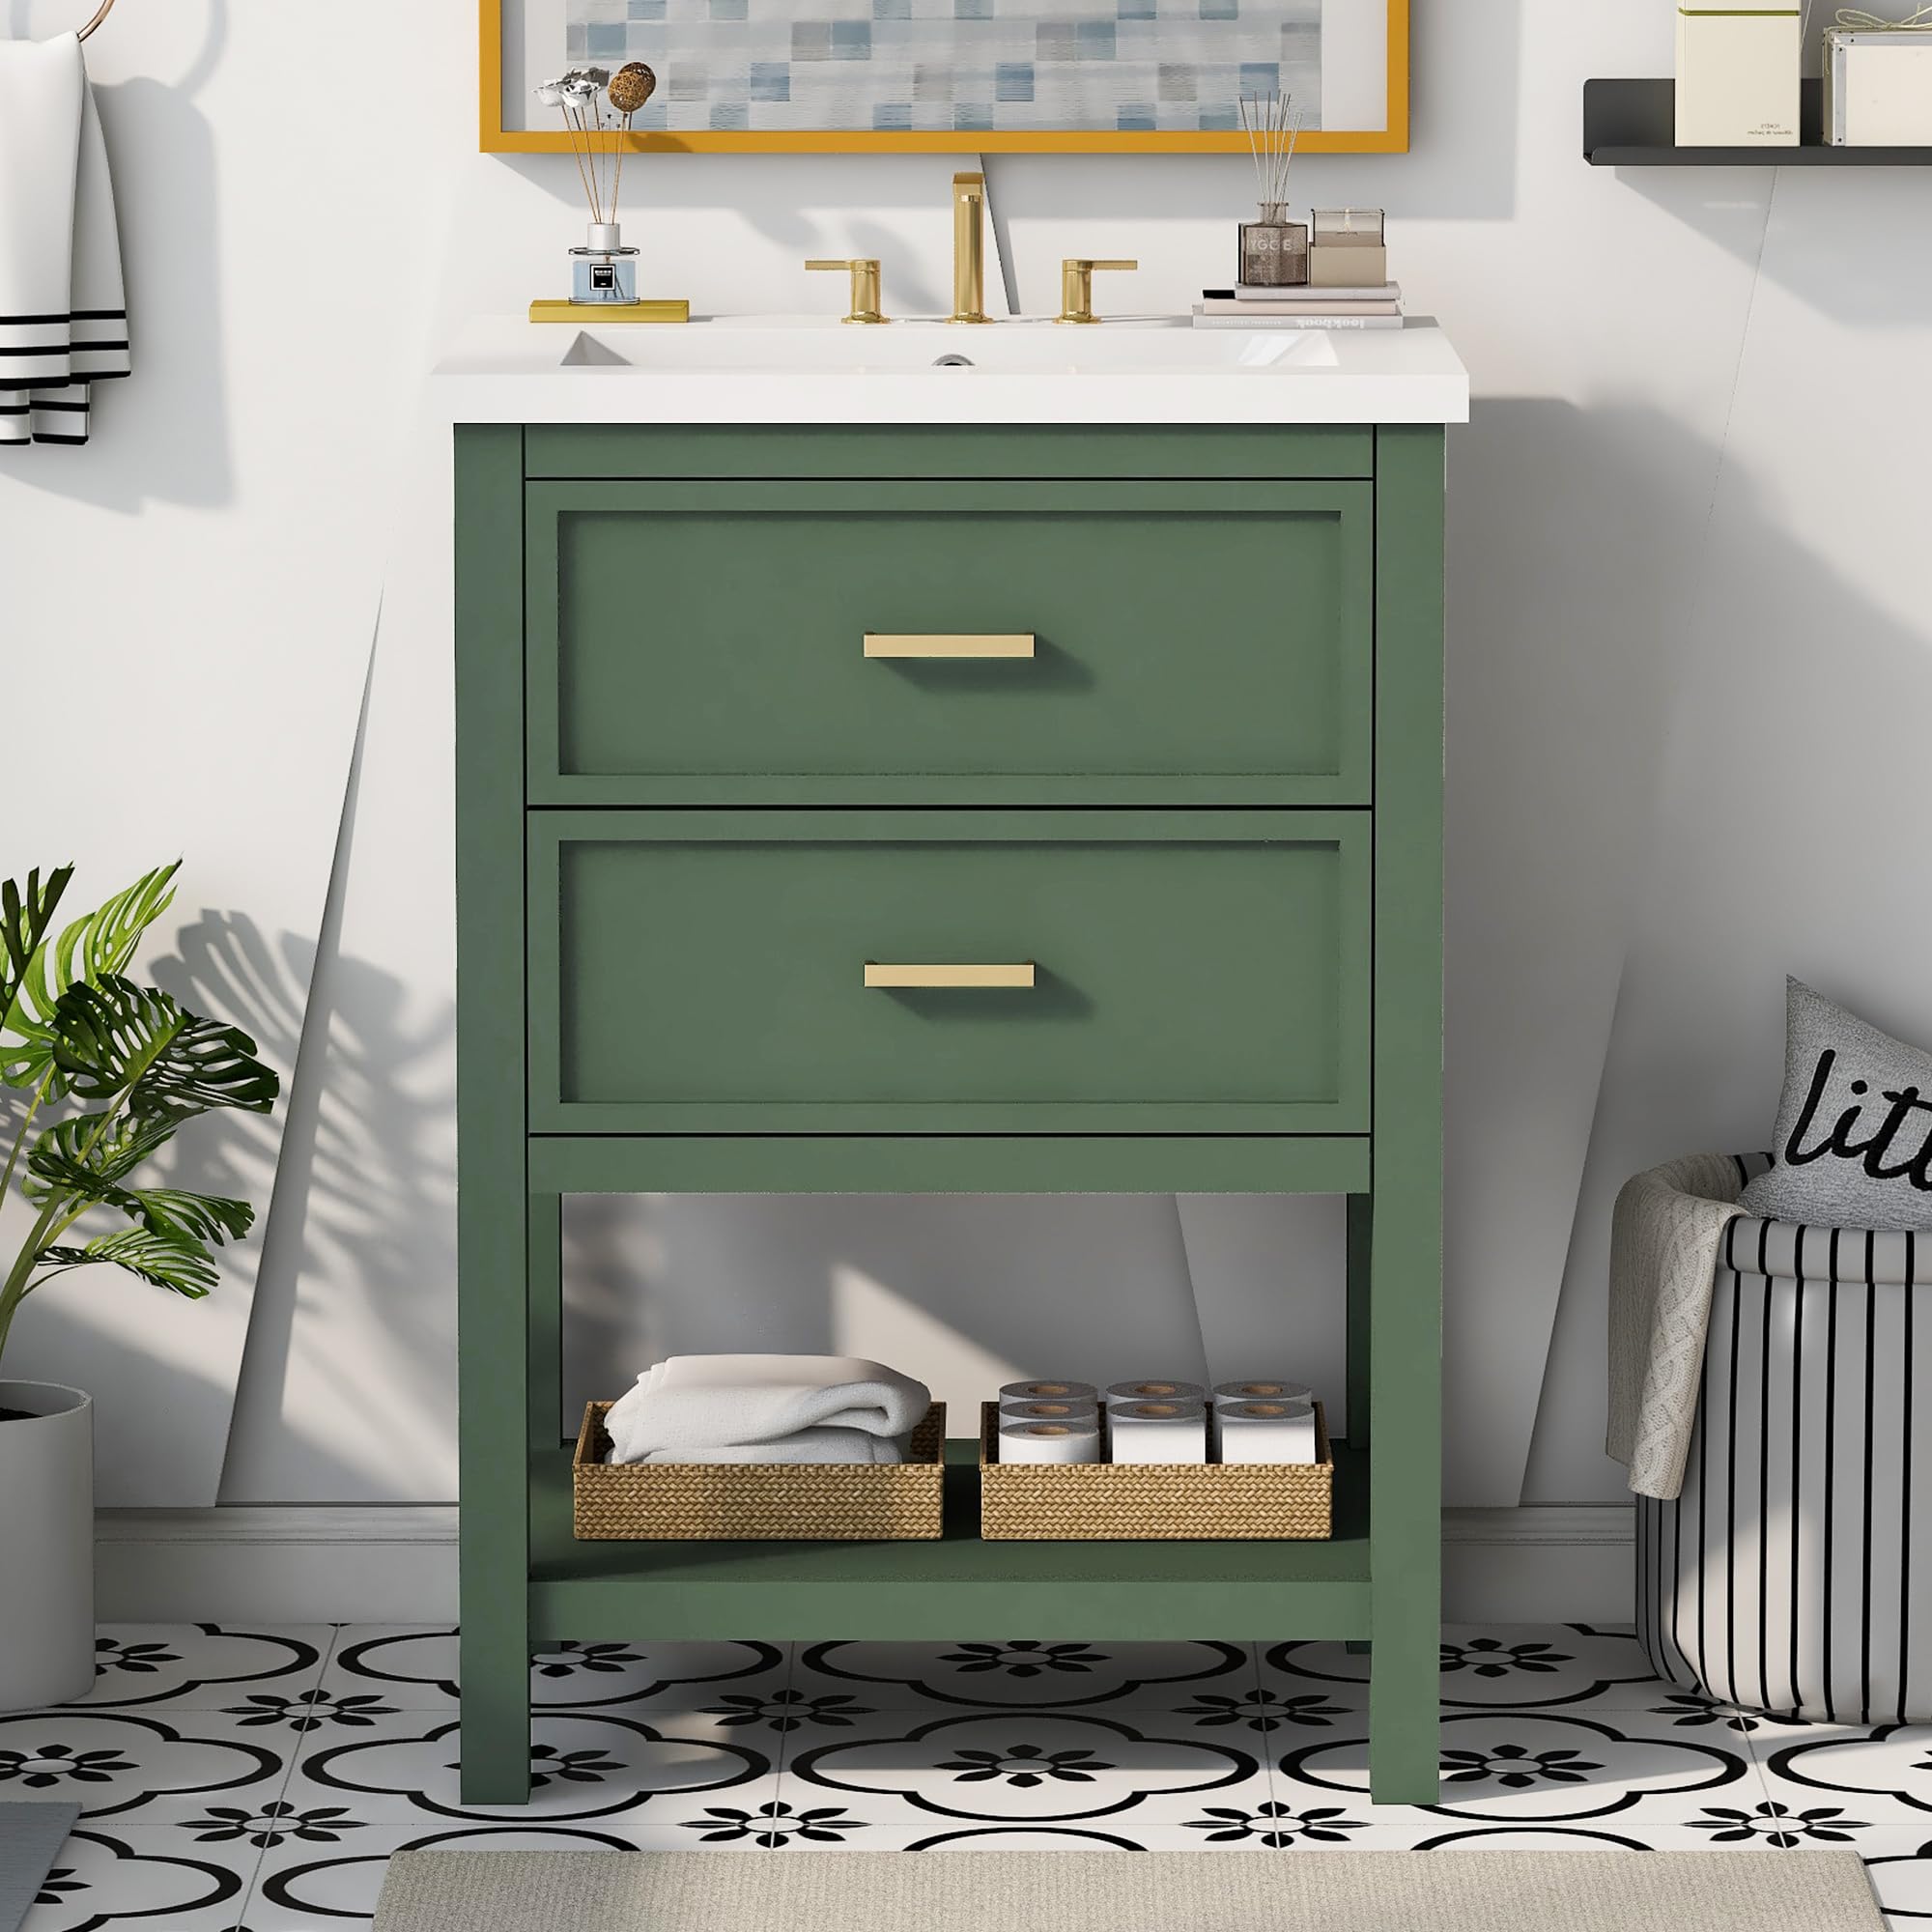
Figure 2.1: Front view of the Virubi 24-inch Bathroom Vanity.
3. Setup and Installation
3.1 Tools Required (Not Included)
- Phillips Head Screwdriver
- Adjustable Wrench
- Level
- Sealant (silicone caulk)
3.2 Assembly Steps
- Unpack Components: Carefully remove all items from the packaging. Place them on a clean, soft surface to prevent scratches.
- Attach Open Shelf: Secure the open storage shelf to the bottom of the vanity cabinet using the provided hardware. Ensure it is level and stable.
- Install Drawer Pulls: Attach the drawer pulls to the pre-drilled holes on the drawers using the included screws.
- Position Vanity: Carefully place the vanity cabinet in its desired location in the bathroom. Use a level to ensure it is perfectly horizontal. Adjust if necessary.
- Install Ceramic Sink Top: Apply a thin bead of silicone sealant along the top edges of the vanity cabinet where the sink will rest. Carefully lower the ceramic sink top onto the cabinet, aligning it properly. Press down gently to ensure a good seal. Allow the sealant to cure according to the manufacturer's instructions.
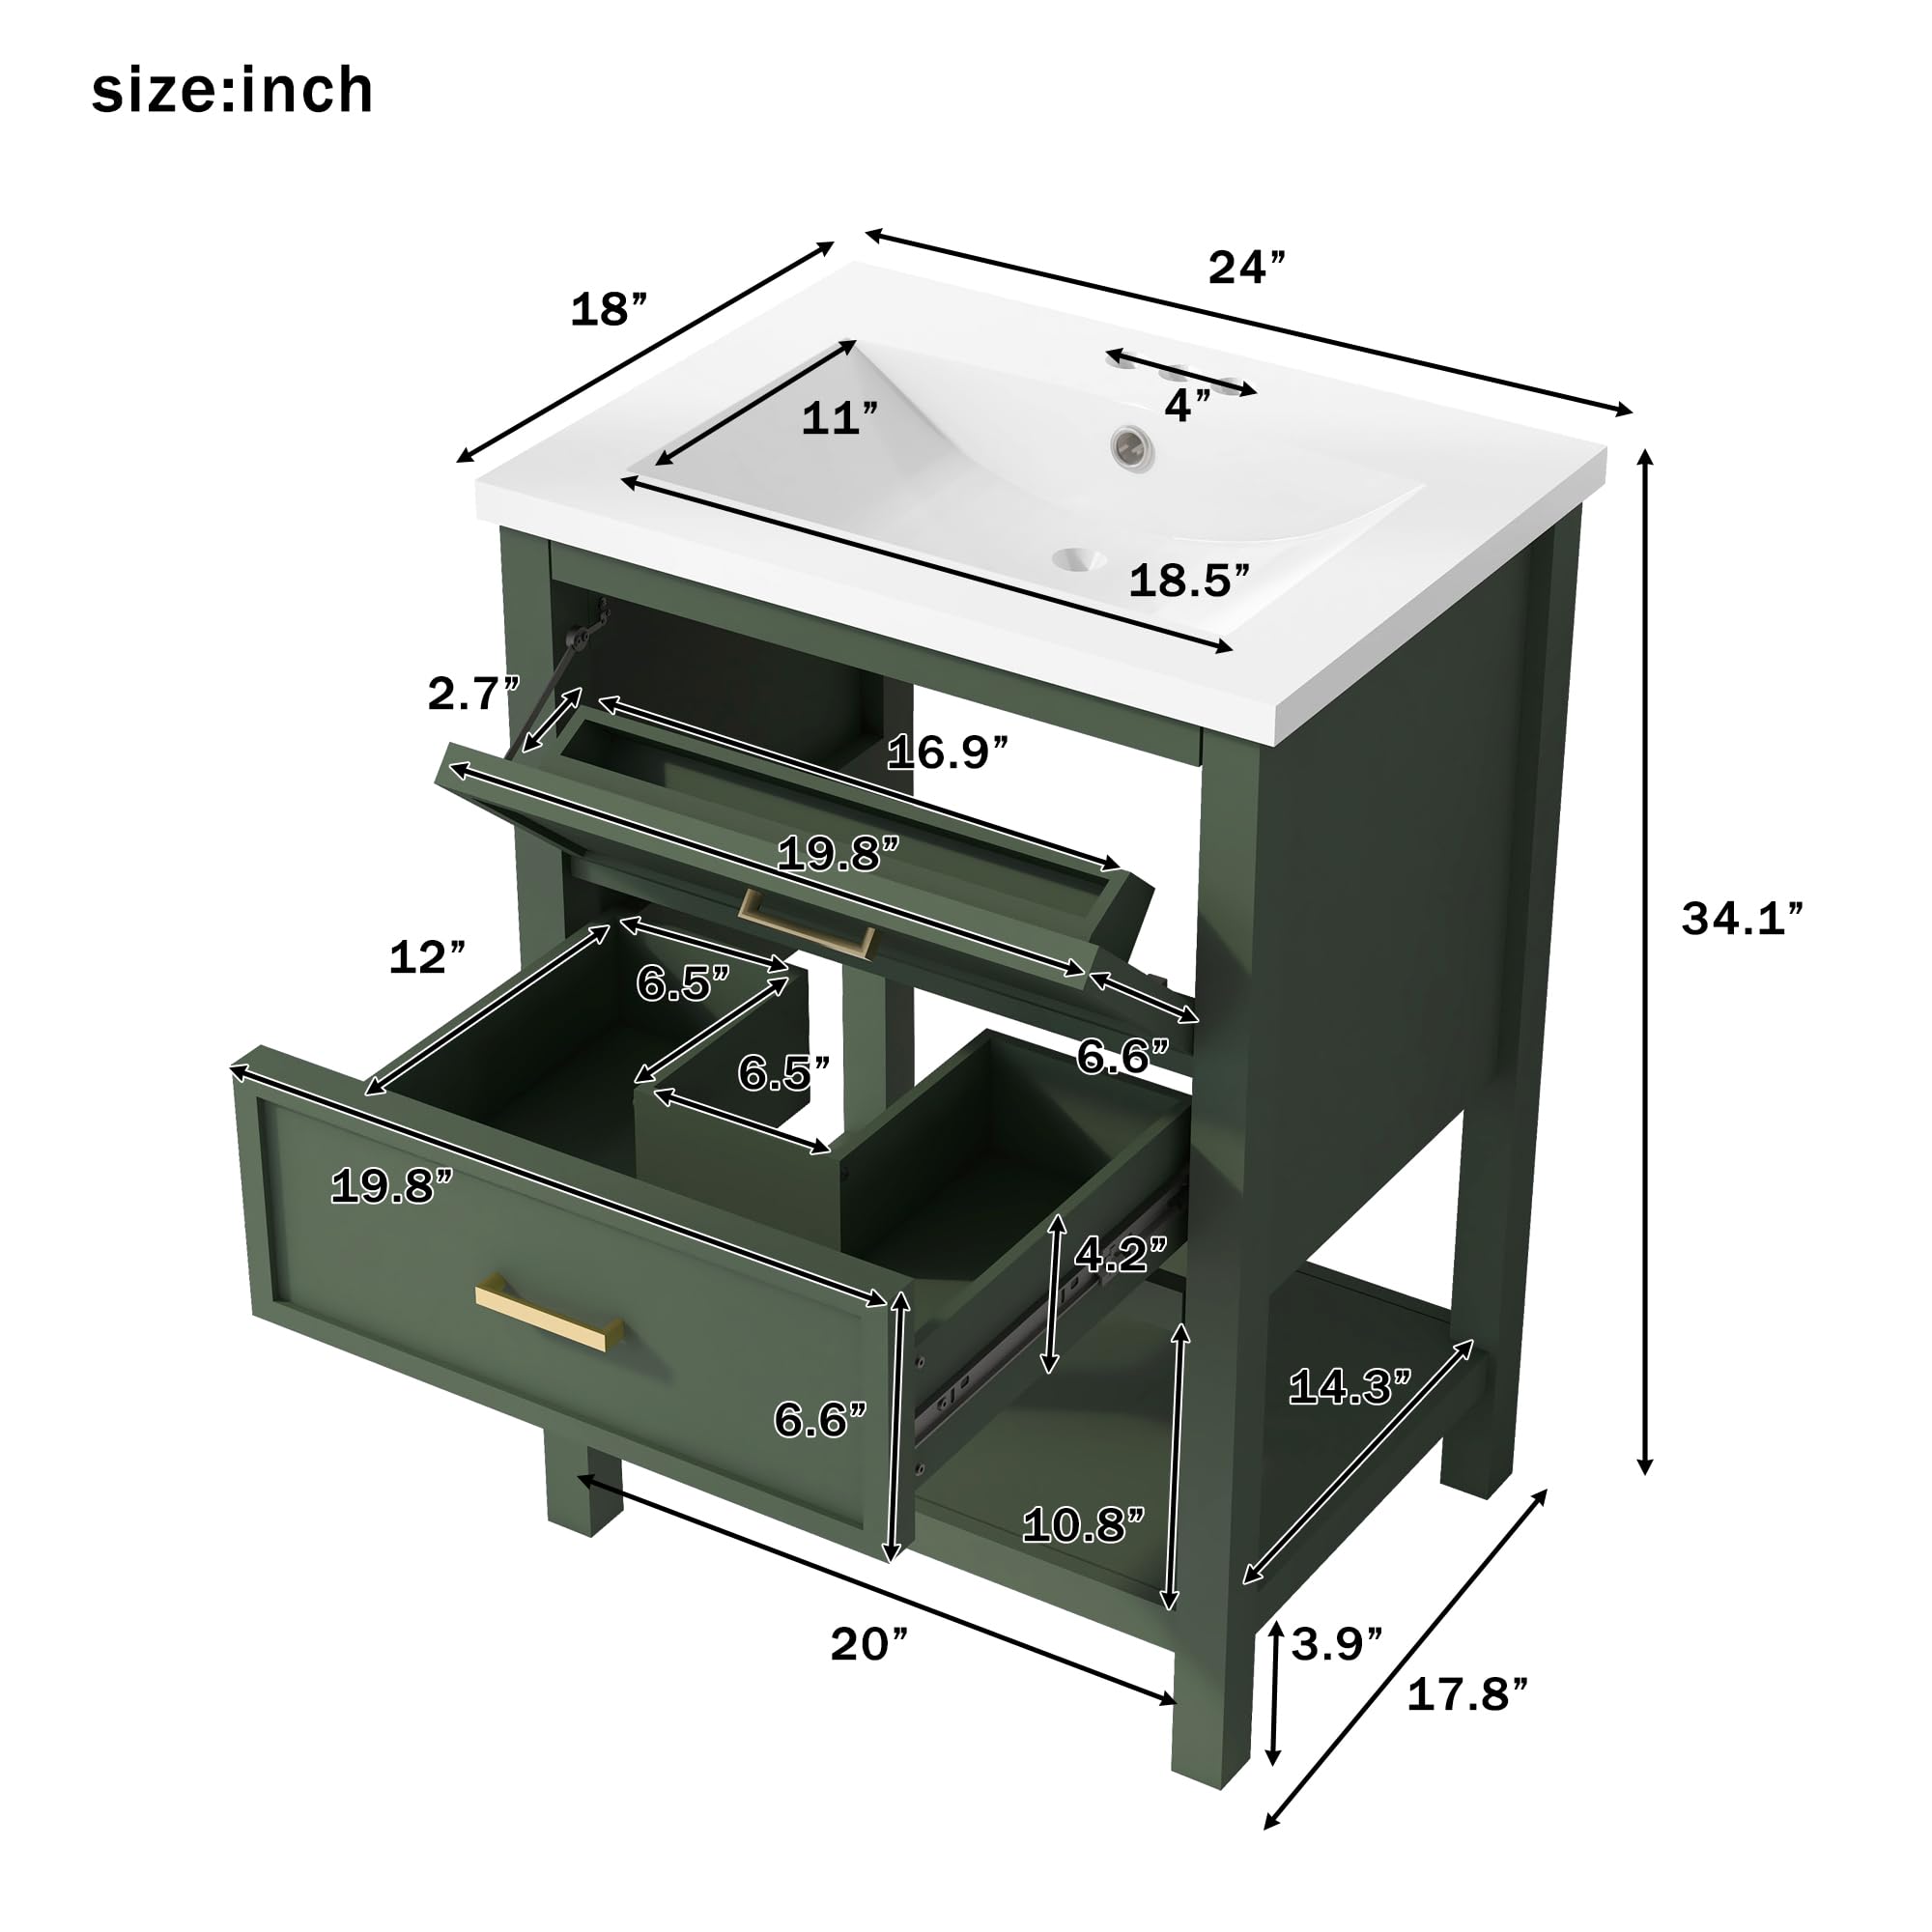
Figure 3.1: Detailed view of multi-functional storage, separate basin features (glossy countertop, plumbing access holes), and product dimensions.
3.3 Plumbing Connections
This vanity is designed with pre-drilled sink holes for a 3-hole faucet. Plumbing connections should be performed by a qualified professional or an individual with appropriate plumbing experience.
- Install Faucet: Follow the faucet manufacturer's instructions to install the faucet onto the ceramic sink top.
- Connect Water Supply: Connect the hot and cold water supply lines to the faucet. Ensure all connections are tight to prevent leaks.
- Connect Drain: Install the drain assembly and connect it to your existing P-trap and wastewater system.
- Test for Leaks: Turn on the water supply and check all connections for leaks. Tighten any leaking connections immediately.
4. Operation
Your Virubi bathroom vanity is designed for convenient and efficient use.
4.1 Drawers
The vanity features double drawers equipped with soft-close DTC hinges and rails. This mechanism ensures quiet and smooth closing, preventing slamming and extending the lifespan of the drawers. To open, gently pull the drawer pulls. To close, push the drawer until the soft-close mechanism engages.
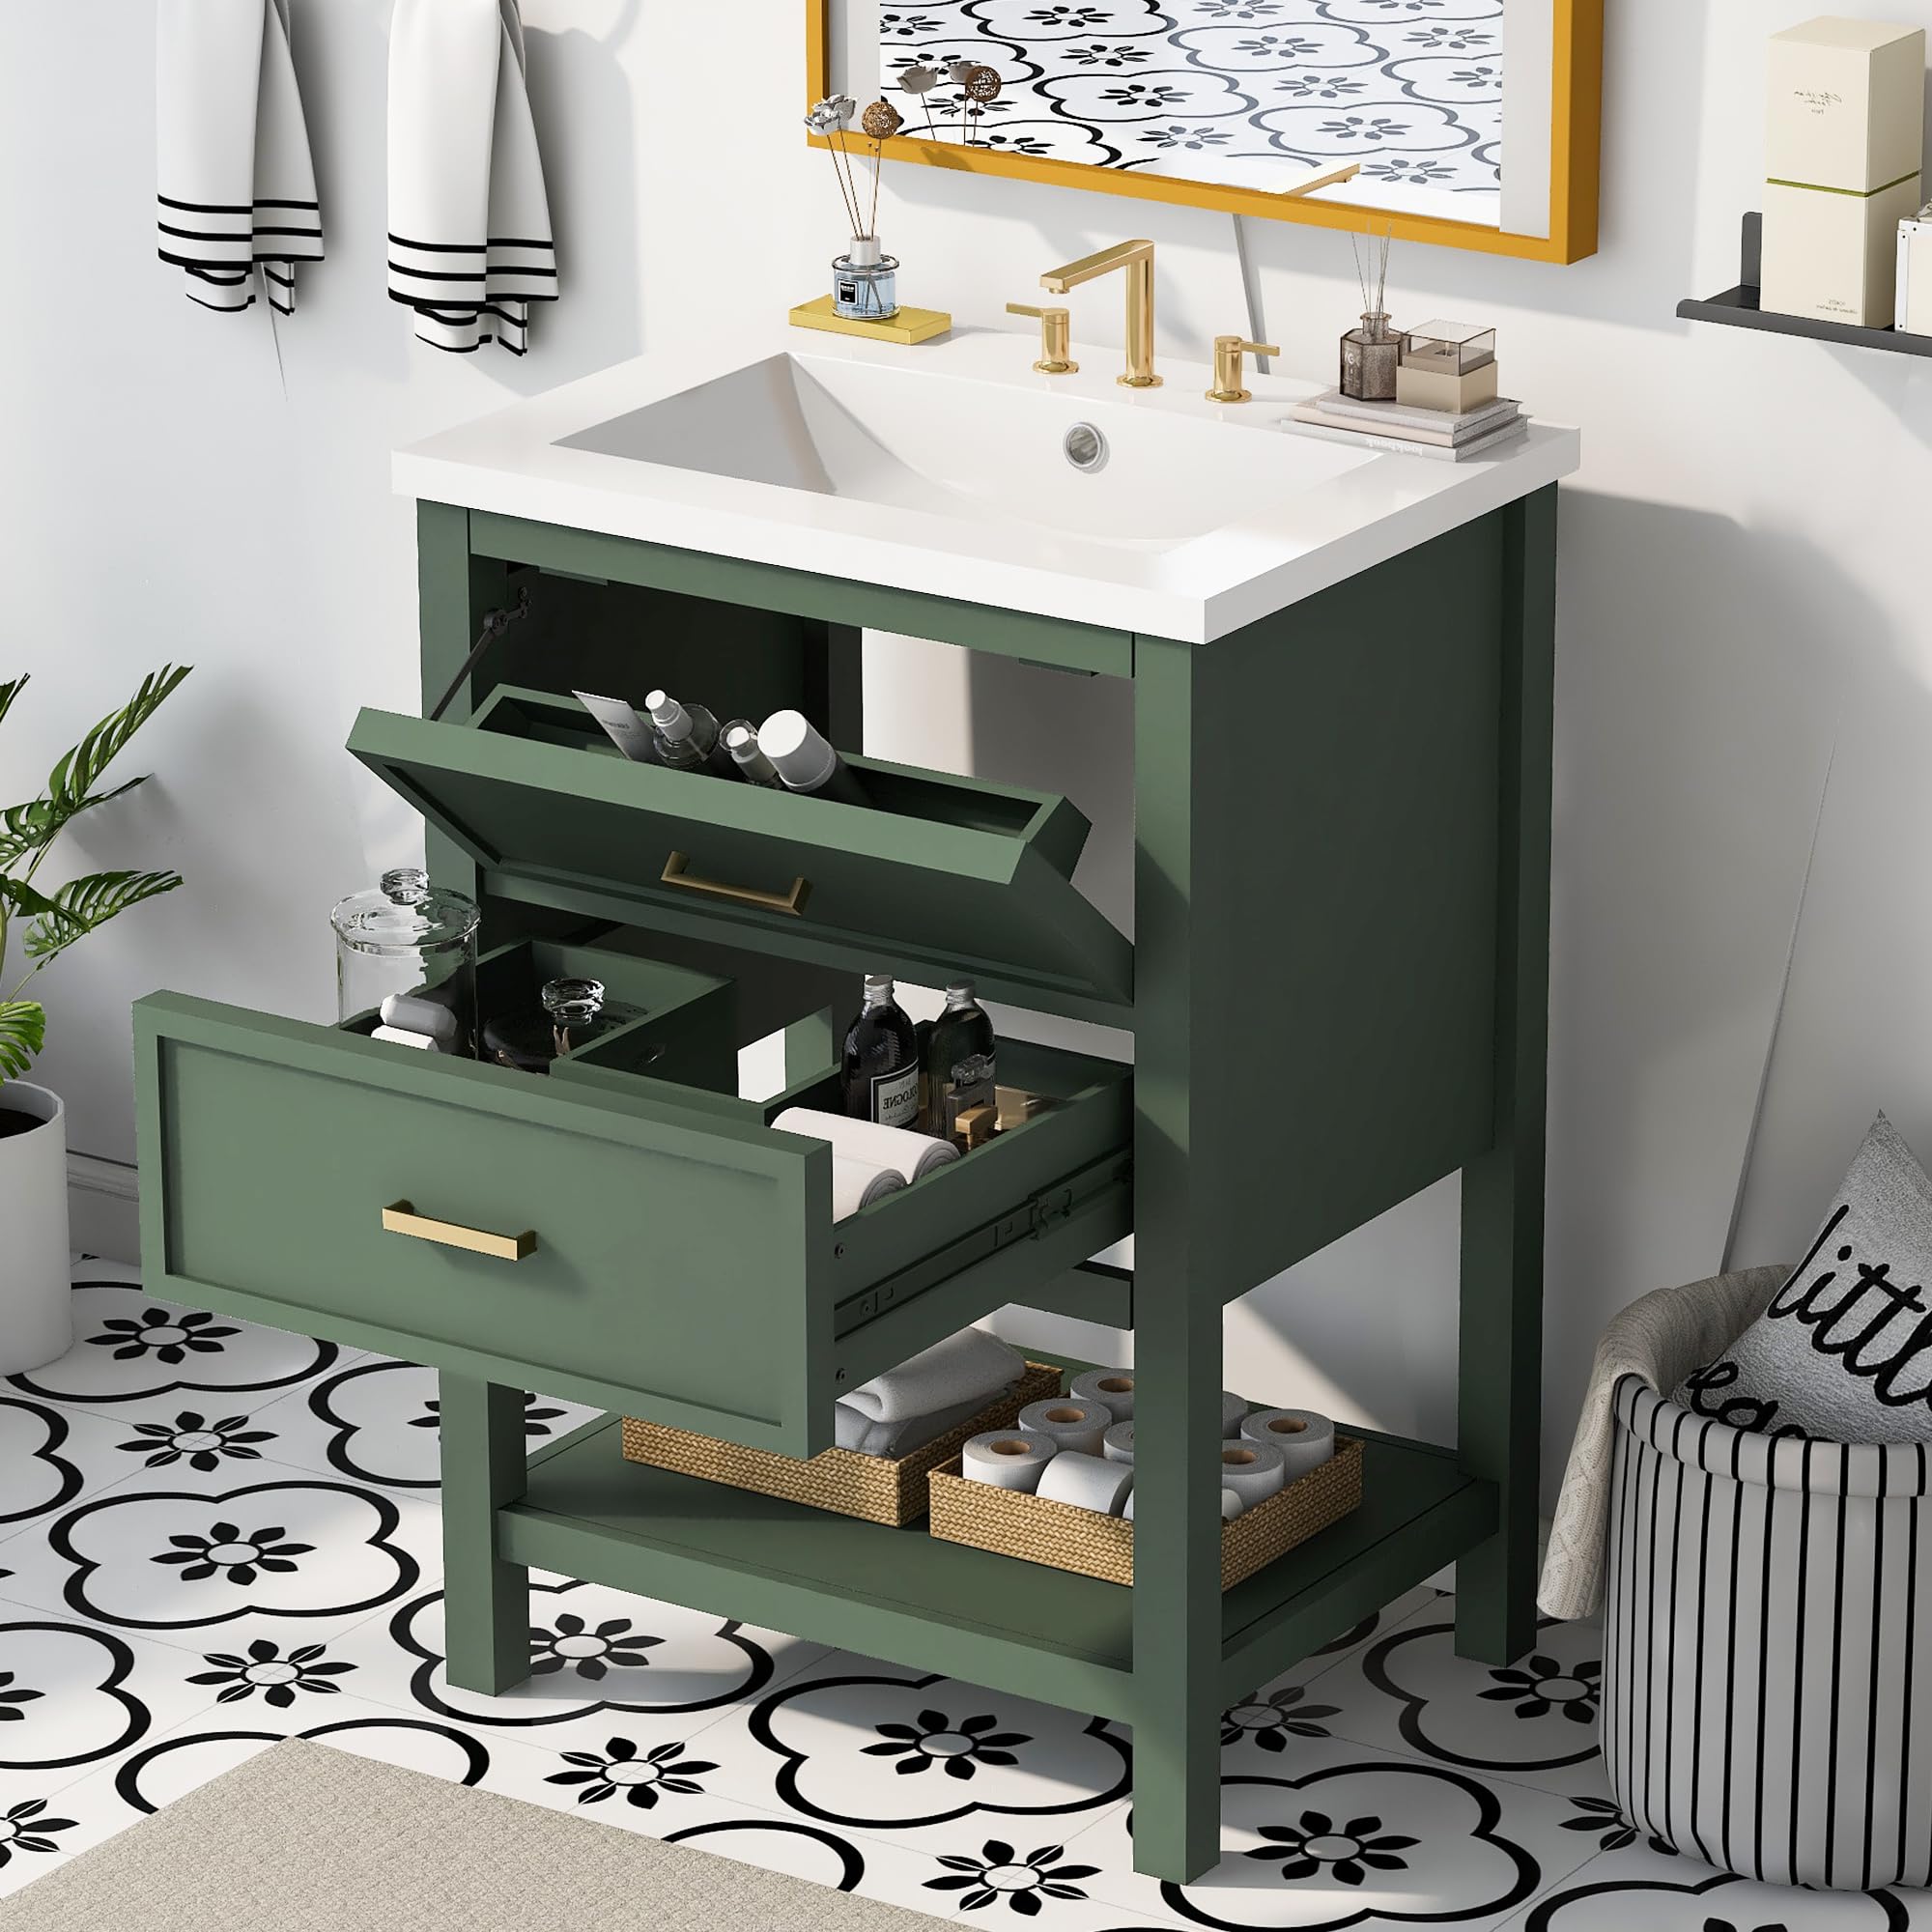
Figure 4.1: Vanity with drawers open, illustrating storage capacity.
4.2 Open Shelf
The lower open shelf provides additional storage space for towels, baskets, or decorative items, keeping them easily accessible.
5. Maintenance and Care
Proper care will ensure the longevity and appearance of your Virubi bathroom vanity.
5.1 Ceramic Sink Care
- Clean the ceramic sink regularly with a soft cloth and mild, non-abrasive cleaner.
- Avoid using harsh chemicals, abrasive pads, or acidic cleaners, as these can damage the glossy finish.
- Rinse thoroughly with water after cleaning and dry with a soft cloth to prevent water spots.
5.2 Cabinet Care
- Wipe the cabinet surfaces with a soft, damp cloth. For tougher stains, use a mild soap solution.
- Avoid excessive moisture. Wipe up spills immediately to protect the water-resistant finish.
- Do not use abrasive cleaners, solvents, or polishes containing silicone, as they may damage the wood finish.
- Periodically check and tighten any loose hardware.
6. Troubleshooting
Refer to the following table for common issues and their solutions.
| Problem | Possible Cause | Solution |
|---|---|---|
| Drawer does not close smoothly. | Obstruction in drawer slide; misaligned drawer. | Check for objects blocking the slide. Ensure drawer is properly seated on the rails. |
| Water leak from faucet or drain. | Loose plumbing connection; improper sealant application. | Tighten all plumbing connections. Reapply sealant if necessary. Consult a plumber if issue persists. |
| Vanity appears wobbly. | Uneven floor; loose assembly hardware. | Use shims under the vanity legs to level it. Check and tighten all assembly screws. |
7. Specifications
| Attribute | Detail |
|---|---|
| Brand | Virubi |
| Model Number (ASIN) | B0F83Z8H12 |
| Color | Green |
| Material | Wood (Cabinet), Ceramic (Sink) |
| Product Dimensions (D x W x H) | 18"D x 24"W x 34"H |
| Style | Modern |
| Installation Type | Countertop |
| Finish Type | Glossy (Sink) |
| Shape | Rectangular |
| Drain Type | Pop-Up (Drain not included, refers to compatible type) |
| Hole Count | 3 (for faucet) |
| Manufacturer | Virubi |
| Date First Available | May 9, 2025 |
8. Warranty and Support
8.1 Limited Warranty
This Virubi product comes with a limited manufacturer's warranty against defects in materials and workmanship. The warranty period and terms may vary. Please retain your proof of purchase for warranty claims.
8.2 Customer Support
For technical assistance, missing parts, or warranty inquiries, please contact Virubi customer support through the retailer where the product was purchased or visit the official Virubi website for contact information.


