
1. Safety Information
Read all instructions carefully before using the ANCHEER TR6012 Walking Pad Treadmill. Retain this manual for future reference.
General Safety Precautions:
- Ensure the treadmill is placed on a flat, stable surface with at least 2 feet of clear space around it.
- Keep children and pets away from the treadmill during operation.
- The maximum user weight capacity is 300 lbs.
- Always use the safety key. Attach it to your clothing before starting the treadmill. If the safety key is removed, the treadmill will stop.
- Wear appropriate athletic footwear. Do not operate the treadmill barefoot or in socks.
- Consult a physician before starting any new exercise program.
- If you experience pain, dizziness, or shortness of breath, stop exercising immediately.
- Do not attempt to adjust the incline or height while the treadmill is in motion.
Electrical Safety:
- Plug the treadmill into a grounded electrical outlet.
- Do not use extension cords or adapters.
- Keep the power cord away from heated surfaces.
- Unplug the treadmill from the power outlet before cleaning or performing maintenance.
2. Package Contents
Verify that all components are present in the package:
- ANCHEER TR6012 Walking Pad Treadmill
- Power Cord
- Remote Control
- Safety Key
- Tool Kit
- User Manual (this document)
3. Setup and Initial Use
The ANCHEER TR6012 treadmill is designed for installation-free setup, allowing for immediate use after unboxing.
Unboxing and Placement:
- Carefully remove the treadmill and all components from the packaging.
- Place the treadmill on a firm, level surface. Ensure there is adequate clear space around the unit for safe operation.
- Unfold the treadmill if it is in its compact storage position.
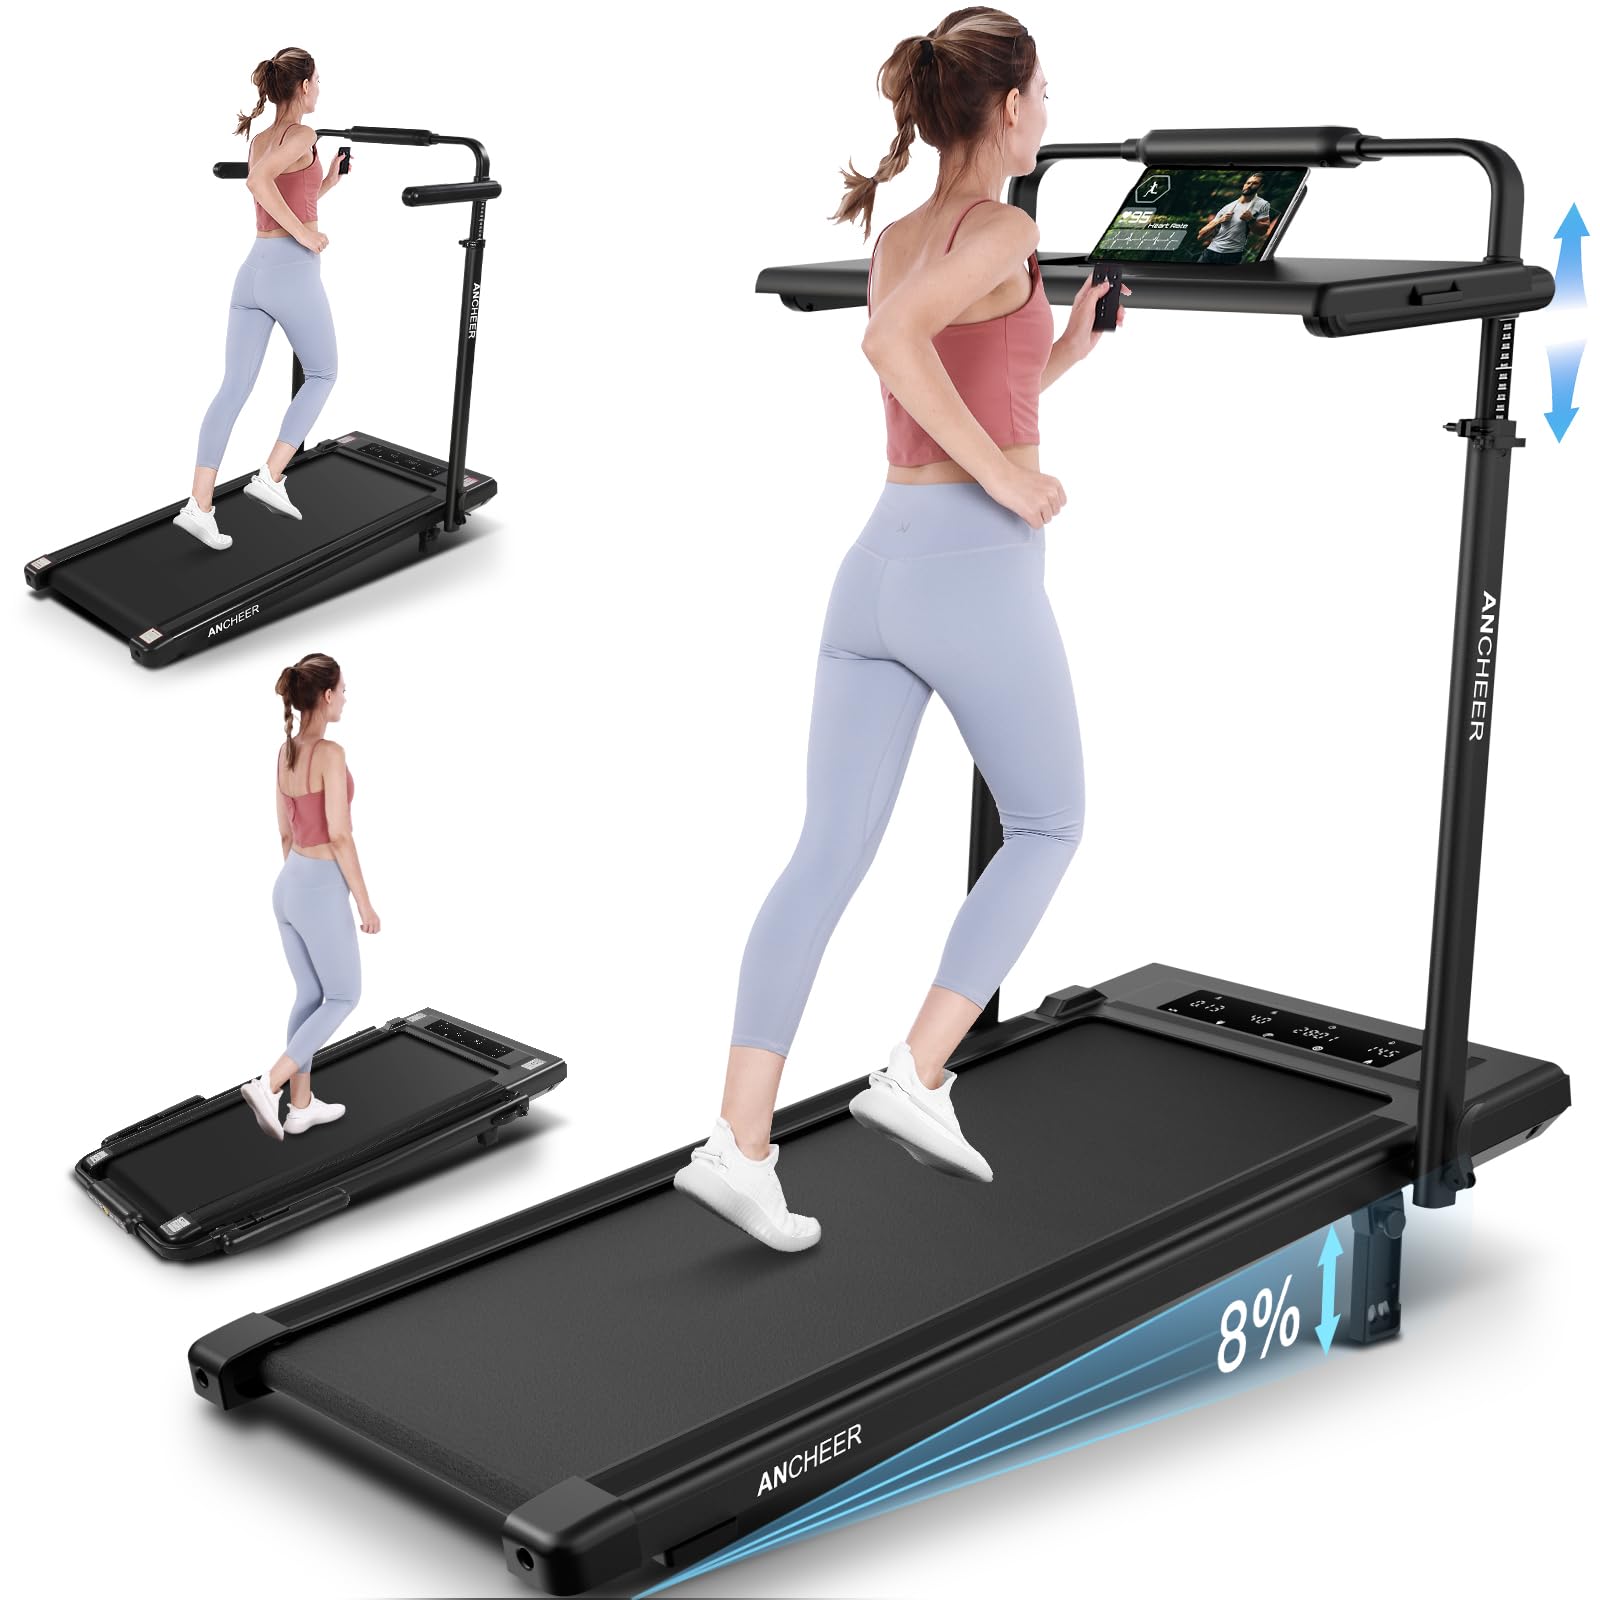
Figure 3.1: The ANCHEER TR6012 Treadmill in its operational and folded configurations.
Connecting Power:
- Locate the power input port on the treadmill.
- Connect the provided power cord to the treadmill and then to a grounded electrical outlet.
- Ensure the safety key is in place before attempting to power on the unit.
4. Components Overview
Familiarize yourself with the main parts of your ANCHEER TR6012 Treadmill:
- Running Belt: A 7-layer shock-absorbing belt designed to reduce impact on joints.
- Motor: A 2.5 HP powerful and quiet motor, operating at less than 30 decibels.
- Control Panel: Integrated display with touch controls for various functions.
- Remote Control: For convenient speed and mode adjustments during exercise.
- Safety Key: A magnetic key that must be attached for operation and acts as an emergency stop.
- Adjustable Handlebars/Upright: Provides support and houses button controls.
- Detachable Workstation Desk: A 27.5 x 14 inch surface for laptops, tablets, or other items.
- Tablet/Phone Holder: Integrated slot on the workstation for devices.
- Transport Wheels: Built-in wheels for easy movement and storage.

Figure 4.1: Key components and features of the treadmill, including the 7-layer running belt and quiet motor.

Figure 4.2: The removable workstation desk, featuring a tablet holder and anti-slip surface.
5. Operating Instructions
Starting the Treadmill:
- Ensure the treadmill is plugged in and the safety key is properly inserted into its slot on the console.
- Attach the clip of the safety key to your clothing.
- Press the Start button on the control panel or remote control. The treadmill will typically begin with a short countdown before the belt starts moving at a low speed.
Control Methods:
The ANCHEER TR6012 offers three ways to control your workout:
- Remote Control: Ideal for adjusting speed and modes when running or walking without needing to reach the console.
- Button Control (on Armrest): Convenient for making adjustments while walking or working, providing easy access to speed and mode changes.
- Touch Control (on Display): Directly interact with the display screen for precise control over settings, especially useful when using the treadmill as a walking pad.

Figure 5.1: Overview of the three control methods available for the treadmill.
Exercise Modes:
The treadmill supports various exercise modes to suit your activity level:
- Walking Mode: Speed range of 0.6 - 4.0 MPH.
- Running Mode: Speed range of 0.6 - 7.5 MPH.
- Working Mode: Speed range of 0.6 - 7.5 MPH, designed for use with the workstation.
- Walking Fast Mode: Speed range of 0.6 - 7.5 MPH.

Figure 5.2: The four primary operational modes of the treadmill.
Speed Adjustment:
Use the '+' and '-' buttons on the remote, armrest, or touch screen to increase or decrease the treadmill speed.
Manual Incline Adjustment:
The treadmill features a 3-level manual incline function, allowing for up to 12% incline. To adjust the incline:
- Ensure the treadmill is stopped and unplugged for safety.
- Locate the incline adjustment mechanism at the rear of the treadmill.
- Manually lift or lower the rear of the treadmill to select one of the three incline levels. Ensure it is securely locked into position before use.

Figure 5.3: The adjustable incline feature enhances calorie expenditure during workouts.
6. Adjustable Height and Workstation Use
Adjusting Treadmill Height:
The treadmill's uprights are height-adjustable, ranging from 47 inches to 50.5 inches, to accommodate various user heights and preferences for working or exercising.
- Loosen the adjustment knobs on the uprights.
- Carefully slide the uprights to the desired height.
- Tighten the adjustment knobs securely to lock the height in place.

Figure 6.1: The treadmill's height can be adjusted to suit individual user needs.
Using the Detachable Workstation Desk:
The 27.5 x 14 inch workstation desk can be attached or detached as needed, providing a versatile space for work or entertainment.
- To attach: Align the desk with the mounting points on the uprights and secure it.
- To detach: Release the securing mechanism and carefully lift the desk off.
- Utilize the integrated tablet/phone holder for hands-free viewing of devices.

Figure 6.2: The detachable desk provides a convenient workstation for multitasking.
7. Maintenance
Regular maintenance ensures the longevity and optimal performance of your treadmill.
Cleaning:
- Always unplug the treadmill before cleaning.
- Wipe down the console, handlebars, and other surfaces with a damp cloth after each use. Avoid abrasive cleaners.
- Periodically vacuum under the treadmill to prevent dust and debris buildup.
Running Belt Lubrication:
The running belt requires periodic lubrication to reduce friction and extend its lifespan. Refer to the specific instructions provided with your treadmill's tool kit for the recommended lubricant and application frequency. Generally, lubrication is needed every few months depending on usage.
Running Belt Adjustment:
If the running belt becomes off-center or slips, it may require adjustment. Use the provided tool kit and follow these general steps:
- Centering: If the belt drifts to one side, use the Allen wrench to turn the corresponding rear roller bolt a quarter turn clockwise. Run the treadmill for a minute and re-check. Repeat until centered.
- Tension: If the belt slips during use, turn both rear roller bolts a quarter turn clockwise. Do not overtighten.
8. Troubleshooting
Refer to this section for solutions to common issues. If problems persist, contact customer support.
| Problem | Possible Cause | Solution |
|---|---|---|
| Treadmill does not power on. | Power cord not connected; Safety key not in place; Power outlet issue. | Ensure power cord is securely plugged in. Verify safety key is fully inserted. Check power outlet with another device. |
| Running belt stops or slips. | Belt tension too loose; Belt requires lubrication; Overload. | Adjust belt tension (see Maintenance). Lubricate the running belt. Ensure user weight is within limits. |
| Unusual noise during operation. | Loose components; Belt friction; Motor issue. | Check for any loose screws or parts and tighten. Lubricate the running belt. If noise persists, discontinue use and contact support. |
| Display not working correctly. | Loose connection; Software glitch. | Unplug the treadmill for 5 minutes, then plug back in. Ensure all connections are secure. |
9. Specifications
| Feature | Detail |
|---|---|
| Brand | ANCHEER |
| Model Name | TR6012 |
| Product Dimensions (LxWxH) | 53"D x 28"W x 5.7"H |
| Folded Size | 26.5" x 28" x 5.7" |
| Material | Alloy Steel |
| Maximum Speed | 7.5 Miles per Hour |
| Minimum Speed | 0.6 Miles per Hour |
| Maximum Weight Recommendation | 300 Pounds |
| Motor Horsepower | 2.5 HP |
| Incline | 3-level Manual (up to 12%) |
| Adjustable Height Range | 47 - 50.5 inches |
| Workstation Desk Size | 27.5" x 14" |
| Included Components | Power Cord, Remote Control, Safety Key, Tool Kit, User Manual |
| Metrics Measured | Calories Burned, Distance, Speed, Time |
| Assembly Required | No |
10. Warranty and Support
Warranty Information:
The ANCHEER TR6012 Walking Pad Treadmill comes with a 1-year warranty from the date of purchase. This warranty covers manufacturing defects under normal use. Please retain your proof of purchase for warranty claims.
Customer Support:
For technical assistance, warranty claims, or any questions regarding your ANCHEER treadmill, please contact the seller or manufacturer directly. You may also visit the official ANCHEER store for more information: