1. Introduction
This manual provides detailed instructions for the installation and operation of the GeeekPi 10-inch 1U Rack Mount, specifically designed for Raspberry Pi 5 boards. This rack mount solution allows for efficient organization and expansion of up to two Raspberry Pi 5 units, integrating seamlessly into standard 1U server cabinets. It includes two PCIe to M.2 NVMe SSD adapters for high-speed storage expansion.
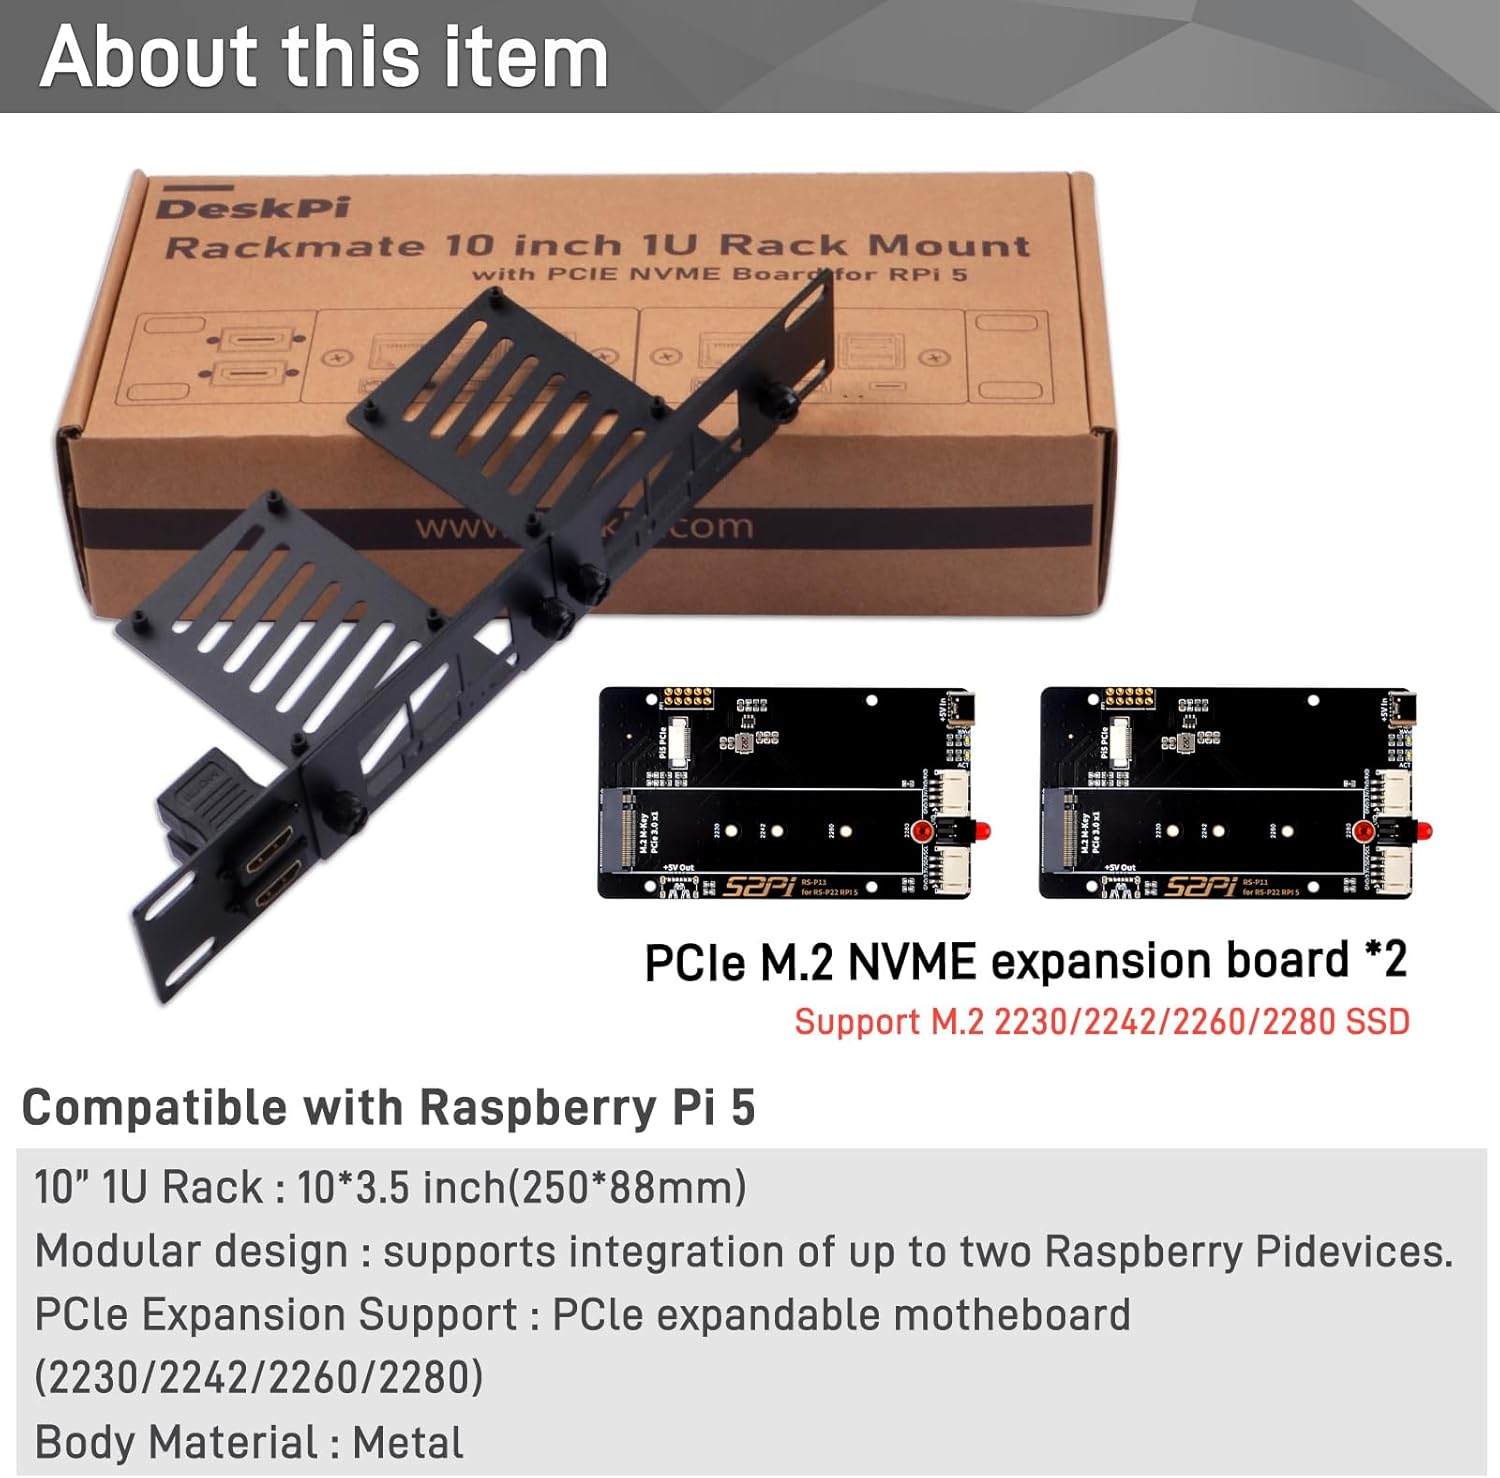
Image 1: GeeekPi 10-inch 1U Rack Mount with included PCIe NVMe expansion boards.
2. Package Contents
Verify that all items listed below are included in your package:
- 1x 10-inch 1U Rack Mount
- 2x PCIe to M.2 NVMe SSD Adapter Boards
- 2x FFC (Flexible Flat Cable) for PCIe connection
- 2x Micro HDMI to HDMI Cables (0.30m)
- 8x M2.5*6 Screws (for Raspberry Pi mounting)
- 8x M2.5*8+4mm Copper Pillars (for adapter board mounting)
- 2x M2.5+1.5 Hard Drive Copper Pillars (for NVMe SSD mounting)
- 2x M2*3 Flat Head Screws (for NVMe SSD mounting)
- 4x #10-32 5/16 Screws (for rack mounting)
- 4x 5*10*1 Washers
- 1x M3 Screwdriver

Image 2: Overview of all components included in the package.
3. Setup and Installation
Follow these steps to assemble and install your GeeekPi 10-inch 1U Rack Mount with Raspberry Pi 5 boards and NVMe SSDs.
3.1. Install NVMe SSDs onto Adapter Boards
- Carefully insert your M.2 NVMe SSD (2230/2242/2260/2280) into the slot on the PCIe to M.2 NVMe adapter board.
- Secure the SSD with the provided M2.5+1.5 hard drive copper pillar and M2*3 flat head screw. Ensure the SSD is firmly seated.
- Connect the FFC cable to the designated port on the adapter board.

Image 3: Detailed view of M.2 NVMe SSD installation on the adapter board.
3.2. Mount Adapter Boards to the Rack
- Align the prepared NVMe adapter boards with the mounting holes on the rack mount.
- Use the M2.5*8+4mm copper pillars to secure the adapter boards to the rack mount.
3.3. Install Raspberry Pi 5 Boards
- Carefully align the Raspberry Pi 5 board with the designated slot on the rack mount. Ensure the GPIO pins on the Pi align with the pogo pins on the adapter board for proper contact.
- Secure each Raspberry Pi 5 board to the rack mount using the M2.5*6 screws.
- Connect the FFC PCIe cable from the NVMe adapter board to the Raspberry Pi 5's PCIe slot. Ensure the cable is oriented correctly.

Image 4: Step-by-step guide for installing the Raspberry Pi 5 and connecting the FFC PCIe cable.
3.4. Connect HDMI Cables
- Connect the Micro HDMI end of the provided cables to the Raspberry Pi 5 boards.
- Connect the standard HDMI end of the cables to the HDMI ports on the rack mount.

Image 5: Fully assembled rack mount with two Raspberry Pi 5 boards and HDMI connections.
3.5. Video Installation Guide
For a visual guide on the installation process, please refer to the official product video below:
Video 1: Official GeeekPi installation guide for the 10-inch 1U Rack Mount for Raspberry Pi 5. This video demonstrates the complete assembly process, including NVMe SSD installation, mounting Raspberry Pi boards, and cable connections.
4. Operating Instructions
Once assembled, the GeeekPi 10-inch 1U Rack Mount is ready for integration into your server environment. Ensure proper power supply to your Raspberry Pi 5 boards. The rack mount features a GPIO4 pin for programmable LED control, allowing for custom status indications.
- Power On: Connect appropriate power adapters to each Raspberry Pi 5 board.
- NVMe Storage: The installed NVMe SSDs will provide high-speed storage for your Raspberry Pi 5. Ensure your operating system is configured to utilize the NVMe drive.
- Programmable LED: The red LED can be programmed via software to indicate device status or for identification purposes. Refer to Raspberry Pi documentation for GPIO programming.
- I2C Interface: A rear I2C interface via PogoPin connectors is available for external peripherals.

Image 6: Example of the rack mount integrated into a mini server cabinet for cluster or Home Assistant server setups.
5. Specifications
| Feature | Detail |
|---|---|
| Brand | GeeekPi |
| Model Number | DP-0039 |
| Product Dimensions | 6.89 x 5.12 x 2.36 inches |
| Item Weight | 1.1 pounds (0.5 Kilograms) |
| Max Supported Devices | 2x Raspberry Pi 5 Boards |
| Hardware Platform | Raspberry Pi |
| Hardware Interface | PCI Express x4 |
| M.2 NVMe SSD Support | M.2 2230/2242/2260/2280 SSD (M-Key) |
| Compatibility | DeskPi RackMate T0/T1/T2/T0 Plus/T1 Plus server cabinets |
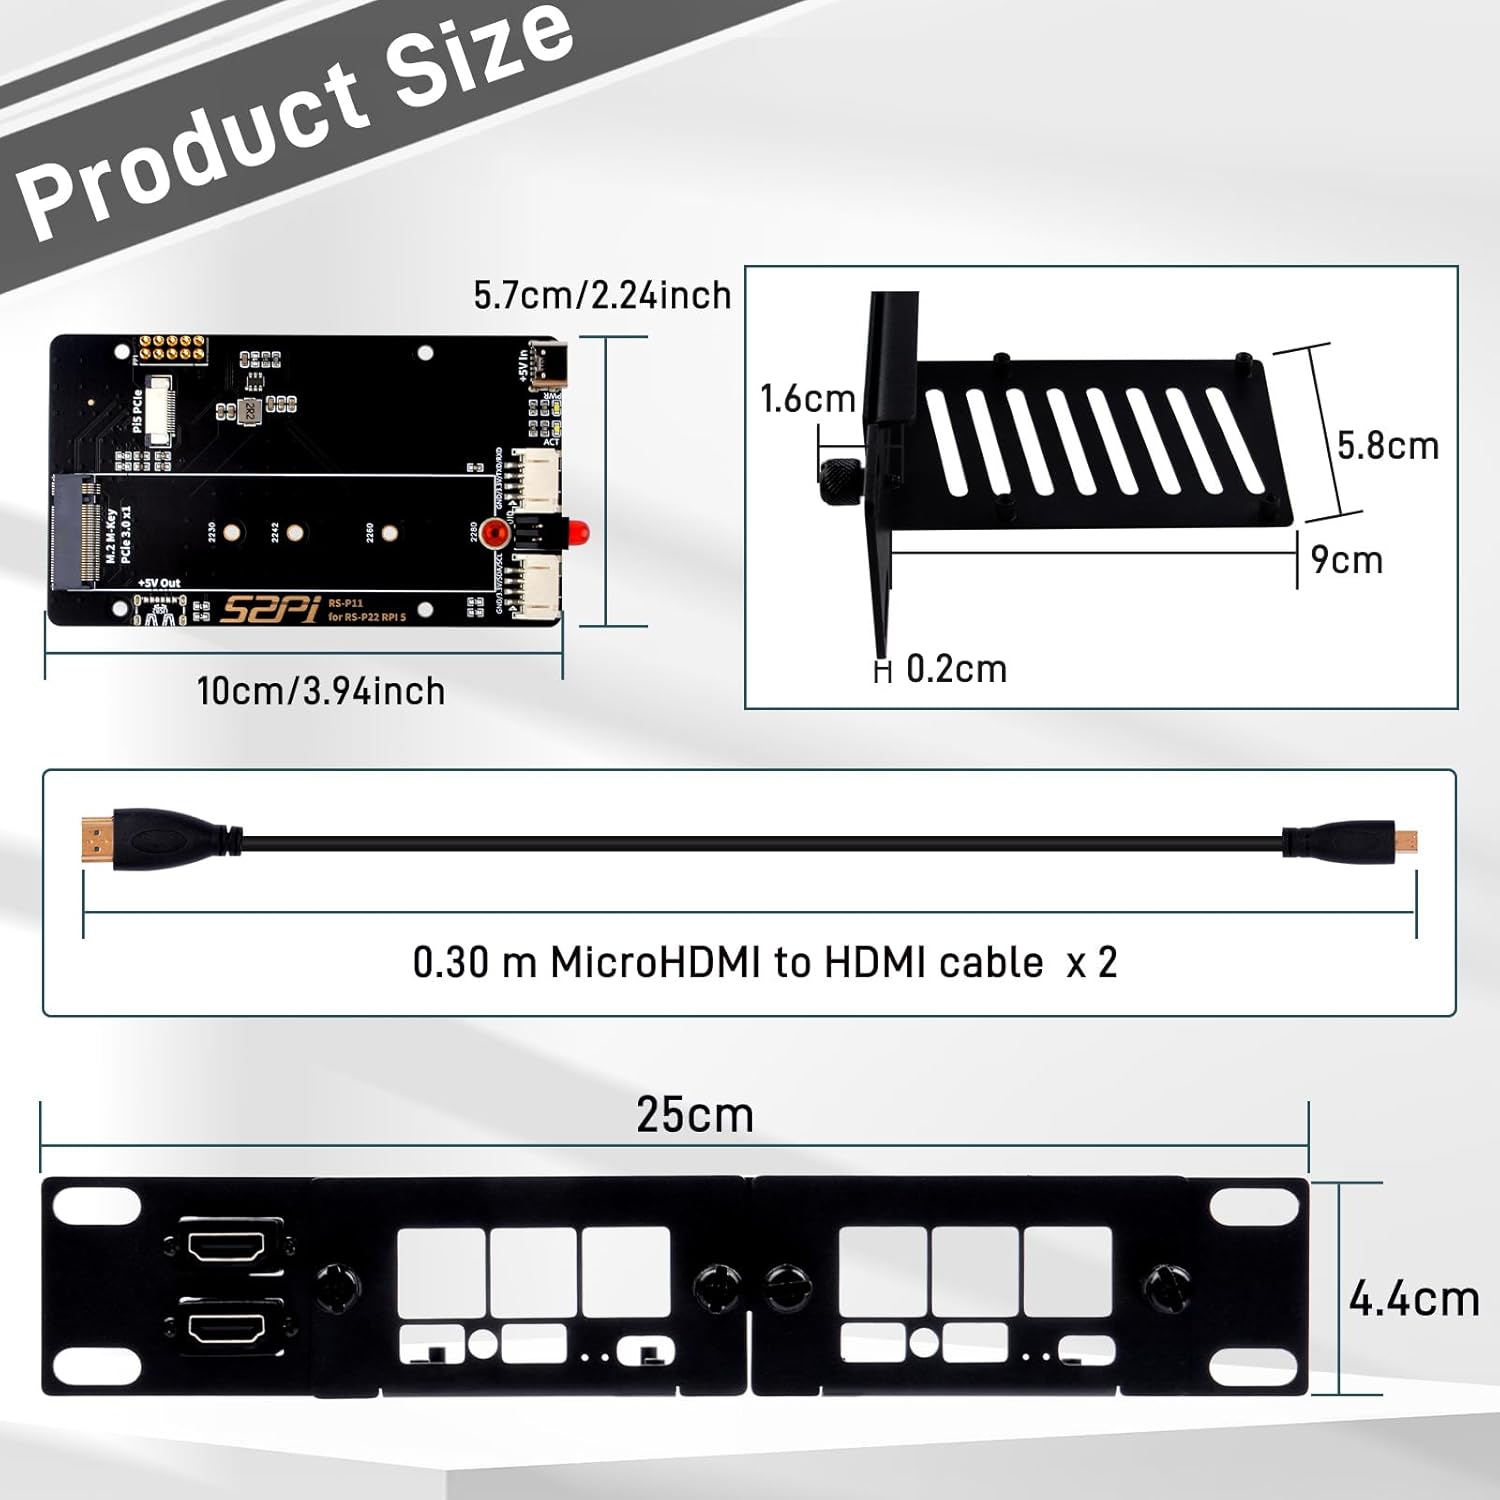
Image 7: Product size and dimensions for the rack mount and adapter board.
6. Troubleshooting
- Cable Clearance Issues: Some users have reported that the standard HDMI to Micro HDMI cables may interfere with the second Raspberry Pi board when both slots are populated. If this occurs, consider using 90-degree HDMI adapters or shorter, more flexible cables to ensure proper fit and prevent strain on the ports.
- NVMe SSD Not Detected:
- Ensure the NVMe SSD is correctly seated and secured on the adapter board.
- Verify that the FFC PCIe cable is securely connected to both the adapter board and the Raspberry Pi 5's PCIe slot, and that its orientation is correct.
- Confirm that your Raspberry Pi 5 operating system is updated and configured to support NVMe boot or storage.
- Raspberry Pi Not Powering On:
- Check all power connections to the Raspberry Pi 5 boards.
- Ensure the Raspberry Pi 5 boards are correctly seated in the rack mount and that the pogo pins are making proper contact with the GPIO points.
7. Warranty and Support
For warranty information, technical support, or further assistance, please contact GeeekPi directly through their official channels or visit their website. General technical support information may also be available at wiki.deskpi.com.


