1. Introduction
This manual provides detailed instructions for the setup, operation, maintenance, and troubleshooting of your ANYCUBIC Kobra S1 3D printer. Please read this manual thoroughly before operating the printer to ensure safe and efficient use.
The ANYCUBIC Kobra S1 is a high-speed FDM 3D printer featuring an ultra-stable CoreXY structure, dual-motor drive, and Kobra OS system. It offers a print size of 250x250x250mm, a maximum speed of 600 mm/s, and AI monitoring capabilities, making it suitable for both beginners and experienced users.
2. Product Overview
The Kobra S1 is designed for precision and speed, incorporating advanced features for an optimized 3D printing experience.
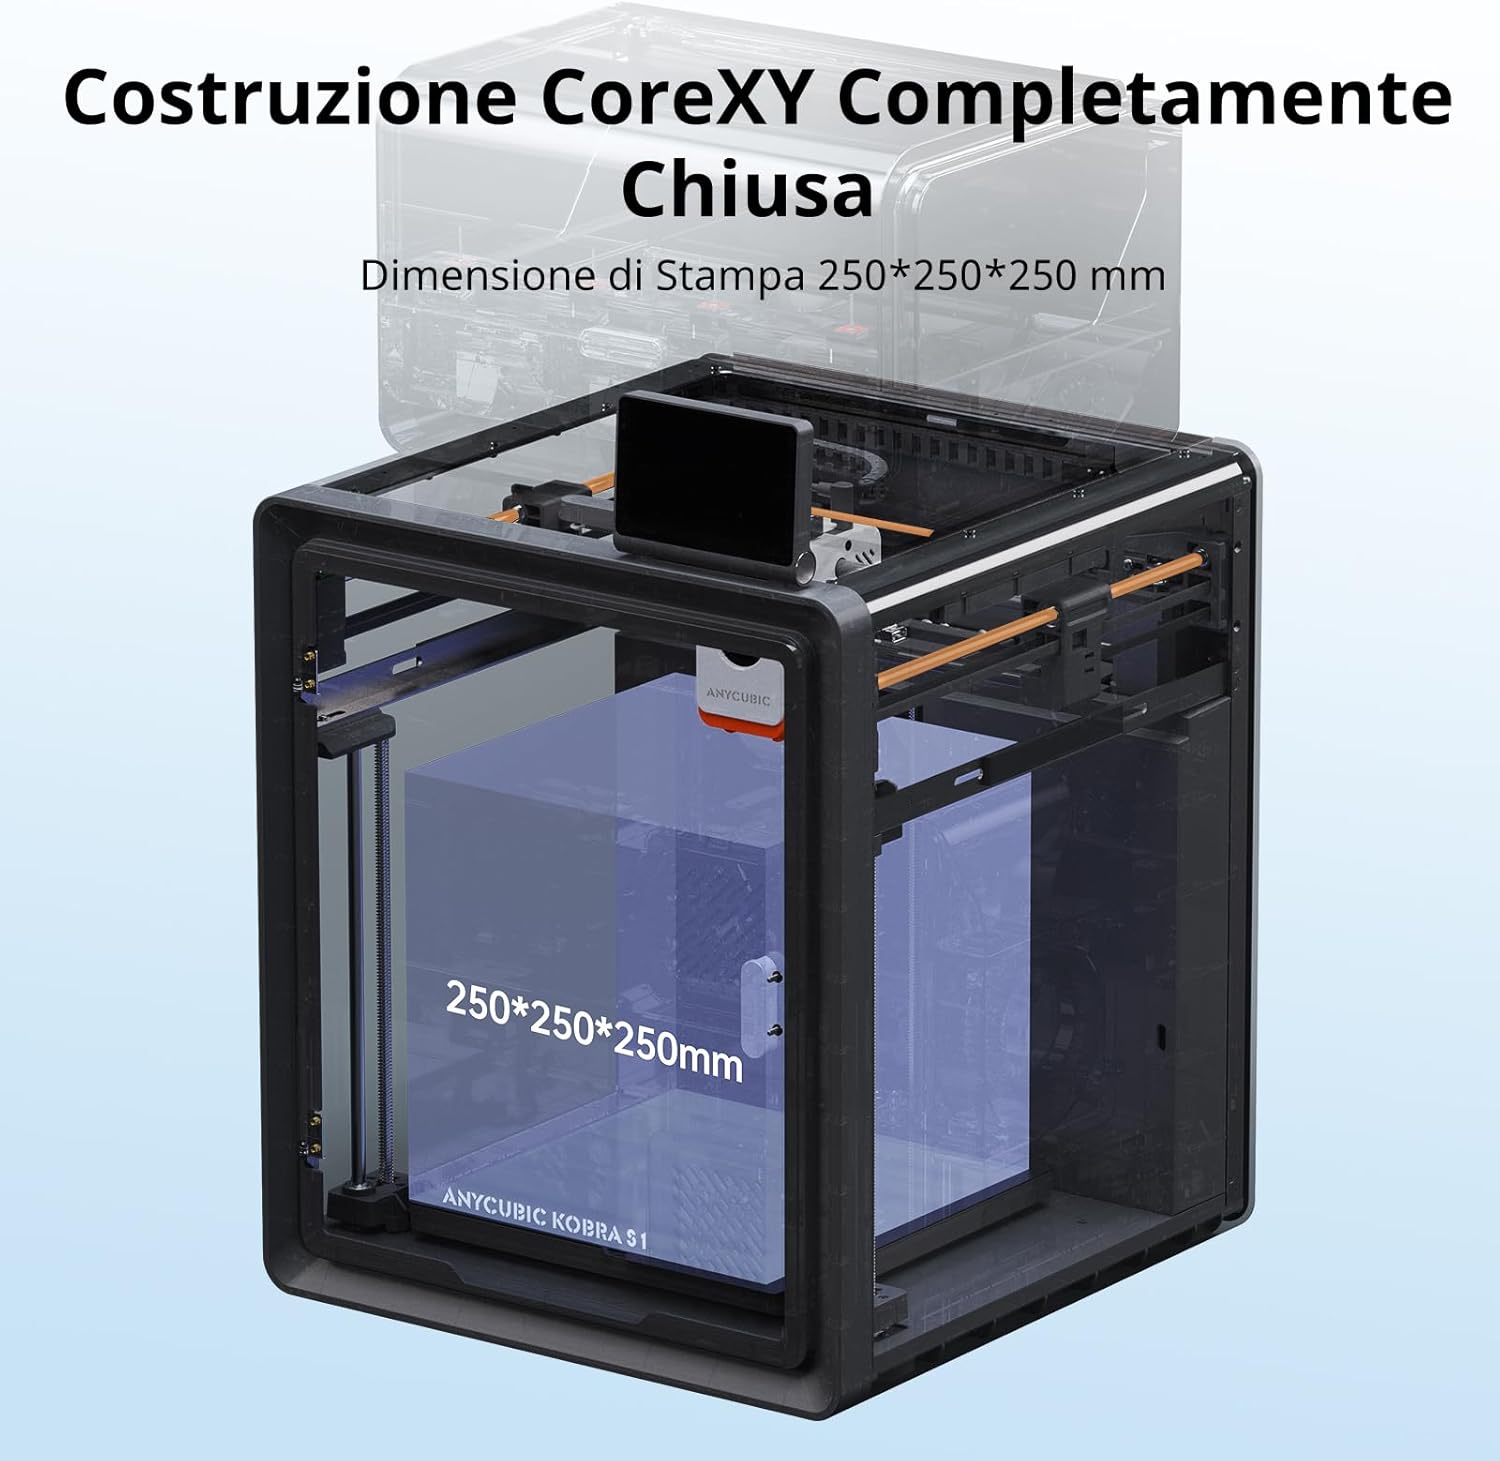
Figure 2.1: Overview of the ANYCUBIC Kobra S1 3D Printer, showcasing its sleek design and enclosed structure.

Figure 2.2: Detailed view of the Kobra S1's CoreXY structure, highlighting the stable dual-motor drive system and the 250x250x250mm print volume.
Key Features:
- CoreXY Structure: Ultra-stable design with dual-motor drive and Kobra OS to minimize vibrations and enhance precision.
- High-Speed Printing: Achieves speeds up to 600 mm/s with 20,000 mm/s² acceleration, completing a Benchy print in 15 minutes.
- Quiet Operation: Standard mode at 46dB, silent mode at 44dB for a quieter printing environment.
- Smart Leveling (LeviQ3.0): Effortless automatic bed leveling for quick setup, even for beginners.
- APP Remote Control & Monitoring: View real-time printing, record time-lapses, and access model resources via the Anycubic APP and Makeronline.
- All-Metal Hotend (320℃): Nozzle reaches 320°C, heated bed up to 120°C, supporting various filaments.
- Pre-assembled Design: Ready to print within 15 minutes of unboxing.
- Tool-Free Hotend Removal: Quick and easy hotend replacement.
- Advanced Monitoring: Belt tension monitoring, power-off resume, and AI monitoring for 'spaghetti' detection.
3. Setup Guide
Follow these steps to set up your ANYCUBIC Kobra S1 3D printer for the first time.
3.1 Unboxing and Initial Preparation
Carefully remove the printer and all accessories from the packaging. Ensure all components listed in the packing list are present.
Video 3.1: ANYCUBIC Kobra S1 Unboxing and Setup Guide. This video demonstrates the initial unboxing, removal of protective materials, and installation of basic components.
3.2 Unlock Print Head
Before operation, unlock the print head by cutting the zip ties and removing the cardboard protection that secures it during shipping.

Figure 3.1: The image shows the print head secured with cardboard and zip ties. These must be carefully removed before use to allow the print head to move freely.
3.3 Unlock Hot Bed
Remove any protective foam or securing elements from the hot bed area to allow for proper movement and prevent damage during operation.

Figure 3.2: The hot bed area, showing the print surface and the mechanisms for movement. Ensure no packing materials obstruct its path.
3.4 Spool Holder Installation
Attach the filament spool holder to the designated slot on the printer's rear panel using the provided screws and Allen key. This ensures stable filament feeding.
Figure 3.3: The rear view of the printer, indicating the mounting point for the filament spool holder. The holder is secured with screws for stability.
3.5 Power Connection
Connect the power cord to the printer's power input and then to a suitable power outlet. Ensure the power switch is in the OFF position before connecting the power cord.
3.6 Activated Carbon Filter Installation
Install the activated carbon filter into its designated compartment inside the printer. This filter helps to reduce odors and fumes produced during the printing process.
Figure 3.4: The internal compartment for the activated carbon filter. The filter bag is placed inside this box to absorb odors and improve air quality.
Note: After completing the installation, power on the machine and follow the on-screen boot options to finalize the setup before starting your first print.
4. Operating Instructions
4.1 Automatic Bed Leveling (LeviQ3.0)
The Kobra S1 features LeviQ3.0 automatic bed leveling. Access this function through the touchscreen interface to ensure optimal first layer adhesion. This process is quick and requires minimal user intervention, making it easy for beginners.

Figure 4.1: Illustration of the LeviQ3.0 automatic bed leveling system in action, showing the probe points on the print bed ensuring precise calibration.
4.2 Loading Filament
Insert the chosen filament into the filament sensor and feed it into the extruder until it is properly loaded. The printer supports various filament types including ABS, ASA, PLA, PETG, and PLA+.

Figure 4.2: Display of various filament types (ASA, ABS, PLA, PLA+, PETG) compatible with the Kobra S1, along with recommended printing temperatures.
Note: When printing TPU, it is only supported by the standalone printer and cannot be used with Anycubic ACE Pro.
4.3 Printing via Anycubic APP and Makeronline
The Anycubic APP allows for remote monitoring and control of your prints. You can view real-time progress, record time-lapses, and access a library of high-quality models from Anycubic Makeronline.

Figure 4.3: Screenshots illustrating the Anycubic APP's remote control and monitoring features, alongside the Makeronline platform for model resources.
4.4 Multicolor Printing (Optional)
For multicolor printing, the Kobra S1 requires the Anycubic ACE Pro-S1 or the Kobra S1 Combo. The Anycubic ACE Pro for Kobra 3 is not directly compatible. Ensure you have the correct accessory for multicolor functionality.

Figure 4.4: An image depicting the Kobra S1 printer alongside the Anycubic ACE Pro, showcasing its capability for multicolor printing.
5. Maintenance
5.1 Hotend Replacement
The Kobra S1 features a tool-free hotend removal system, allowing for quick replacement in seconds. This is useful for maintenance or when switching to different nozzle sizes (0.2mm, 0.4mm, 0.6mm, 0.8mm).

Figure 5.1: A hand demonstrating the tool-free removal of the hotend from the print head, highlighting the ease of maintenance.

Figure 5.2: An illustration showing different hotend nozzle sizes (0.2mm, 0.4mm, 0.6mm, 0.8mm) supported by the Kobra S1. Note that specific nozzles must be purchased separately.
5.2 Cleaning and General Care
- Regularly clean the print bed with isopropyl alcohol to ensure good adhesion.
- Inspect the extruder nozzle for clogs and clean as needed using the provided nozzle cleaner.
- Keep the printer's interior free of dust and filament debris.
- Check belt tension periodically; the printer includes belt tension monitoring.
6. Troubleshooting
6.1 Common Printing Issues
- Poor First Layer Adhesion: Re-run LeviQ3.0 auto-leveling. Ensure the print bed is clean and free of grease. Adjust Z-offset if necessary.
- Filament Clogging: Check the hotend temperature for the specific filament. Use the nozzle cleaner to clear any blockages. Ensure filament is properly loaded.
- "Spaghetti" Failures: The AI monitoring system will detect and alert you to these anomalies. Check for proper bed adhesion and filament flow.
- Layer Shifting: Verify that the printer is on a stable surface. Check belt tension and ensure all mechanical components are secure.
6.2 Firmware Updates
It is recommended to update the printer's firmware to the latest version (e.g., 2.4.8.3 or newer) to access new features and improvements. You can update via Wi-Fi (OTA Upgrade) or by downloading the firmware from the Anycubic website and installing it via USB.

Figure 6.1: An image detailing the methods for firmware updates: OTA via Wi-Fi, contacting support, or manual firmware installation.
7. Specifications
| Feature | Specification |
|---|---|
| Brand | ANYCUBIC |
| Model | Anycubic Kobra S1 |
| Print Dimensions | 250 x 250 x 250 mm |
| Recommended Print Speed | 300 mm/s |
| Maximum Print Speed | 600 mm/s |
| Maximum Acceleration | 20,000 mm/s² |
| Hotend Temperature | Up to 320°C |
| Heated Bed Temperature | Up to 120°C |
| Leveling | LeviQ3.0 Automatic Leveling |
| Supported Filaments | ABS, ASA, PLA, PETG, PLA+ |
| Nozzle Diameter | 0.2, 0.4, 0.6, 0.8 mm (standard 0.4mm) |
| Noise Level | ≤46dB (Standard), ≤44dB (Silent) |
| Connectivity | WLAN, Cloud, USB, Mobile |
| Operating System | Windows, macOS |
| Included Components | Filament Sample |
| Item Weight | 19.6 Kilograms |
| Product Dimensions | 49P x 48l x 57H cm |

Figure 7.1: A visual summary of the Anycubic Kobra S1's key technical parameters and specifications.
8. Warranty and Support
For warranty information, please refer to the official Anycubic website or contact your retailer. For technical support, visit the Anycubic Store or contact their customer service directly. Ensure you have your product model number and purchase details ready.
Software updates are guaranteed until an unknown date. Please check the official Anycubic channels for the latest information regarding software support and updates.


