
1. Introduction
Thank you for choosing the PopoIron Rechargeable LED Wall Sconces. This manual provides detailed instructions for the safe and efficient use of your new lighting product. These versatile wall sconces feature a natural wood aesthetic, rechargeable battery, magnetic 360° rotation, and multiple lighting options including 3 white tones, 15 RGB colors, and dynamic effects, all controllable via touch or remote.
2. What's Included
- 2 x Wall Lights
- 2 x Magnetic Base & 2 x Double-Sided Adhesive Tape
- 2 x Type-C Charging Cables
- 2 x Pack Screw Sets
- 1 x Remote Control
3. Setup & Installation
3.1 Components Overview

Figure 1: The PopoIron LED Wall Sconce components, showing the light unit and magnetic base.
The PopoIron LED Wall Sconce consists of the light unit and a magnetic base. The light unit features touch controls and a charging port. The magnetic base attaches to the wall and allows for 360° rotation of the light.
3.2 Installation Methods
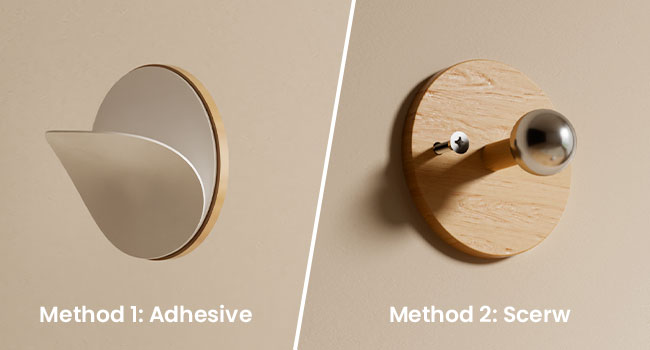
Figure 2: Choose between adhesive or screw mounting for the magnetic base.
Choose between two installation methods: adhesive or screw mounting. Both methods provide a secure attachment for the magnetic base.
Method 1: Adhesive Installation
- Clean the desired wall surface thoroughly to ensure it is dry and free of dust or grease.
- Peel off the protective film from one side of the double-sided adhesive tape and apply it firmly to the back of the magnetic base.
- Peel off the protective film from the other side of the adhesive tape and press the magnetic base firmly onto the cleaned wall surface for at least 30 seconds.
Method 2: Screw Installation
- Mark the desired position for the magnetic base on the wall. Use the base as a template to mark the screw holes.
- Drill pilot holes at the marked positions. Insert the wall anchors (if necessary for your wall type).
- Align the magnetic base with the drilled holes and secure it to the wall using the provided screws.

Figure 3: The light unit magnetically attaches to the spherical head of the base.
Once the base is secured, the light unit magnetically attaches to the spherical head, allowing for easy removal and 360° adjustment of the light direction.
Video 1: Demonstration of the magnetic attachment and 360-degree rotation of the PopoIron wall sconce.
4. Operation
4.1 Touch Control

Figure 4: The light unit features touch-sensitive buttons for power and light adjustment.
The light unit features touch-sensitive buttons for power and brightness/color adjustment. These are located on the top surface of the light unit.
- Power On/Off: Touch the power icon to turn the light on or off.
- Adjust White Light: Touch the sun/brightness icon to cycle through 3 natural white tones (3000K, 4000K, 6000K).
- Adjust Brightness: Long-press the sun/brightness icon to dim or brighten the light (5 gradual levels from 5% to 100%).
4.2 Remote Control
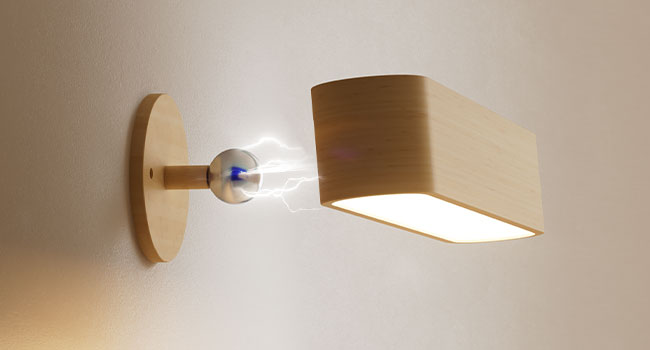
Figure 5: The included remote control for comprehensive light management.
The included remote control provides comprehensive control over all light functions from a distance of up to 10 meters.
- ON/OFF: Turn the light on or off.
- Brightness +/-: Adjust the brightness level.
- White Tones: Select between 3000K (Warm White), 4500K (Natural White), and 6000K (Cool White).
- RGB Colors: Cycle through 15 static RGB colors.
- Dynamic Modes: Activate 3 RGB effects: Solid Color, Breathing Glow, and Color Cycling.
- Timer: Set an automatic shut-off timer for 30, 60, or 90 minutes.
Video 2: Demonstration of both touch and remote control functionalities for the wall sconce.
4.3 Light Modes & Brightness
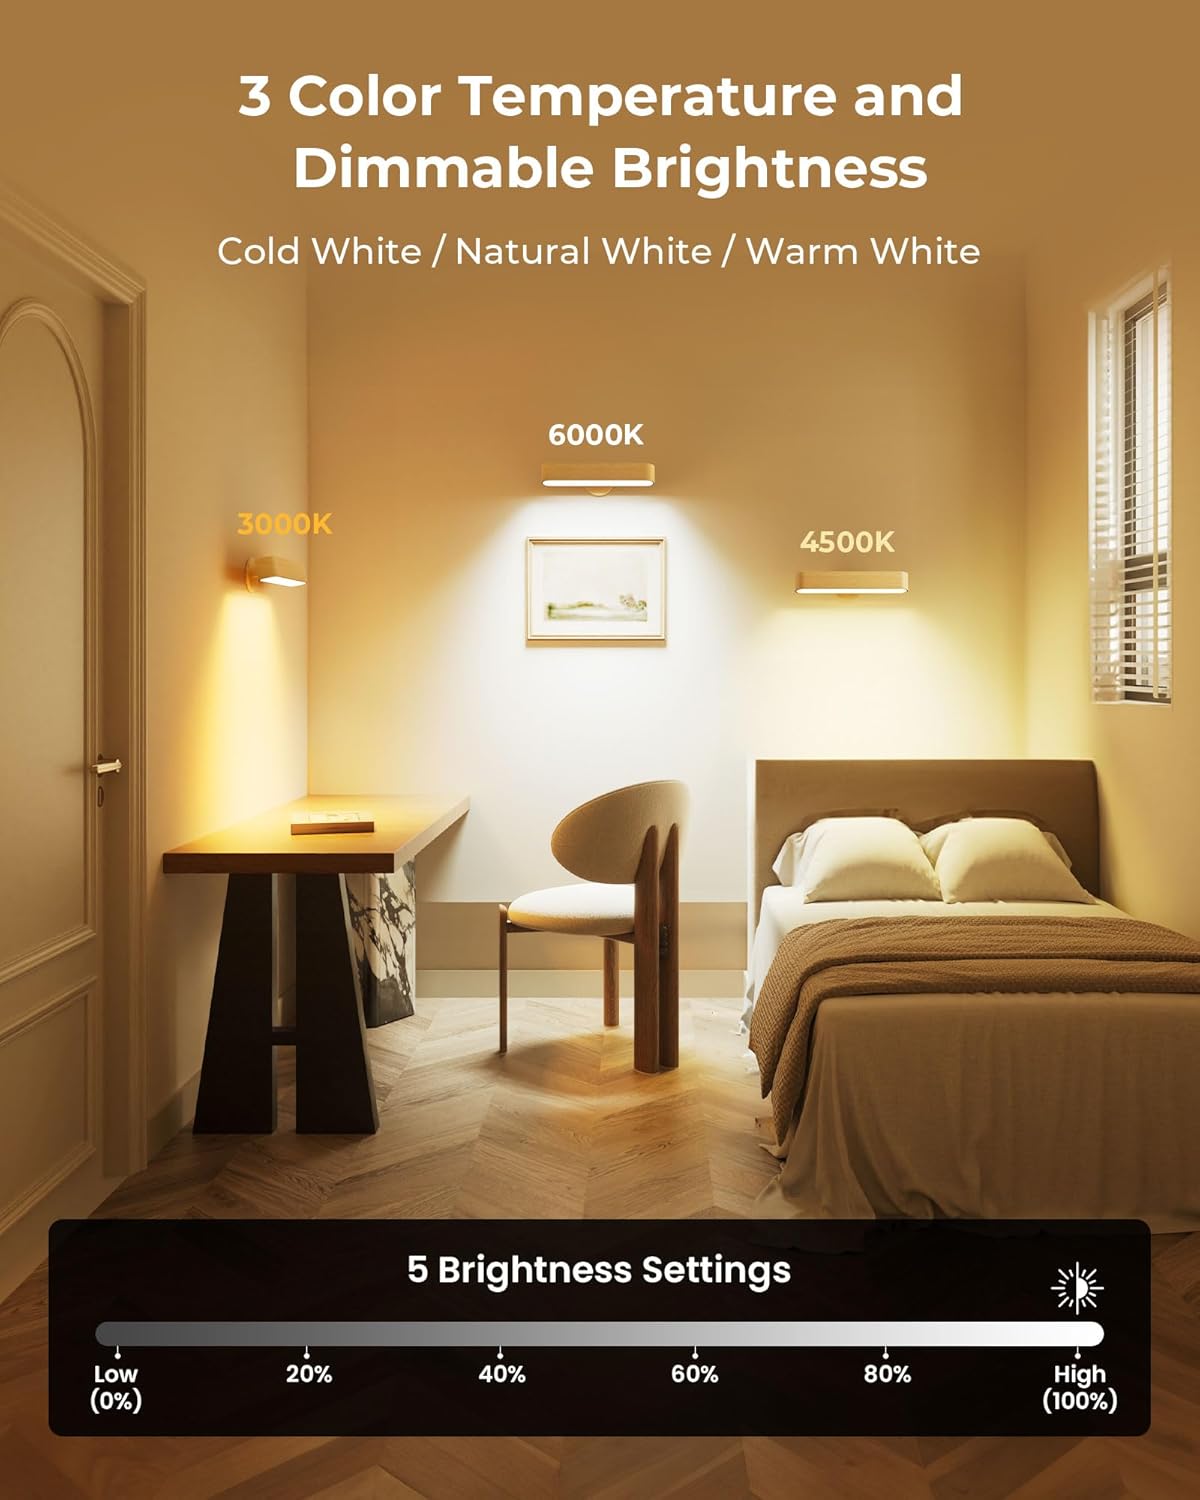
Figure 6: The sconce offers 3 natural white color temperatures (3000K, 4000K, 6000K).
Choose from 3 natural white tones (3000K, 4000K, 6000K) and 15 adjustable RGB colors. Adjust brightness from 5% (nightlight) to 100% (task lighting) using 5 gradual levels.
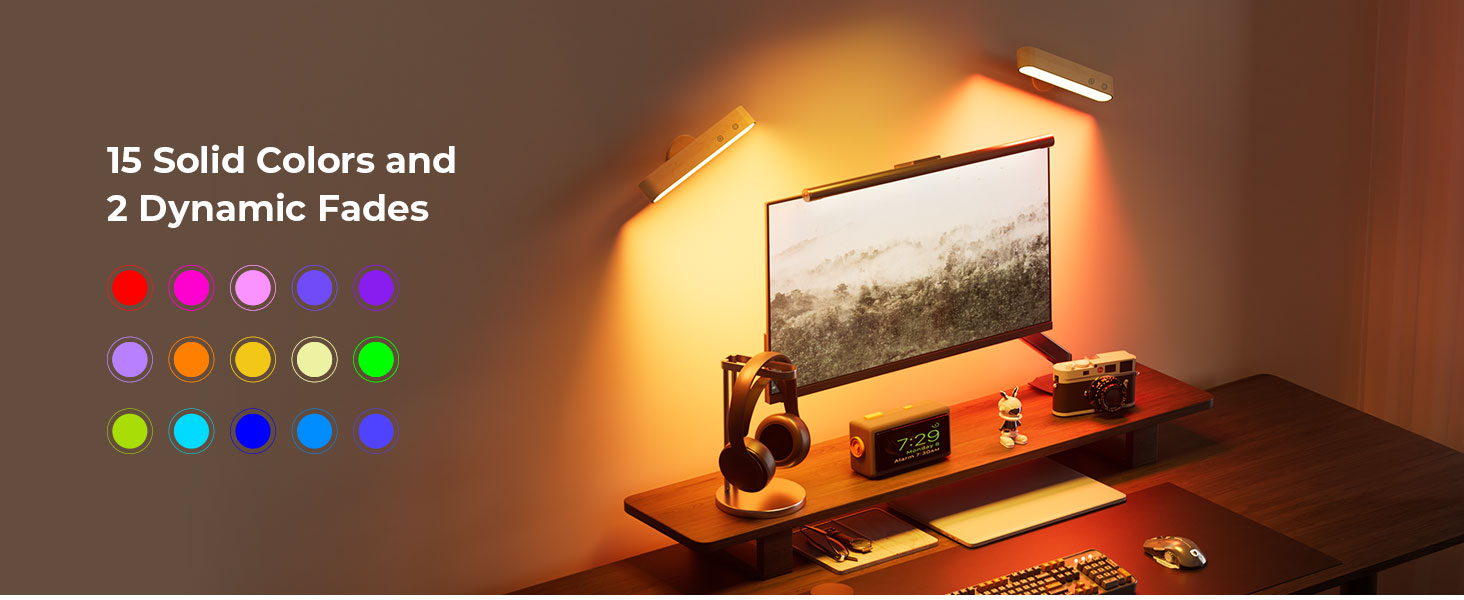
Figure 7: Explore 15 static RGB colors and 3 dynamic RGB effects.
Explore 15 static RGB colors and 3 dynamic RGB effects: Solid Color, Breathing Glow, and Color Cycling to create diverse atmospheres.
5. Charging & Battery

Figure 8: The sconce charging via its Type-C port.
The sconce features a 7500mAh rechargeable battery. Charge fully in approximately 5 hours using the provided Type-C cable. A full charge provides up to 30 hours of lighting on lower settings. The light unit can be easily detached from its magnetic base for convenient charging.
Video 3: This video highlights the portability of the light unit, suggesting its use as an emergency flashlight during power outages.
6. Maintenance
To ensure the longevity and optimal performance of your PopoIron LED Wall Sconces, follow these maintenance guidelines:
- Cleaning: Wipe the light unit and magnetic base with a soft, dry cloth. Avoid using abrasive cleaners or solvents, as these can damage the wood finish or electronic components.
- Battery Care: For best battery life, avoid fully discharging the battery frequently. Recharge the sconce when the light output noticeably diminishes. If storing for an extended period, charge the battery to about 50% and recharge every 3-6 months.
- Storage: Store the sconces in a cool, dry place away from direct sunlight and extreme temperatures.
7. Troubleshooting
If you encounter any issues with your PopoIron LED Wall Sconces, please refer to the following common troubleshooting steps:
- Light Not Turning On: Ensure the battery is charged. Connect the Type-C charging cable and allow it to charge for at least 30 minutes before attempting to turn it on again.
- Remote Control Not Responding: Check if the remote control's battery needs replacement. Ensure there are no obstructions between the remote and the light unit. Try operating the light using the touch controls to confirm the light unit is functional.
- Light Flickering or Dim: This usually indicates a low battery. Recharge the sconce fully.
- Magnetic Base Not Holding: Ensure the wall surface is clean and dry before adhesive application. For screw installation, verify screws are tightened securely. The magnetic connection is strong, but ensure the light unit is properly aligned with the spherical head.
If these steps do not resolve the issue, please contact PopoIron customer support for further assistance.
8. Specifications
| Feature | Specification |
|---|---|
| Brand | PopoIron |
| Model Name | WL15 |
| Material | Wood |
| Light Source Type | LED |
| Brightness | 350 Lumen |
| Wattage | 4 watts |
| Voltage | 5 Volts |
| Color Temperature | 3000K/4500K/6000K (White), 15 RGB Colors |
| Control Method | Remote, Touch |
| Power Source | Battery Powered (3 C batteries included) |
| Battery Capacity | 7500mAh |
| Charging Time | Approx. 5 hours |
| Usage Time | Up to 30 hours (on lower settings) |
| Product Dimensions | 9"L x 3.3"W x 2.4"H |
| Installation Type | Surface Mount (Adhesive or Screws) |
| Special Features | Adjustable Color Temperature, Color Changing, Dimmable, Energy Efficient, Timer, 360° Magnetic Rotation |
9. Warranty & Support
PopoIron stands behind its wall sconces with a full 12-month replacement service. If you encounter any issues or defects within this period, we offer a hassle-free replacement.
Our dedicated after-sales service ensures that any questions or problems will be addressed within 12 hours. Please contact us directly for support.