1. Introduction
This manual provides essential instructions for setting up, operating, and maintaining your CONSUMER CELLULAR Iris Connect smartphone. The Iris Connect is designed for reliable performance, featuring a 6.5-inch display, 32GB of storage, and running on Android 13. Please read this manual thoroughly to ensure proper use and to maximize your device's capabilities.
2. What's in the Box
Upon unboxing your CONSUMER CELLULAR Iris Connect, verify that all the following items are included:
- CONSUMER CELLULAR Iris Connect Smartphone
- USB Cable
- Quick Start Guide
3. Device Overview
Familiarize yourself with the physical components of your Iris Connect smartphone.

Figure 3.1: Front and back view of the Iris Connect smartphone, highlighting its sleek design and camera placement.

Figure 3.2: Front view of the Iris Connect, showcasing the 6.5-inch display and front-facing camera.
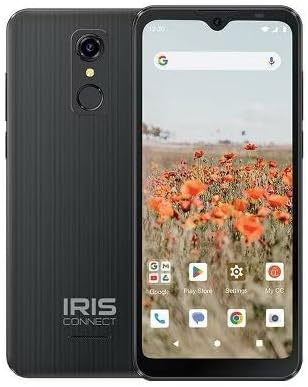
Figure 3.3: Back view of the Iris Connect, showing the main camera, flash, and fingerprint sensor.
Key Components:
- 6.5-inch Display: High Definition+ screen for clear visuals.
- Front Camera (8MP): Located at the top of the display for selfies and video calls.
- Main Camera (13MP): Located on the rear, for high-resolution photos and videos.
- Fingerprint Scanner: Integrated on the rear for secure unlocking.
- Power Button: Typically on the right side, used to turn the device on/off or wake/sleep the screen.
- Volume Buttons: Adjacent to the power button, for adjusting audio levels.
- USB-C Port: At the bottom, for charging and data transfer.
- 3.5mm Audio Jack: For connecting headphones.
4. Setup
4.1. Inserting SIM Card and MicroSD Card
- Locate the SIM tray on the side of your device.
- Insert the SIM ejector tool (not included, use a thin paperclip) into the small hole next to the tray and press gently until the tray pops out.
- Place your Nano-SIM card(s) into the designated slots with the gold contacts facing down.
- If desired, insert a microSD card (up to 256GB) into its dedicated slot for expanded storage.
- Carefully reinsert the tray into the device until it clicks into place.
4.2. Initial Power On and Setup Wizard
- Press and hold the Power Button until the screen lights up.
- Follow the on-screen instructions to select your language, connect to a Wi-Fi network, and set up your Google account.
- You may be prompted to transfer data from an old device or set up security features like the fingerprint scanner.
4.3. Charging the Device
Before first use, it is recommended to fully charge your device. The Iris Connect features a 3500 mAh battery with an approximate charging time of 2.5 hours.
- Connect the USB cable to the USB-C port at the bottom of your phone.
- Connect the other end of the USB cable to a compatible power adapter (not included) and plug it into a wall outlet.
- The charging indicator will appear on the screen.
5. Operating Instructions
5.1. Basic Navigation
- Touch: Tap an icon to open an app or select an item.
- Swipe: Drag your finger across the screen to scroll or navigate between screens.
- Pinch: Use two fingers to zoom in or out on photos and web pages.
- Home Screen: The central hub for your apps and widgets.
- App Drawer: Swipe up from the home screen to access all installed applications.
5.2. Making Calls
- Tap the Phone icon on your home screen or app drawer.
- Enter the phone number using the dial pad or select a contact from your address book.
- Tap the Call button to initiate the call.
5.3. Sending Messages
- Open the Messages app.
- Tap the Start chat or New message icon.
- Enter the recipient's number or select from contacts, then type your message.
- Tap the Send button.
5.4. Connecting to Wi-Fi
- Go to Settings > Network & internet > Internet.
- Toggle Wi-Fi On.
- Select your desired Wi-Fi network from the list and enter the password if prompted.
5.5. Bluetooth Pairing
- Go to Settings > Connected devices > Connection preferences > Bluetooth.
- Toggle Bluetooth On.
- Select Pair new device and choose your desired device from the list. Follow any on-screen prompts to complete pairing.
5.6. Camera Usage
The Iris Connect features a 13MP main camera and an 8MP front-facing camera.
- Open the Camera app.
- Tap the Shutter button to take a photo.
- Switch between photo and video modes, or front and rear cameras, using the on-screen icons.
5.7. Fingerprint Scanner
To set up the fingerprint scanner for secure unlocking:
- Go to Settings > Security & privacy > Device unlock > Fingerprint.
- Follow the on-screen instructions to register your fingerprint(s).
6. Maintenance
6.1. Cleaning the Device
To keep your device clean and functional:
- Use a soft, lint-free cloth to wipe the screen and body.
- Avoid using harsh chemicals, abrasive cleaners, or aerosol sprays.
- Ensure ports are free of dust and debris.
6.2. Battery Care
To optimize your battery life (up to 26 hours of use):
- Avoid extreme temperatures.
- Do not leave the device charging for extended periods after it's full.
- Adjust screen brightness and close unused apps to conserve power.
6.3. Software Updates
Regularly check for software updates to ensure your device has the latest features and security patches:
- Go to Settings > System > System update.
- Follow the on-screen instructions to download and install any available updates.
7. Troubleshooting
This section addresses common issues you might encounter with your Iris Connect smartphone.
- Device not powering on: Ensure the battery is charged. Connect the charger and wait a few minutes before attempting to power on again.
- No network signal: Check if your SIM card is correctly inserted. Verify that Airplane Mode is off (swipe down from the top of the screen to check quick settings). Contact your service provider if the issue persists.
- Apps crashing or freezing: Try restarting the app. If the issue continues, restart the phone. You may also clear the app's cache or data via Settings > Apps > [App Name] > Storage & cache.
- Slow performance: Close unused apps, clear cache, or consider uninstalling rarely used applications to free up storage.
- Unable to connect to Wi-Fi/Bluetooth: Ensure Wi-Fi/Bluetooth is enabled in settings. Try forgetting the network/device and reconnecting. Restart your phone and the router/Bluetooth device.
- Forgot screen lock password/pattern: If you have a Google account linked, you might be able to reset it. Otherwise, a factory reset may be necessary (this will erase all data).
For more complex issues, please refer to the official CONSUMER CELLULAR support resources or contact their customer service.
8. Specifications
Detailed technical specifications for the CONSUMER CELLULAR Iris Connect smartphone (Model: SH4650).
| Feature | Specification |
|---|---|
| Model Name | Iris Connect |
| Model Number | SH4650 |
| Operating System | Android 13.0 |
| Display Size | 6.5 Inches |
| Display Resolution | 1440 x 810 |
| CPU Model | Snapdragon 710 |
| CPU Speed | 2 GHz |
| RAM Memory Installed Size | 3 GB |
| Internal Storage | 32 GB |
| Expandable Storage | Up to 256GB via microSD |
| Main Camera | 13 MP |
| Front Camera | 8 MP |
| Battery Capacity | 3500 Milliamp Hours |
| Battery Power Rating | 3600 (likely Wh or similar unit, as mAh is 3500) |
| Charging Time | 2.5 Hours |
| Connectivity | 4G LTE, Bluetooth, Wi-Fi |
| Special Features | Dual Camera, Expandable Storage, Fingerprint Scanner, Long Battery Life |
| Audio Jack | 3.5 Millimeter |
| Dimensions | 8 x 6 x 3 inches |
| Item Weight | 6.5 ounces |
9. Warranty and Support
For information regarding your product's warranty, please refer to the warranty card included with your purchase or visit the official CONSUMER CELLULAR website. For technical assistance, troubleshooting beyond this manual, or customer service inquiries, please contact CONSUMER CELLULAR support directly.
CONSUMER CELLULAR Official Website: www.consumercellular.com


